Chapter 3: Setting A Building Energy Limit

December 22, 2017

We couldn’t look at houses the same way again after we learned about the internationally recognized performance-based energy standard in construction called Passive House (Passivhaus in German). In chapter 3 of the Midori Haus book you’ll read about another shift that happened to us. My mindset transformed from “looking for a tech gadget that made green magic happen at the push of a button” to “looking at the whole house as a system and appreciating good design and craftsmanship.”

Early on we thought green building consisted of different green components: something that used resources efficiently so that we didn’t end up consuming everything and leaving nothing for future generations; something that protected our health so that we didn’t get sick from breathing toxins or allergens; something that reduced waste and pollution so that future generations (and ours) could enjoy clean air, clean water, and nature.

I used to think, “Why not install photovoltaic (PV) panels on the roof to generate electricity from the sun and be done with it?” Solar energy is green, right? We could generate all the electricity we used in our home and sell some back to the utility so that at the end of the year our electricity bill would be near zero. It would probably pay back in about twelve years. I wondered why some­one would go through the extensive calculation and install lots of insulations and perform extensive air sealing to save energy. It seemed to me that PV was easier and better. Eventually we learned that it depends on how you frame the problem.

The problem we were trying to solve was not solely about getting the electricity bill to zero. We wanted to live in a house that was comfortable and healthy. Covering the roof area of a ninety-year-old house with PV would not make it comfortable and healthy.

We first heard about the Passive House Standard in March 2010. We didn’t fully embrace it when we first heard about it from a green building consultant who came out to give advice on a property we wanted to buy.

On the surface there was nothing profound in what he had to say—better windows, insulation, minimizing air leaks, consider the shading from the trees. These all sounded mundane and pedestrian, perhaps because I was secretly hoping to get an insight into the latest tech gadget that makes green magic happen at the push of the button. Sadly, he offered no such gadget. The one thing that seemed to perk him up was discussing the Passive House Standard.

We didn’t dive into Passive House after our initial encounter with the consultant. Six months later, we were in a Passive House workshop. That’s when we finally embraced Passive House.

Chie and Kurt, ordinary homeowners, transformed into Passive House enthusiasts with a single realization: energy used to quickly adjust temperature, either to heat or cool a conventionally built house, can be eliminated if the shell of the building is constructed like a thermos. Keeping the indoor temperature constant and controlling ventilation could make our house comfortable and healthy. And we didn’t have to wait for some new invention to come about or spend extraordinary amounts of money to achieve a radical reduction in home energy.

The tools, techniques, and products to successfully build Passive Houses are available today. It requires the architect to use detailed modeling to guide the plans to hit the specific target for energy use. It requires the builder to pay careful attention to construction details and comply with the specific limit on air leakage. In other words, good design and good craftsmanship. This is Passive House.

Kurt summed up the appeal of Passive House Standard by saying, “It’s brilliant systems-thinking.”

… The green buiding certification programs we’d seen so far were like ordering à la carte from a restaurant menu: slap on a solar panel, get energy star appliances, get bigger windows to make use of day lighting, and so forth. Each component was green in its own way, but who knew if they would work together effectively to seriously reduce energy consumption. I didn’t want to wait until after we lived in our house to find out if the mishmash of systems resulted in comfort or heartburn. The Passive House Standard was geared towards achieving a very specific low-energy use with occupant comfort in mind…

We wanted more than a lower utility bill. Our focus was to follow our values and do the “right” things that would last a long time. We wanted to use more current sunlight and less of the ancient sunlight. We wanted the air inside our house to be healthy. We wanted the house to be pretty and pleasant and we wanted to be comfortable living there. We wanted to demonstrate and show others that an old house can retain its charm and have excellent energy performance. We wanted everything to work together nicely and within our budget. Passive House represented the path to achieving this. Simply install a bunch of PV panels on the roof without dong any of the other work did not.

It’s not that we’re opposed to using PV. Learning about Passive House clarified the sequence for us: First, do the improvement on the building envelope. See how it performs. Then later add PV when we’re ready to switch from gasoline vehicles to electric cars.

In the introduction of this book, I said that the most important thing we learned was to stick to our personal values, and that has guided us through buying a home and navigating options to make it green. Besides the personal benefits we’d enjoy by living in a Passive House, we set about on this renovation project to make a contribution to the greater community. Rather than wait for the government to institute regulations to curb greenhouse gas emissions to retard climate change, we wanted to reduce the greenhouse gas emissions that came from living in the house.

Learning about Passive House made a big difference in how we approached our home renovation project. Are you curious about the Passive House Standard? This short video will explain it in 90 seconds.

Winter Experiment: Heat Recovery Ventilator (HRV) to Energy Recovery Ventilator (ERV)

November 24, 2016

On November 18, 2016 we did some maintenance. The Zehnder ComfoAir 350 ventilation system is the heart of our Passive House (Passivhaus in German). It continuously provides pre-warmed filtered fresh air to  different rooms and exhausts stale air from kitchen and bathrooms. The heat recovery ventilator (HRV) was originally installed four years ago and commissioned in January 2013. In addition to cleaning out the filters couple of times a year, we were supposed to clean out the HRV core annually. This was the first time we pulled out our HRV core and it was quite dirty.

​We also pulled out the bypass duct. Our system is configured as ComfoAir 350 LEFT where the fan on the right side move the air in and out of the house (through ComfoPipes) and the fan on the left move the air within the house (through ComfoDucts.) In the LEFT version the bypass duct (black hexagonal foam) is installed behind the core. 

The body of the ComfoAir 350, the casing that housed the core, was dirty too. Our first task was to clean out the dust, dirt, and dead bugs. We didn't have a vacuum cleaner handy, so we simply wiped down the surface with damp paper towels. 

There are two fans: one of the right and another on the left. We pulled out the fan on the right side, opened it up, cleaned it, and replaced it. Then repeated the procedure with the  left. We took care to not pull on the power cables attached to the fan.  

Now that everything is clean again, it's time to replace the core. Instead of re-installing the HRV core we chose to install the ERV core (enthalpy exchanger). Note that the ERV core is blue. The color of the HRV core was teal. This will help redistribute the moisture extracted from the kitchen and bathrooms to the other rooms. We are doing this because we live in a dry climate. In the winter the air outside is so dry. When the dry air is brought into the house  the relative humidity in some of the rooms drop below 30 percent. So, to avoid dry skin and chapped lips, we are doing an experiment this winter.

We replaced the front covers and the filters. We use the red F7 filter (MERV 13) on the right (towards ComfoPipe) and the black G4 filter (MERV 7/8)  on the left (towards ComfoDuct).

We will be collecting the temperature and humidity data through our WELserver. While our sophisticated body sensors (skin and lungs) will tell us whether our experiment was a success or not, the measurements of relative humidity will convey them in numbers. Stay tuned.​

How Much Energy Did We Use In Our First Year?

About one year ago I cut off 30-inches of my hair
and donated the half-pound of hair to Locks of Love, an
organization that makes wigs for children.  I’ve done this a few times
before and it makes me feel good.  In the past friends would often ask me,
“How’s your house project coming along?” and at times it seemed to go
on forever.  So at one point I started telling everyone, “You’ll know
when it’s done because I’ll cut off my hair and donate them.  If you see
me with short hair that means the house is done!”  So I was quite
happy when I had this photo taken because it meant the house was done and I
didn’t need the extra insulation to keep me warm.
Now that we’ve been living in Midori Haus for one
year it’s time we share our energy data for the first year of occupancy.
 You might recall from my previous post where we compared our energy
data for the first 8 months in Midori Haus with the energy data from the
slightly smaller condo we used to live in.  We were pleased with the
comparison of spring-summer data where our total energy use at Midori Haus
proved to be much lower than the smaller condo.  Now that we have the
energy data for the winter season it’s even better.   Let me show you some
graphs.

If you are a PG&E customer, the above graphs
will be familiar to you.  You can log into your account at pge.com and
select the “My Usage” tab to track, compare, and monitor your energy
usage.  They do a nice job of comparing your energy usage with similar
homes in the area.  Similar homes in the context of Midori Haus is 100
homes with similar square footage (1560 in our case) within half-mile radius
that are heated by natural gas.  At Midori Haus we let the sun do the
warming most of the time but when the sun is not shining the gas boiler
provides make-up heat for the hot water tank and the hot water warms the house.
 Since there is not a category for “mostly sun-heated house” we
technically fall into the category of “heated by natural gas.”

In this past year (March 1, 2013 through February
28, 2014) we used a lot less energy than similar homes.  The total energy
use at Midori Haus was 4,334 kWh
compared to 19,596 kWh for similar homes.  Our Midori Haus used 2,869 kWh
of electricity and a scant 50 therms (this is equivalent to 1,465 kWh) of
natural gas while similar homes used 5,118 kWh of electricity and 494 therms
(this is equivalent to 14,478 kWh) of natural gas.  To put it in another
way, Midori Haus used only 22% of the total energy used by similar homes in the
past year. 

By the way, we were comfortable inside and we do
not have PV (solar electric) to offset our electricity usage.  We plan to
do so in the future but it was important for us to start from the most
efficient house before we put in PV.
This next graph is very validating.  We’re
fortunate to have copies of the energy bills from the prior owner of the house.
 The seller was friendly and ordered PG&E to send copies of the past
energy bill to us for the years 200 and 2006.  Back then there were 3 elderly
occupants in the house and they used gas furnace to heat the house and perhaps some electric space heating too.  Their energy bill from March
2005 through February 2006 is a good basis of comparison with our first year of
post-retrofit occupancy at Midori Haus because many things about the house is
the same:  same square footage, same foundation, mostly same framing, same
floor, same roof, and we kept the original built-in-furniture (dining room
buffet) in place.  So the reduction in energy use that you see below represents
the performance of the house before (without any insulation or air sealing) and
after (super-insulation, extreme airtightness, minimizing thermal bridges, heat
recovery ventilator, low energy lighting, and low energy appliances).  

The prior occupant used 21,928 kWh of energy in one
year.  Midori Haus used 4,334 kWh of energy in one year.  That is
80% reduction in energy use for the same house!
 And Midori Haus stays
in a comfortable temperature range year round with good indoor air quality.
 Passive House works!

Digging further into gas usage I wanted to see if
there is a correlation between rain and gas usage.  So I overlaid the our
daily natural gas usage with rainfall.  It’s a bit challenging to see the
details but you’ll notice that the when there is rain (blue column) the natural
gas (red column) follows close by.  This confirms that gas boiler turns on
if the sun is not shining.  The little blips of gas you see in the summer
months represents outdoor barbecue use.  We have natural gas plumbed to
the barbecue on the deck.
The source of rain data is from a local weather
station that I found on the weather underground site.  The Weather Cat station
is located just 2 miles away from Midori Haus so it’s a good representative of
the outdoor condition for the past year.  Below is a graph of the daily
high and low temperature.  What you will see below is that there is always
about 10-30 degrees Fahrenheit temperature difference between the daily high
and daily low.  Because of this diurnal swing in the temperature we don’t
need to have air conditioning during the summer because the house will cool off
at night if we simply open the windows for an hour or so.  

I now present to you a simple conclusion:  Passive house works.  Up until now we’ve been telling everyone, “Once we have a house built to Passivhaus standard we will use 80% less
energy than similar homes.”  Now we can actually show the data where
we have used 80% less energy than similar homes.  Don’t you want your home to be
passive house too?  :)

Energy Usage: First 8 Months

September 1, 2013

Are you curious how much energy Midori Haus uses and how it compares with other houses in the area?  The proof is in the utility bill.  When I get the utility bill from Pacific Gas & Electric (PG&E) each month via email I always log in to their site to look at the “My Usage” tab to see how our electricity and natural gas usage compare with similar homes in the area.  Take a look at these screen shots:

Our electriity usage averaged 227kWh per month for the last 6 months (Mar-Aug).  You can see from the graph that our usage (blue line) is pretty low, tracking closely to the efficient homes (green line) in the area.  The house was in construction through January and we started living full time in the house on March 15, 2013 when the blinds for the windows were installed.

Electricity usage was a bit higher in February and March when we had several fans and vaporizers running 24/7 to remove the smell coming from the stains applied to the fiberglass door.  Usage was low in April when we were on vacation for 10 days.

 Our natural gas usage averaged 1.8 Therms per month for the last 6 months (Mar-Aug).  Our gas usage (blue line) is just a fraction of similar homes in the area and even lower than the most efficient homes in the area.

We use a gas boiler as a backup heat source for domestic hot water.  Primary source of heat for the hot water is the sun.  We have a solar thermal system (to be explained in a separate post) that pre-heats the hot water.  We also have a natural gas barbecue grill out on the deck.  That accounts for the little blip in gas usage in the summer — 2 Therms in June, 1 Therm in August.

You may wonder what homes are compared in these graphs.  PG&E does a good job of giving us an apples-to-apples comparison.  The definition of similar homes for us is single family houses with an average of 1572 sq ft using natural gas heat within 0.6 miles.

Our house is technically heated by gas because PG&E does not have a category for homes heated by the sun.  How is our house heated?  When the temperature in the hallway thermostat dips below 68F a pump in the mechanical room turns on to circulate hot water (mostly heated by the sun) through the hydronic coil in the house.  The hydronic coil is used to warm up the air in our ventilation system. For a typical house this amount of heat is not enough to make it comfortable.  But Midori Haus is a passive house that is super-insulated and super-airtight.  So we only need the equivalent energy of half a hairdryer to heat our home in the winter.  Should the temperature in the hot water tank dip below 120F then the backup gas boiler turns on, thus the house is technicall heated by natural gas.  But as you can see from the graph above this doesn’t happen regularly.  The higher usage of natural gas in January and February reflects the start-up condition for the hot water heater.  The storage tank and the backup gas boiler were installed and turned on in January when it was cold outside and the sunlight duration short.  So the gas boiler did bulk of the work to heat up 165 gallons of water to 120F.  It’s amazing that we only used only about quarter of natural gas that similar homes used in January and the house was comfortable.

The amount of energy reflected in the utility bill is not only for heating the house.  A good portion is attributed to appliance choices and our behavior.  At Midori Haus we use electricity for cooking, clothes washing, lighting and handful of gadgets plugged into the wall.  When we lived in the 1300 sq ft condo we had lots of gas appliances — wall furnace, standard hotwater heater, stove and oven.  So I expected our electricity usage to be a bit higher at Midori Haus than at our condo.  And it is a bit higher but not by much.  To compare the energy usage between similar seasons I grabbed a few screen shots of the energy usage at our condo in 2012:

 The monthly electricity usage averaged about 147 kWh for the condo for the same period last year (Mar – Aug 2012). Some of the gadgets consuming electricity are the same — laptop computers, stereo, hair dryer, coffee grinder, etc.  The occupant behavior is somewhat similar too.  The difference in occupant behavior is that I spend far less time at Internet cafes now.  Back in 2012 when I was uncomfortable at the condo (I thought it wasn’t warm enough) I packed up my computer and hung out at the local coffee shops.  Now I don’t do that.

 The gas usage at our condo has an interesting story.  In the winter of 2011-2012 we did an experiment of setting the thermostat for our wall furnace really low and wore layers of sweaters to keep warm.  In our mild climate in Santa Cruz if you set your thermostat at 55F in the winter it hardly turns on.  I thought our gas usage would be pretty flat to track with the summer usage pattern.  But it didn’t.  It was lower than similar homes and the curve rather bumpy. The winter usage went up as if we were turning on the wall furnace but we did not.  Our gas usage (blue line) was even higher than efficient similar homes.  What’s going on?  The likely culprit is the water heater.  The gas water heater at the condo was located in a cabinet next to the refrigerator in the kitchen.  It’s in the conditioned space so it had no insulation around the water heater.  This is OK for most times when the kitchen temperature is between 68F and 72F, but not when the kitchen temperature is at 58F.  So the water heater was using more gas in the heater to keep the water warm.  Interesting, isn’t?

 The similar homes for the condo are all apartments or condos with natural gas heat located within 0.9 miles.  Our condo shared 2 walls with our neighbors so 50% of the walls are well-insulated.  But it is definitely not airtight and I was often cold in the winter.  People in cooler climate may laugh when I complain about it being cold in the winter here but I grew up in Hawaii where it’s nice and warm.

It’s hard to compare the energy bills of homes with different types of appliances (e.g. gas stove top vs. induction cooktop, gas clothes dryer vs. electric condensing clothes dryer, gas wall furnace vs. hydronic coil).  To do an apples-to-apples comparison I took the 6 months data (Mar – Aug 2013) for Midori Haus and the 6 months data for the condo (Mar – Aug 2012) and converted the gas usage (measured in Therms) to equivalent electricity usage (measured in kWh).  1 Therm is equivalent to 29.307 kWh.  Plotting this combined usage data on a graph I found the Midori Haus total energy usage to be much less than the total energy we used at the condo.  It’s the same people with same occupant behavior but  living in a different space.  This means the dwelling itself is much more energy efficient and the space is much more comfortable.  Passive house is amazing.

Our Energy Baseline

Because we chose not to live in the house until the renovation is done, we don’t have an exact way to measure the energy performance improvement from the renovation.  It would be fantastic if we could say, “Our annual energy consumption at the house was 100 before the renovation and and after the renovation it dropped to 20, so we realized 80% improvement.”  That would give us a nice clean comparison, but we don’t want to live in the house while construction is going on.  So, we will be using relevant data for this “before and after” comparison.  The former resident of the house, Bob, was kind enough to provide us with access to his past utility bill data.  This provides us with an approximate baseline of how much energy was used at the house “before” renovation.  Thanks Bob!

Along with the attribute of the house, the lifestyle of the occupant plays a role in the energy consumption — what kind of electronic gadgets used in the house, what’s the preferred thermostat setting, what kind and how much cooking is done, and so forth.  You may remember that we’ve been going to various energy efficiency classes and several of the instructors suggested we gather and analyze our utility bill.  So, I did just that last week for our current home.  Our current home is a 1,300 sq.ft., 3-bedroom, 2-bathroom, 2-story condominium where we share 2 walls with our neighbors.

First, I logged on to our home account on the website of our local utility, PG&E,  and gathered data from our past billing history.  The Excel spreadsheet with the basic data looks like this.

Next, I took the gas data and graphed it over a 12-month period.  This is useful because I can tell how much gas is used for heating the condo from the shape of the curve.  How?  In our mild climate we don’t need to heat the home during the summer months.  You’ll notice that the gas usage in the months of August, September and October is constant at 10 Therms per month.  Because we have gas furnace, gas water heater, gas oven, gas cooktop and gas clothes dryer, the 10 Therms per months represent our normal usage of hot water, cooking and clothes drying.  Anything above 10 Therms is for heating.  You can see the gas usage goes up in the winter and down in the summer, where in December we’ve used up to 35 Therms to heat the house.  Here’s what the graph looks like.

Then I graphed the data for electricity.  This turned out to be pretty uniform throughout the year.  In July we were on vacation so both gas and electricity usage dipped a bit.  There is a slight bump in electricity usage in December.  I’m guessing that  we used more lights around the winter solstice when days are very short.

Interesting, isn’t?  We can further analyze the electricity data by doing some detective work.  There is a little device called, “Kill A Watt,” which measures the electricity usage of an appliance by plugging in the Kill A Watt device into the electric outlet and the appliance you want to measure into the device.  A couple of years ago Kurt went around our home and measured different equipment and found that his stereo equipment had quite a bit of vampire load or standby load.  This means that the equipment uses electricity for just being plugged in, even if the equipment is not turned on.  He immediately put his stereo on a separate power strip and turns off the power strip when he’s not listening to music.

By the way, we got a bonus credit of 20% from PG&E in March for low energy usage. They sent us a lovely email expressing their appreciation for conserving gas.

I don’t think we were consciously trying to reduce energy consumption this winter, but we were curious. So we did a little experiment to find out, “How cold does it get in the house?” by turning down the thermostat to about 50 degrees Fahrenheit.  The answer?  In the range of 60-65 degrees Fahrenheit.  Actually, I’m glad that experiment is over…

Save Electricity and Make Money

I just bought a compact emergency radio. It has a solar charger, a flash light, an USB port to charge my phone, and a hand crank to charge the battery when there is no power. The best part? It was it was almost free. I used the points accumulated in my Ohm Connect account and converted the points to a gift card on Amazon. I earn points whenever I participate in Ohm Hour to reduce my energy use.

Ohm Hour is a program that incentivizes participants to avoid using electricity for an hour (or two) at the time of day when it counts. Usually, this is when the sun is going down and we power up our appliances in our homes for the evening routine.

When I receive a message (text and email) for an upcoming Ohm Hour 24-hours before the event, I plan my evening routine with my husband. We shift our evening activities such as cooking, laundry, and using electronics around the Ohm Hour. Often, we eat our dinner in the garden or go for a walk in the neighborhood.

We participate in this program because we know that we can make a bigger impact by being strategic about when we cut down on the use of our power. Why? Because of the duck curve. This short video explains what a duck curve is, and how incentivizing evening energy use reduction fits into the solution.

If you don’t want to convert your points for an Amazon gift card, you can donate it to Sierra Club. I’ve done both.

If you live in California and receive electric service from PG&E, SCE or SDG&E, check out the Ohm Hour program. If you have a friend who participates in Ohm Hour, ask them for their referral code. They’ll receive a bonus when you sign up and start participating in the program. You can click here for my referral code.

Celebration at Midori Haus: Millionth Square Meter of Passive House

February 1, 2015
Bjorn Kierluf presenting Millionth Square Meter of Passive House Award – photo by Claire Darling 

Date:  February 20, 2015

Time:  3:00 pm
Place:  Midori Haus 
Special Guests:  Bjorn Kierulf, Andrew Michler, Mayor Don Lane, Leslie Villegas (Senator Bill Monning’s staff)

In December 2014 Midori Haus received the official certificate for Passive House Certification from Passivhaus Institut in Germany, marking the milestone of millionth square meter of Passive House around the world.  See the international press release here.

What Is Passive House?

Passive House is a performance-based energy standard in construction. Results from buildings  constructed using the Passive House approach show 80% ~ 90% less energy is used to keep it comfortable.  This voluntary standard is internationally recognized and applies to all types of buildings, not just single family homes.

Why Is this Significant?

It’s a glimpse into the future of housing.  Midori Haus demonstrates that a 93-year old house can have extraordinary energy performance (80% reduction in energy compared to pre-remodel, without applying solar electric panels) and still retain the charm of the original Craftsman architecture.  Energy bills from PGE show that significant reduction of home energy use is possible for all seasons of the year.  Occupants enjoy comfortable temperature and good indoor air quality for the life of the building.  Building owners can do this today by following the Passive House Standard, which has over 20 year track record for reducing energy usage in a buildings.  

In his inaugural speech on January 5, 2015, California Governor, Jerry Brown unveiled ambitious energy goals:

“…we are well on our way to meeting our AB 32 goal of reducing carbon pollution and limiting the emissions of heat-trapping gases to 431 million tons by 2020. But now, it is time to establish our next set of objectives for 2030 and beyond.Toward that end, I propose three ambitious goals to be accomplished within the next 15 years:Increase from one-third to 50 percent our electricity derived from renewable sources;Reduce today’s petroleum use in cars and trucks by up to 50 percent;Double the efficiency of existing buildings and make heating fuels cleaner.”

Midori Haus shows that Passive House Standard easily lead the path towards the Governor’s goal of doubling the efficiency of existing buildings.

About Midori Haus

Originally built in 1922, the 3-bedroom, 2-bathroom single story house was remodeled in 2012 to the Passive House Standard.  The house retained the original foundation, floor, framing, porch, built-in furniture, as well as the interior trims and accents.  Utility bills from PG&E showed that the energy consumption did indeed drop by 80%.

Midori Haus – photo by Kurt Hurley

Design and Passive House Services:  Graham Irwin, Essential Habitat
Construction:  Taylor Darling, Santa Cruz Green Builders

Please refer to the following post for details on energy and water.
Energy Usage:  How Much Energy Did We Use In Our First Year?
Water Usage:  Water Efficiency Features

Contact:  [email protected]

Don Lane, Mayor of City of Santa Cruz, shares his observation of Midori Haus transformation – photo by Bronwyn Barry

Leslie Villegas from Senator Bill Monning’s office presenting Certificate of Recognition from California Senate
– photo by Bronwyn Barry
Taylor Darling, General Contractor, and Graham Irwin, Architect and Passive House Consultant – photo by Claire Darling

Midori Haus Team:  Taylor Darling, Graham Irwin, Tom Nedelsky, Pat Splitt, Chie Kawahara, Kurt Hurley
– photo by Bronwyn Barry

What is Midori Haus?

January 13, 2015

It’s a comfortable home that looks like a nice old house that is ultra energy efficient.  Although it’s located just a half a block away from a busy intersection in a walkable neighborhood it’s very quiet inside the house with good indoor air quality.  Water is used wisely with the combination of rainwater harvesting, grey water, and efficient fixtures and appliances.

We invite you to browse through the site and tour the house to gather ideas for your green home journey.

Water Efficiency Features

August 22, 2014

In this post I will share the water efficiency features we have at Midori Haus.  The features are organized into 3 categories:  easy, moderate, and advanced.  The items in the easy category can be done for a low cost without specialized skills such as changing the shower head.  The moderate items cost a little bit more and unless you have the skills yourself, you’ll likely need to hire someone who knows what they’re doing.  For example changing out your toilet.  The advanced items require permit and competence in plumbing and you’ll need to hire a plumber.

Easy:  Sheet Mulching

Sheet mulching is a great way to manage rainwater oudoors.  It’s good for both water conservation (no need to water the lawn) and for water onsite recharge (rather than sending the rainwater down the storm drain).  Sheet mulching is easy.  First you harvest a bunch of large, sturdy cardboards from the recycling bins of stores that sell large stuff like bicycles, appliances, lawn mowers, etc.  Be sure to ask them first.  Even if it’s a waste product they’re dumping in the recycling bin the stores appreciate you for asking their permission to take the cardboards.  Once you’ve hauled the cardboards to your property (you may need to make several trips) you lay them down in the yard, overlapping the edges by 6-8 inches to block the weeds from sprouting, and spread wood chips or mulch over them.  We got our mulch from Vision Recycling.

Our primary purpose for sheet mulching was to have a low maintenance yard while we figured out what to do with landscaping.  Some folks test the soil then apply compost and soil amendment before laying down cardboard to make the soil suitable for the intended plants.  Since we didn’t know specific plants to be placed in what spot and we needed to cover a large area (about 4,000 sqft) we didn’t bother with applying compost below the cardboard.  The only thing we paid attention to was the removal of all packing tape and staples from the cardboard boxes.  This we learned years ago when we did sheet mulching at another property.  The packing tapes adhered to the cardboards lasted much longer than the cardboard itself and and over time we ended up picking up strips of plastic tape in the mulch when the carboard degraded.  It looks a bit trashy and ugly at that point so best to eliminate them before placing the cardboard down.

Heads-up:  If you plan to do sheet mulching be sure to check with your local water department for rebate availability.  We didn’t qualify for the rebate from our local water department because the criteria was removal of active water sprinklers. Since the sprinklers and pipes we dug up were not used for several years we did not get a rebate.  My friend in San Bruno recently completed sheet mulching of her yard but found out too late about the rebate.  The water department in her area offers rebate for sheet mulching but you have to apply for it before you begin your project.   Each water district offers different incentives so check with them before you embark on water saving projects at your home.

Sheet mulching is beneficial in many ways.  The obvious one is to eliminate the need to water a lawn.  In our case the unmanicured grass in the yard was plain ugly so we were happy to not water them and cover it up.  The second benefit is to avoid flooding during heavy rain because the mulch soaks up the rainwater.  In the winter a section in the backyard near the garage would flood and made it difficult to get into the garage.  This problem went away with sheet mulching.  The third benefit is to keeping our shoes clean during the rain. With heavy clay soil around our property walking on wet soil after rain resulted in having an inch of mud caked on to the bottom of our shoes.  And finally, the mulch keeps the soil underneath moist and happy.  Our orange tree seems to be doing a lot better after sheet mulching.

Here are some photos of before, during and after sheet mulching.

Before:  Backyard near the garage would flood during heavy rain.

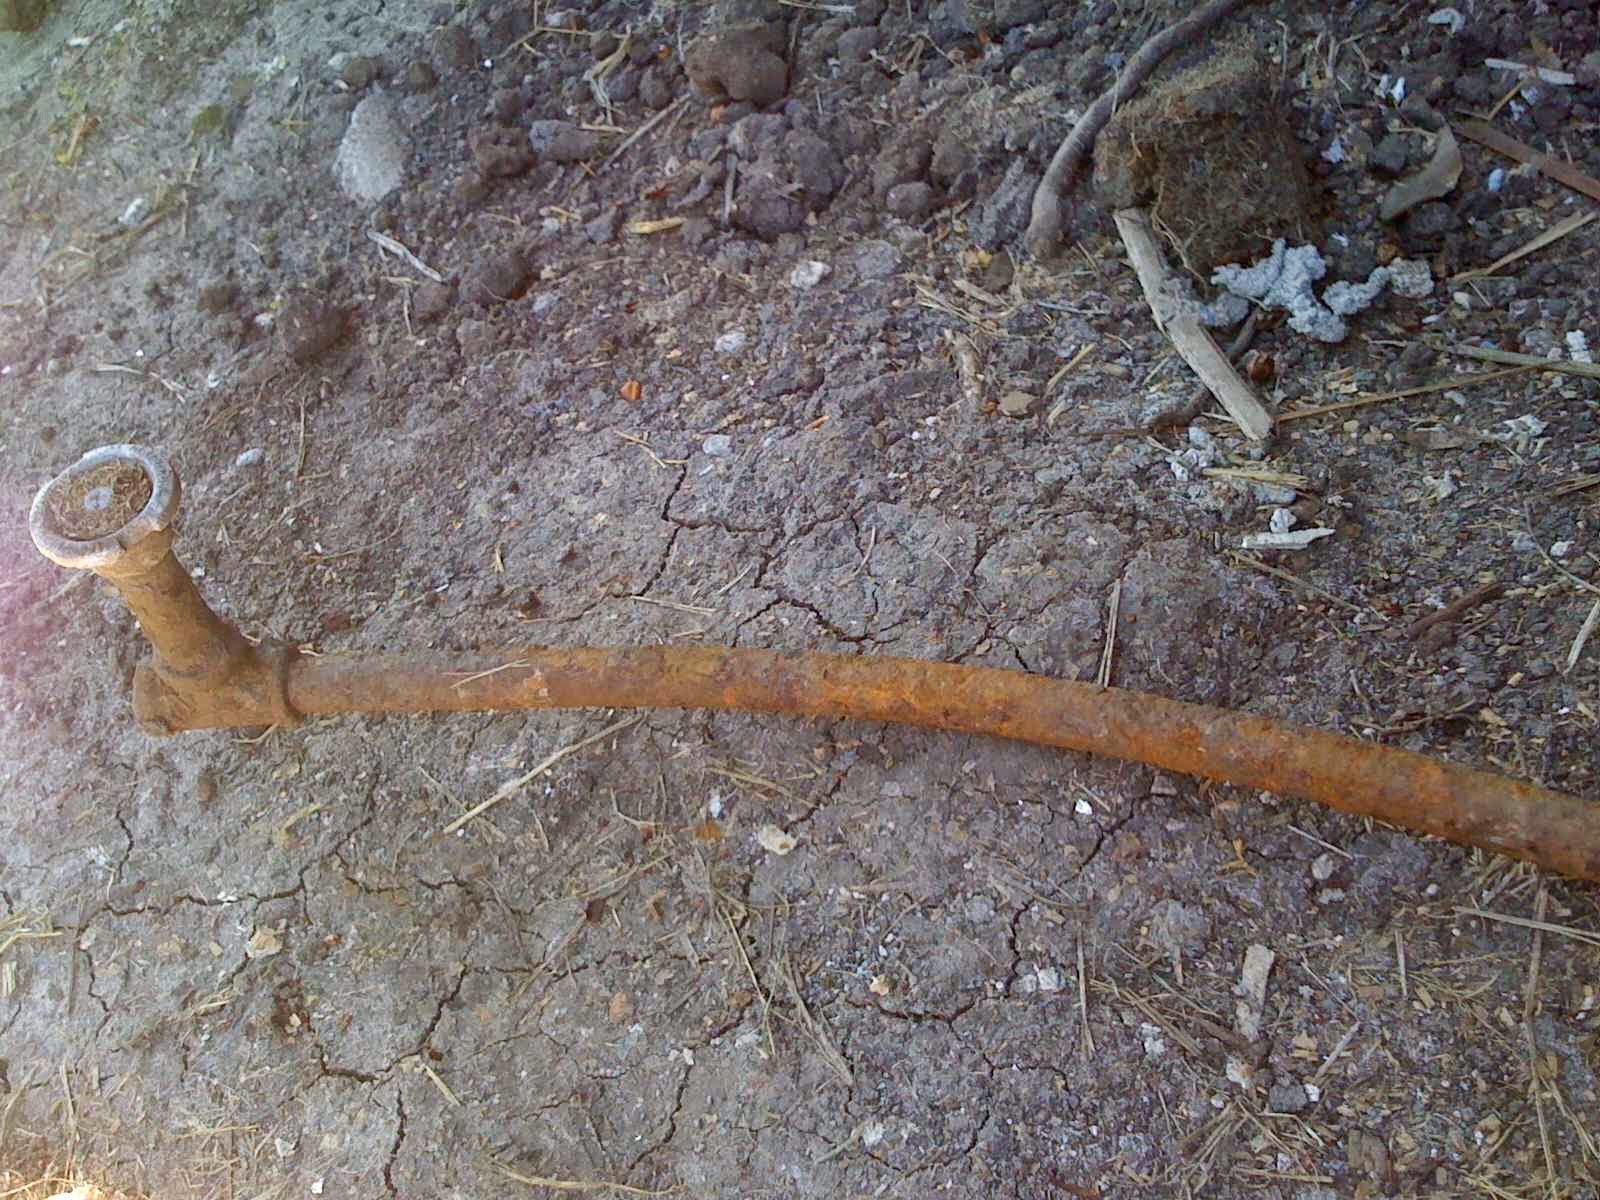
Before:  Although we dug up old sprinkler remains we weren’t eligible for a rebate from the water department.

During:  Laying down cardboard.

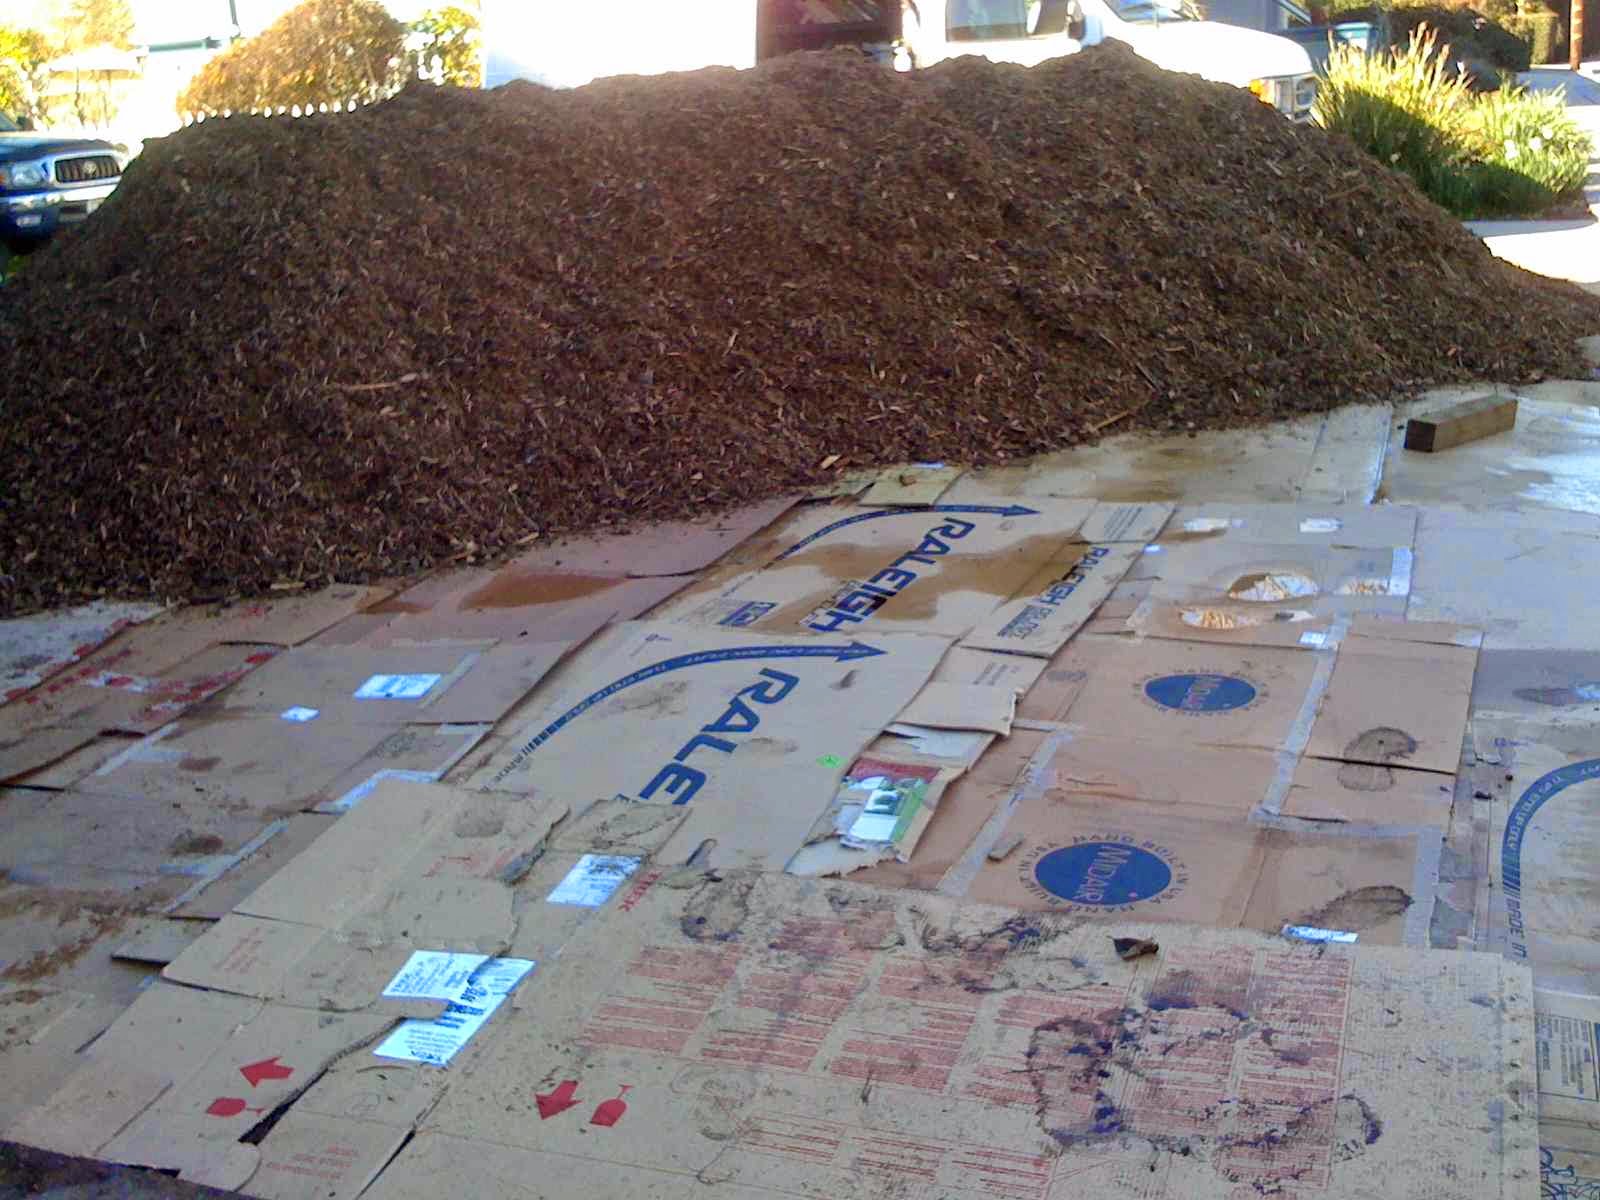
During:  Wood chips delivered 

After:  Sheet mulching completed. 

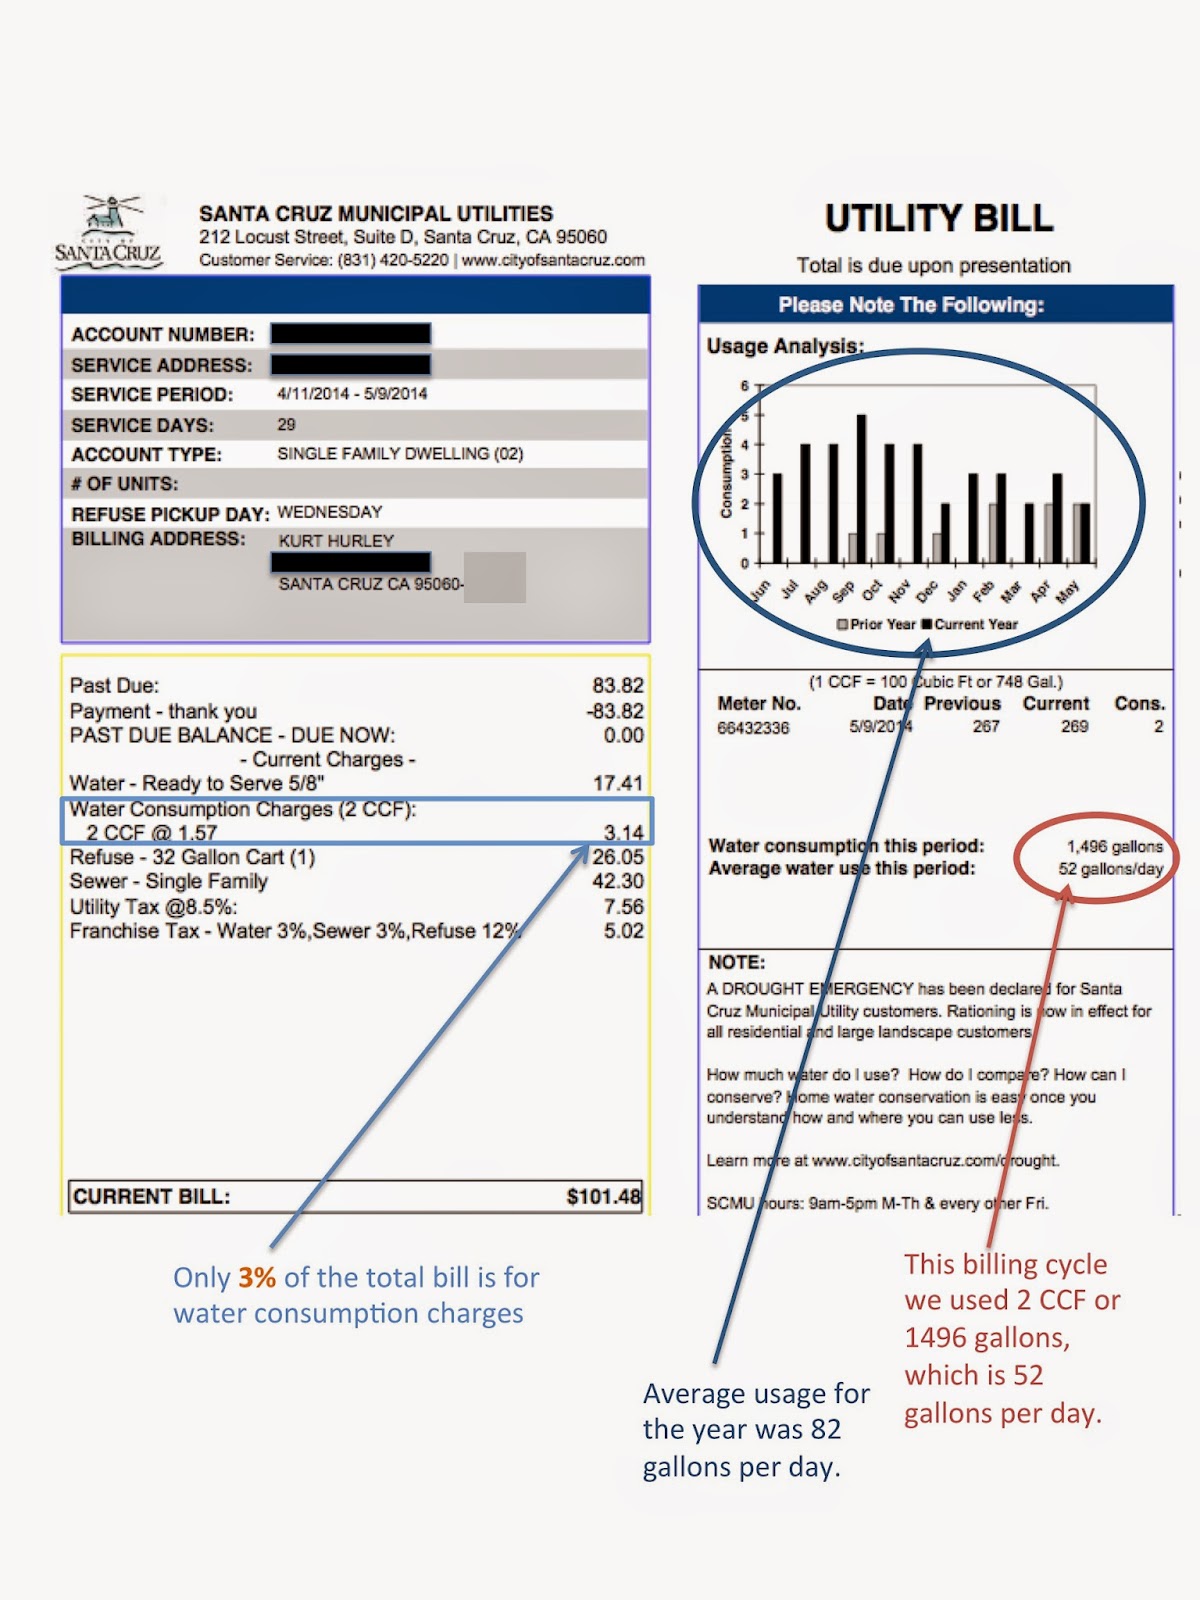
Food for thought:  Did you know that the volume of water used outdoors versus indoors vary quite a bit within California?  In the interactive graph in this KQED blog you’ll see the average household water use in California broken down by indoor and outdoor use.  The average use for the state of California is 53% outdoors and 47% indoors.  In northern California, where we are, the ratio is reversed where 42% (125 gallons/day) is for outdoor and 58% (171 gallons/day) is for indoor.  Then there are further variation by water districts.  For example, when you look at a coastal city like Santa Cruz the residents have low average use of 95 gallons per day and the portion for outdoor use is small.  If you’re interested in further detail of the water use by Santa Cruz residents the Water Use Baseline Survey will provide you with interesting data such as 50% of single family homes have no turf (figure 13 page 26).

Easy:  Showerhead

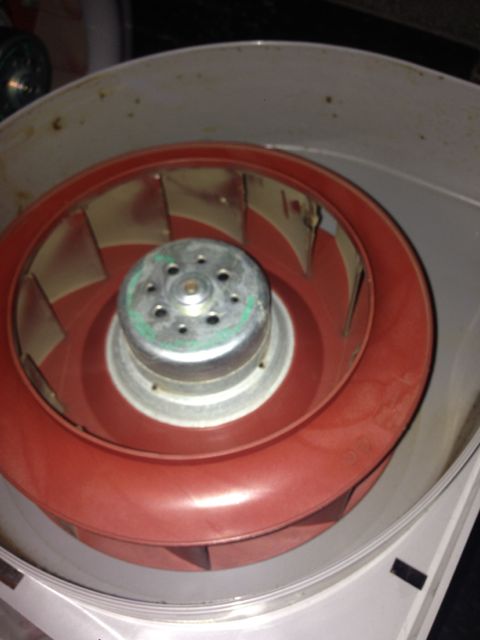
Replacing the showerhead is easy.  Plumbing code requires showerheads to be 2.5 gallons per minute (GPM) or less and we all can do better than that.  We came across the Niagara line of products at the exhibitor booth at a water conservation conference we attended. Here is a photo of our well-used, hard-water-stained showerhead made by Niagara.

Niagara Bi-Max Showerhead can be set for 1 gallon per minute or 1.5 gallons per minute.  We have it set at 1 GPM and the it feels nice.  The water that hits your body is a combination of a raindrop and a fine mist and it’s surprisingly satisfying.

Easy:  Faucet

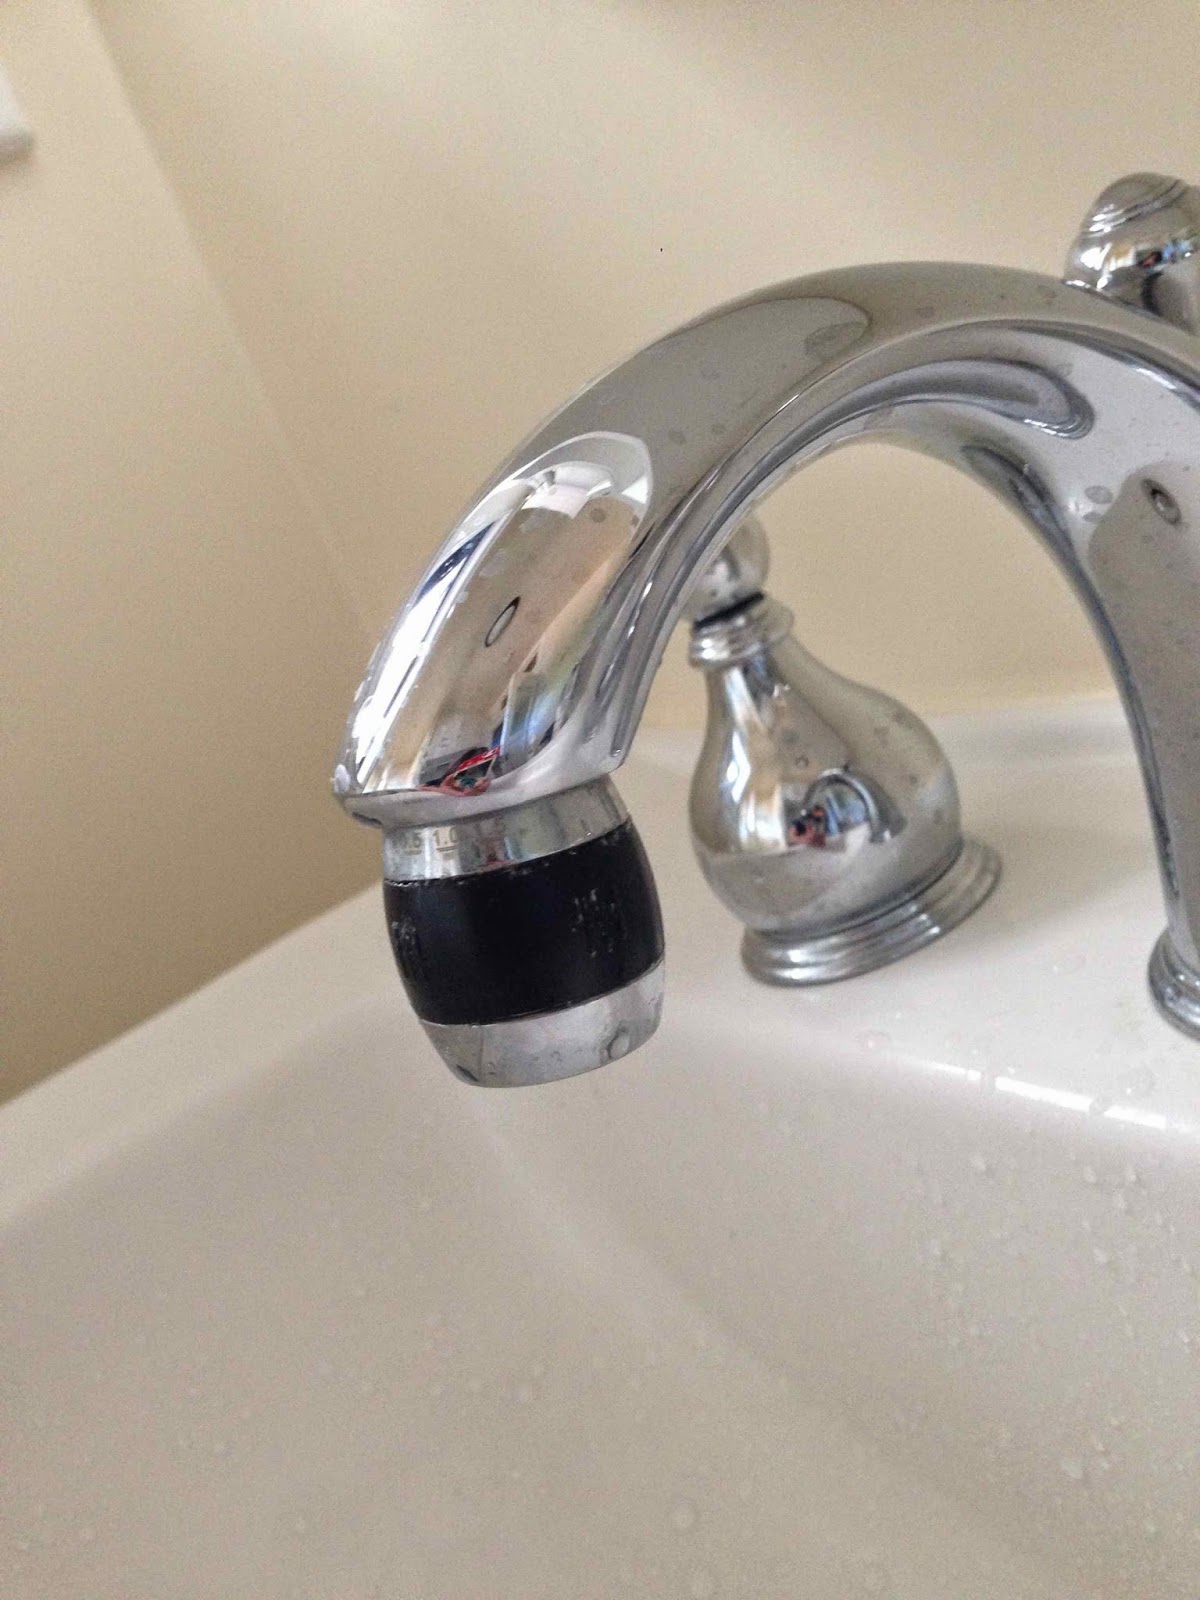
Here’s another product from Niagara to reduce water flow.  This aerator attached to the bathroom faucet and we usually have it set to the low flow setting for handwashing.  I use the higher flow rate if I’m filling a vase or a small bucket.

Niagara Tri-Max Aerator has 3 settings:  0.5 gallons per minute, 1.0 gallons per minute, and 1.5 gallons per minute.

Easy:  No Garbage Disposal

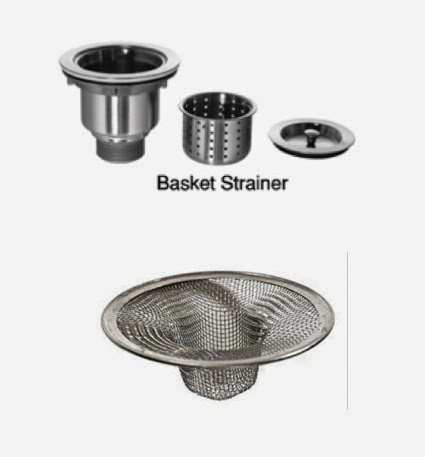
Grinding food scraps in the garbage disposal requires both electricity and water.  And you may be inclined to use lots of water to make sure the food scraps move along in the waste water pipe to prevent clogging.  But what if you didn’t send the food scraps down the sink in the first place?  It’s just as easy to trap the carrot peels and food scraps in the wire mesh and throw it into the trash can. Or placing the food scraps in the compost bin is even better.

We didn’t install garbage disposal under the sink becase we didn’t want the noise and we also wanted to save both water and electricity.  We’ve been living in Midori Haus for 18 months and I’m happy to report that we have had no problems with the food scraps clogging our pipes.  We have double containment in our kitchen sink to prevent large food particles from getting into the wastewater pipe.  It doesn’t take much effort to empty out the strainers regularly.  The basket strainer came with the sink and we got the mesh strainer at local hardware store.

If you have a garbage disposal in your kitchen sink today you can simply choose to stop using them.  Super simple, right?  But I realize that some folks are really passionate about their garbage disposal.  In the introduction section of the book, On The Grid, Scott Hueler shares a colorful narrative of his city’s (Raleigh, North Carolina) attempt to ban the garbage disposal during a drought.

Food for thought:  Have you ever taken a tour of the sewage treatment plant?  I’ve been to waste water treatment plants in Santa Cruz and Palo Alto and have taken a guided tour of the facilities.  Yes, it’s stinky.  It’s also quite fascinating.  One of the first things they do at sewage treatment plant is to scoop out solid materials to be hauled off to a landfill.  This made me think about how my personal actions affect downstream processing at the wastewater treatment plant.  By grinding your food scraps in the garbage disposal and sending it down the sewer you’re just giving the waste water treatment plant more stuff to process.  I should mention too that in my monthly utility bill that combines water, garbage, and sewer services the sewer component is the most expensive.

Moderate:  Toilets

Most homes have 1.6 gallons per flush toilets.  These are much better than the older toilets but if you want to do better you can install a dual flush toilet (2 different buttons — one for liquid waste and another for solid waste).  Or you can simply install a 0.8 GPF Niagara Stealth toilet like we did.

We have two of these toilets and they work well.

Look for rebates in your area for replacing your older toilet that used more than 1.6 gallons per flush with high efficiency toilets.  Here’s an example of a high efficiency toilet rebate in San Francisco.

Moderate:  Dishwasher

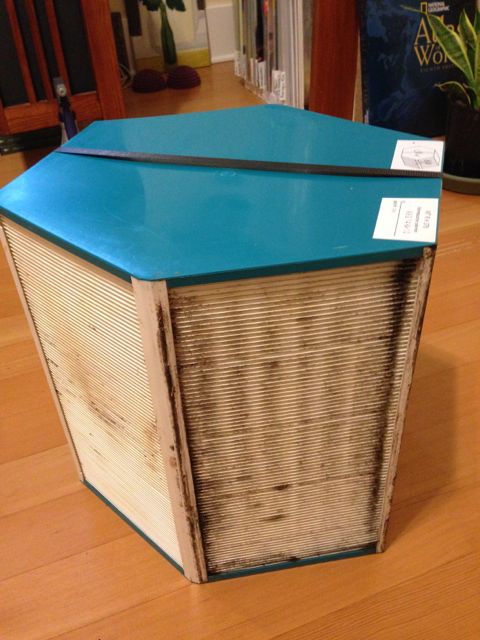
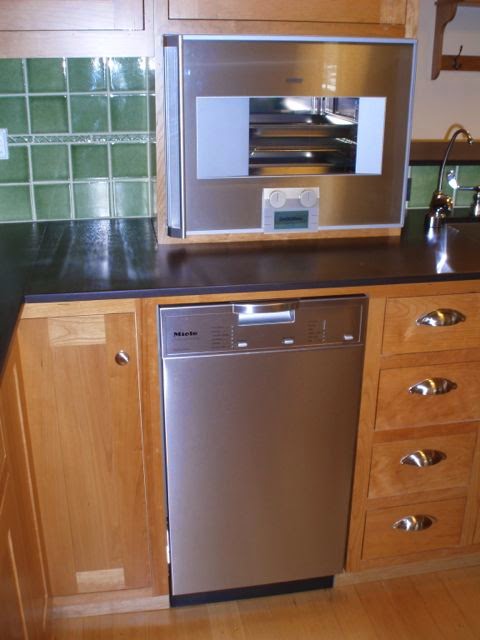
A small dishwasher uses less water than a large one.  For just the two of us this Futura Slimline Series dishwasher from Miele works really well.  It’s less than 18-inches wide but it fits dishes for 10 place settings.  It uses only 6 gallons per cycle.

Moderate:  Clothes washer

For clothes washer we chose the 24″ Bosch Axxis Plus model that uses very little water.  The manufacturer’s spec sheet says 3,904 gallons per year.  In general the front loading washers use 1/3 less water and detergent than the top loading ones.

Moderate:  Spray Rinse in Kitchen

The commercial pre-rinse assembly and faucet from Fisher delivers 1.15 GPM at 60 PSI.  It removes food from pots and pan pretty well using very little water.  We decided to use a commercial assembly rather than a residential kitchen faucet because it’s cheaper than the fancy residential models, works better, and the replacement parts will be available for a long time.  It doesn’t look bad either.

Moderate:  Laundry to Landscape Graywater

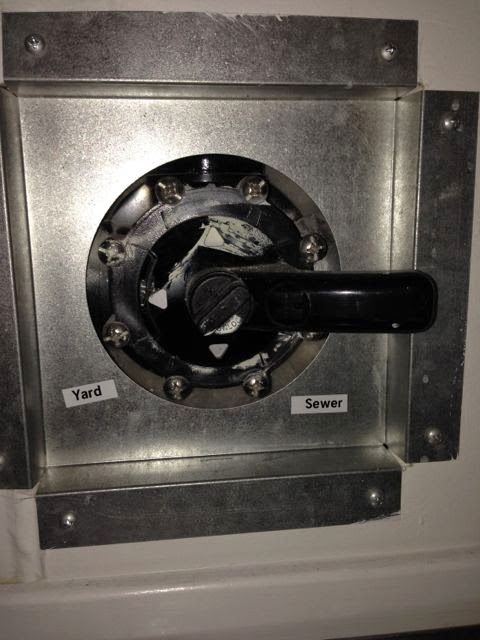
The wastewater pipe from our washing machine is connected to diverter valve that can direct the laundry wastewater from the washing machine to the landscape.

Right now the diverter valve is set to flow the laundry wastewater to the sewer.  Why?  Well, we don’t have our garden planted with all the fruit trees we want yet.  Our orange and apples trees are very mature and the roots are probably tapped into some water source.  We’ve planted lemon, plum, and pear trees a few months ago and will likely plant other fruit trees.  Once all the trees are planted we’ll lay out the irrigation pipes to direct the laundry water to the roots of the fruit trees.  I wrote about laundry to landscape when I took a workshop with LeAnne Ravinale in October 2011 showing details of an installation at another house in Santa Cruz.  You can find the post here.

While Laundry to Landscape can be done without pulling a permit in California you need to follow some guidelines.  By the way, you need to be careful about the type of laundry soap you use when you start watering your garden with your laundry wastewater.  There is a list of ingredients to avoid and you can carefully read the label of the the laundry soap at the supermarket.  But it’s much easier to refer to a list of safe products and shop from the safe list.

We have a very water efficient front loading washing machine so the amount of laundry water irrigating the landscape will be about 50-80 gallons per week for doing 6-8 loads of laundry.  If you have an older top loading washer you can direct a lot more laundry wastewater to water your garden!

Advanced:  Thinner Pipes

“What do you do between the time you turn on your shower and the time you get in?” was the question asked in the hot water heating class at PG&E.  The guy sitting next to me said he would go to the kitchen and make coffee and come back in 5 minutes because that’s how long it took for the hot water to come from the water heater to the shower.  Other people had various routines they would do while waiting for the shower to get warm.  When I told the instructor I didn’t have a routine he asked me, “So you just turn on your shower and get in?” to which I replied, “Yes, the hot water heater is next to the shower.” I took this class several years ago from Gary Klein who works in the area of water-energy nexus.  He has an interesting presentation on the topic of residential hot water distribution systems and advocated the use of structured plumbing where quick hot water would be available to every fixture with no greater energy consumption, with the target of no more than one cup of water is wasted while waiting for hot water.

The cold water flowing from the showerhead down into the drain represents the water that was sitting in the pipe between the hot water heater and the showerhead.  The longer the distance between the hot water heater and the shower the more water wasted.  The fatter the diameter of the pipe the more water wasted.  (On page 25 of Gary’s paper you’ll see the chart that represents the various lengths of the pipe that holds 1 cup of water for different diameter pipes.)  For example, the length of a 3/4-inch diameter pipe holding one cup of water is 2.5 feet long.  The length of a 3/8-inch diameter pipe holding one cup of water is 8 feet long.  So, thinner pipes means less water wasted.  In the case of the the guy in class who made coffee while waiting for his shower to get warm he had a fat pipe that ran a long distance.

I imagine some of you put a bucket in the shower to collect the cold water while waiting for the shower to get warm then use the water in the bucket to water the plants in the garden — if you do bravo!  But not everyone is that conscientious and sometimes you forget.  So, if you have the opportunity to replace your distribution plumbing in your house go for the thinner pipes which reduces water waste.

Since we replaced all the walls and the plumbing infrastructure was ripe for replacement we chose to go with thinner pipes.  At Midori Haus we have cross linked polyethylene PEX tubes conveying cold and hot water through the house.  These tubes, fast becoming the standard in residential plumbing, have several benefits.  These include flexibility that enables routing to avoid cutting and splicing, easier installation, lower cost, and more.  See this link for other benefits of PEX.  To minimize the volume of hot water sitting in the distribution pipes we used 3/8-inch PEX line between the hot water heater and fixtures.  The cold water line coming into the house to the hot water heater is a larger 3/4-inch PEX pipe.  I’ve watched our general contractor, Taylor Darling of Santa Cruz Green Builders install PEX and make various connections and it seemed straight forward.

There are concerns about the chemicals leaching from PEX.  The type of material we used (ASTM F2023 standard) has a 25 year assurance.  We filter our drinking water at the kitchen sink.  If you are concerned about this I invite you to visit this site and made a decision for yourself.

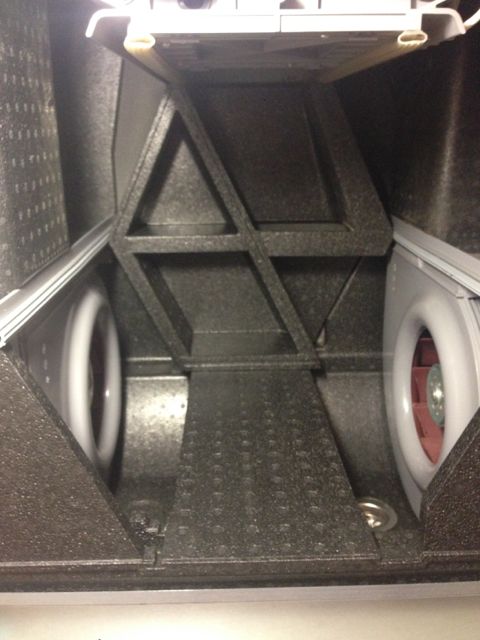
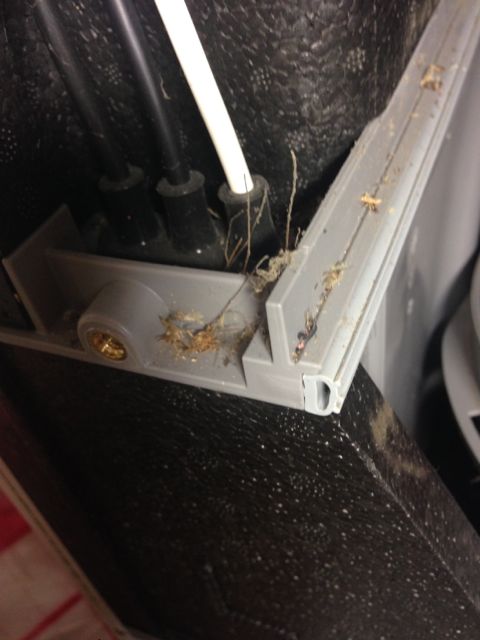
Here are some photos of the PEX lines taken during installation.

PEX lines behind the master bathroom shower

PEX expander tool used to connect the cold water line under the house

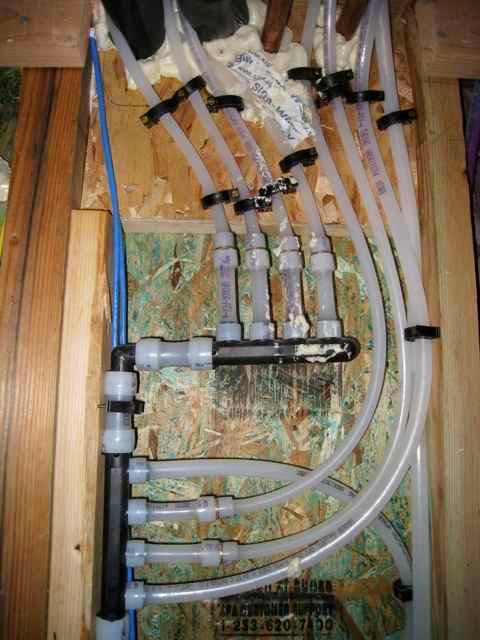
Home run PEX lines converging at central manifold in the interior wall next to the mechanical room 

To further minimize the heat loss of the hot water sitting in pipe the 3/8-inch hot water PEX lines are insulated using Therma Cell which has an R-value of 5.8.

Food for thought:  Another way to minimize hot water waste at the faucet or the shower is to use a recirculating pump in the hot water line.  This can be installed using a timer that circulates hot water on a programmable schedule or have it operate manually by pressing a button.  We decided not to use a recirculating pump at Midori Haus because our hot water lines to the showers are relatively short and we didn’t want to use electricity for this purpose.

Advanced:  Rainwater for indoor non-potable use

Many people collect rainwater from the roof of their house and store them in a tank for watering their garden.  This is not difficult and many people take this on a s a DIY project by referring to online resources or by attending community workshops.  American Rainwater Catchment Systems Association (ARCSA) is a good resource for workshops and webinars on rainwater harvesting.

A more complex use of rainwater is to put indoor plumbing in place to for non-drinking purposes.  Toilet flushing and laundry are the two large components of indoor residential water use according to this diagram from East Bay Municipal Utility District.

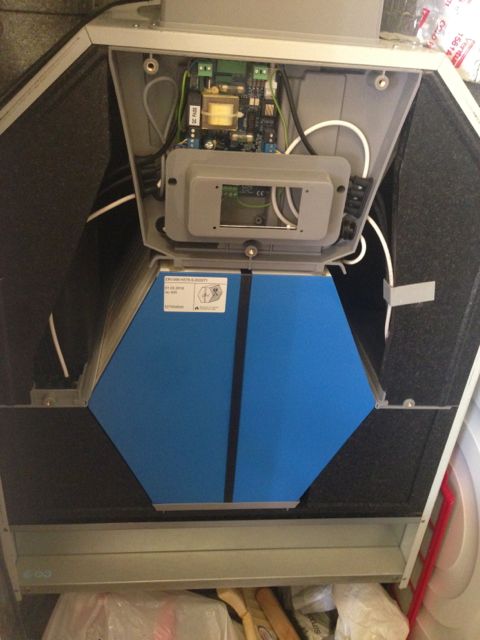
If we replace the water used used for toilet flushing and clothes washing with rainwater we can reduce the demand on our local water utility.  We knew we wanted to use rainwater for toilet flushing laundry.  But 3 years ago when we were in the midst of designing the details of Midori Haus we had a difficult time finding a resource to design and install a rainwater system for toilet flushing and laundry for a reasonable cost.  Back then this was not part of the plumbing code so the specialist that designed and installed these systems had to go through a cumbersome process to get the system approved for a permit to satisfy the building department and the health department.  People who had such systems installed spent around $30,000 and that was too much for us.  So, in anticipation of having the rainwater for toilet flushing and laundry implemented in a future stage we had the toilets and washer dual plumbed — one line for city water and another line for rainwater.  This will allow us to simply unscrew the hose that connects the toilet (or the washer) to the city water line and connect it with the rainwater line when the system is available.  There is no cross connection in this approach — the rainwater and city water never mixes.  Here are some photos of the internal plumbing.

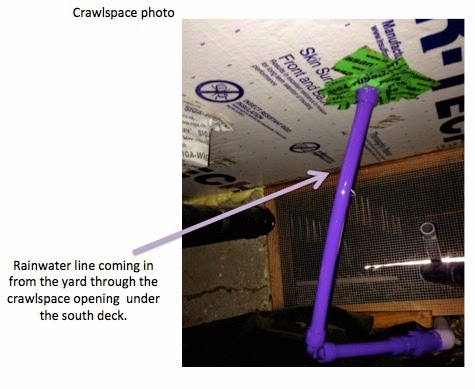
                              Rainwater line into the house

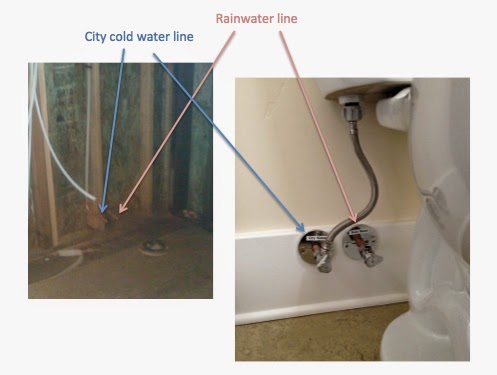
Dual plumbing for toilet

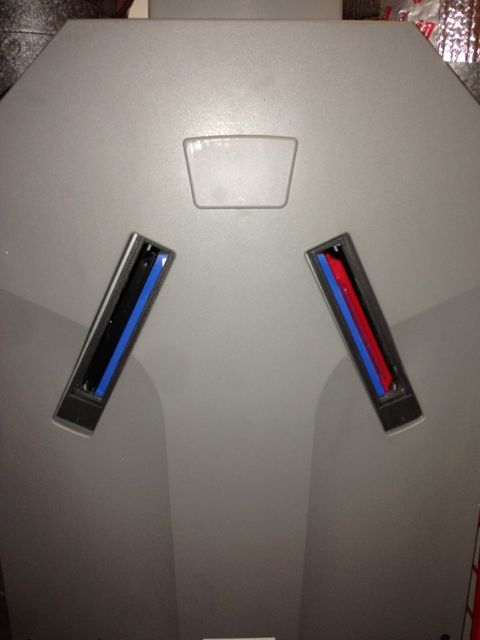
Spigots for washing machine

Note:  There is a difference between rainwater and gray water.  Gray water is re-using the water from your sink, shower, and washing machine by making changes in the sewer plumbing so that you can direct the waste water to your landscape or to the sewer.  Rainwater is harvesting the rain water that falls on your property and using them for irrigating your landscape or using them for non-potable use indoors.

Exterior details of the rainwater harvesting system installed by AquaSoleil will be covered in the next post.

Rainwater for Indoor Non-potable Use

Yay!  We got the permit for our rainwater harvesting system for indoor non-potable use.  Up until now we’ve focused our attention on thermal comfort and energy consumption in our home.  Now we shift our attention to water — the precious natural resource we can’t live without.  In this post I’ll share the background of how we got here on our green journey and why it’s important.

Most of you know that California is in the middle of a drought right now.  When I read this article in New York Times I was reminded that residents of Santa Cruz have been practicing water conservation for a long time, ever since the drought in the 1980’s.  The effect of the conservation effort is reflected in the current volume supplied by the local water district:  30% less today than it was in 1987.  Unlike San Francisco and nearby cities in the Bay Area, Santa Cruz is not connected to the California Aqueduct and we don’t have water piped in from remote sources.  Our drinking water comes from local sources and residents here are not a fan of desalinization so we make do with less water per person.  On May 1, 2014, new rationing allotments and progressive surcharges went into effect.  For single family homes this means 249 gallons per day (assuming 4 people living in the house) or 62 gallons per person per day.  For the 2 residents of Midori Haus the allotment comes out to 124 gallons per day.

Currently we are using well below the allotment amount.  Let me show you our recent water bill.  By the way, I used to simply file away the water bill after I paid it and haven’t paid much attention to the data.  The current drought condition got me curious about typical usage volume and for what purpose.  If you’re also curious have a look at the middle portion of this page on Sierra Club’s website that shows the breakdown of household water use.  I’m sharing my utility bill here with you as food for thought.  I invite you to pull out or download your water bill and simply notice how much water your household uses.

Last month (May 2014) we used an average of 52 gallons per day (only 43% of our allotment) and our annual average water consumption was 82 gallons per day (66% of our allotment).  I’m pretty happy with our our low water usage.  And we’re not super frugal about our behavior.  We do about 8 loads of laundry per week, run the dishwasher almost daily, prepare 2-3 meals at home daily, and I’ll even confess that I’ve never outgrown the teenage syndrome of long showers.  The main reason why we have low water usage is because we don’t have a lawn and most of our trees have tapped into the water table under the soil so we don’t water them.  It also helps that we have super efficient water appliances and fixtures in the house.

In a separate post I’ll show you the different components of water saving features we have in the house today.  For now let me explain what we mean by non-potable use of rainwater catchment system.

Non-potable means not suitable for drinking.  So what are the uses of non-potable water inside the house?  Toilet flushing and laundry.  At this point I invite you to pause and think about the water used to flush the toilet.  Water is extracted from the ground, river, or reservoir then treated to make it safe for drinking at the water treatment plant.  Then the clean drinking water is pumped through the network of pipes from the water treatment plant to your home.  When you press the button or the handle on your toilet to flush the pee or poo you are using clean drinking water to transport them to the sewage treatment plant or into your septic tank.  Hmm.  Seems like a lot of energy and resources are expended to flush the toilet.  So, what if you collected a portion of the rainwater falling on your property and used that instead to flush the toilet?  That’s what we’ll being doing.

The notion of using rainwater to flush toilets and doing laundry is no longer exotic.  The indoor non potable uses of rainwater is spelled out in the California Plumbing Code now.  Chapter 17 of the 2013 California Plumbing Code describe the requirements for non-potable rainwater catchment system.  Note that even if it is part of the plumbing code the building officials doing the plan check may not be as familiar with this yet so they may grace you with extra scrutiny.  For us it wasn’t an over-the-counter permit and it cost us over $900 for the permit.  Let’s hope that the permit process will be faster and cheaper as it becomes mainstream.

How did we get the inspiration to do this?  About 3 years ago we visited the dormitory at the Green Gulch Farm at the San Francisco Zen Center for a Passive House Tour.  It was there where we first saw the installation of rainwater harvesting system to flush toilets and to do laundry.  We’ve been wanting to do this at Midori Haus but the details of the permitting process wasn’t clear when we were in our home remodel construction phase.  So had some pre-plumbing put in place and we decided to shift the implementation of the rainwater system to a later phase.  (Remember, this was before the 2013 California Plumbing Code update).  When we learned about a local program to evaluate the water quality and cost effectiveness of non-potable rainwater harvesting system for indoor use we jumped on it.  We filed our application with Ecology Action, a local environmental nonprofit organization, back in October 2013.  In January 2014 we were delighted to hear that we’ve been selected as one of the 7 participants of the study.  The rebate and technical assistance of this program is funded through the Proposition 84 Monterey Bay Regional LID Planning and Incentives Program grant.  Sherry Lee Bryan of Ecology Action has been instrumental in providing technical assistance.  Thanks Sherry!

Some of you may say, “Why worry about the small reduction in household water use when the largest consumer of water is electric utilities and agriculture?”  Well, if you’re looking at the aggregate data for the country and if you are in a position to do something about it then by all means please focus your efforts in those areas.  I am not in such position and as a homeowner living in an area where we rely on local watershed for our drinking water I’m doing my part to save water.

Curiosity tidbit:  Water is the 2nd largest chunk of spending by our city government (Santa Cruz).

Next month Jon Ramsey and his crew from AquaSoleil will be installing a green 4,995 gallon tank in the corner of our yard along with the agricultural grade pump. They’ll make the necessary connections to the plumbing and the system will be tested.  Then we wait for the rain. It won’t be until we get a good storm or two to fill the tank to see this system in action.  This could be as early as September (wishful thinking) or as late as November (more likely the case).

I will share the photos and notes of the system after it’s installed in July.

1 2 3 4
>