Before and After Photos

September 25, 2015

On September 15, 2010 we signed escrow papers to buy a 3-bedroom 2-bathroom Bungalow in Santa Cruz, California. "She's got good bones," said our real estate agent, Gary Ransone. He was enthusiastic about this property and we trusted him. He is not a typical real estate agent because he is also a licensed general contractor and a construction attorney. During the two years we've worked with him he talked us out of many properties because he saw red flags we didn't. Still, having been outbid three times prior to this we weary of getting our hopes up too high. This was at the bottom of the real estate market and investors flush with cash came out of the woodwork and snatched up properties left and right. In retrospect we are glad that we didn't get any of the the other places. You see Midori, as we named her, was perfect. Located in a convenient walkable location with a large sunny backyard, Midori was in a perfect state for a gut remodel -- knob and tube wiring, no insulation, single pane windows, and many other characteristics of an old house in a state of lovely perfect decay.

Designing the remodel took one year and construction took another year. I've been re-living the design and construction process as I write the book on this amazing journey. We learned a lot about building science and construction. We met many people who generously shared their knowledge with us. We were very fortunate to work with Graham Irwin, a brilliant architect and passive house consultant. Although there were no experienced passive house builders in our area Taylor Darling of Santa Cruz Green Builders more than met the challenge. Midori uses 80% less energy than before and it feels comfortable and healthy inside. The unexpected benefit of this remodel project was learning to work side by side with my husband, Kurt, to manage the project and to make decisions together. I've gained appreciation of his work style and I respect his nature of driving tasks to closure. Since we've never worked together professionally it was a pleasant surprise to find our complementary skills fitting together nicely. 

If you would like to know more about our story of transforming a 90-year old house to be super energy efficient while retaining the classic charm of a bungalow, sign up for the mailing list. I will let you know when the book is available.

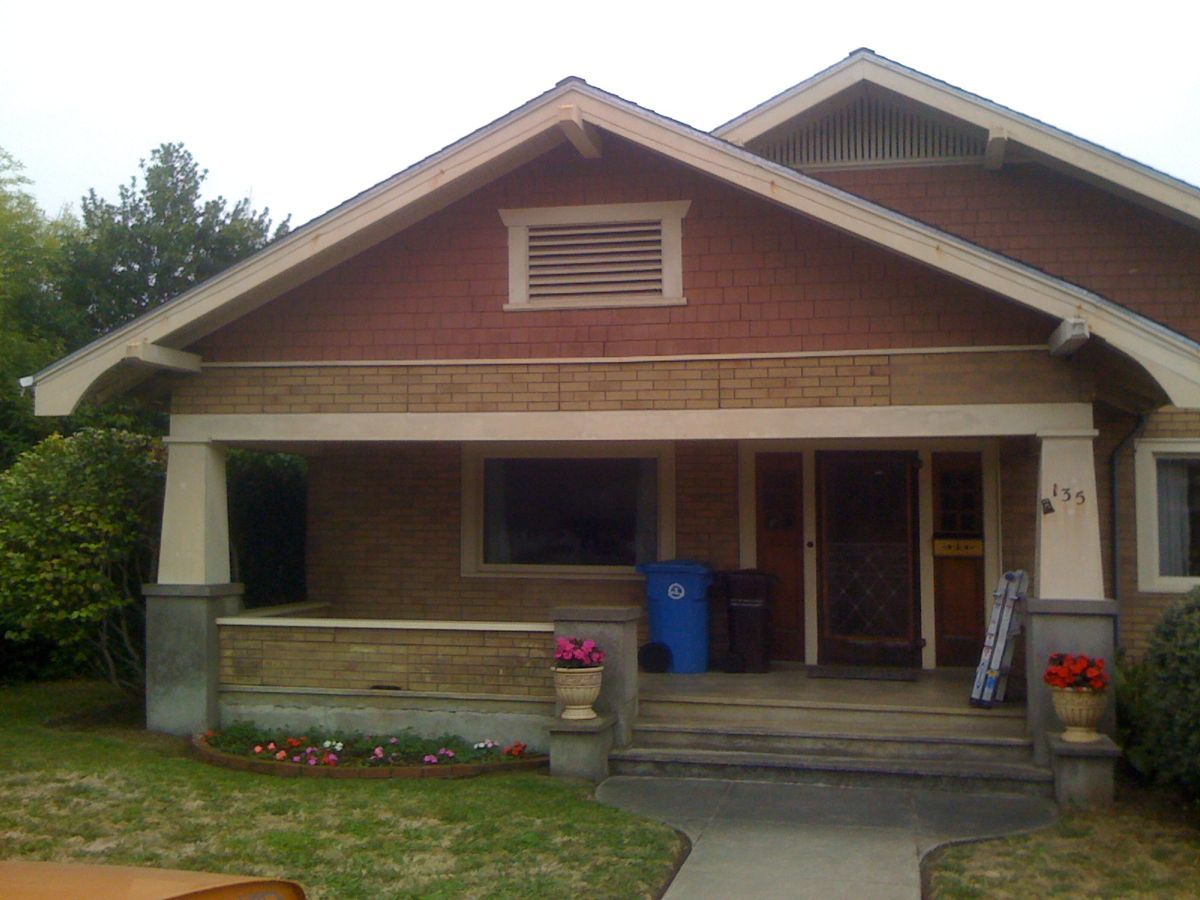
Here are some before and after photos.​

Before: Front of the house 

After: Front of the house

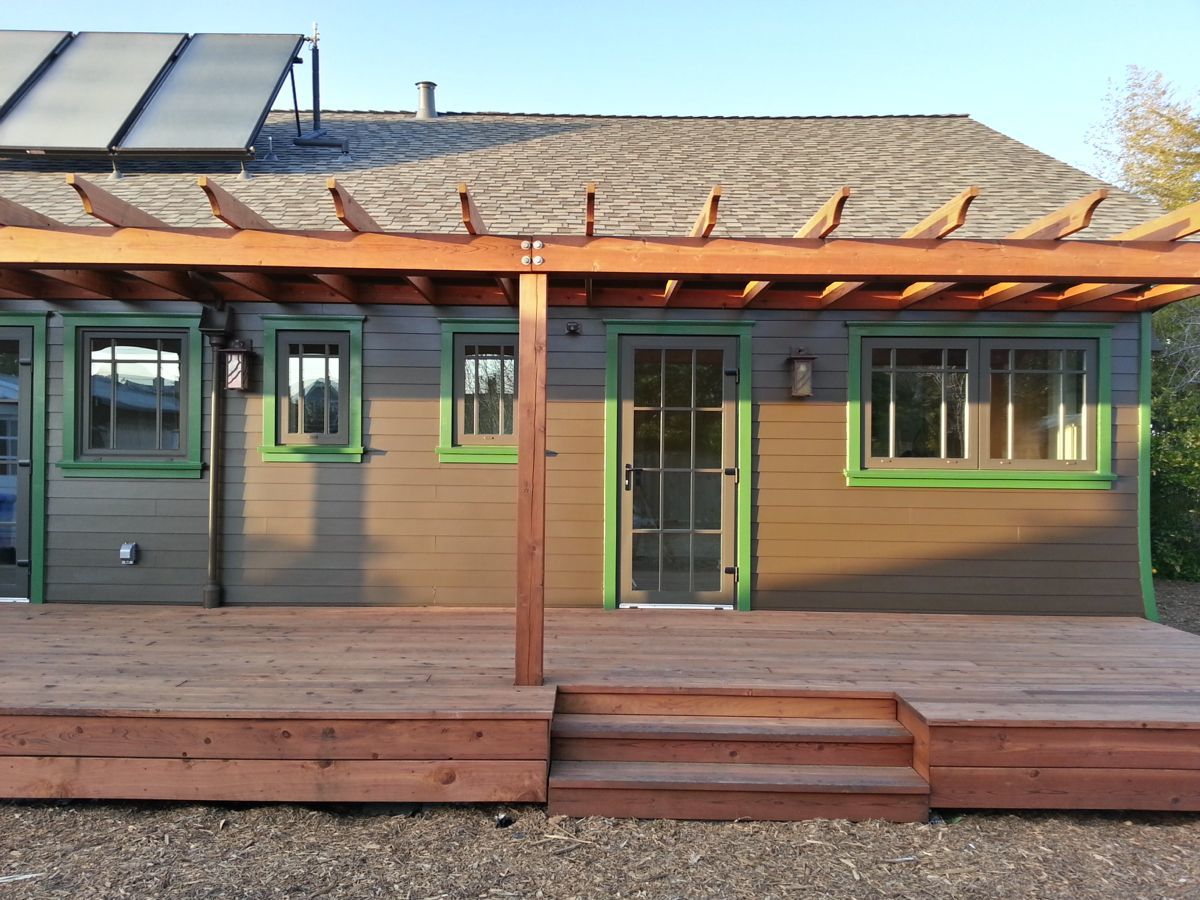
Before: Back of the house

After: Back of the house

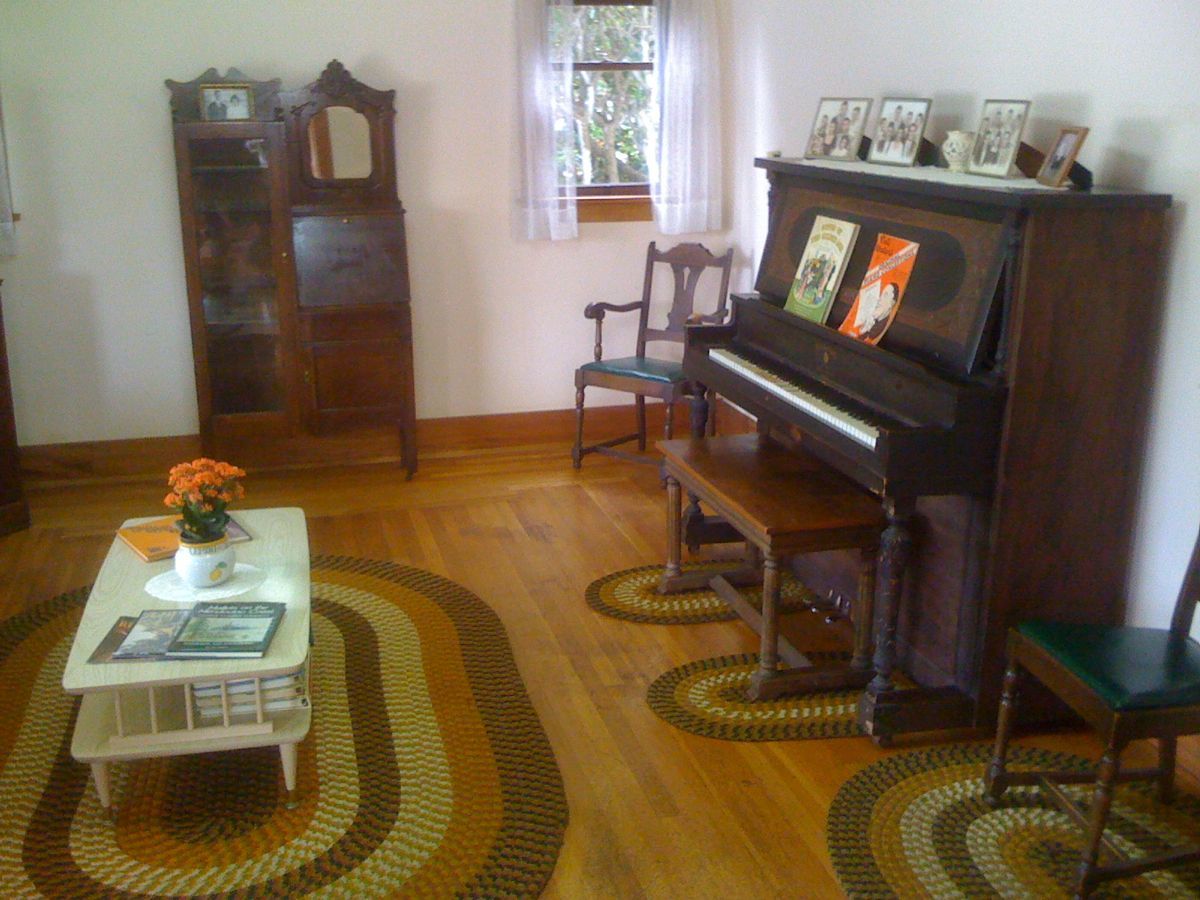
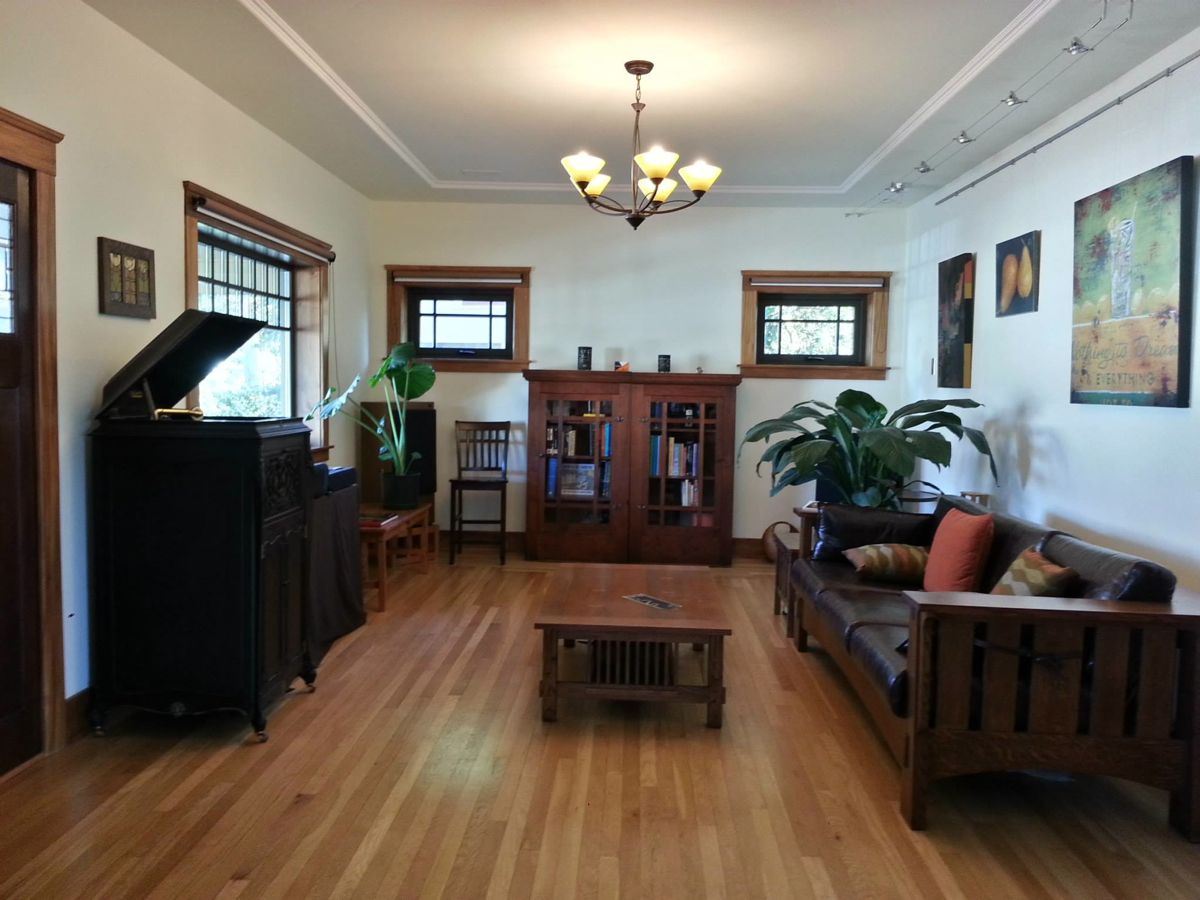
Before: Living Room

After: Living Room

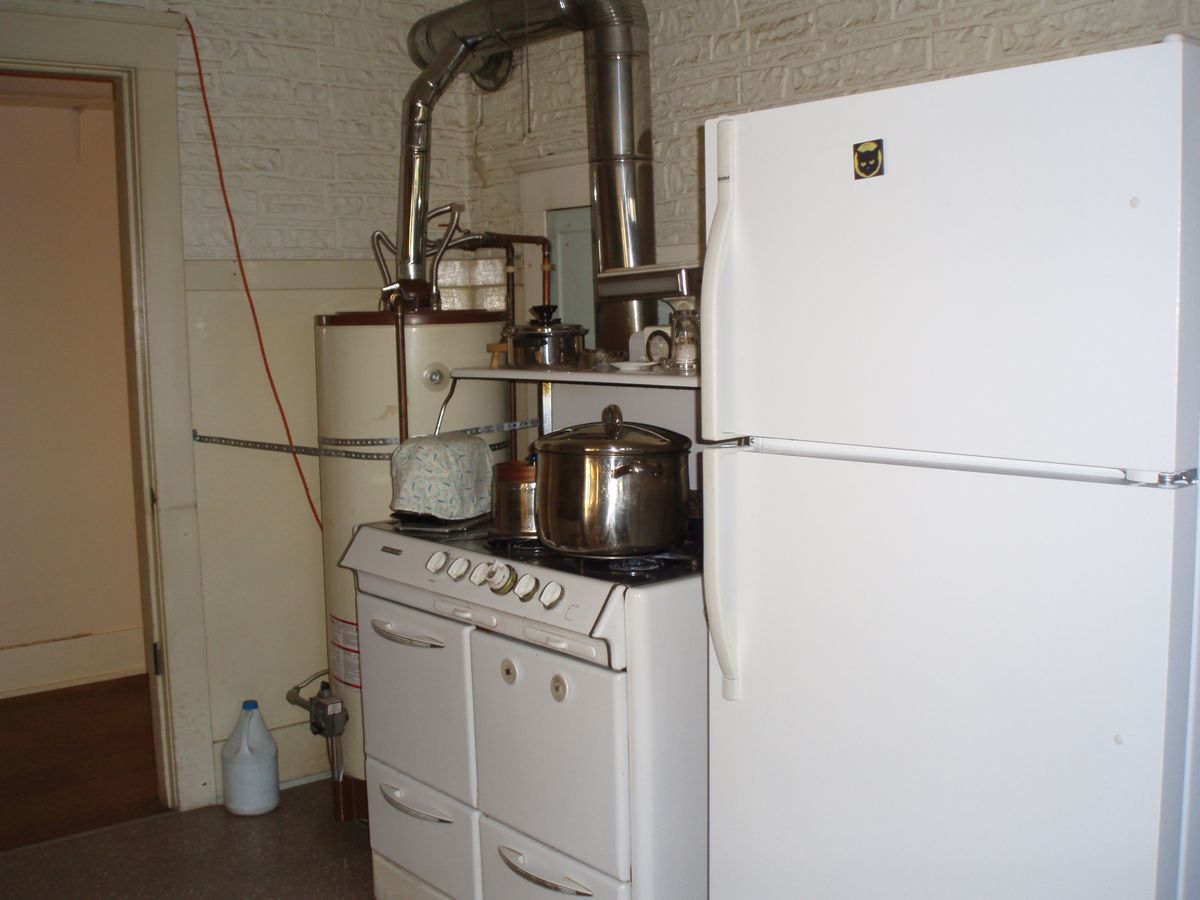
Before: Kitchen

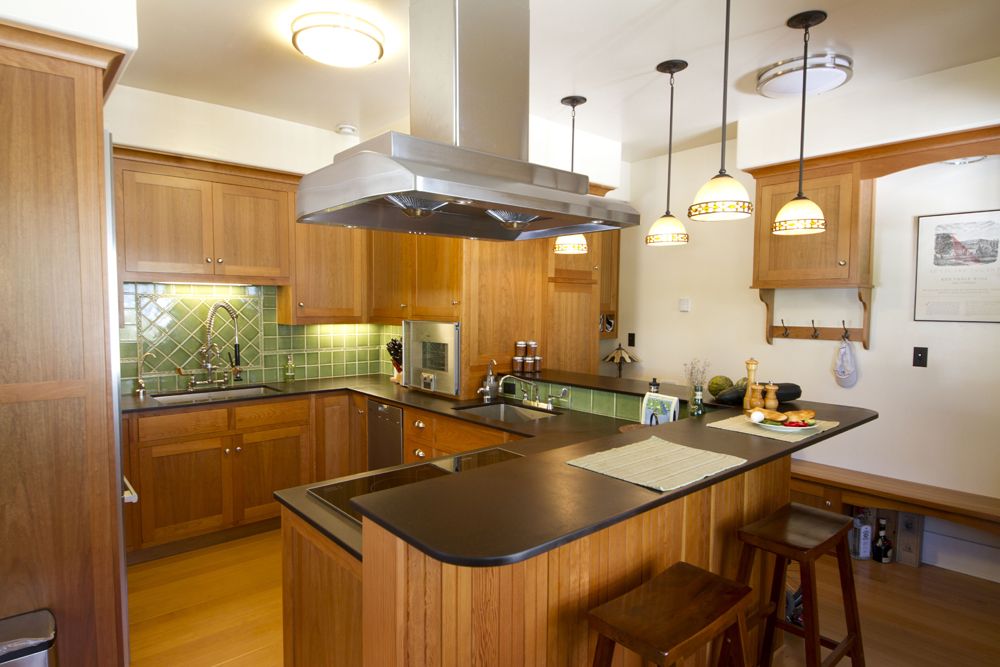
After: Kitchen

Urbanite – Concrete Re-Use

September 18, 2015

This post is not about a person who lives in a city. The other definition of urbanite is the broken pieces of concrete left over from a demolition project and we have lots of those. The tower of broken pieces of concrete in the photo above came from our old driveway and detached garage foundation. It currently serve as a playground and launching point for neighborhood cats to jump up to the back fence. In the past two years we've made good use of these in both the back and front yards.   

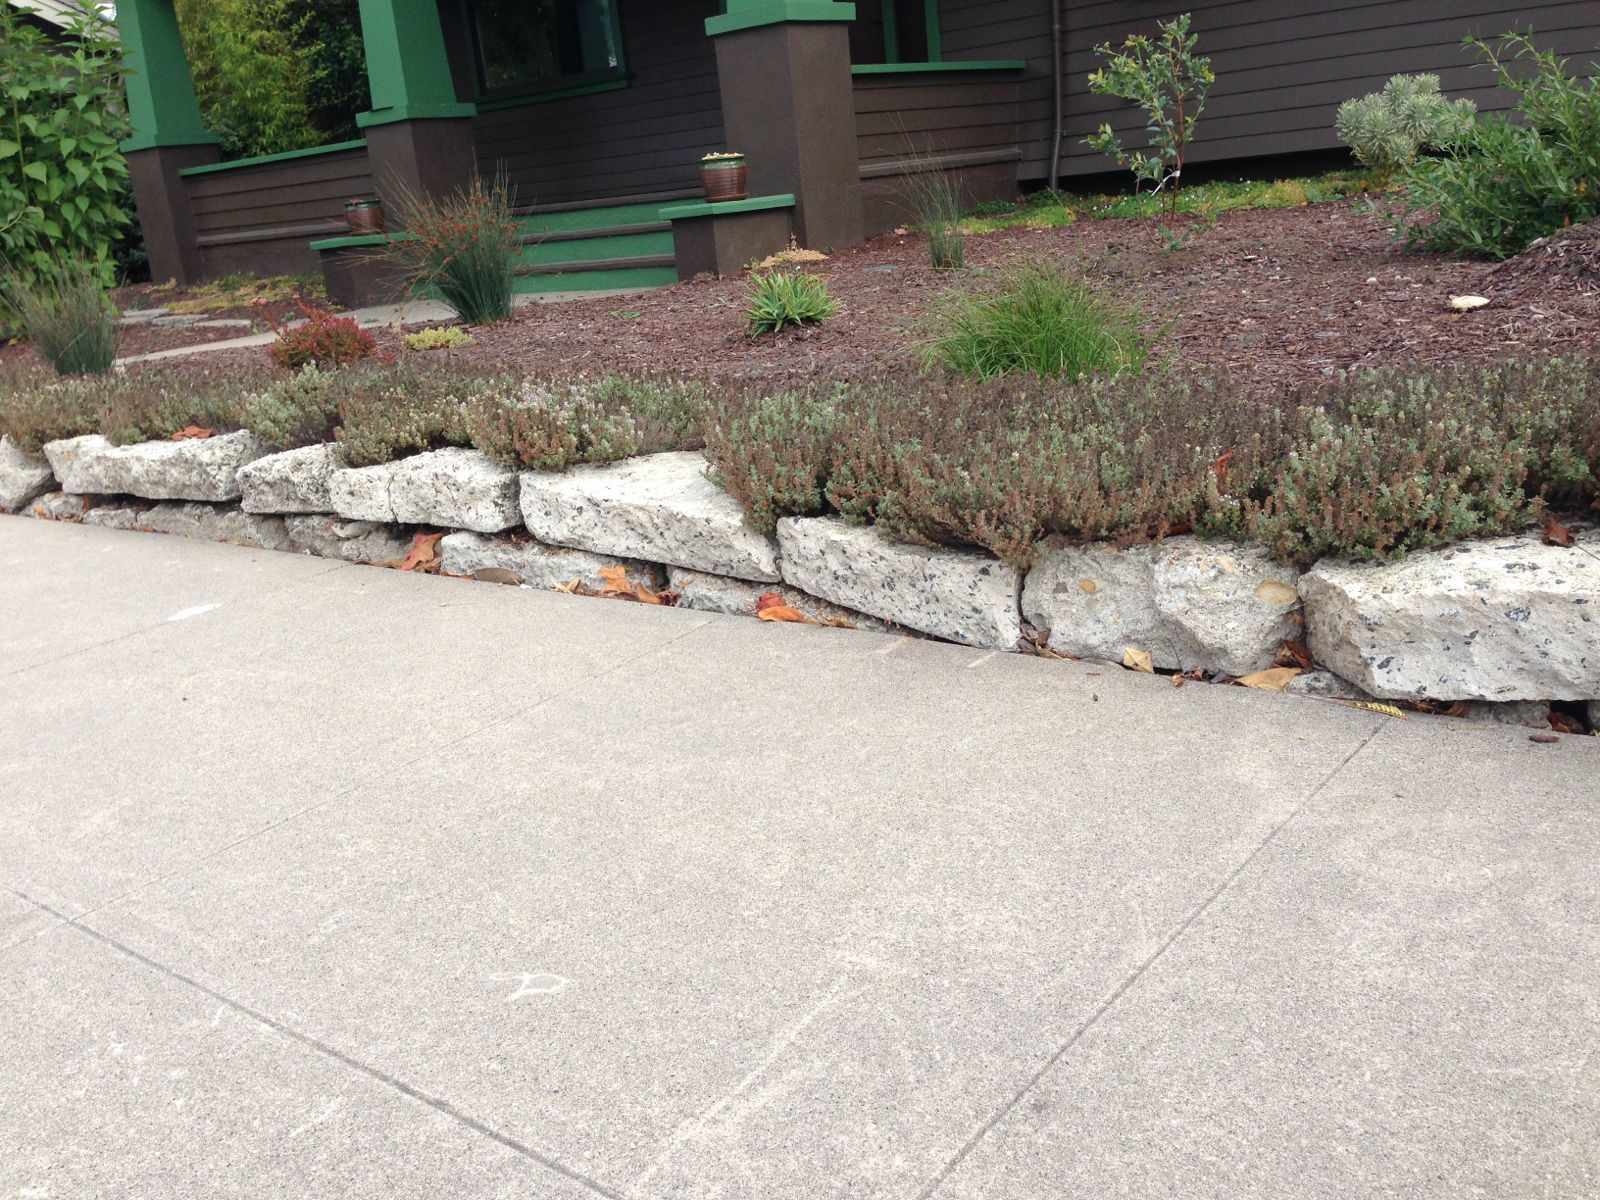
In the front yard urbanite pieces were stacked along the sidewalk to give a sense of boundary.  The low wall is intentionally kept at a height between the ankle and the calf to make the front yard feel open.  We heard that stacking the urbanites just two high makes it an awkward height for people to sit on the wall. Silver thyme was planted in between the urbanite pieces. We're pleased that they thrive despite the lack of water. 

Low Wall To Separate Sidewalk and Front Yard

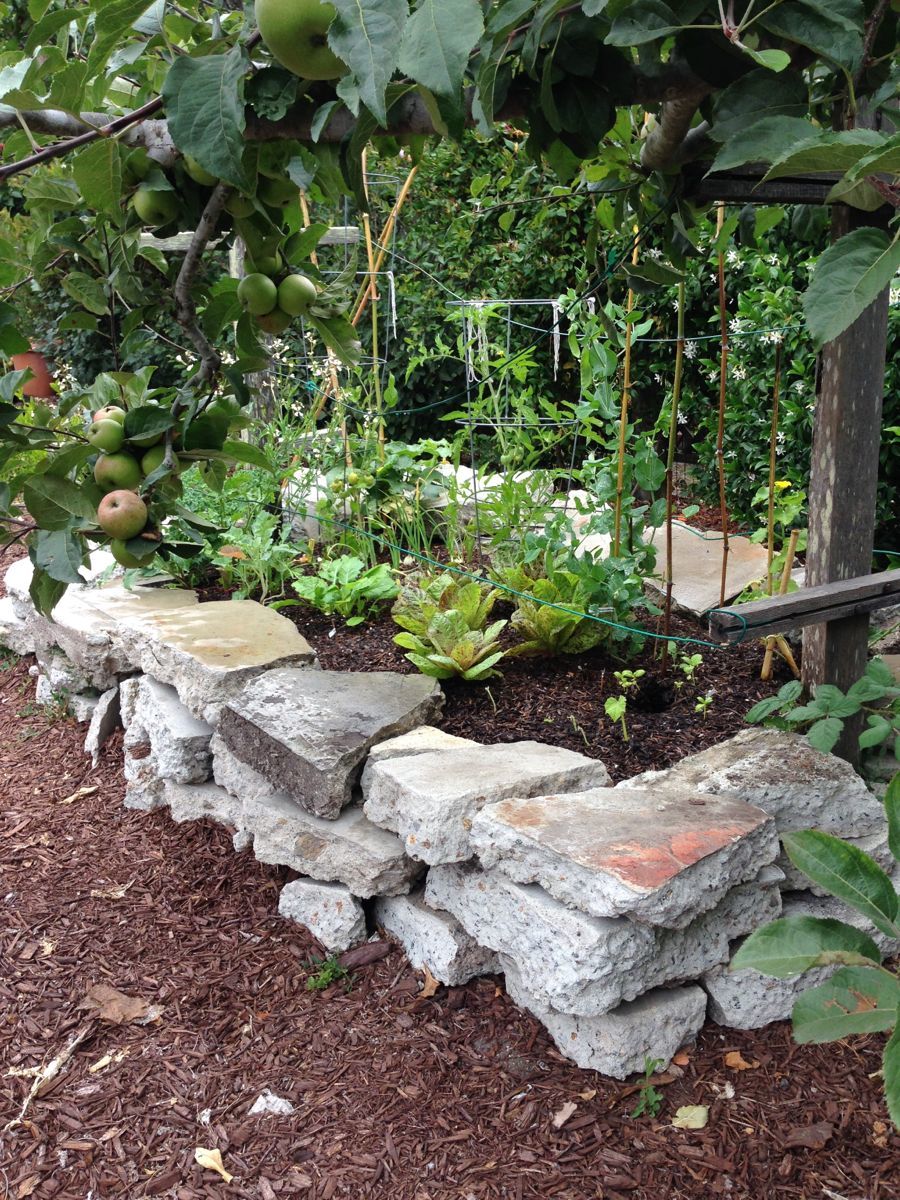
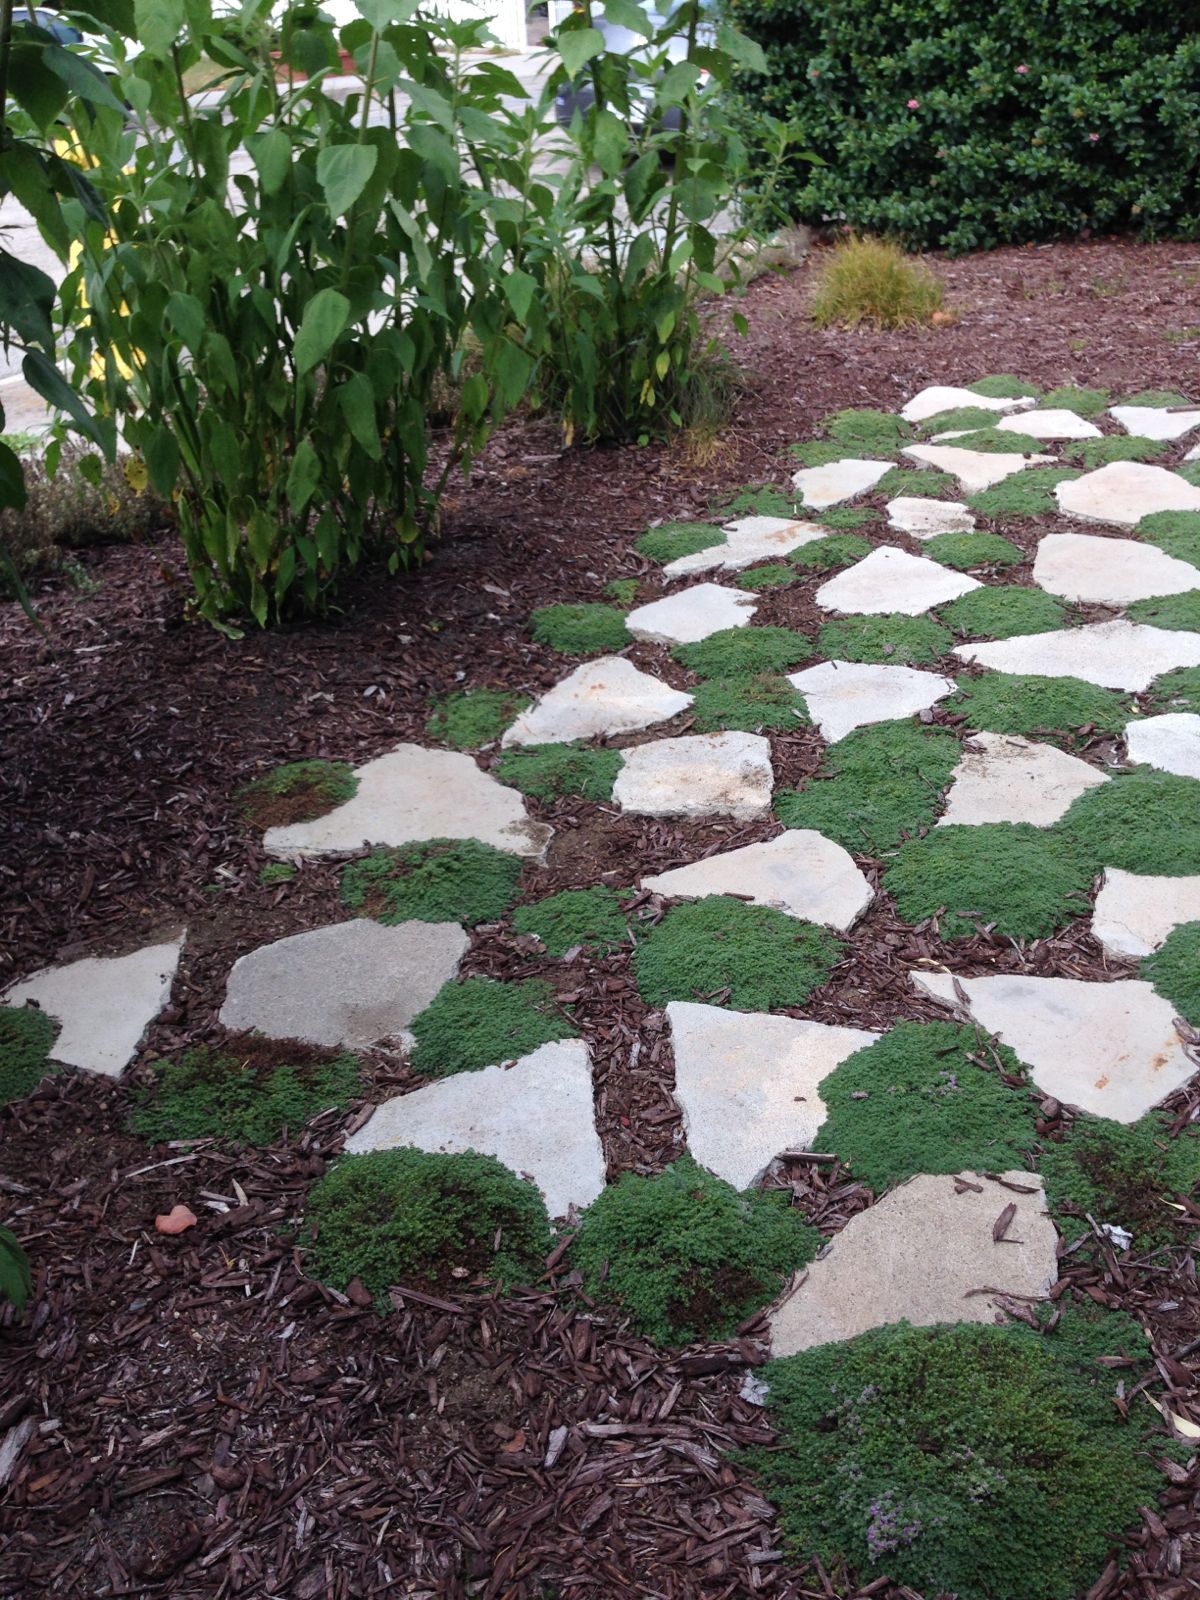
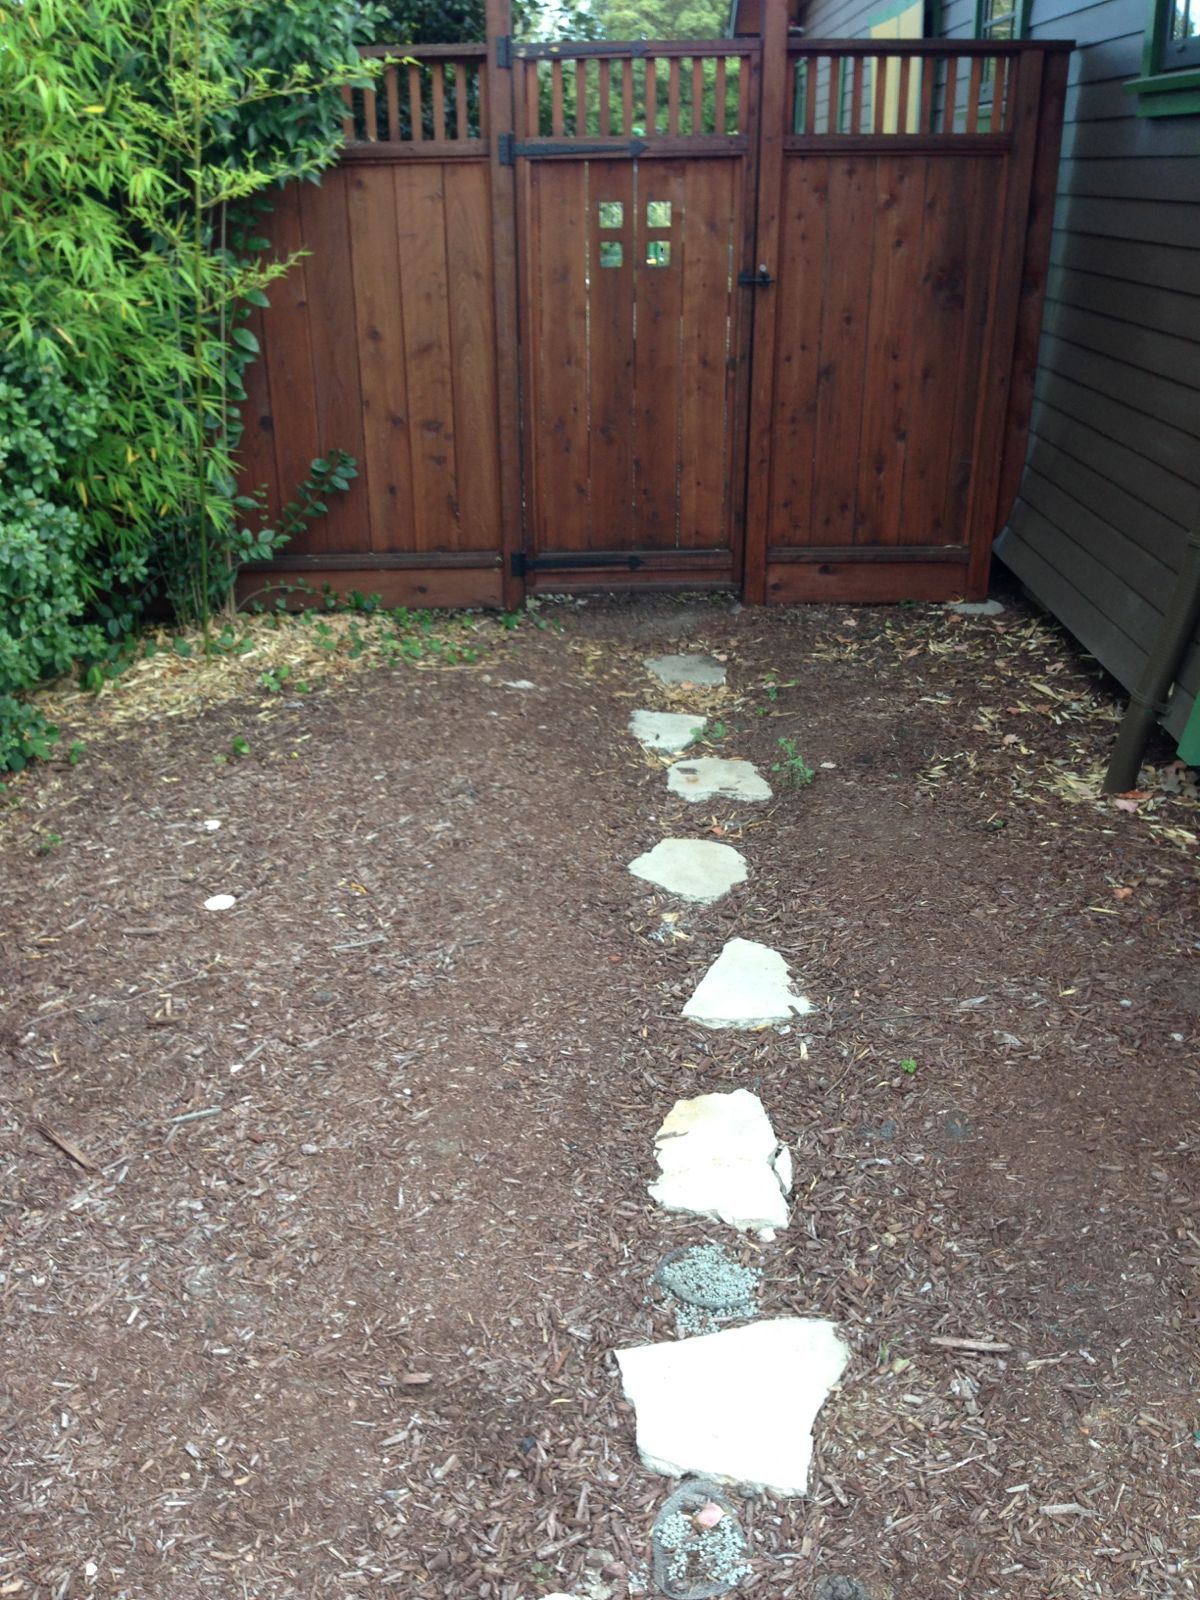
In the back yard the urbanites were stacked three high to create a garden bed for growing veggies. Behind the large sunflowers in the front yard is a patio area with elfin thyme as the ground cover filling the space between urbanites. We also have urbanites used as stepping stones to create a walking path leading up to the gate.

Urbanite Garden Bed Next to Apple Tree

Patio Area with Urbanite and Elfin Thyme

Urbanite as Stepping Stone to the Gate

It takes a lot of energy to heat the limestones at a very high temperature for a long period of time to make cement, the basic ingredient of concrete. When the structure made of concrete is at the end of life it's best to re-use the broken up pieces for some other purpose. Concrete can be recycled and there is cost associated with dropping them off at our local resource recovery facility. They charge $15 per yard or $32 per ton. No wonder people are happy to offer the urbanites for free! Just look on Craigslist to see listings for free urbanites.  

Building Carbon Zero California

September 11, 2015

Mark your calendar and get your tickets for the 2015 “Building Carbon Zero California” event hosted by Passive House California (PHCA). The fourth in a series, the event also serves as PHCA’s annual conference. In addition to large group presentations and panel discussions, break-out sessions follow one of two tracks: Carbon, Efficiency + PV and Retrofits and Large Passive House. More than 17 respected and renowned experts will share how increasing energy efficiency while reducing carbon emissions is being addressed both here and across the continent.

An expo during the event features a variety of companies that provide some of today’s most advanced materials, technologies and equipment used to achieve high-performance buildings.

Friday, November 13, 8:00 a.m. to 5:30 p.m.

Lucie Stern Community Center

1305 Middlefield Road, Palo Alto

Bike tour of high-performance projects, Saturday, November 14, 10:00 a.m. to 4:00 p.m.

For a complete list of speakers, sponsors, conference schedule and to purchase tickets visit www.co2zeroca.org. Early bird pricing ends September 30.

After A Green Smoothie

September 4, 2015

A friend introduced me to green smoothies about 6 years ago. It's a great way to enjoy fruits and veggies in a drink and I like sipping it for breakfast or for a late afternoon snack.  After following recipes for a while I started experimenting with different fruits and vegetables in season.  My favorite during the summer is a blend of peach, pear, celery, parsley, kale, and ginger.  Just cut them up, place it in a blender with some water, and let it blend to the consistency of your choice. Yum!

After enjoying the smoothie the task of cleaning the blender remains. Chunky film of green stuff clings to the inside of the blender and a thought crossed my mind: I wonder if I can use this for something? The trimmings from the veggies and fruits went to compost and will eventually feed the tomato and other plants. Soil is the recycling system for nutrients and organic wastes and it's also a medium for plant growth.  What if I just fed the smoothie washing water to the tomatoes directly? Hmm... 

So I did.  Filling up the blender with water and swirling it to dislodge the smoothie sludge​ from the inside of the blender I took this smoothie washing water and fed it to the tomatoes.  Tomato plants seemed to like it, meaning they didn't die and the fruits tasted pretty darn good.  So I kept up this practice. Earlier this summer I started feeding the smoothie washing water to the blueberry bushes after hearing that they like acidic soil.  They seem to like it too.

Technically this is black water since it would normally go down the kitchen sink and waste water from the kitchen is considered black water. In nature the content of the green smoothie (veggies and fruits) would go back into the soil so I figured it's OK to feed it to the plants. Although I know many people using water from vegetable washing to water the plants in drought stricken California, you should consult appropriate sources to decide whether this is right for you.

Washing Out Blender

Water Edible Plants

Happy Blueberries!

Keeping Cool With A Low-Budget Shade Cloth

August 27, 2015

Exterior shading is an important feature of keeping the house at a comfortable temperature when it's hot outside.  It's especially important to manage the sun well at Midori Haus because we have no air conditioning.  Just as we wear a wide brimmed hat when we're outside in the hot sun the house needs sun protection like a generous eaves overhang or awning over the windows.  

The shade cloth is seasonal. Unlike the deciduous plants (like grapes or kiwis) we originally planned to use on the arbor we control when we want shade.  We use our skin to guide us when to put these up.  During the winter we want the heat from the sun warming the space.  As soon as we start feeling a bit warm in late spring we put up the shade cloth.  We keep it up through early fall and remove it when the last bit of heatwave goes by.  So far the shade season has been running late April through mid-October.

Last year I wrote about  how exterior shading on a house built to the Passive house standard ​kept the inside of the house at a comfortable 73 degrees (F) during the heat 100 degree (F) heat wave. (See post here)  In this post you will see the details of  making a low budget shade cloth using simple materials readily available at the neighborhood hardware store.

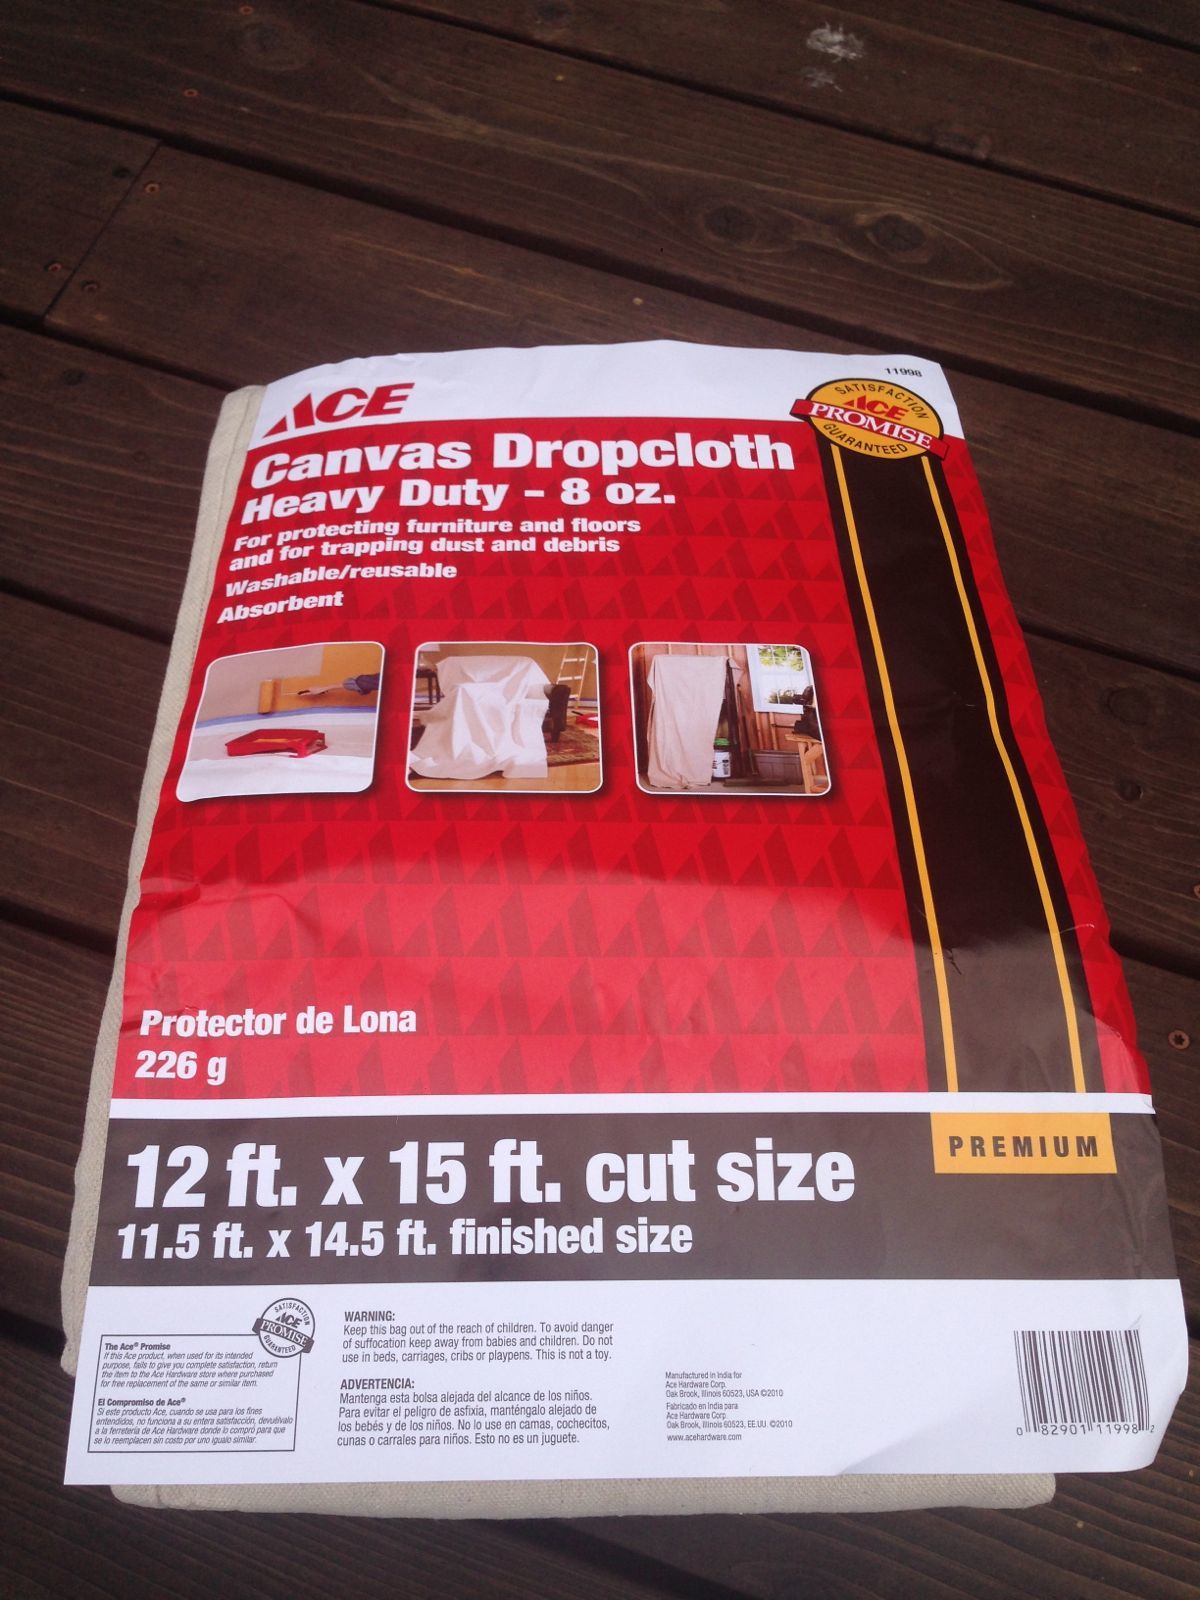
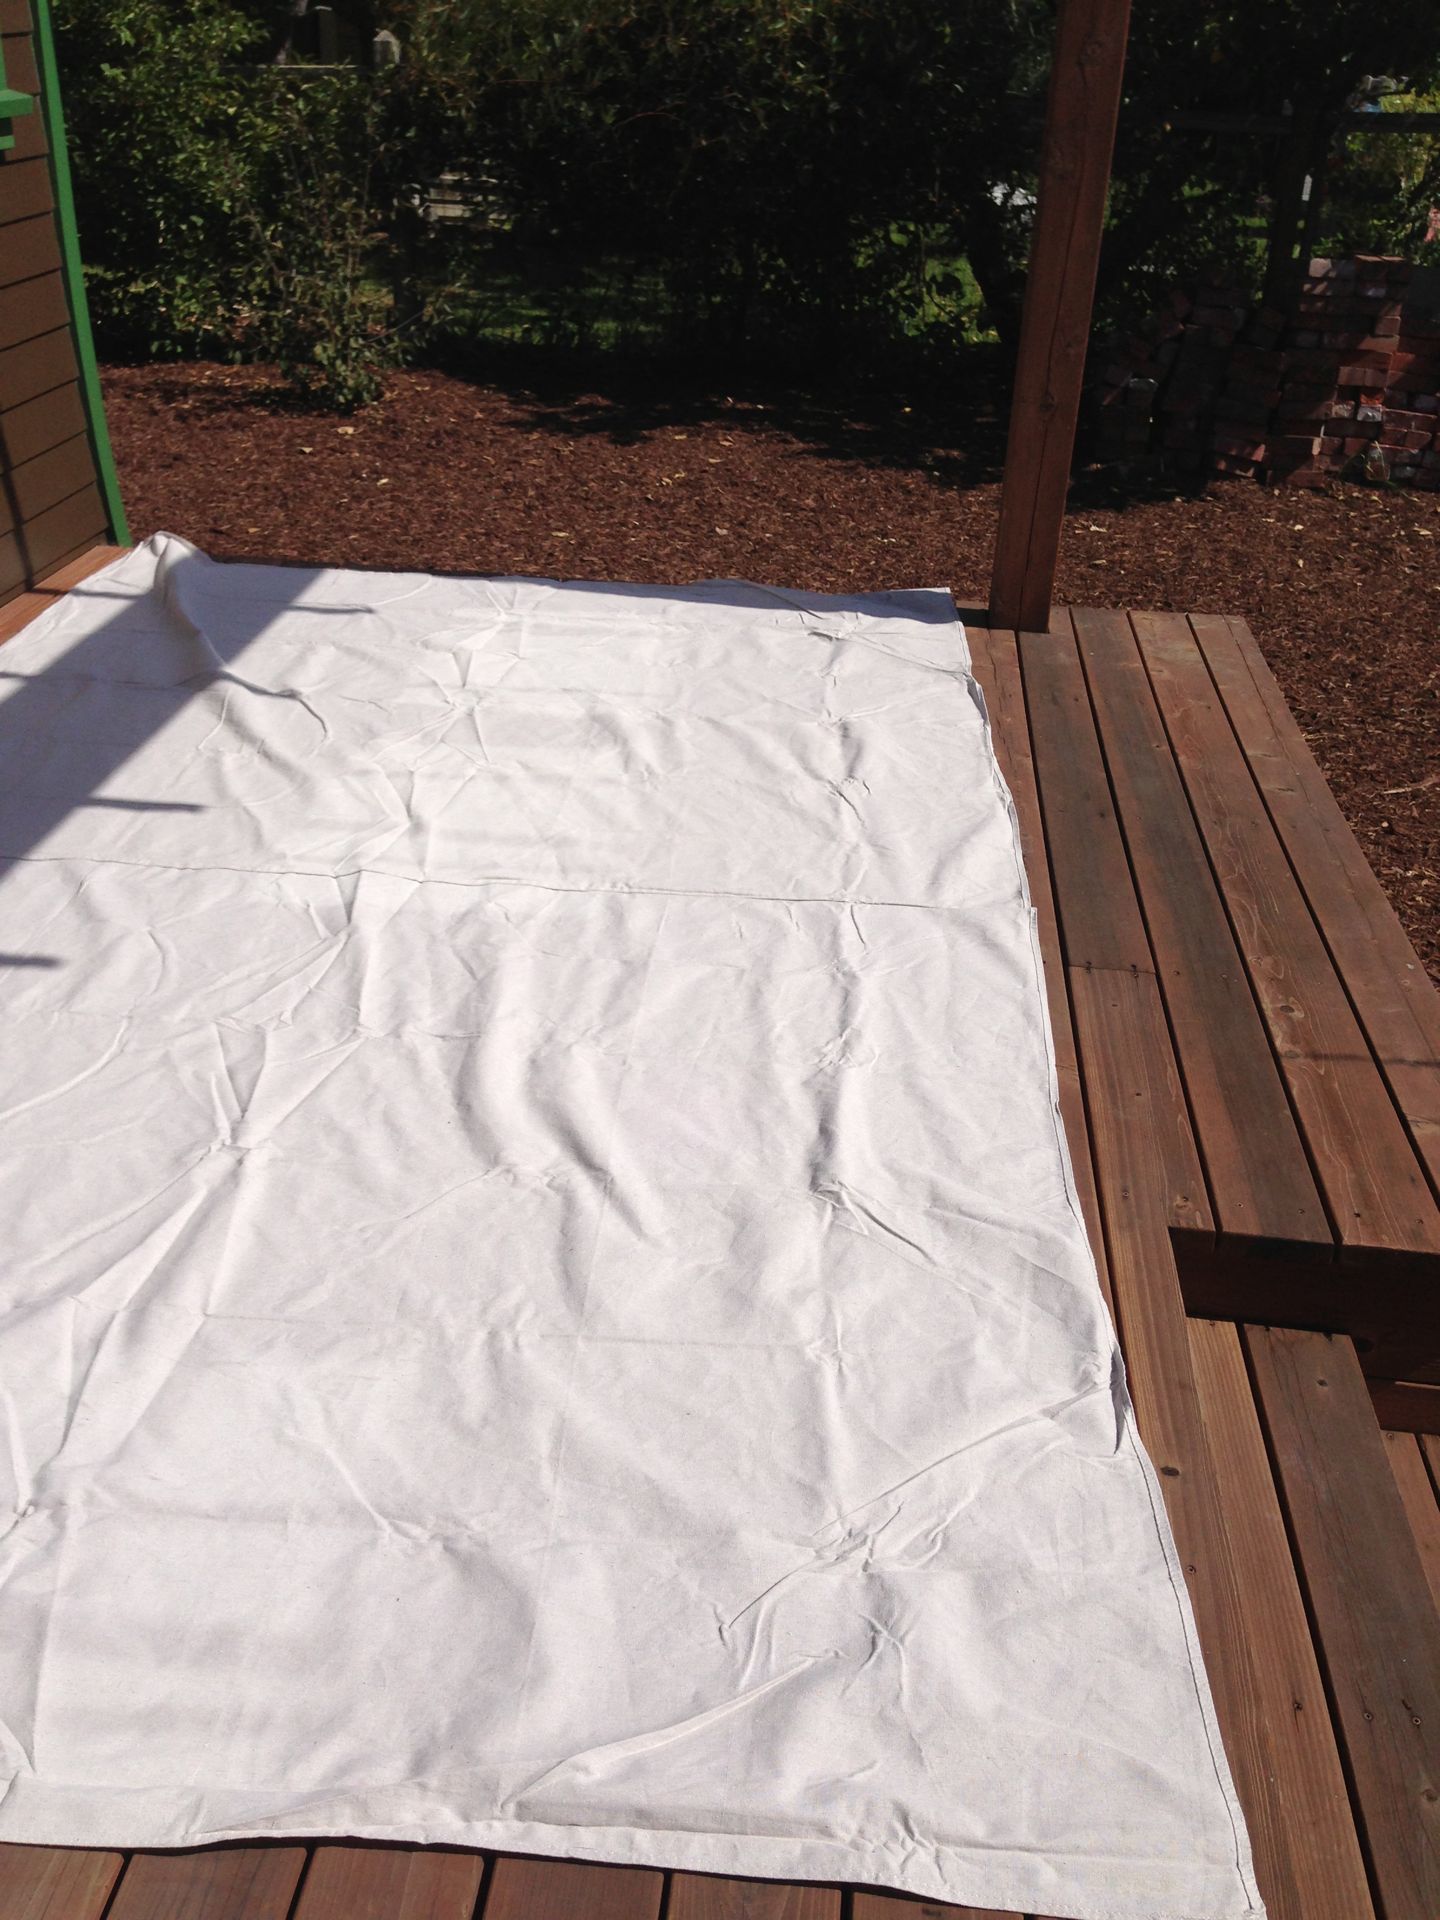
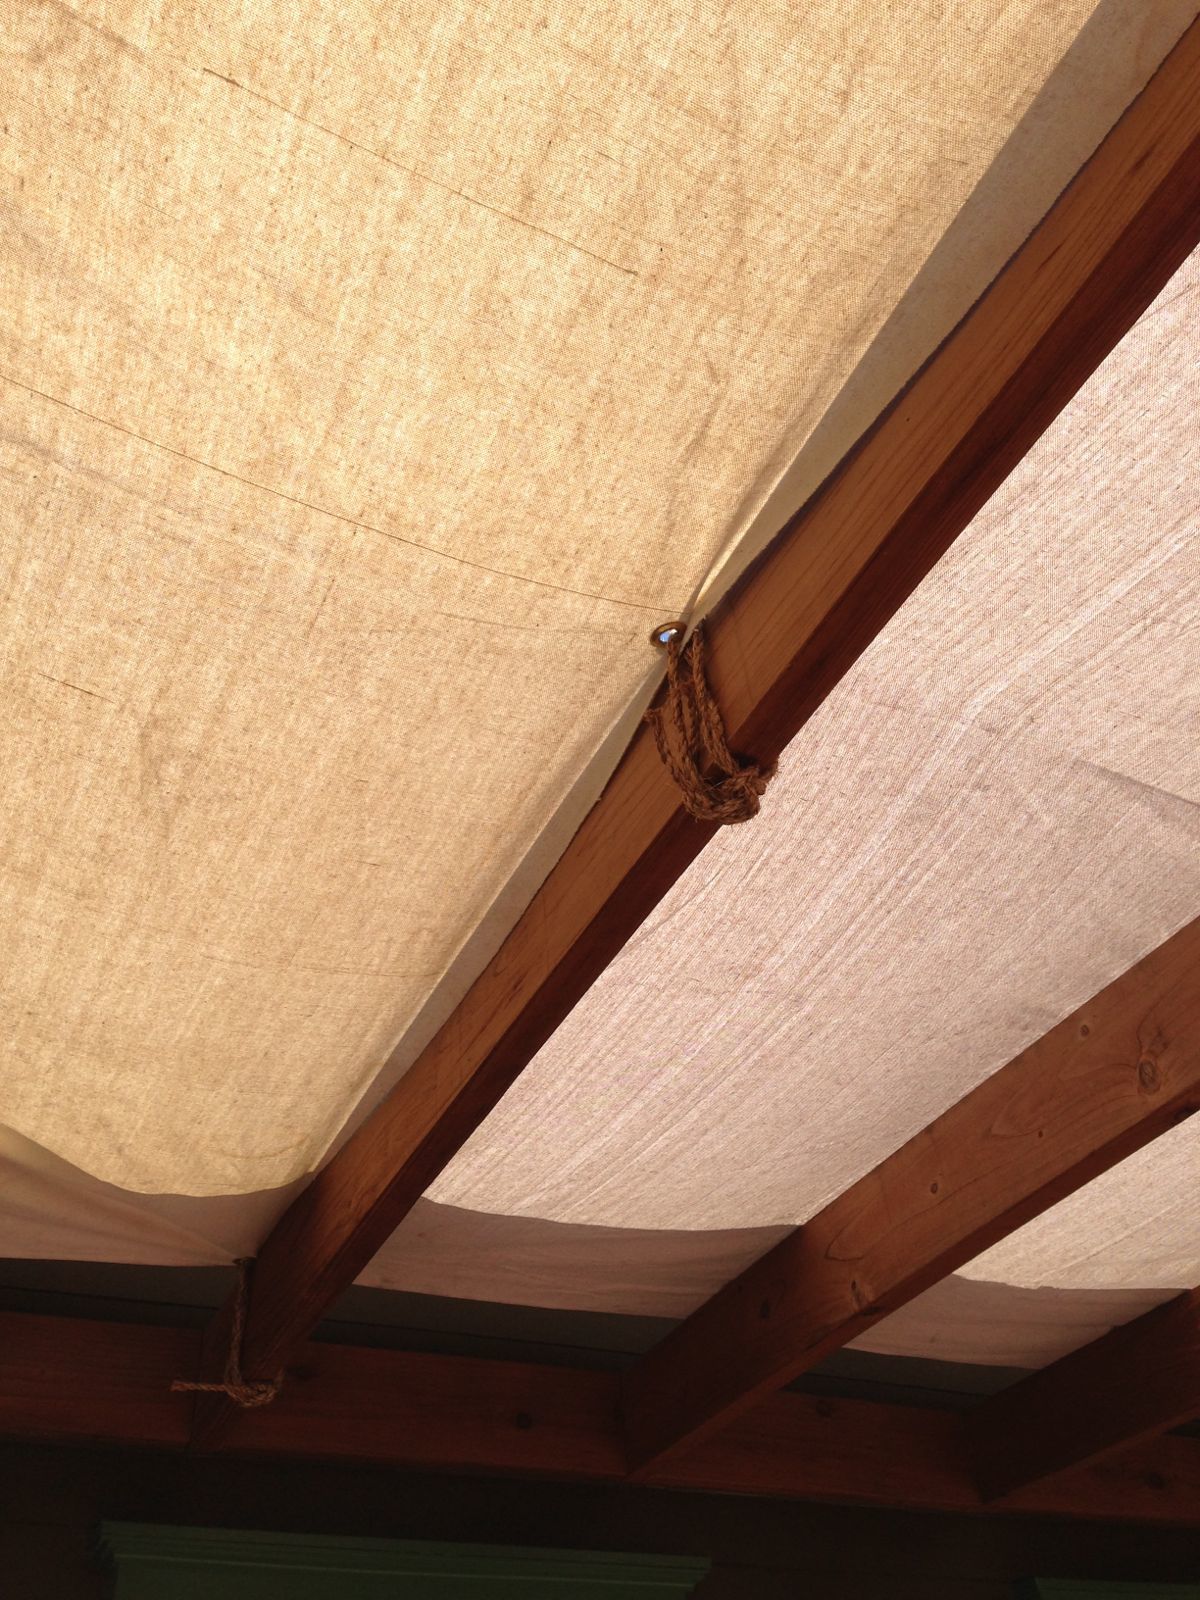
Painters Dropcloth

Cut Cloth In Half

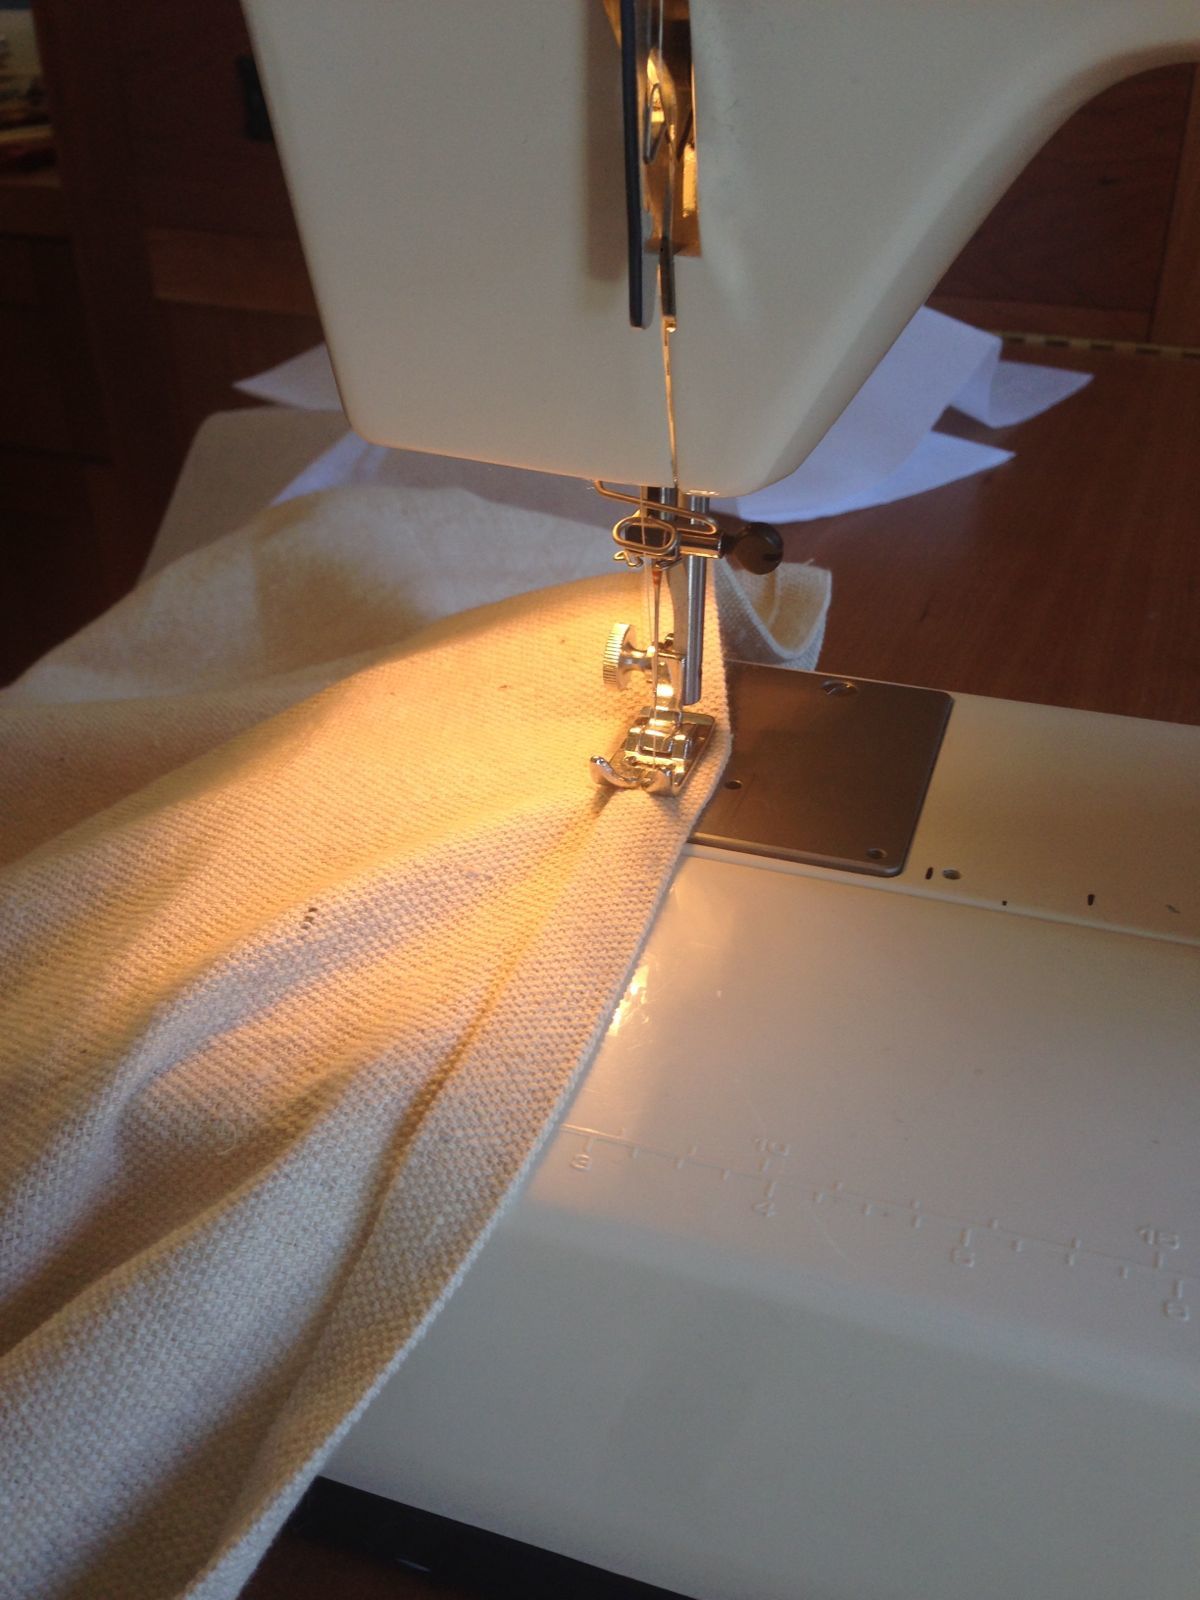
Stitching Edges

1.  Measure the arbor area and figure out how much material is needed.  After measuring the size of the deck arbor we decided that two packages of the largest canvas dropcloth (12 ft. x 15 ft.) will cover our two arbor areas.  Each package was about $36 at the Ace Hardware store.  Don't forget to pick up the grommet kit while at the store.  We used 10 grommets per sheet, or total of 40 grommets.  The grommet fastening kit with 24 grommets and the tools was about $10.  Extra grommets are $5 for package of 24.

2.  Wash and dry the canvas drop cloth.  These cloths have a really strong chemical smell.  It's much easier to work with them after washing them.

3.  Cut the cloth to the arbor dimensions.  We simply cut them in half so the two packages yielded 4 pieces of  material (7.5 ft. x 12 ft.)​

4.  Sew the raw edges.  Fold the cut edge of the material twice, about 1/3 inch wide, and iron them.  ​Sew the edges.  

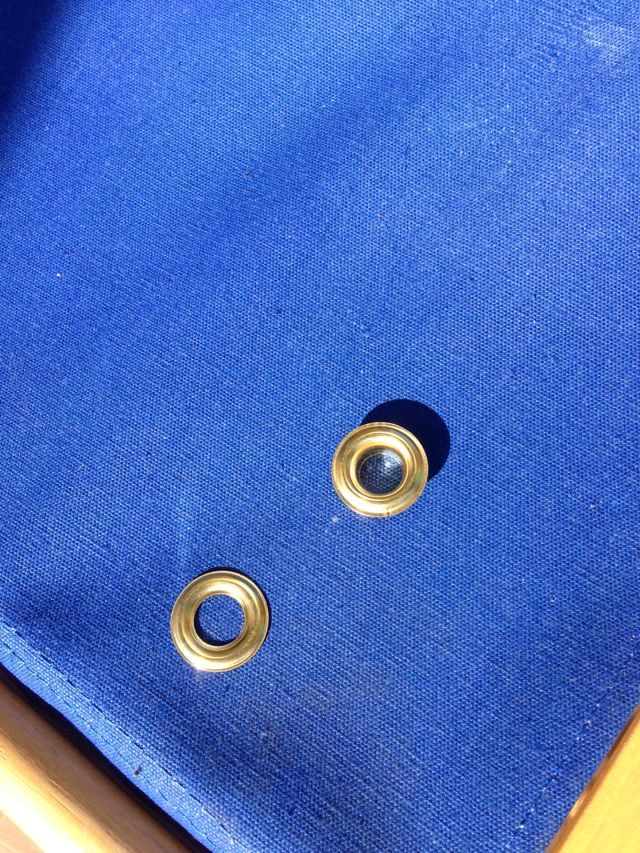
Grommets

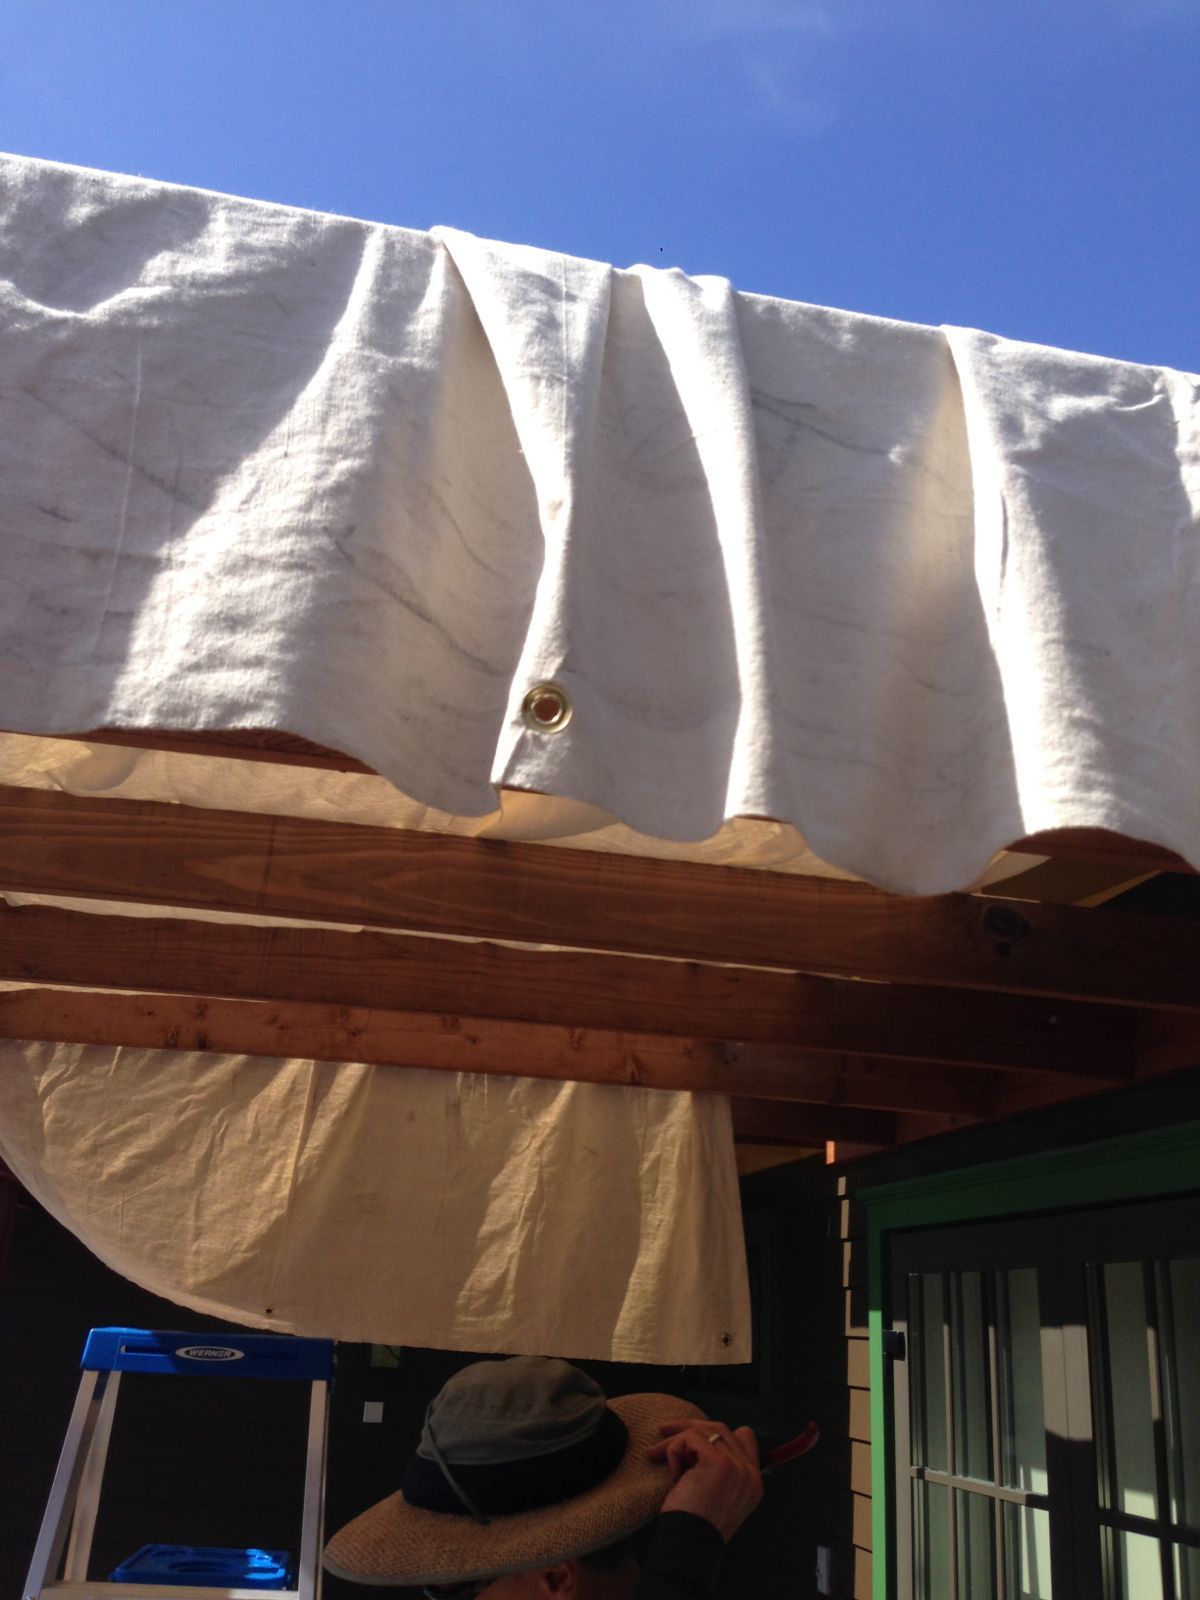
Hang The Cloth On Arbor

Fasten With Rope

​5.  Install grommets.  Lay the cloth on the deck and mark the spots that align with the arbor.  Follow instructions on the package of grommets.  Note:  You may want to reinforce the area where the grommet is installed.  If the shade cloth is installed in an area where there is high wind the cloth around the grommet will be stressed and will tear after a season or two.  As I write this I'm seeing the shade cloth flapping violently in 20 mph wind gusts outside my window.  Two out of four sheets needed replacing after two years.  I've reinforced the problem areas with sheets of heavy duty fusible interfacing (available at fabric store) on each side and stitched over them. 

6. Drape cloth on arbor.  Lay the cloth on top of the arbor​ and line up the grommets with the arbor beams.  Note:  This is a good time to mark on the cloth which corner goes where (e.g. south-east corner, etc.) using permanent marker on the arbor.  This will make it easier to re-install the shade cloth next summer.

7.  Fasten​ shade cloth using rope.  We chose natural fiber rope for a rustic look.  After cutting the rope to desired length we taped the edge of the rope to keep it from fraying.

Simple, isn't?  About $100 materials cost and half day of labor.​

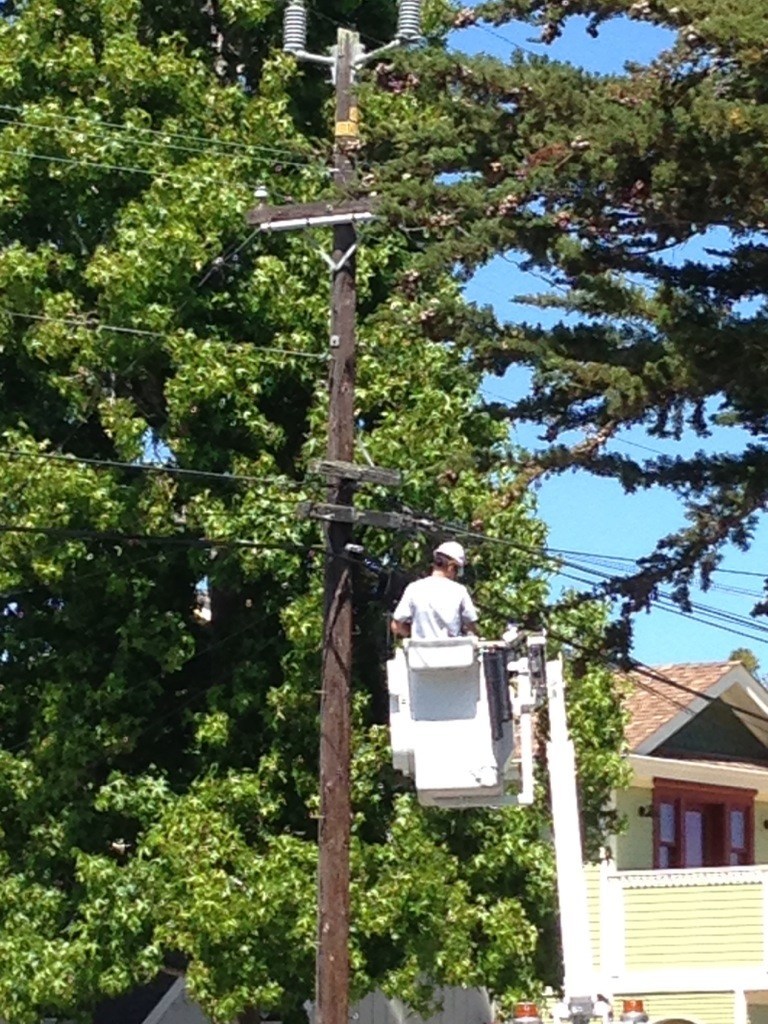
Updated Telephone Lines

The above photo was taken after the service person from AT&T replaced the telephone line from the telephone pole to the house.  He came out to investigate if there were any infrastructure problems that would cause the voice on our landline to be really faint.  Kurt, who prefers landline over cell phone, got tired of people telling him that they can't hear him.  He hears the other party just fine.  It's frustrating because it's an intermittent problem that is hard to pinpoint the cause.

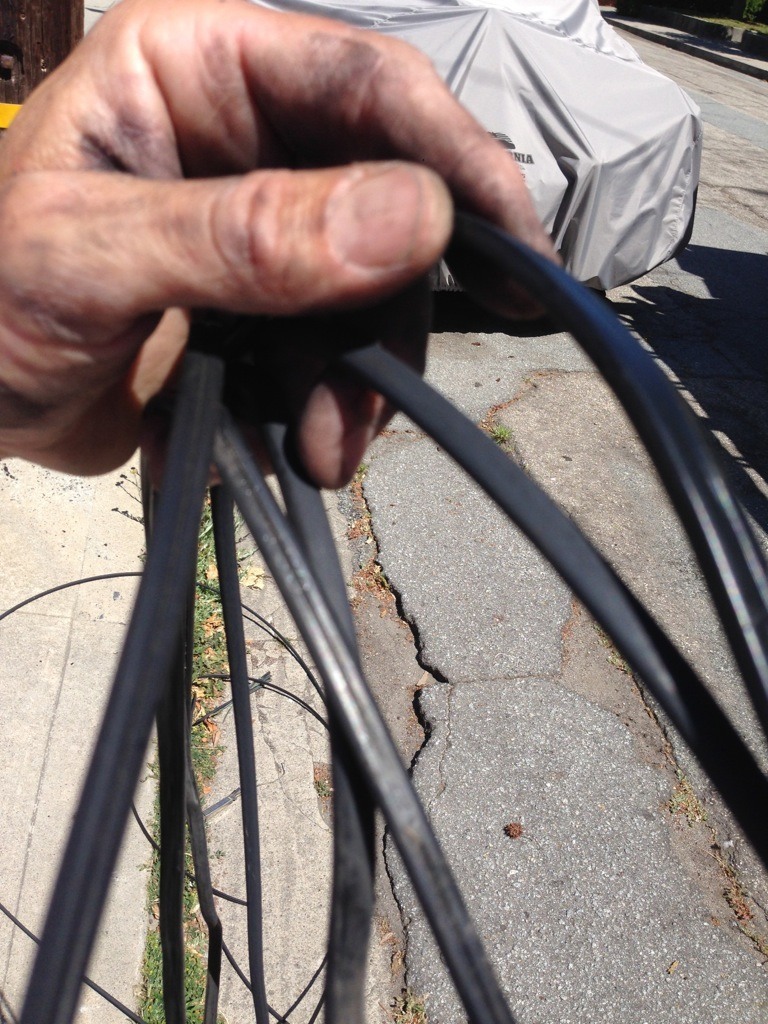
The service person did not find anything "wrong" when he inspected the connections but he did notice the telephone line to the house was old.  He said it looked like it was about 70-years old and decided the ancient 2-wire telephone line wrapped in fabric material should be replaced with the standard 4-wire line.  He split the wire for me when I asked to take a photo and you can see the frayed fabric holding the 2 rusty-looking wires together.

While we upgraded the electrical panel and replaced the sewer and water pipes during our 2012 remodel, we seem to have overlooked the telephone line.  Lesson learned:  Upgrade all of the infrastructure when remodeling an old house.  Hopefully this will improve the quality of telephone conversations over our landline.

Replacing Line From The Telephone Pole

Old Wire and New Wire

4 Wires Inside The New Telephone Line

Built-in Shoes Storage

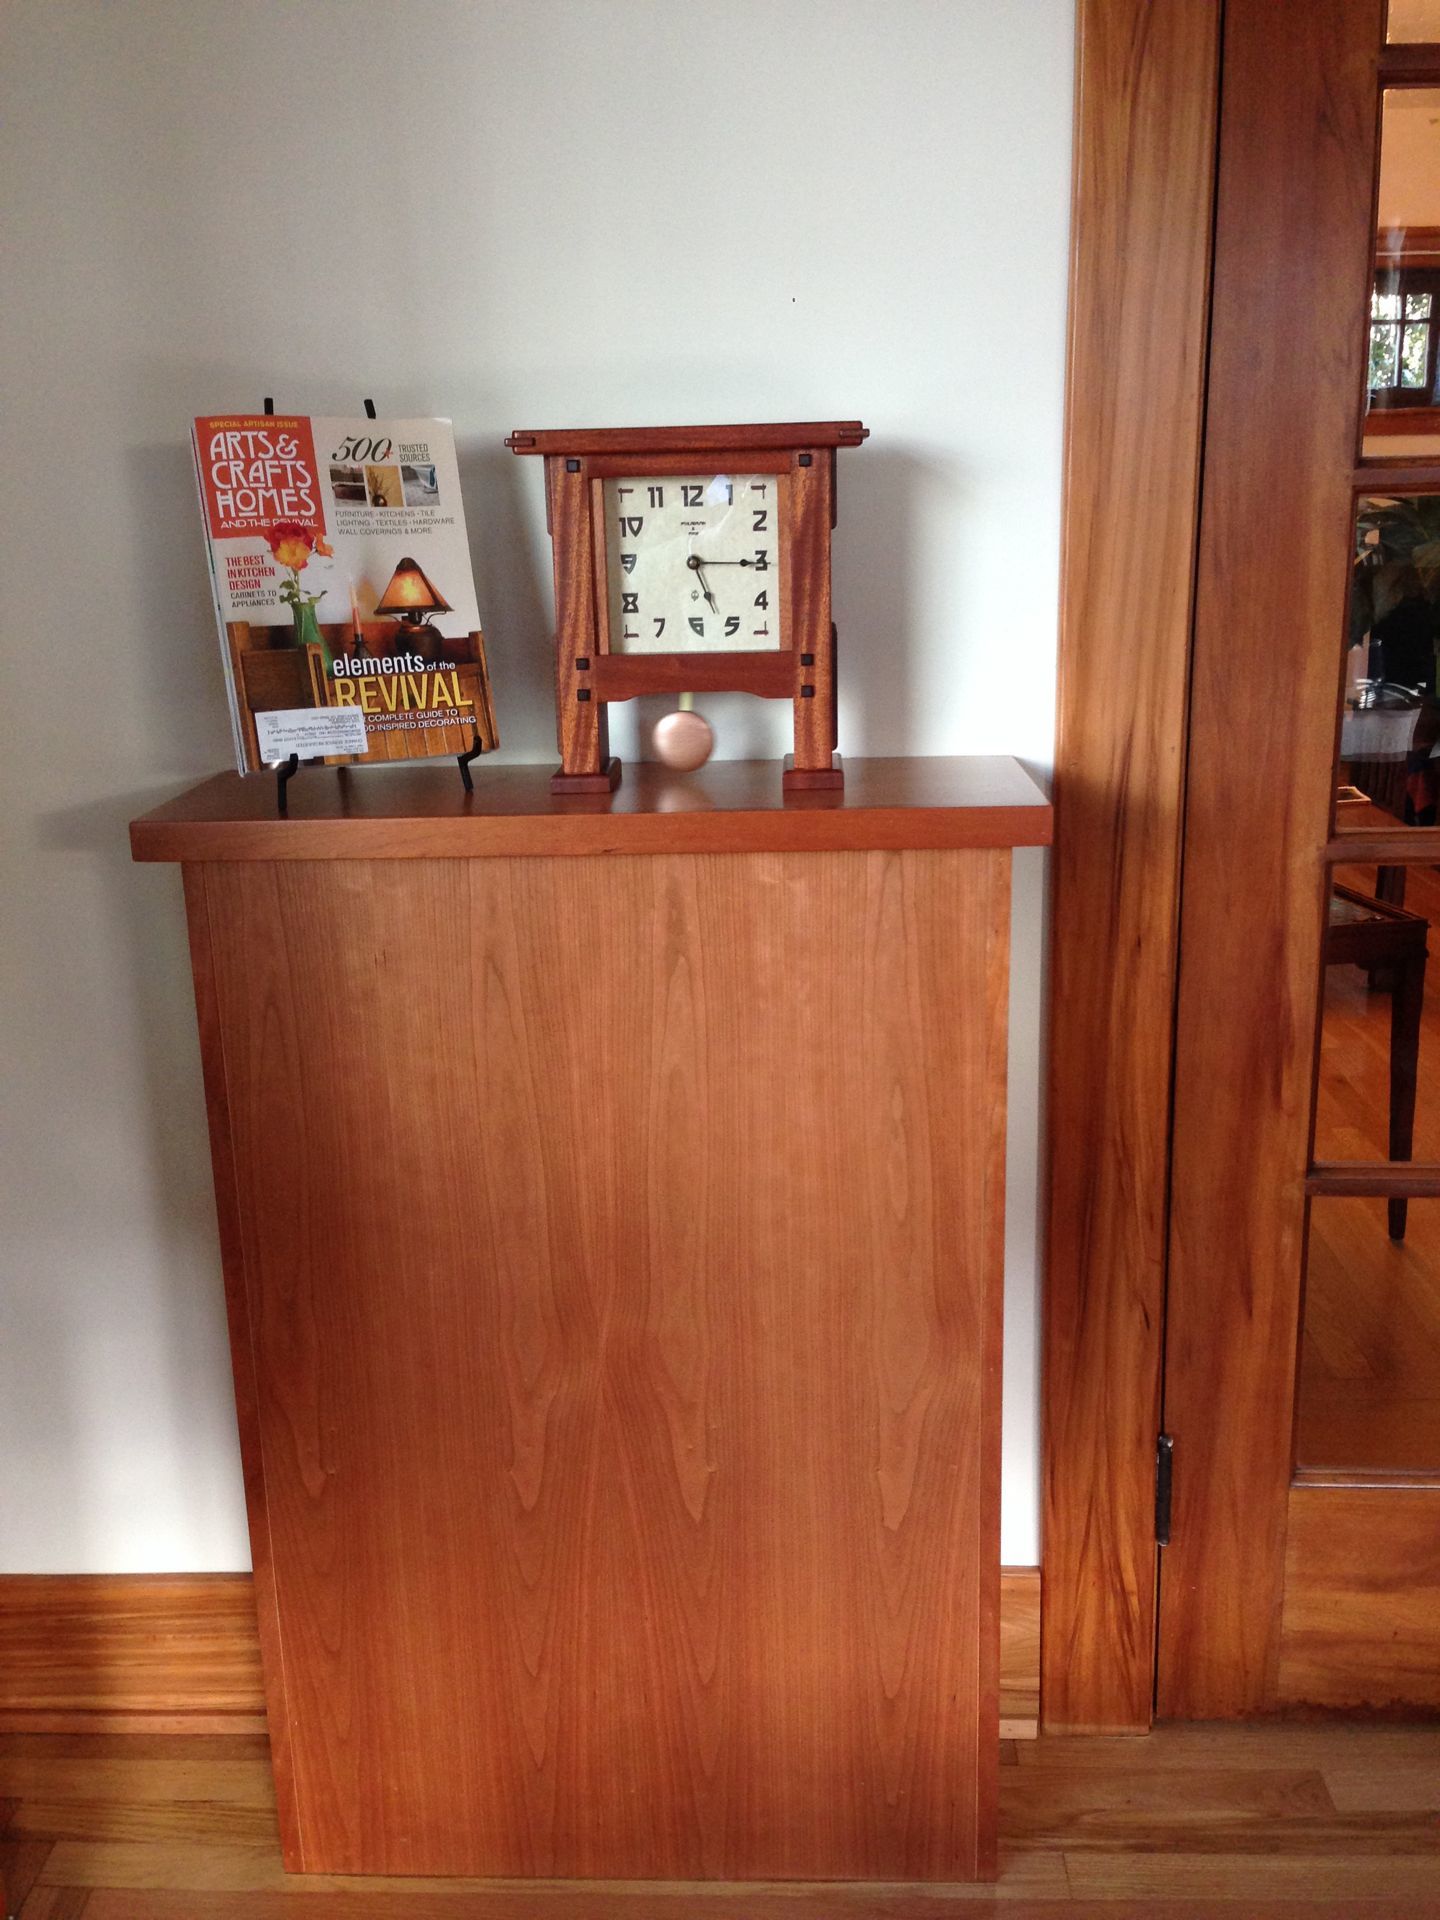
This post is about a piece of furniture that solved a conflicting priority problem. Shoes-off home is great because it contains any dirt tracked in to the entrance area. But what do you do with the shoes? In my experience this practice resulted in shoes cluttering the entrance area after a just a few days.  Despite the neat shoe organizers in the bedroom closet the entrance area becomes cluttered with various footwear -- running shoes, sandals, dress shoes, boots, and flip-flops.  I like the convenience of having the shoes by the door but the visual clutter is annoying. How can we have both the convenience  and a tidy look? Shoe cupboard or getabako in Japanese is the simple solution.

In a Japanese house the getabako is located in the entrance area to store several pairs of shoes. Once the sliding door is closed the visual clutter goes away. Since Arts and Crafts style is influenced by Japanese aesthetics having a getabako in the entrance area was the simple solution our problem.

This is a short excerpt from the Midori Haus book:

The problem was the ideal location was already spoken for. Kurt’s large speakers were to be placed “just so” in the four corners of the living room for the audiophile in the house. This left no room for the getabako near the front door. What shall we do? Attempting to logically convince the other of the merits of one’s pet feature until the other caves had the wrong energy. We had to think outside the box. Literally outside the box. Into the wall.

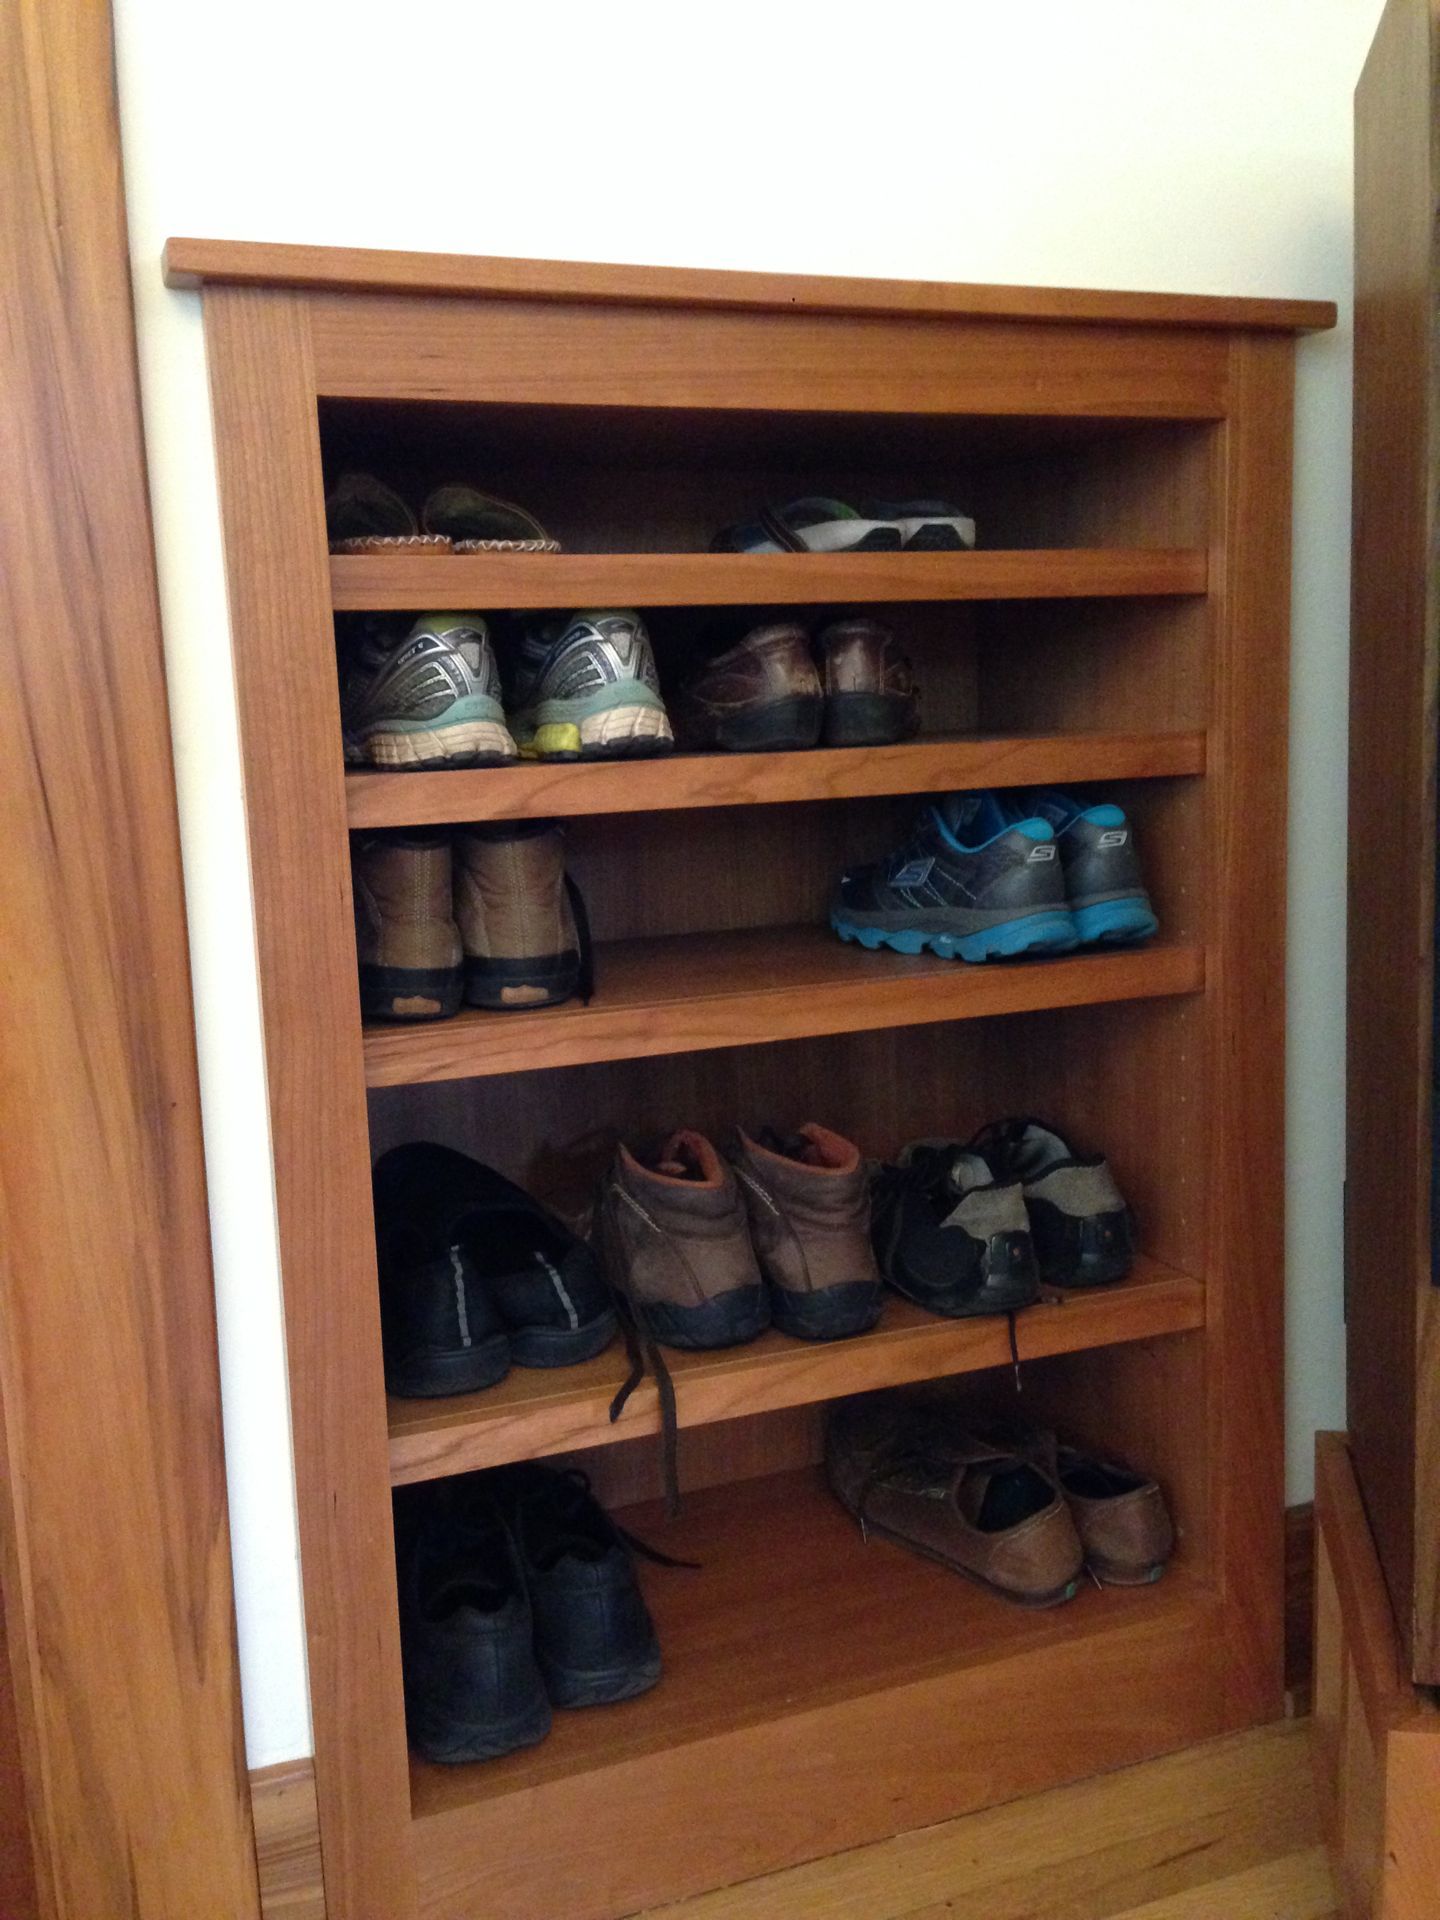
The solution evolved to become a piece of built-in furniture that recessed into the wall and protruded into the dining room. This made sense for us because the wall space was open during the remodel, and it was easy for the cabinet maker to create a custom shoe cupboard using the same type of wood as our kitchen cabinets. The front is flush with the wall so it doesn’t conflict with the speaker space, and the back looks like a simple decorative stand. It turned out to be about the same price or cheaper than buying a nice piece of Craftsman furniture. Later this large floor speaker standing next to the recessed shoe box became a visual reminder of our ability to creativity solve a couple’s conflicting priority problem.

Front:  Shoes Storage Shelves in Living Room

Back:  Decorative Stand in Dining Room

Celebration at Midori Haus: Millionth Square Meter of Passive House

February 1, 2015
Bjorn Kierluf presenting Millionth Square Meter of Passive House Award – photo by Claire Darling 

Date:  February 20, 2015

Time:  3:00 pm
Place:  Midori Haus 
Special Guests:  Bjorn Kierulf, Andrew Michler, Mayor Don Lane, Leslie Villegas (Senator Bill Monning’s staff)

In December 2014 Midori Haus received the official certificate for Passive House Certification from Passivhaus Institut in Germany, marking the milestone of millionth square meter of Passive House around the world.  See the international press release here.

What Is Passive House?

Passive House is a performance-based energy standard in construction. Results from buildings  constructed using the Passive House approach show 80% ~ 90% less energy is used to keep it comfortable.  This voluntary standard is internationally recognized and applies to all types of buildings, not just single family homes.

Why Is this Significant?

It’s a glimpse into the future of housing.  Midori Haus demonstrates that a 93-year old house can have extraordinary energy performance (80% reduction in energy compared to pre-remodel, without applying solar electric panels) and still retain the charm of the original Craftsman architecture.  Energy bills from PGE show that significant reduction of home energy use is possible for all seasons of the year.  Occupants enjoy comfortable temperature and good indoor air quality for the life of the building.  Building owners can do this today by following the Passive House Standard, which has over 20 year track record for reducing energy usage in a buildings.  

In his inaugural speech on January 5, 2015, California Governor, Jerry Brown unveiled ambitious energy goals:

“…we are well on our way to meeting our AB 32 goal of reducing carbon pollution and limiting the emissions of heat-trapping gases to 431 million tons by 2020. But now, it is time to establish our next set of objectives for 2030 and beyond.Toward that end, I propose three ambitious goals to be accomplished within the next 15 years:Increase from one-third to 50 percent our electricity derived from renewable sources;Reduce today’s petroleum use in cars and trucks by up to 50 percent;Double the efficiency of existing buildings and make heating fuels cleaner.”

Midori Haus shows that Passive House Standard easily lead the path towards the Governor’s goal of doubling the efficiency of existing buildings.

About Midori Haus

Originally built in 1922, the 3-bedroom, 2-bathroom single story house was remodeled in 2012 to the Passive House Standard.  The house retained the original foundation, floor, framing, porch, built-in furniture, as well as the interior trims and accents.  Utility bills from PG&E showed that the energy consumption did indeed drop by 80%.

Midori Haus – photo by Kurt Hurley

Design and Passive House Services:  Graham Irwin, Essential Habitat
Construction:  Taylor Darling, Santa Cruz Green Builders

Please refer to the following post for details on energy and water.
Energy Usage:  How Much Energy Did We Use In Our First Year?
Water Usage:  Water Efficiency Features

Contact:  [email protected]

Don Lane, Mayor of City of Santa Cruz, shares his observation of Midori Haus transformation – photo by Bronwyn Barry

Leslie Villegas from Senator Bill Monning’s office presenting Certificate of Recognition from California Senate
– photo by Bronwyn Barry
Taylor Darling, General Contractor, and Graham Irwin, Architect and Passive House Consultant – photo by Claire Darling

Midori Haus Team:  Taylor Darling, Graham Irwin, Tom Nedelsky, Pat Splitt, Chie Kawahara, Kurt Hurley
– photo by Bronwyn Barry

Rainwater Harvesting System Installation

February 1, 2015

Why did we choose to install a 5,000 gallon tank (technically 4,995 gallons) for our rainwater harvesting system?  The short answer is because that’s what made sense for us.  We’re using the rainwater to flush the toilets and for the cold water laundry.  We estimate this volume to be around 6,000 ~ 8,500 gallons per year (roughly 500 ~ 700 gallons per month).  So, we could have installed a much smaller tank, say 600 gallons if we wanted to.  But when we looked at the cost of installing the system (this includes tank, pipes, filters, fittings, labor, etc.) the cost of the tank is just a fraction of the total system cost.  Most of the cost is in the labor.  So why not get a large tank?

But not so large.  The reason why manufacturers sell tanks sized 4,995 gallons (just a shade smaller than 5,000 gallons) is because of the building codes.  Above ground rainwater harvesting tanks larger than 5,000 gallons need to be placed on a foundation or platform.  Tanks smaller than 5,000 gallons can simply be placed on a bed of gravel.  Thus, we opted for the 4,995 gallon tank that will allow us to capture larger volume of rainwater during the winter without having to build a special foundation for it.

The amount of rainfall in Santa Cruz has been highly variable in the last 7 years.  I invite you to take a peek at the data from WeatherCat website which shows the annual rainfall in Santa Cruz ranging from 15 inches to 34 inches annually.  We’re grateful that this private weather station located just 2 miles away from our house provides us with lots of useful detailed climate data, much better than what we could do for ourselves.  Thanks WeatherCat!  So, how many gallons of water can be harvested from 15 – 34 inches of rain on our rooftop?  It depends not only on how much rain we get but also on the roof area.  We have most of the gutters (about 3/4 of the total roof area) directed towards the rainwater tank.  This means 15 – 34 inches of rain per year can yield between 14,000 to  32,000 gallons of water.

By the way, the rule of thumb is 1 inch of rain yields about 600 gallons for 1,000 square feet roof.  To get the precise conversion of inches of rain to gallons of water simply plug in the figures in this calculator.

Santa Cruz Municipal Utility bill tells us that our annual water usage (Apr 2013 – Mar 2014) is pretty low — 38 CCF or 28,424 gallons for everything.  This includes water used for toilets, cooking, bathing, laundry, watering the garden, etc.  What this means is that even if our roof areas is capable of capturing over 30,000 gallons of rainwater on a very rainy year we won’t be able to use all of it.  Trying to maximize storage for our roof area is an overkill.

Rainwater Tank

The 4,995 gallon tank comes in 2 different shapes — tuna can or the soup can.  Easy to imagine them right?  The tuna can is wider and shorter than the soup can and it fits nicely into the corner of our yard where the dark green tank blends in with the trees.  The model is Bushman CWTX5-132 which measures 10-feet 9-inches in diameter and 8-feet tall.  It looked huge when it arrived on Jon Ramsey’s trailer on a July morning.  They said that it barely cleared some of the bridges and freeway overpass on the way.  It rolled easily down the driveway into the backyard.  The team from AquaSoleil was busy in our back yard for a few days.
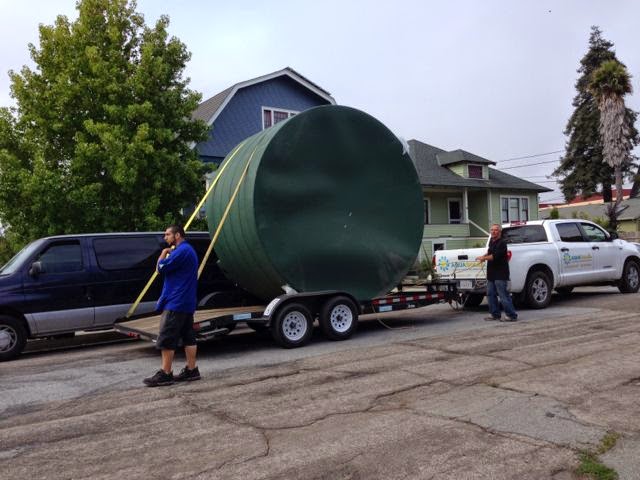
rainwater tank delivery
Getting it placed properly in the corner of the yard was a bit tricky — 4 men rolled and turned the tank along the temporary skids positioning the tank just so.  Micro adjustments were made before the tank was tipped over right side up.  Experienced eyeballing enabled the guys to place the tank so that the openings would be aligned with the pipes in the trench.
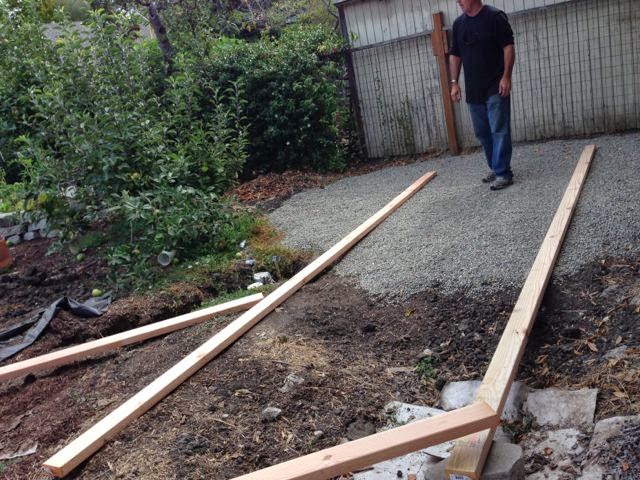
skids to position the tank

Now let’s follow the path of the water, from the rooftop to the tank.  Rain from 1,503 square feet of roof is directed to the rainwater tank via the roof gutter and underground pipes that makes its way over to the back corner of the yard.  The rest of the roof area feeds rainwater to the rain garden next to the tank.

Gutters, Leaf Screens

Since there are no tall trees next to the gutters we weren’t worried about having fallen leaves clog up the gutters and the downspouts.  Still, there were gritty sand-sized debris accumulated in the gutter when we took a look one week before the rainwater system installation.  To make sure we get clean water into the tank we cleaned out the gutters thoroughly by hauling the shop vac onto the roof and vacuumed it.
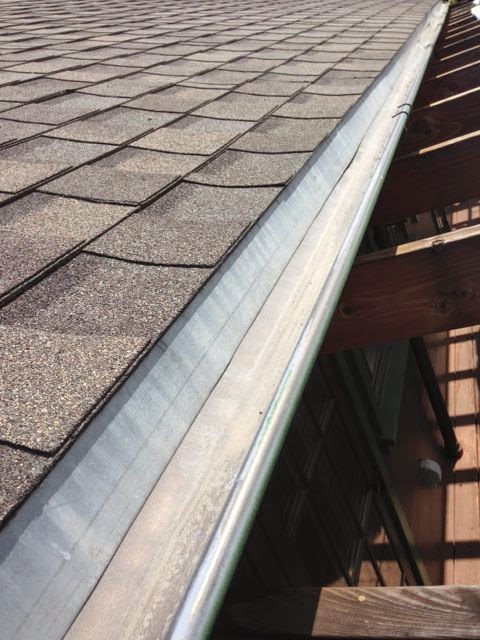
clean gutters

RHINO Gutter Guard was installed over the gutter.  This will keep the gutters clean.  No more cleaning gutters!

Rhino Gutter Guard

Rain collected in the gutters flow down through the 2 screens from the downspout into the pipe that conveys water to the tank.  In case you’re wondering, this was in place before the Rhino guard on the gutters.  Now that we have screens directly on the gutters we really don’t need the leaf screens but it’s there just in case.
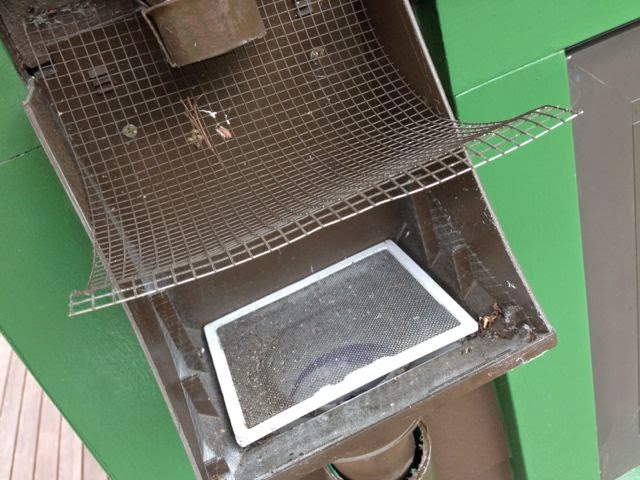
leaf catcher in the downspout

Fittings, Connections

The pipes that convey rainwater from the house to the tank in the backyard were installed 3 years ago during the installation of the french drain.  3-inch PVC pipes are buried 18-inches below grade and gently sloped down across the yard to where the rainwater tank is.  Also installed 3 years ago were the electrical conduit to power the pump and the 1-inch rainwater supply line (purple pipe).  The open ends of these pipes were covered with duct tape.  When the rainwater system project came along we found some debris in the pipes since the duct tape fell off.

In the photo below the green pipe on the right (without any valves) is the overflow to the rain garden when the tank continues to fill beyond capacity.  The green pipe on the left conveys rainwater from the roof and fills the tank.  The two valves in the picture will either let the water pass or not.  When we want the rainwater to fill the tank the upper valve will point upwards and the lower valve will be in a horizontal position to prevent water from draining directly into the rain garden.  When the tank is full and we want to simply direct the rainwater straight to the rain garden the valve positions will be reversed — upper valve in horizontal position and the lower valve pointing down. (Note:  The position of the valves in the photo below shouldn’t be used because the rainwater will never fill the tank.)
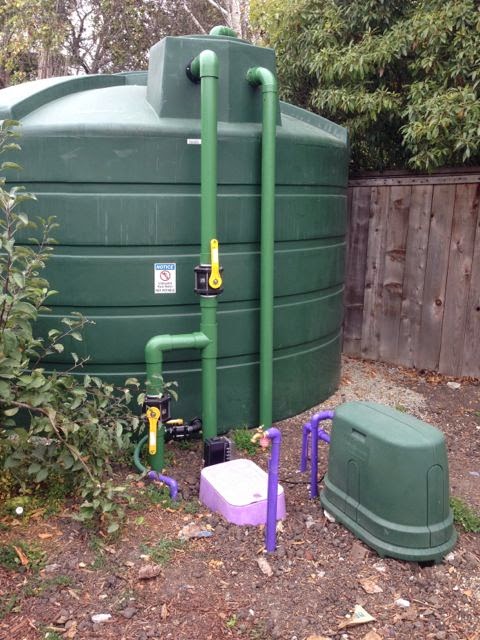
Rainwater tank

The green hose coming out from the bottom is feeding the water from the tank into the pump.
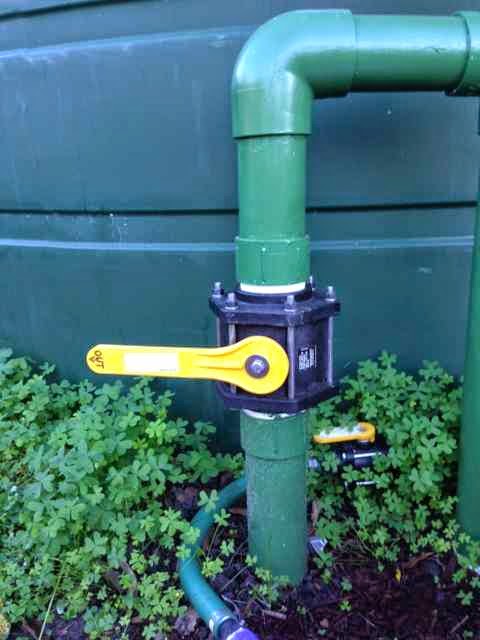
Outlet from rainwater tank
water filter and meter installed

Filter

Inside the lavender box in the above photo are the water filter and the water meter.  EZ Kleen Y-filter is installed to remove debris before the rainwater goes into the pump.  The removable cartridge is easy to clean.
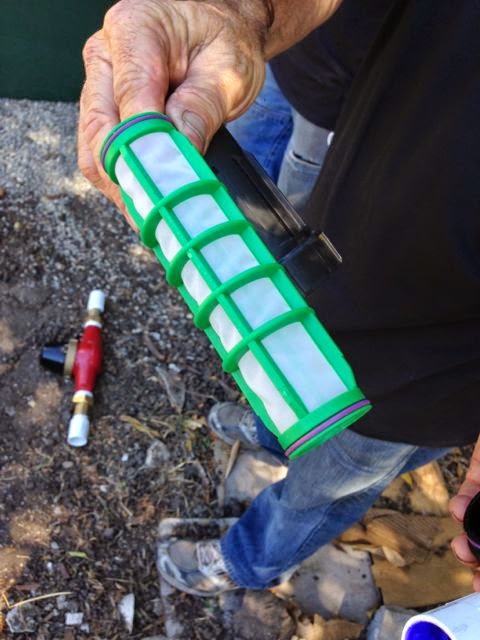
EZ Kleen 100 micron Y-filter

Water Meter

This Netafim M series water meter is used to measure the amount of water that flows from the pump into the house.  This was installed to measure the volume of rainwater used inside the house for toilets flushing and cold water laundry.  On a monthly basis a field crew from Ecology Action comes by to take measurements and water samples.  Thus far they’ve told us that our rainwater is pretty clean.

Netafim M-series Water Meter

Pump

Grundfos MQ 3-45 pump turns on automatically when it detects water flow and shuts off automatically when water ceased to flow.  So it only turns on when we flush the toilets or when the washing machine calls for cold water.

Grundfos MQ 3-45 pump

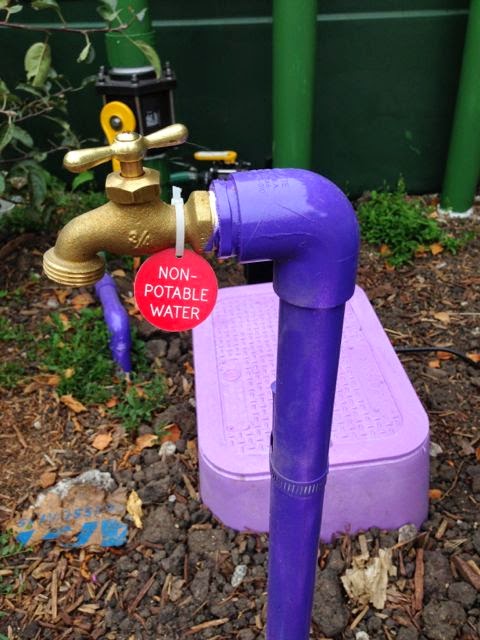
Notice the rainwater spigot is painted purple and the tag clearly says non-potable water.  If you happen to visit our yard please don’t drink this water!
Rainwater Spigot

Connect and Test

Since there were 2 different companies involved in installing our rainwater system infrastructure we asked both to be present when we did the initial test.  Back in 2012 Santa Cruz Green Builders installed the dual plumbing to the toilets and washing machine inside the house as well as the underground infrastructure in the yard.  In 2014 AquaSoleil installed the tank, pump, and the fittings.  

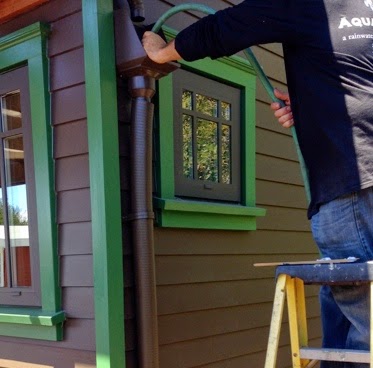
It was a dry August week with no chance of rain when we did the installation.  So the tank needed to be partially filled with city water supply to do the end-to-end test.  First part of the test was to see if the water from the gutter will fill the rainwater tank.  This was simulated by taking the garden hose and running the water into the downspout.  This test removed all doubt of whether gravity feeding was adequate to fill the rainwater tank or not.
Pour water into downspout for test
Rainwater tank is filled

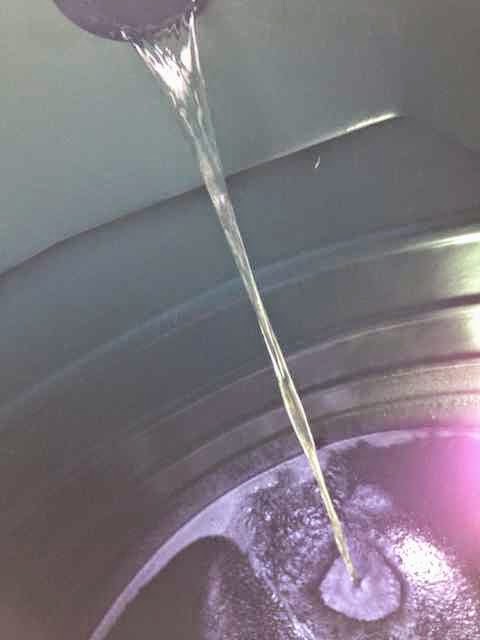
The cutover from city water source to rainwater source was easy.  First, the city water valve was turned off and the hose connected to toilet tank was switched over to the rainwater side.  Before connecting the hose to the toilet, accumulated debris (dirt and mulch) was first flushed out from the pipe that sat dormant for 2 years.  Flushing out the debris proved that the pump was working. When the water ran clear for a minute or so the hose was connected to the toilet.  I had the honor of pressing the button on the Niagara Stealth toilet for the first test and it worked!  So now, we just need to wait for the rain.

And we did get a little bit of rain in September.  Less than an inch but it probably deposited about 400 gallons in our rainwater tank.  Optimistically expecting more rain in October, we switched our toilet line from city water to the rainwater supply on October 1, 2014.  Hurray!  All done, right?  Well, not really.

Backflow Prevention


In mid-October we learned that the rainwater system project was not truly done.  Not until the paperwork is finished with the water department, anyway.  We received a call from them asking us if we had a back flow prevention device installed.  We didn’t and we hoped we didn’t have to.

Backflow prevention device is installed to protect the potable water supply.  If there is a condition on the property that has the potential for untreated water (rainwater in our case) to flow back into the water department’s supply line then a backflow prevention device must be installed near the utility’s water meter on our property.  In our case the potential exists because we have a pump that conveys rainwater to the toilets and washing machine.  If a cross connection was made to connect rainwater to city’s potable water (which we wouldn’t do because we won’t be able to flush the toilets) and the city’s water pressure dropped because a nearby fire hydrant was hit by a bus (which I’ve seen happen last year) then our non-potable rainwater could get into the city’s water supply.  It’s a very remote chance  but our water department is vigilant and have a good track record for installing backflow prevention devices.

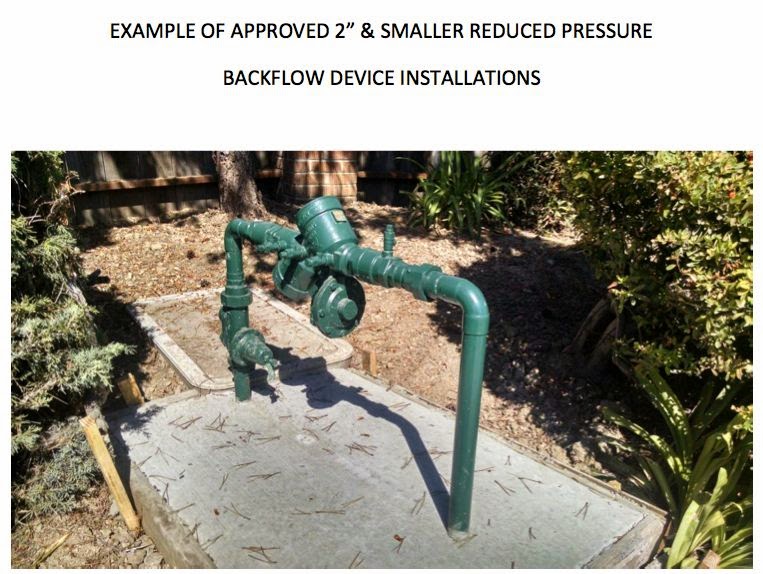
Below is a photo of a small backflow prevention device.  Once I recognized this for what it is I started seeing them everywhere — in front of medical buildings, shopping malls, commercial buildings, schools, etc.  The presence of the backflow prevention device means there’s some potential at the property for non-potable water to get into the water supply.  Typical things that raise a red flag are radiant floor system, solar thermal system, and pump of some kind.  Some of the backflow prevention devices on commercial properties are huge — diameter of the pipe being the size of a large tree trunk.  Besides the additional cost to install the device there is an annual cost associated with having this on the property — annual inspection must be made by a certified professional who charges for such inspection.  But mostly I didn’t want this in our front yard because I didn’t want it to deter other people from doing a rainwater harvesting project like ours.  It’s a simple concept and the implementation should be simple too.
Backflow prevention device

I invited the inspector to come take a look at our installation and discussed the approach used by another site doing the same rainwater application over at the Live Oak Grange.  They have the system set up so that the rainwater lines are permanently connected to the toilet, thus eliminating the need for switching the lines back and forth between city water and rainwater.  The city water feeds the rainwater tank when the water level gets low using a float and a valve triggered by the float. ( This is just like how the toilet tank is filled using a float and a valve.)  The key to this setup is to show that there is an “air gap” between the city water supply and the rainwater tank.  

I told the inspector we will be doing the same and he agreed to this approach.  When he came back again to look at the completed setup of the “air gap” he was satisfied and signed off on the paperwork.  He’ll be making a visual inspection of the air gap on an annual basis.

Here are some photos from the installation of the air gap and testing to make sure it works.
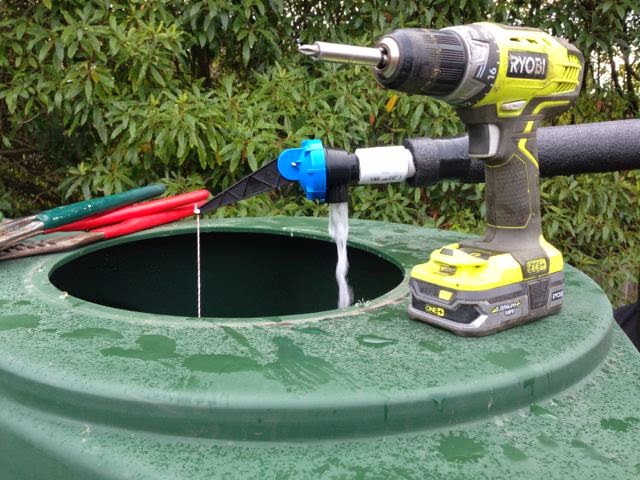
When the water level is down the float pulls the string and the valve opens
When the water level is up the float shuts off the valve

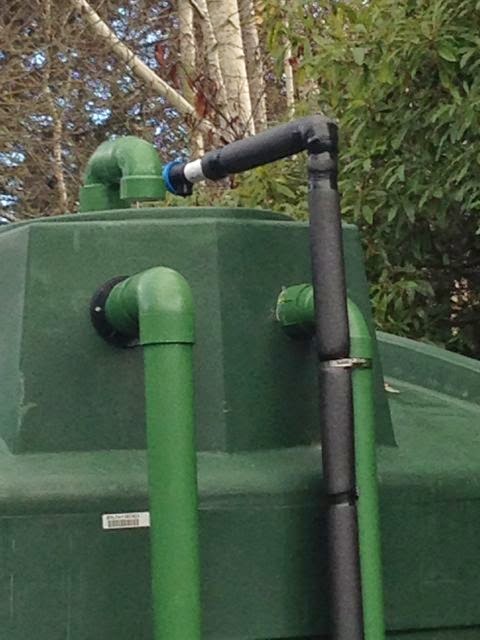
There is an air gap of 3 inches between the valve (blue) and the top of the tank

We started using rainwater for toilet flushing on October 1, 2014.  After the big storm in December our rainwater tank was full so we switched our cold water line for the washing machine on January 5, 2015.  We haven’t noticed any difference in the quality of laundry.  So far so good!
What is Midori Haus?

January 13, 2015

It’s a comfortable home that looks like a nice old house that is ultra energy efficient.  Although it’s located just a half a block away from a busy intersection in a walkable neighborhood it’s very quiet inside the house with good indoor air quality.  Water is used wisely with the combination of rainwater harvesting, grey water, and efficient fixtures and appliances.

We invite you to browse through the site and tour the house to gather ideas for your green home journey.

>