Balancing Airflow in our Zehnder HRV System

This post is about the adjustments I’ve made to our heat recovery ventilator (HRV) system to balance the incoming and outgoing airflow. While you may find this post helpful, please consult your HRV professional before making any adjustments to your system. I wrote this post mainly to remember what I did.

Our Zehnder ComfoAir 350 HRVwas installed about 6 years ago. Our home, Midori Haus, is a certified Passivhaus so the house is very airtight (0.6ACH50). Having an effective ventilation system is important for comfort and health. My husband and I wanted to install the yellow particle filter, rated at MERV15, near the air intake. After experiencing extended poor outdoor air quality days during the 2018 California wildfire season, we thought this was prudent. Adding an extra air filter would increase the resistance in the incoming airflow. We expected the incoming air flow be reduced, but didn’t know how much, so we measured it.

Equipment Used

I did the work myself. Tools used for this work included:

  • Ladder – to reach diffusers installed in 9-foot ceiling

The system we have in place is a Zehnder ComfoAir 350 HRV with F7 red filter (MERV 13)for supply, G4 black filter (MERV 7 / 8)for exhaust, and CW-FC 320 activated carbon filterin ComfoWell.

Baseline Measurement

First task was to take a baseline measurement before installing the new filter. I took the balometer to each of the 13 diffusers inside the house and measured the airflow.
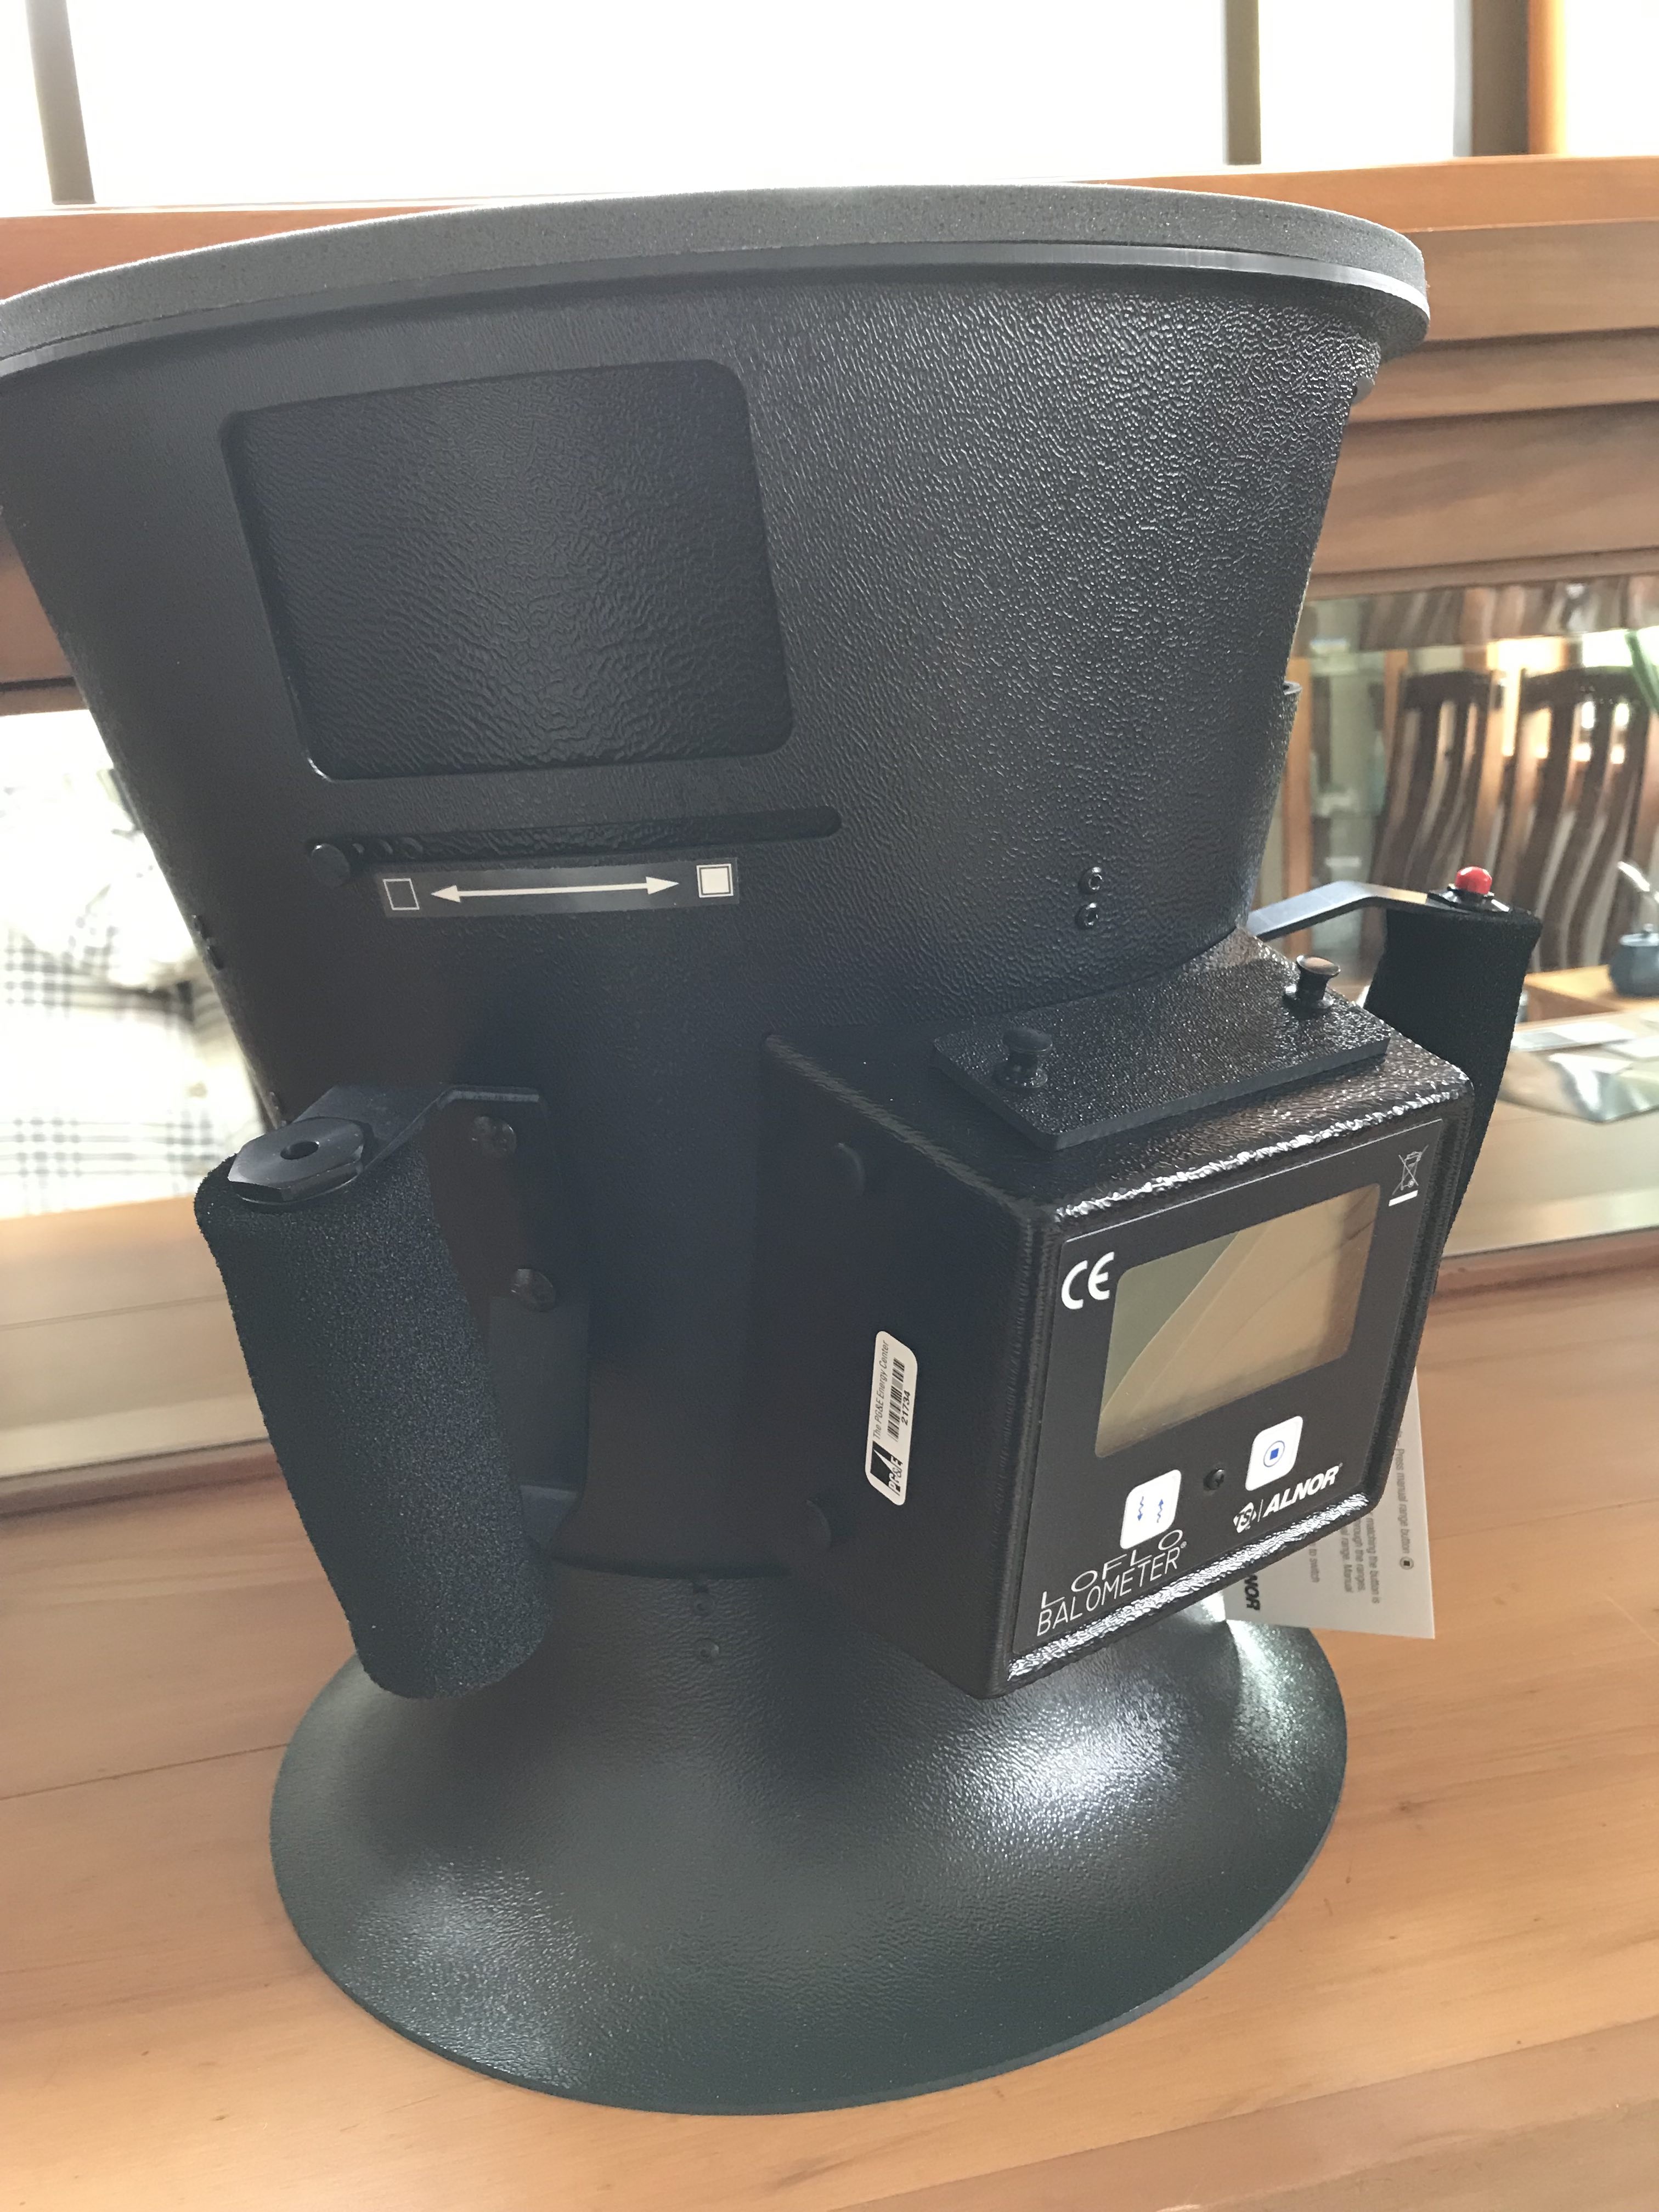
Alnor Loflo balometer (6200D)

Here is the baseline measurement:
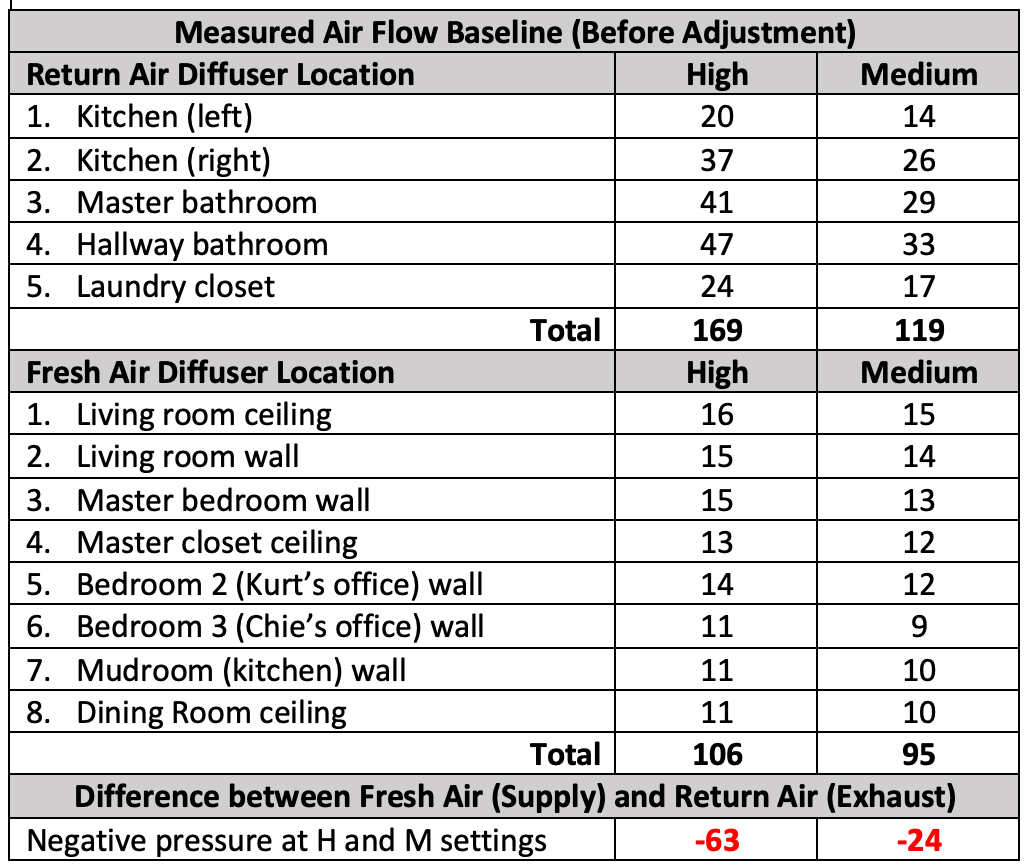
Though I suspected there would be a slight negative pressure, I was surprised to see these numbers confirming it. I compared these numbers to the commissioning report from January 2013 and noticed that:

  • Return Air (Exhaust) total was much higher (25%) than the original commissioning numbers. I suspect we caused this when we cleaned the dust out of the diffuser, we didn’t place them back to their original setting.
  • Fresh Air (Supply) total was slightly lower (2% ~ 6%) than the original commissioning numbers. This can be attributed to the installation of the activated carbon filter near the supply intake. The ComfoWell box was installed in October 2013 and we haven’t balanced the air flow at that time.

Note to self: Next time you clean the diffuser, put them back to the same settings as you found them!

Adjust Return Air (Exhaust) Diffuser Opening

This is what the Return Air diffusers they looked like when I pulled them out, before the adjustment and cleaning:
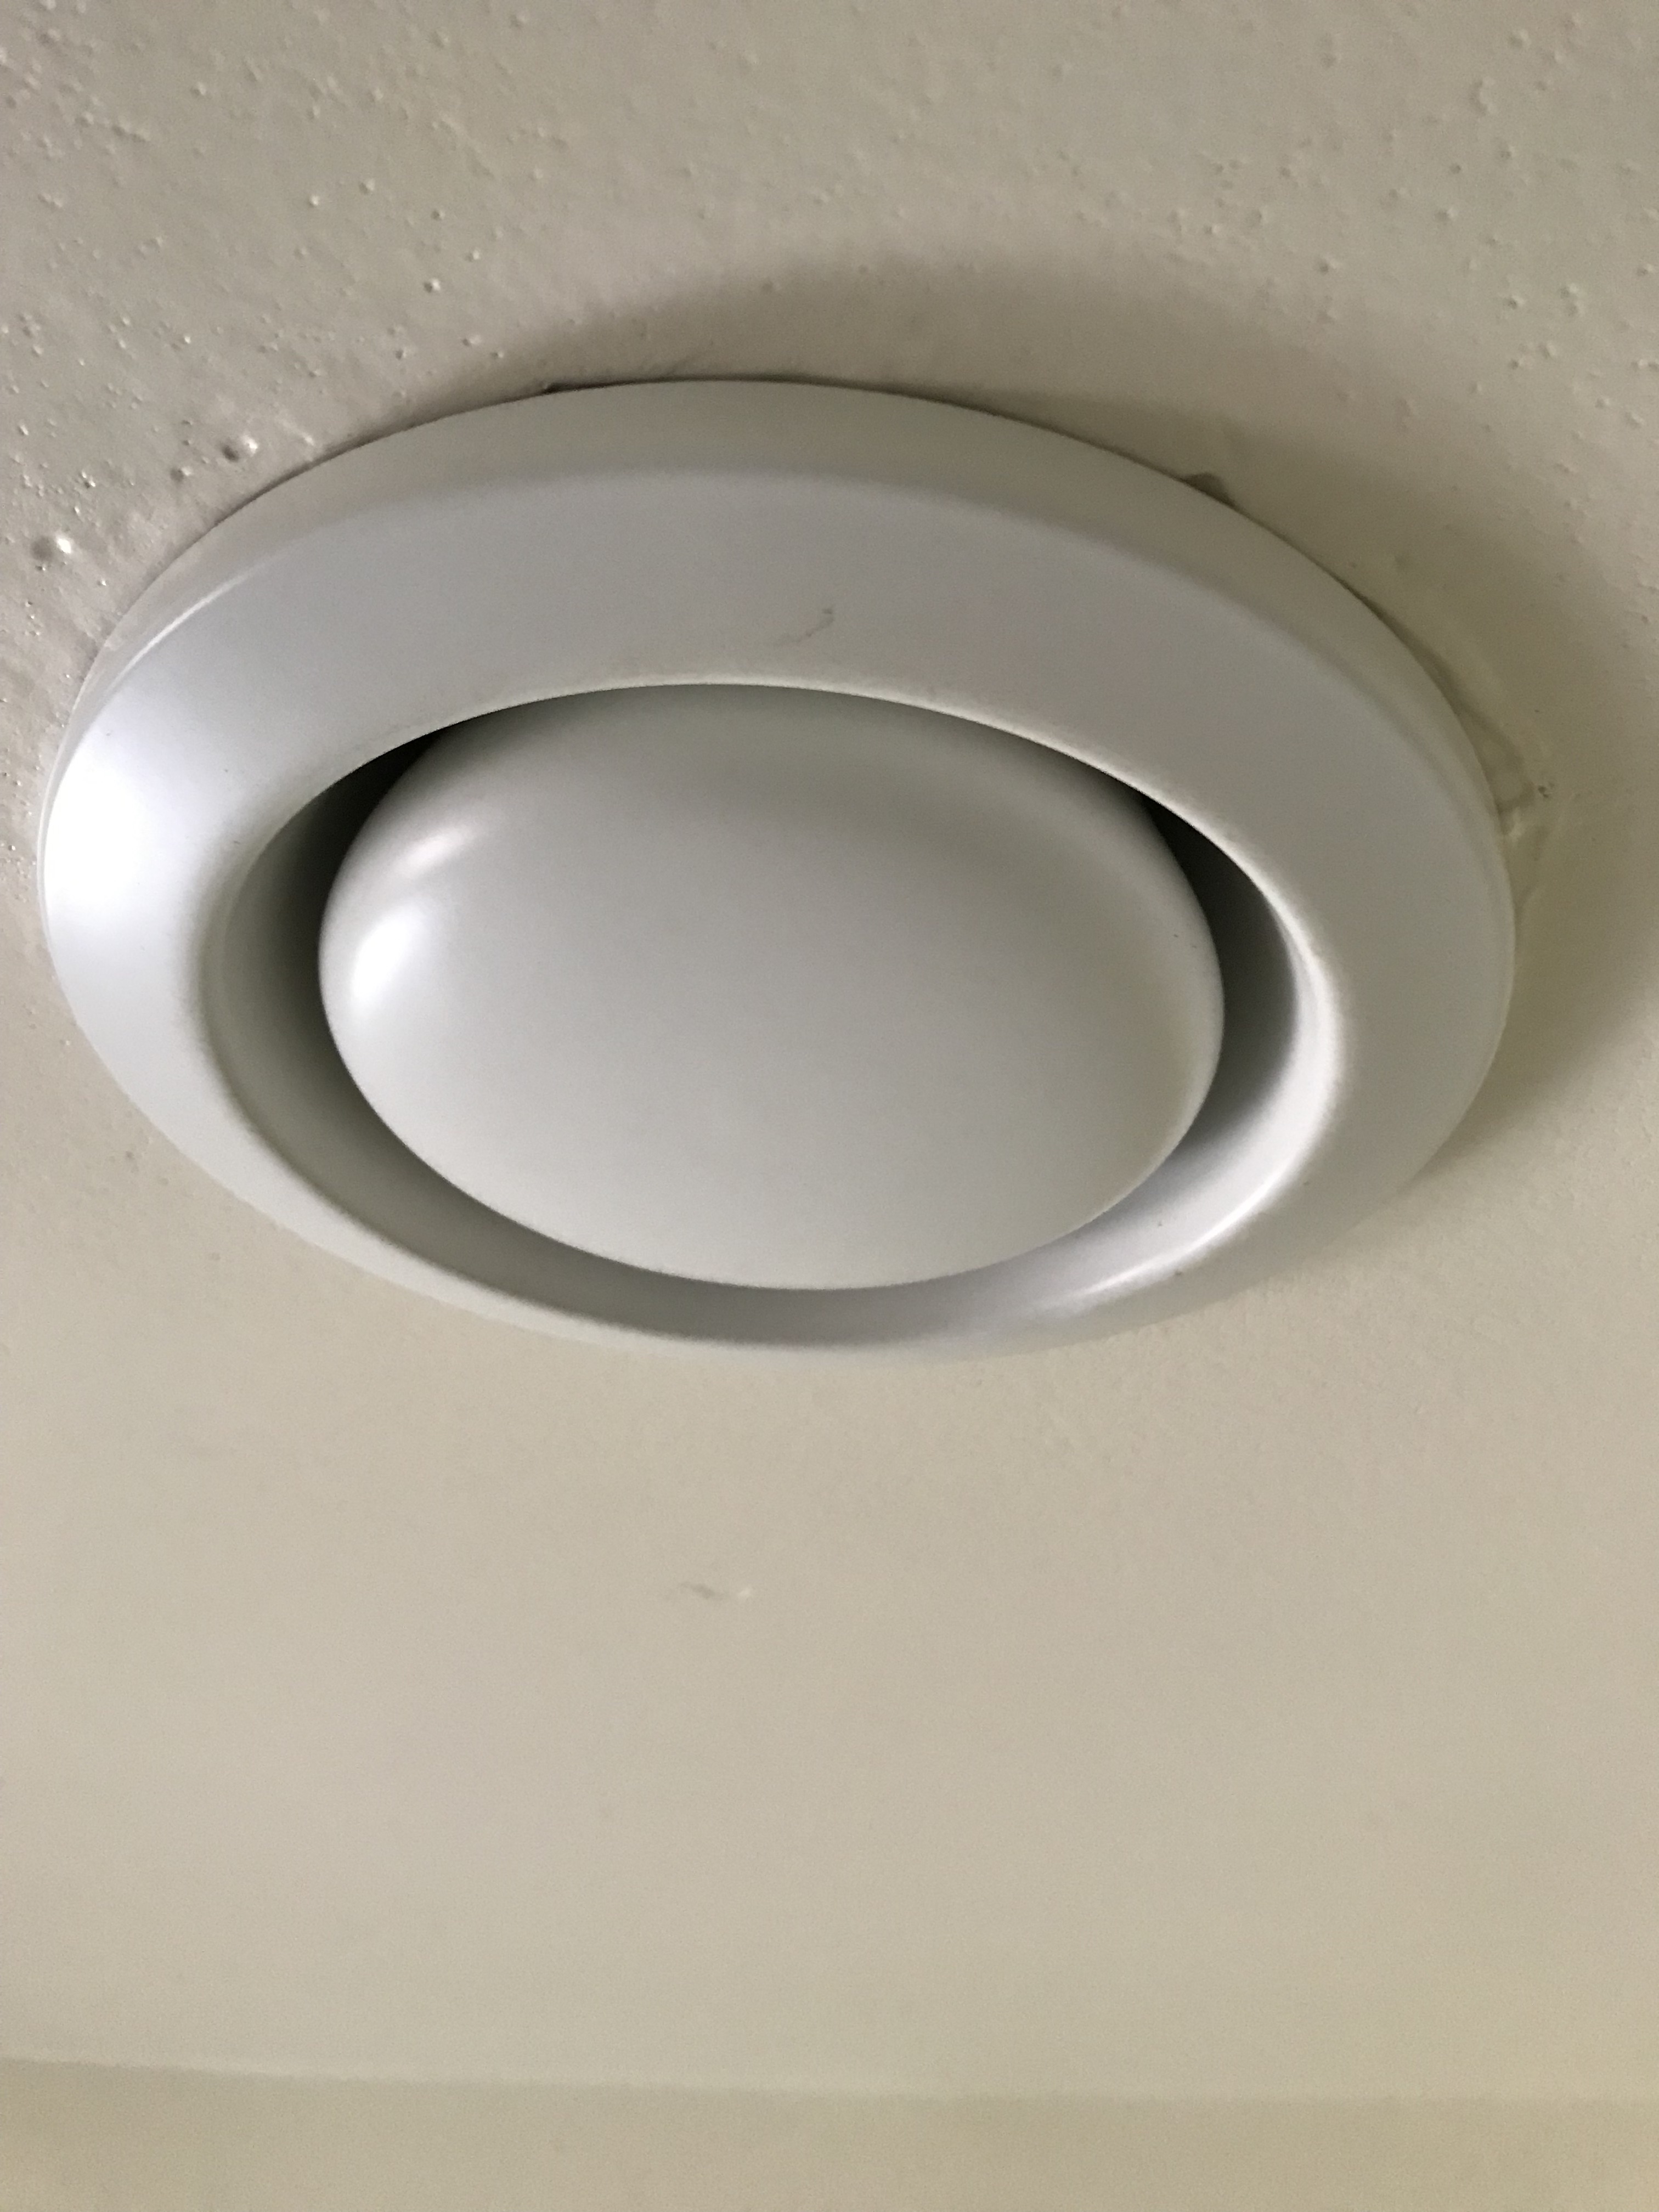
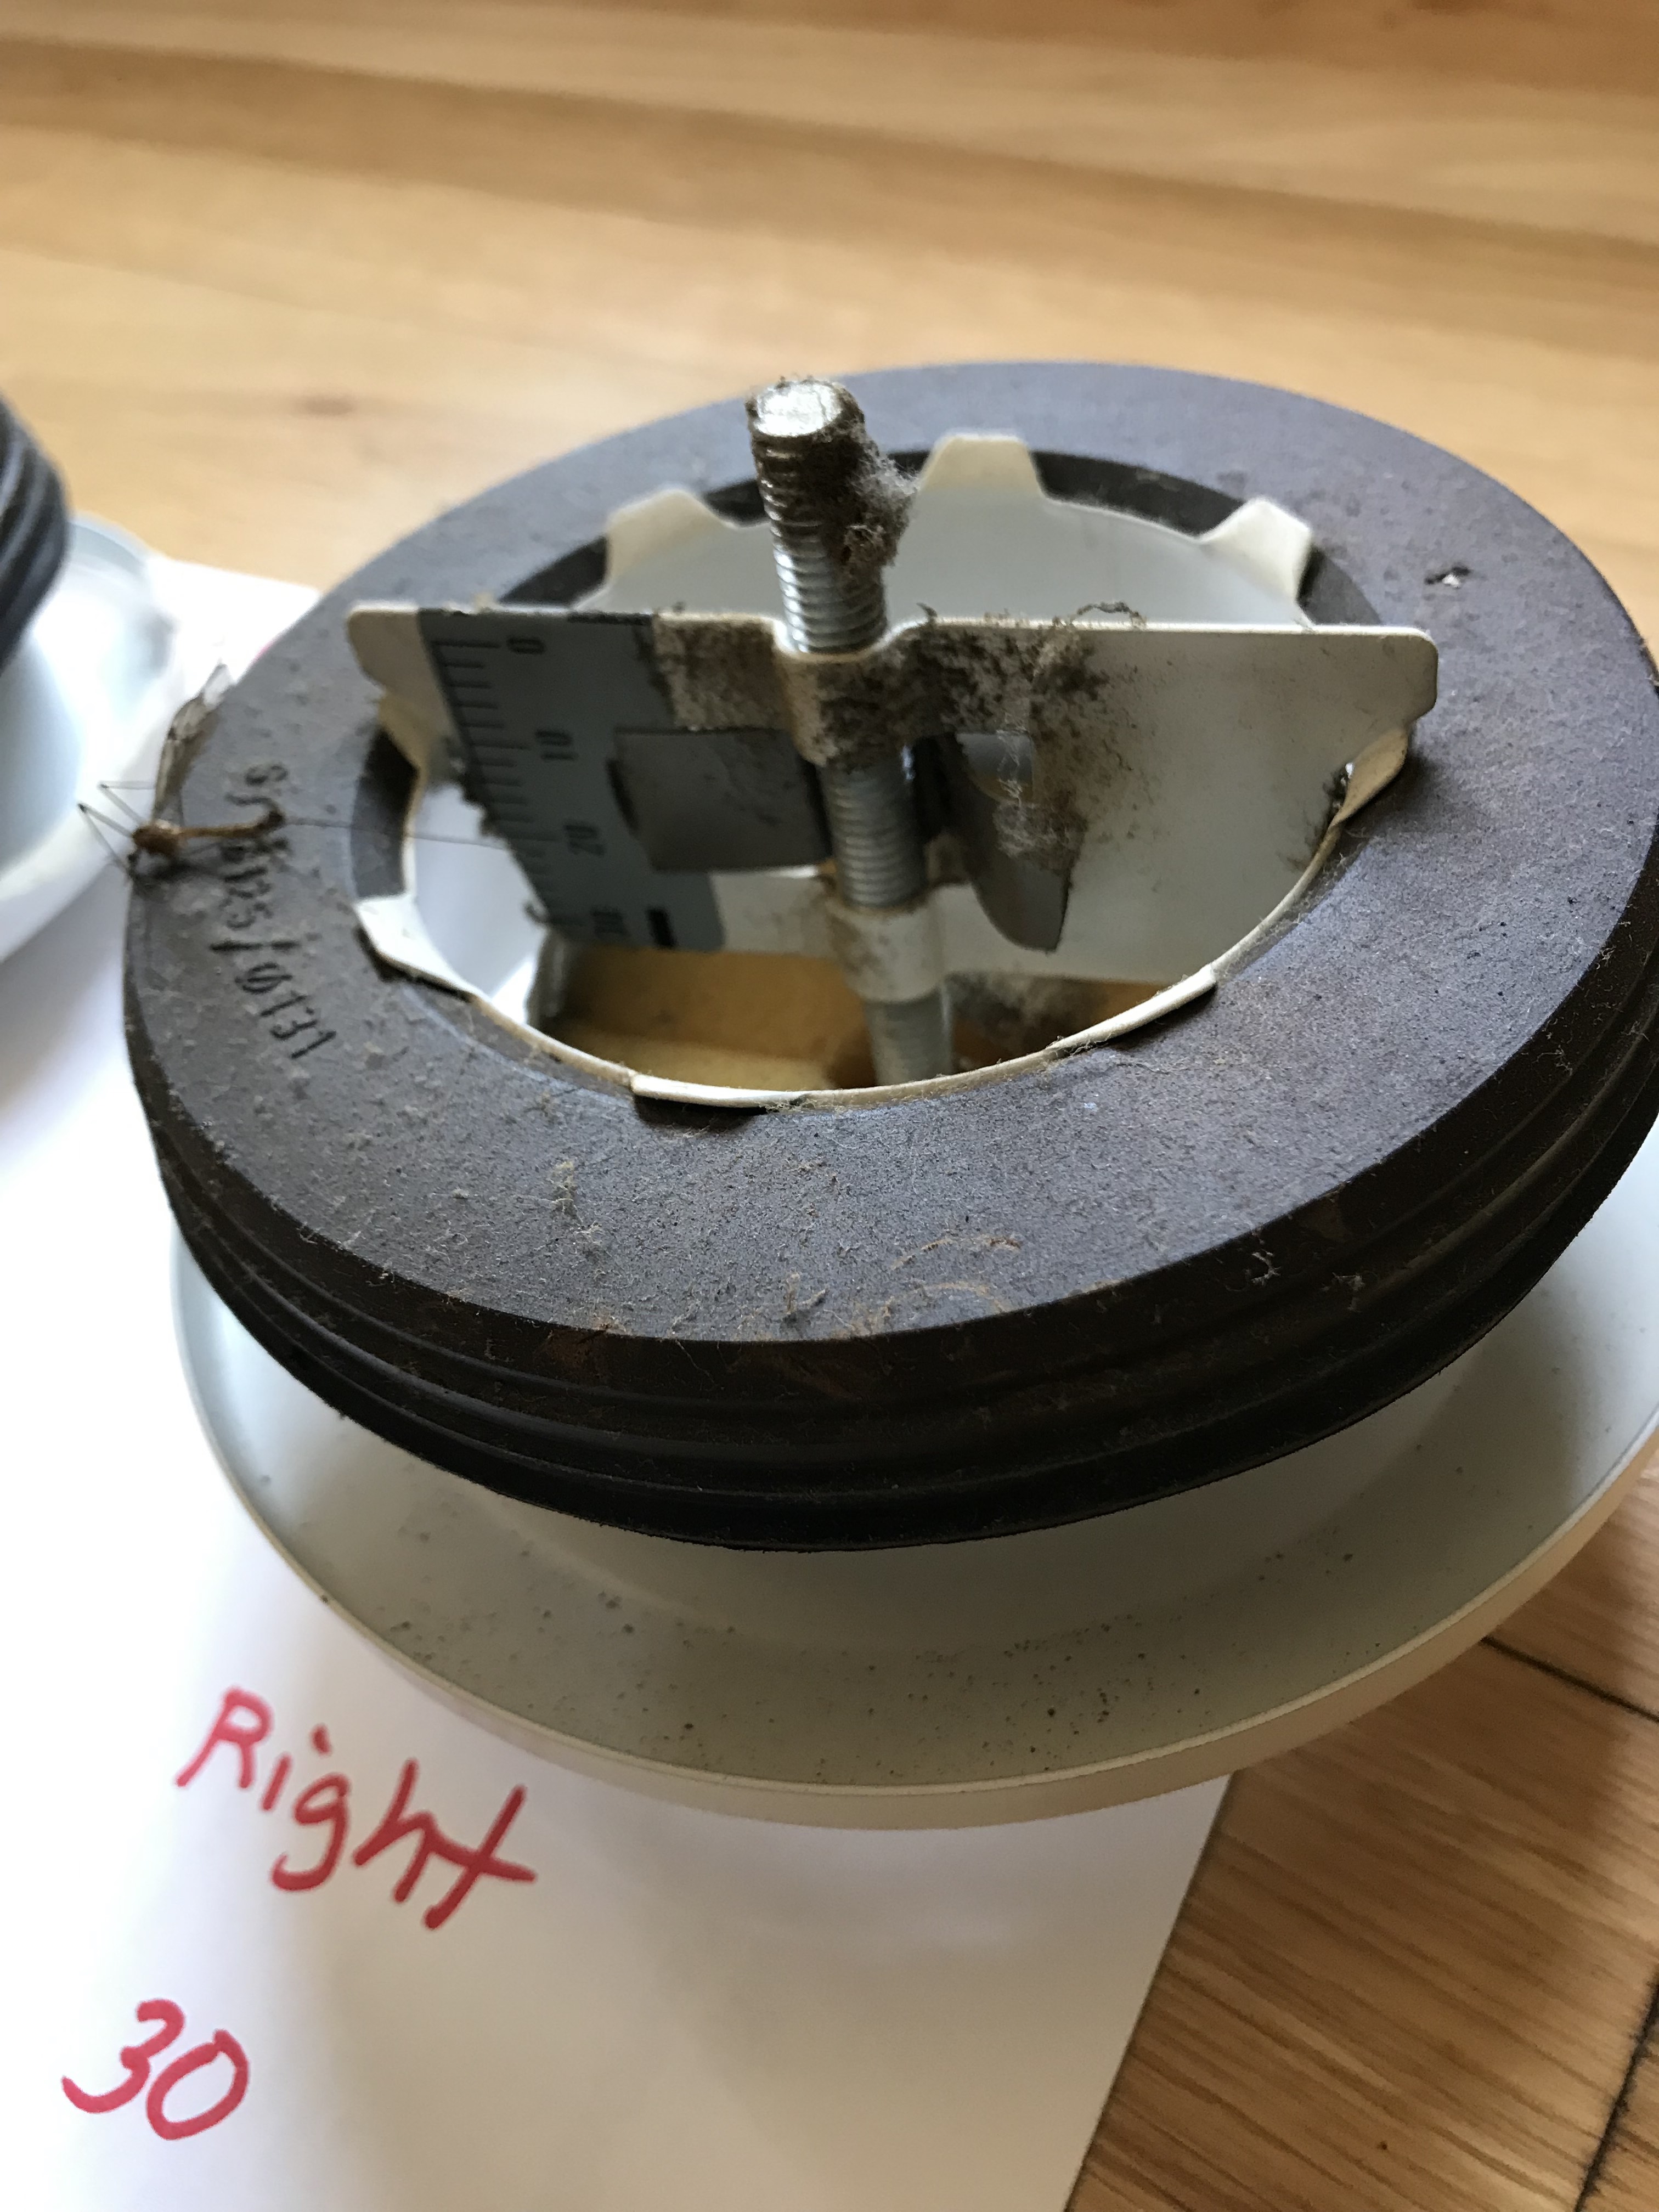
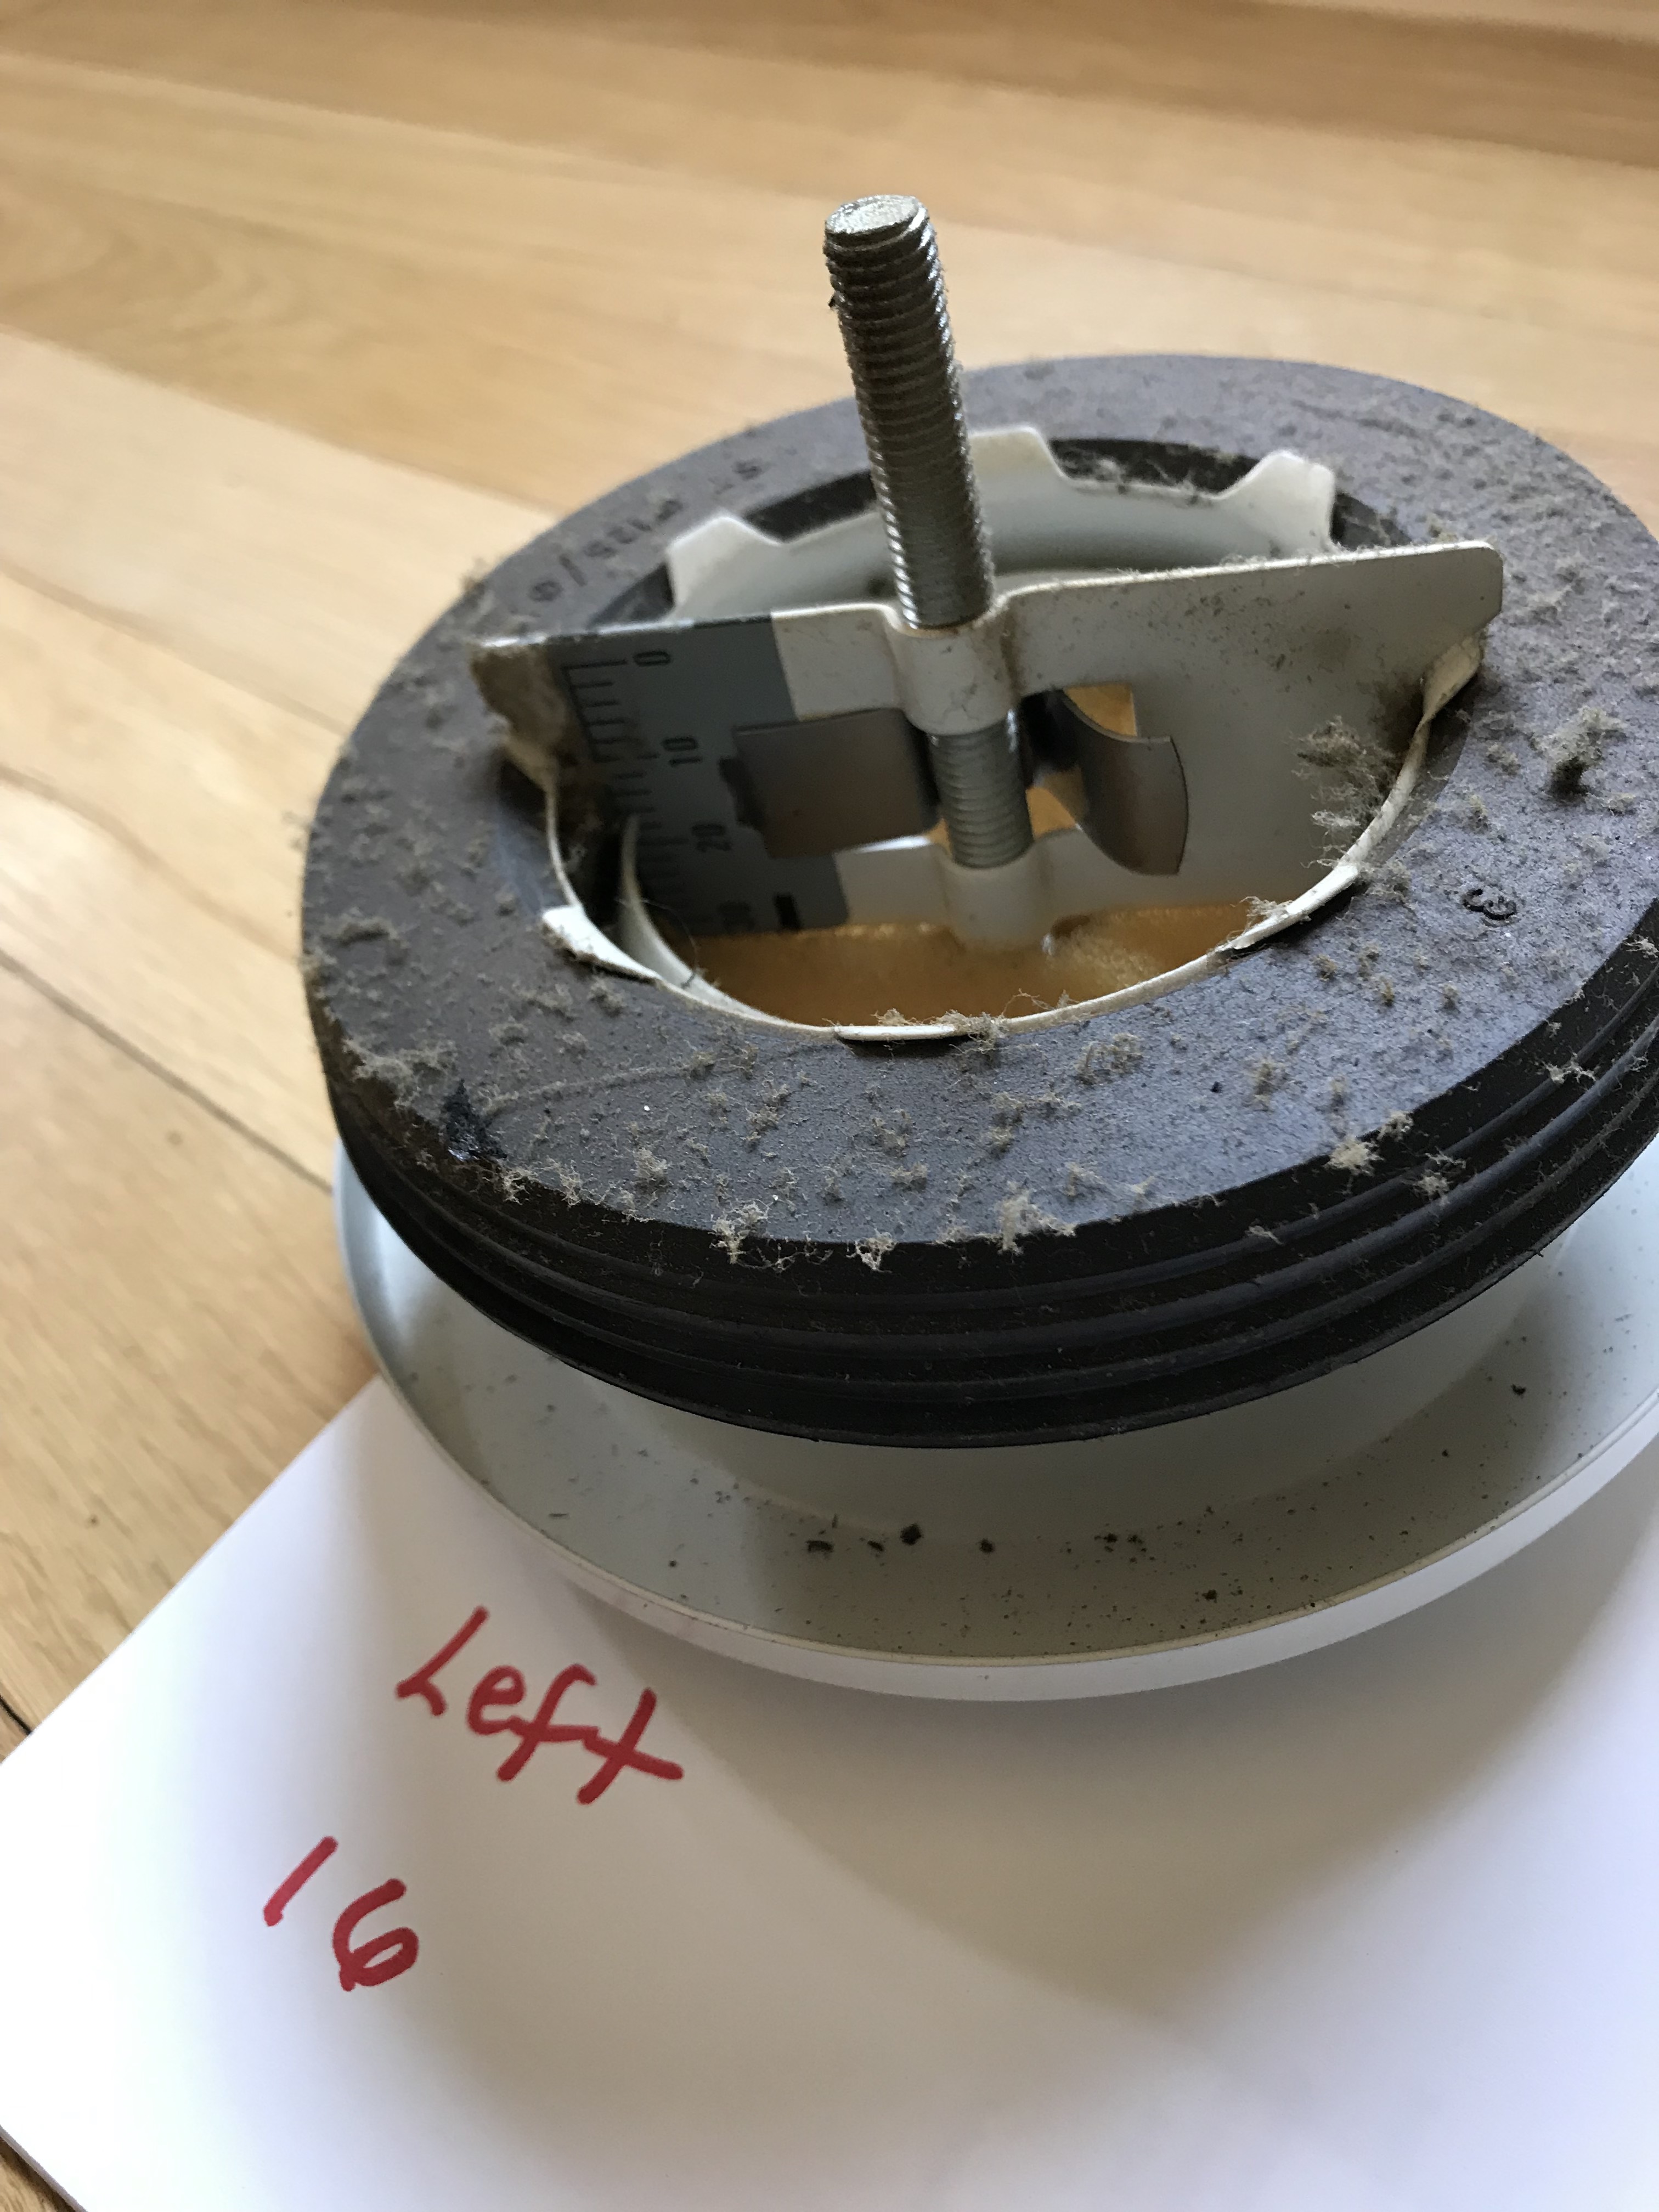
Adjusted the opening size by pressing the tongue and pushing in the inner fitting. The size of the smaller opening in the photo below is 8 on the gauge. This roughly corresponded to the air volume measured (in CFM) at the medium HRV setting.
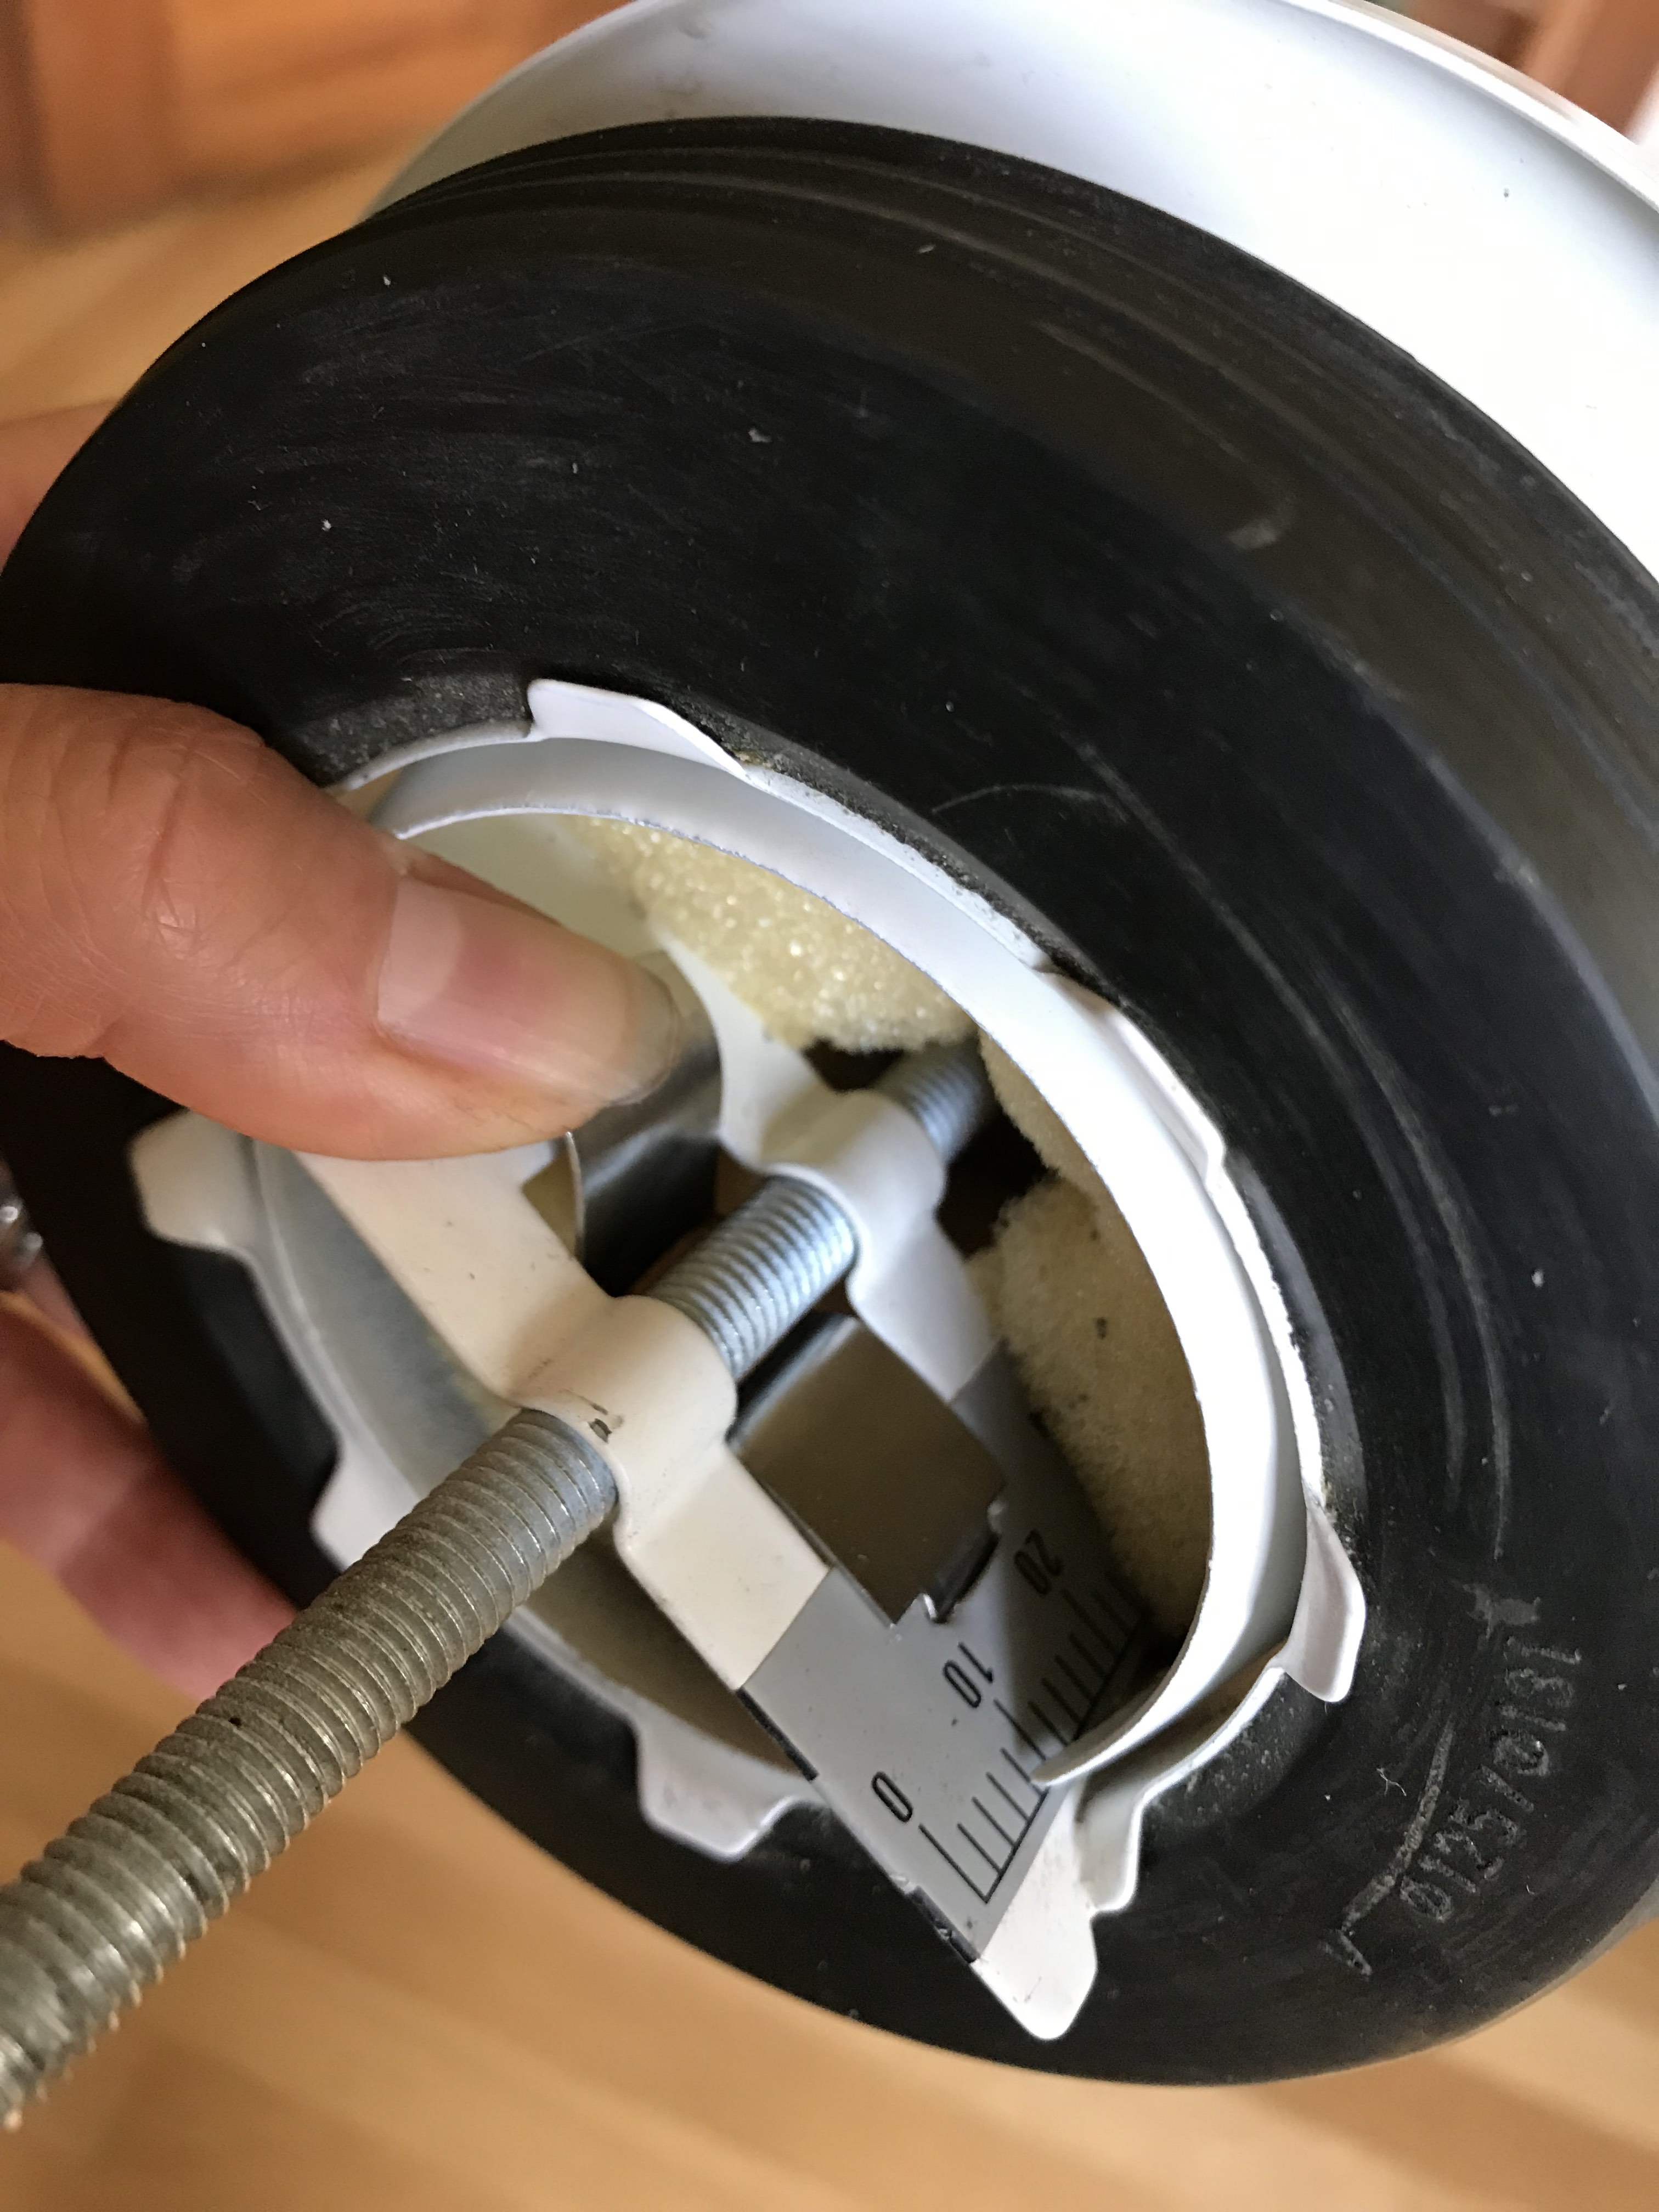
Press down tab and adjust

Adjust Supply Diffuser

I adjusted the supply diffuser in one room to slightly increase the flow. The smallest ring was in place. I removed the ring and cut it smaller. This increased the flow by 2 CFM.
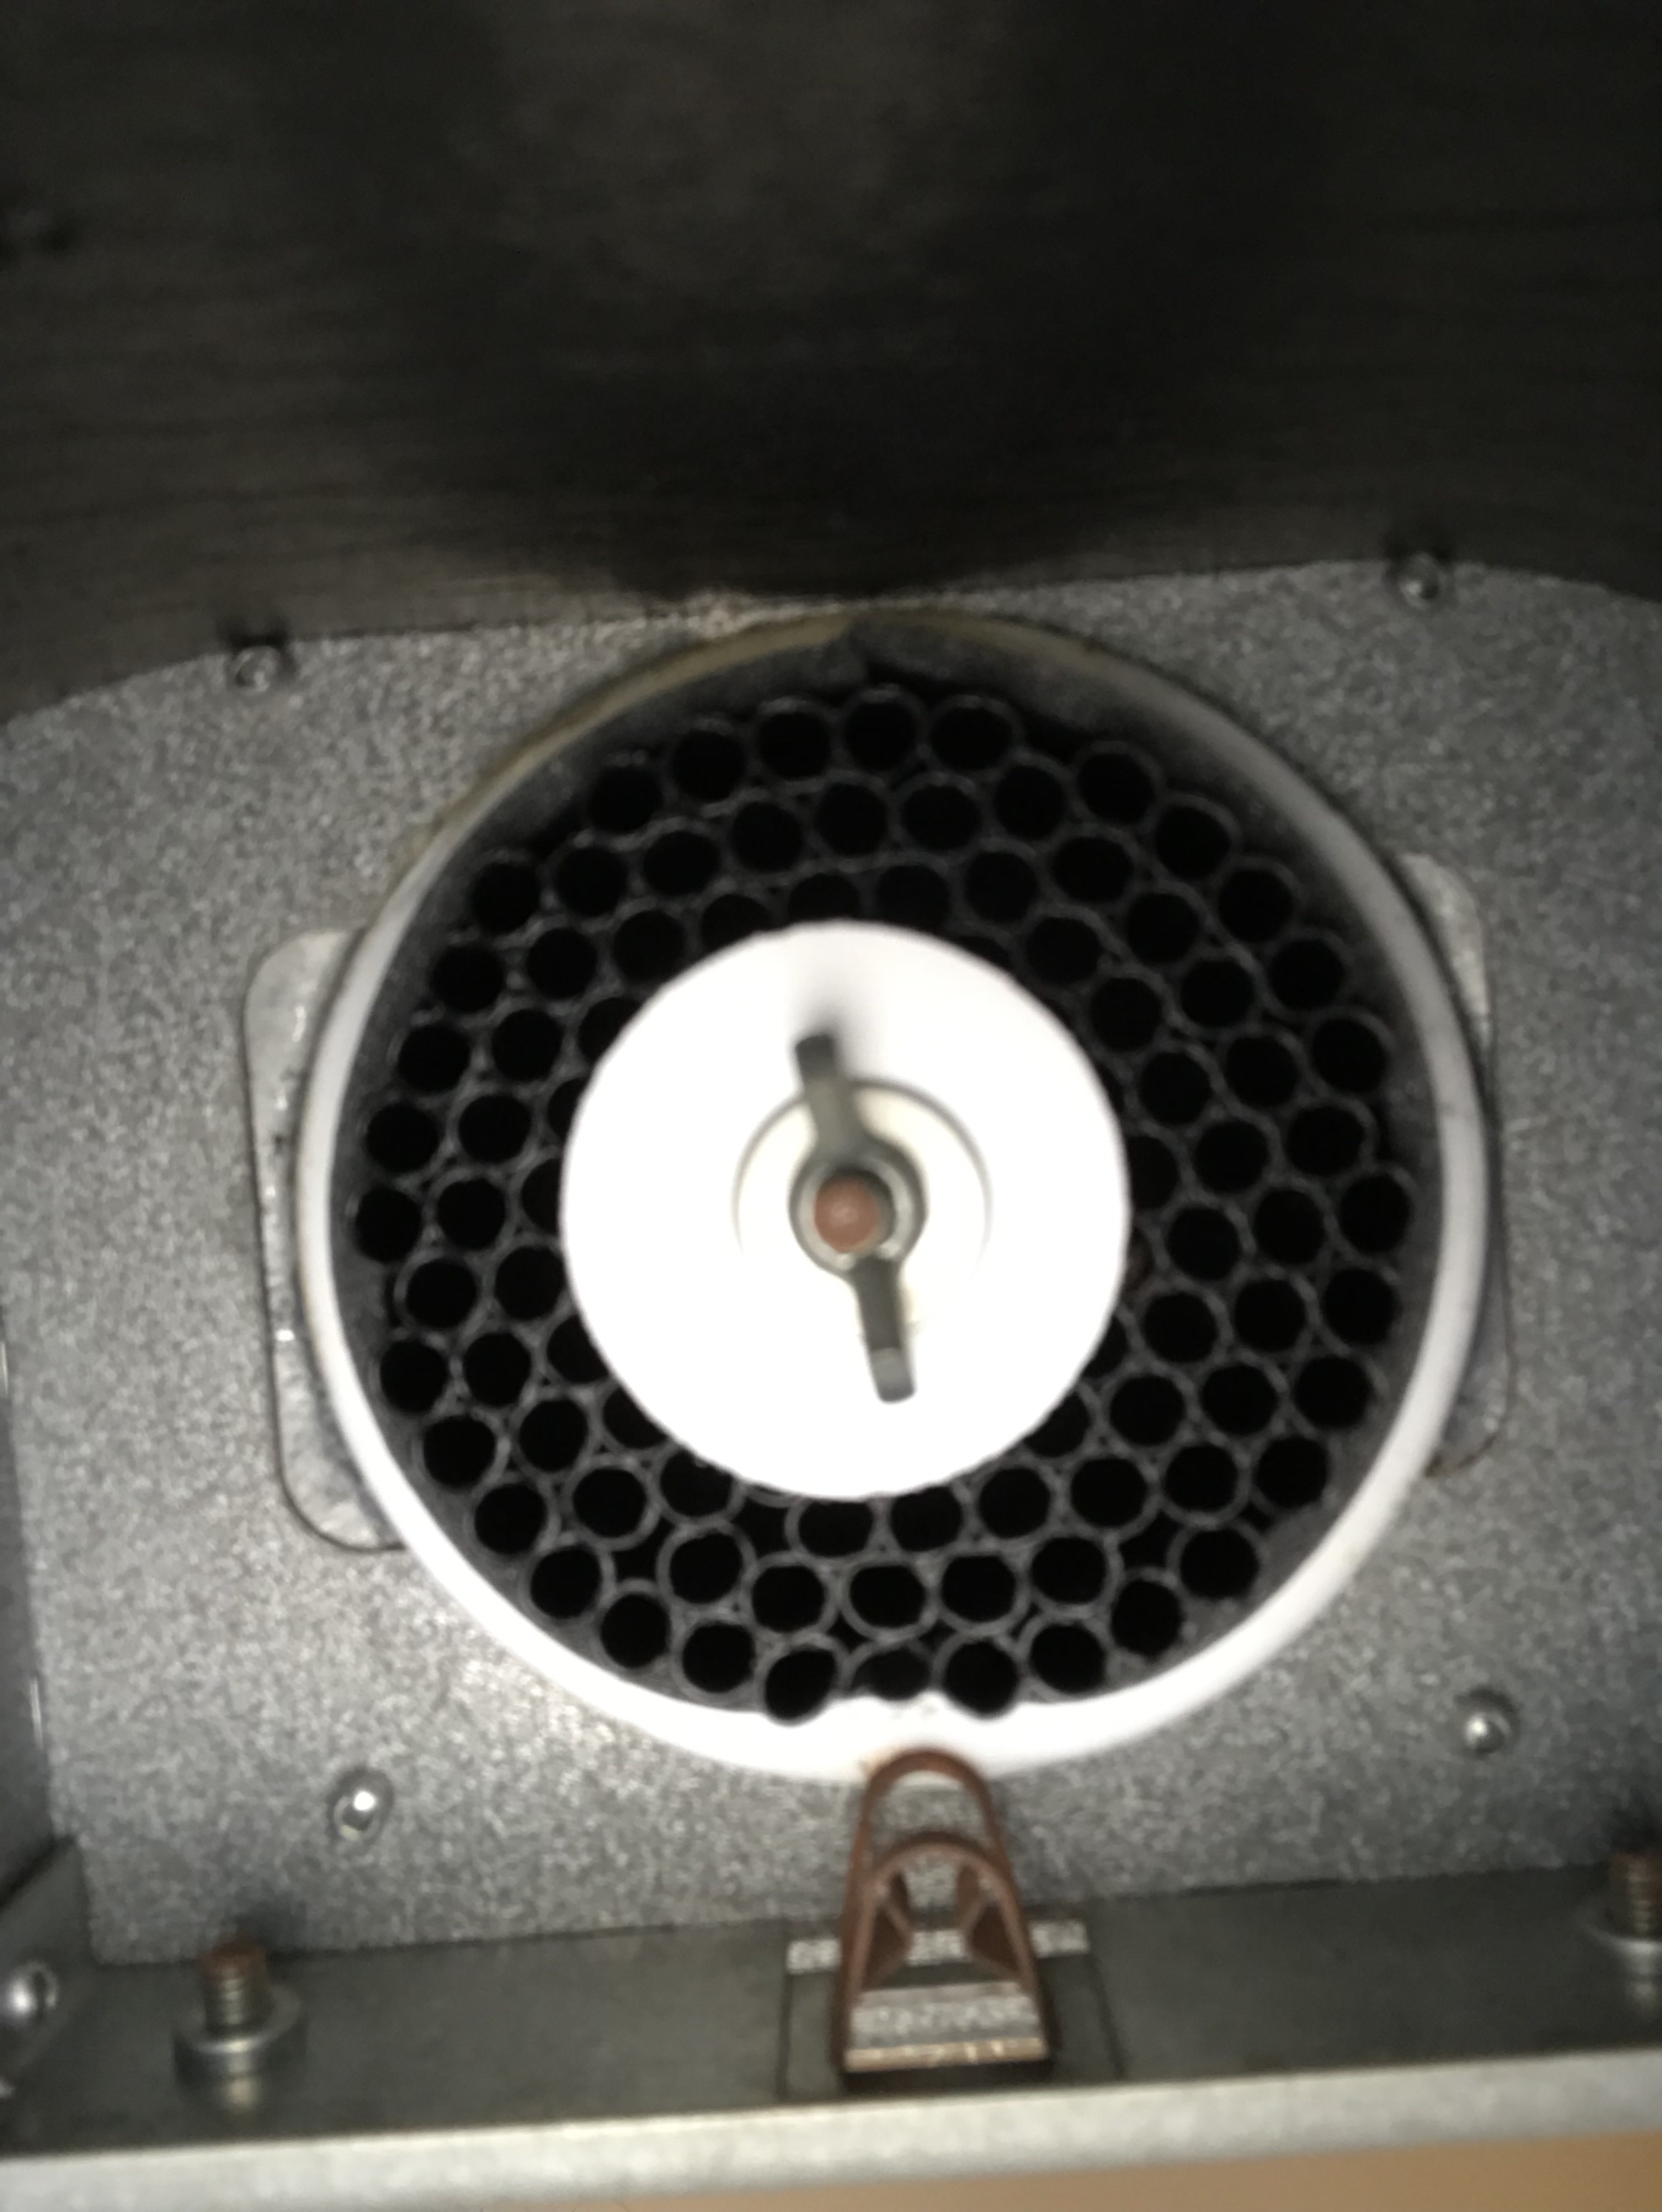
Fresh Air (Supply) Diffuser before adjustment
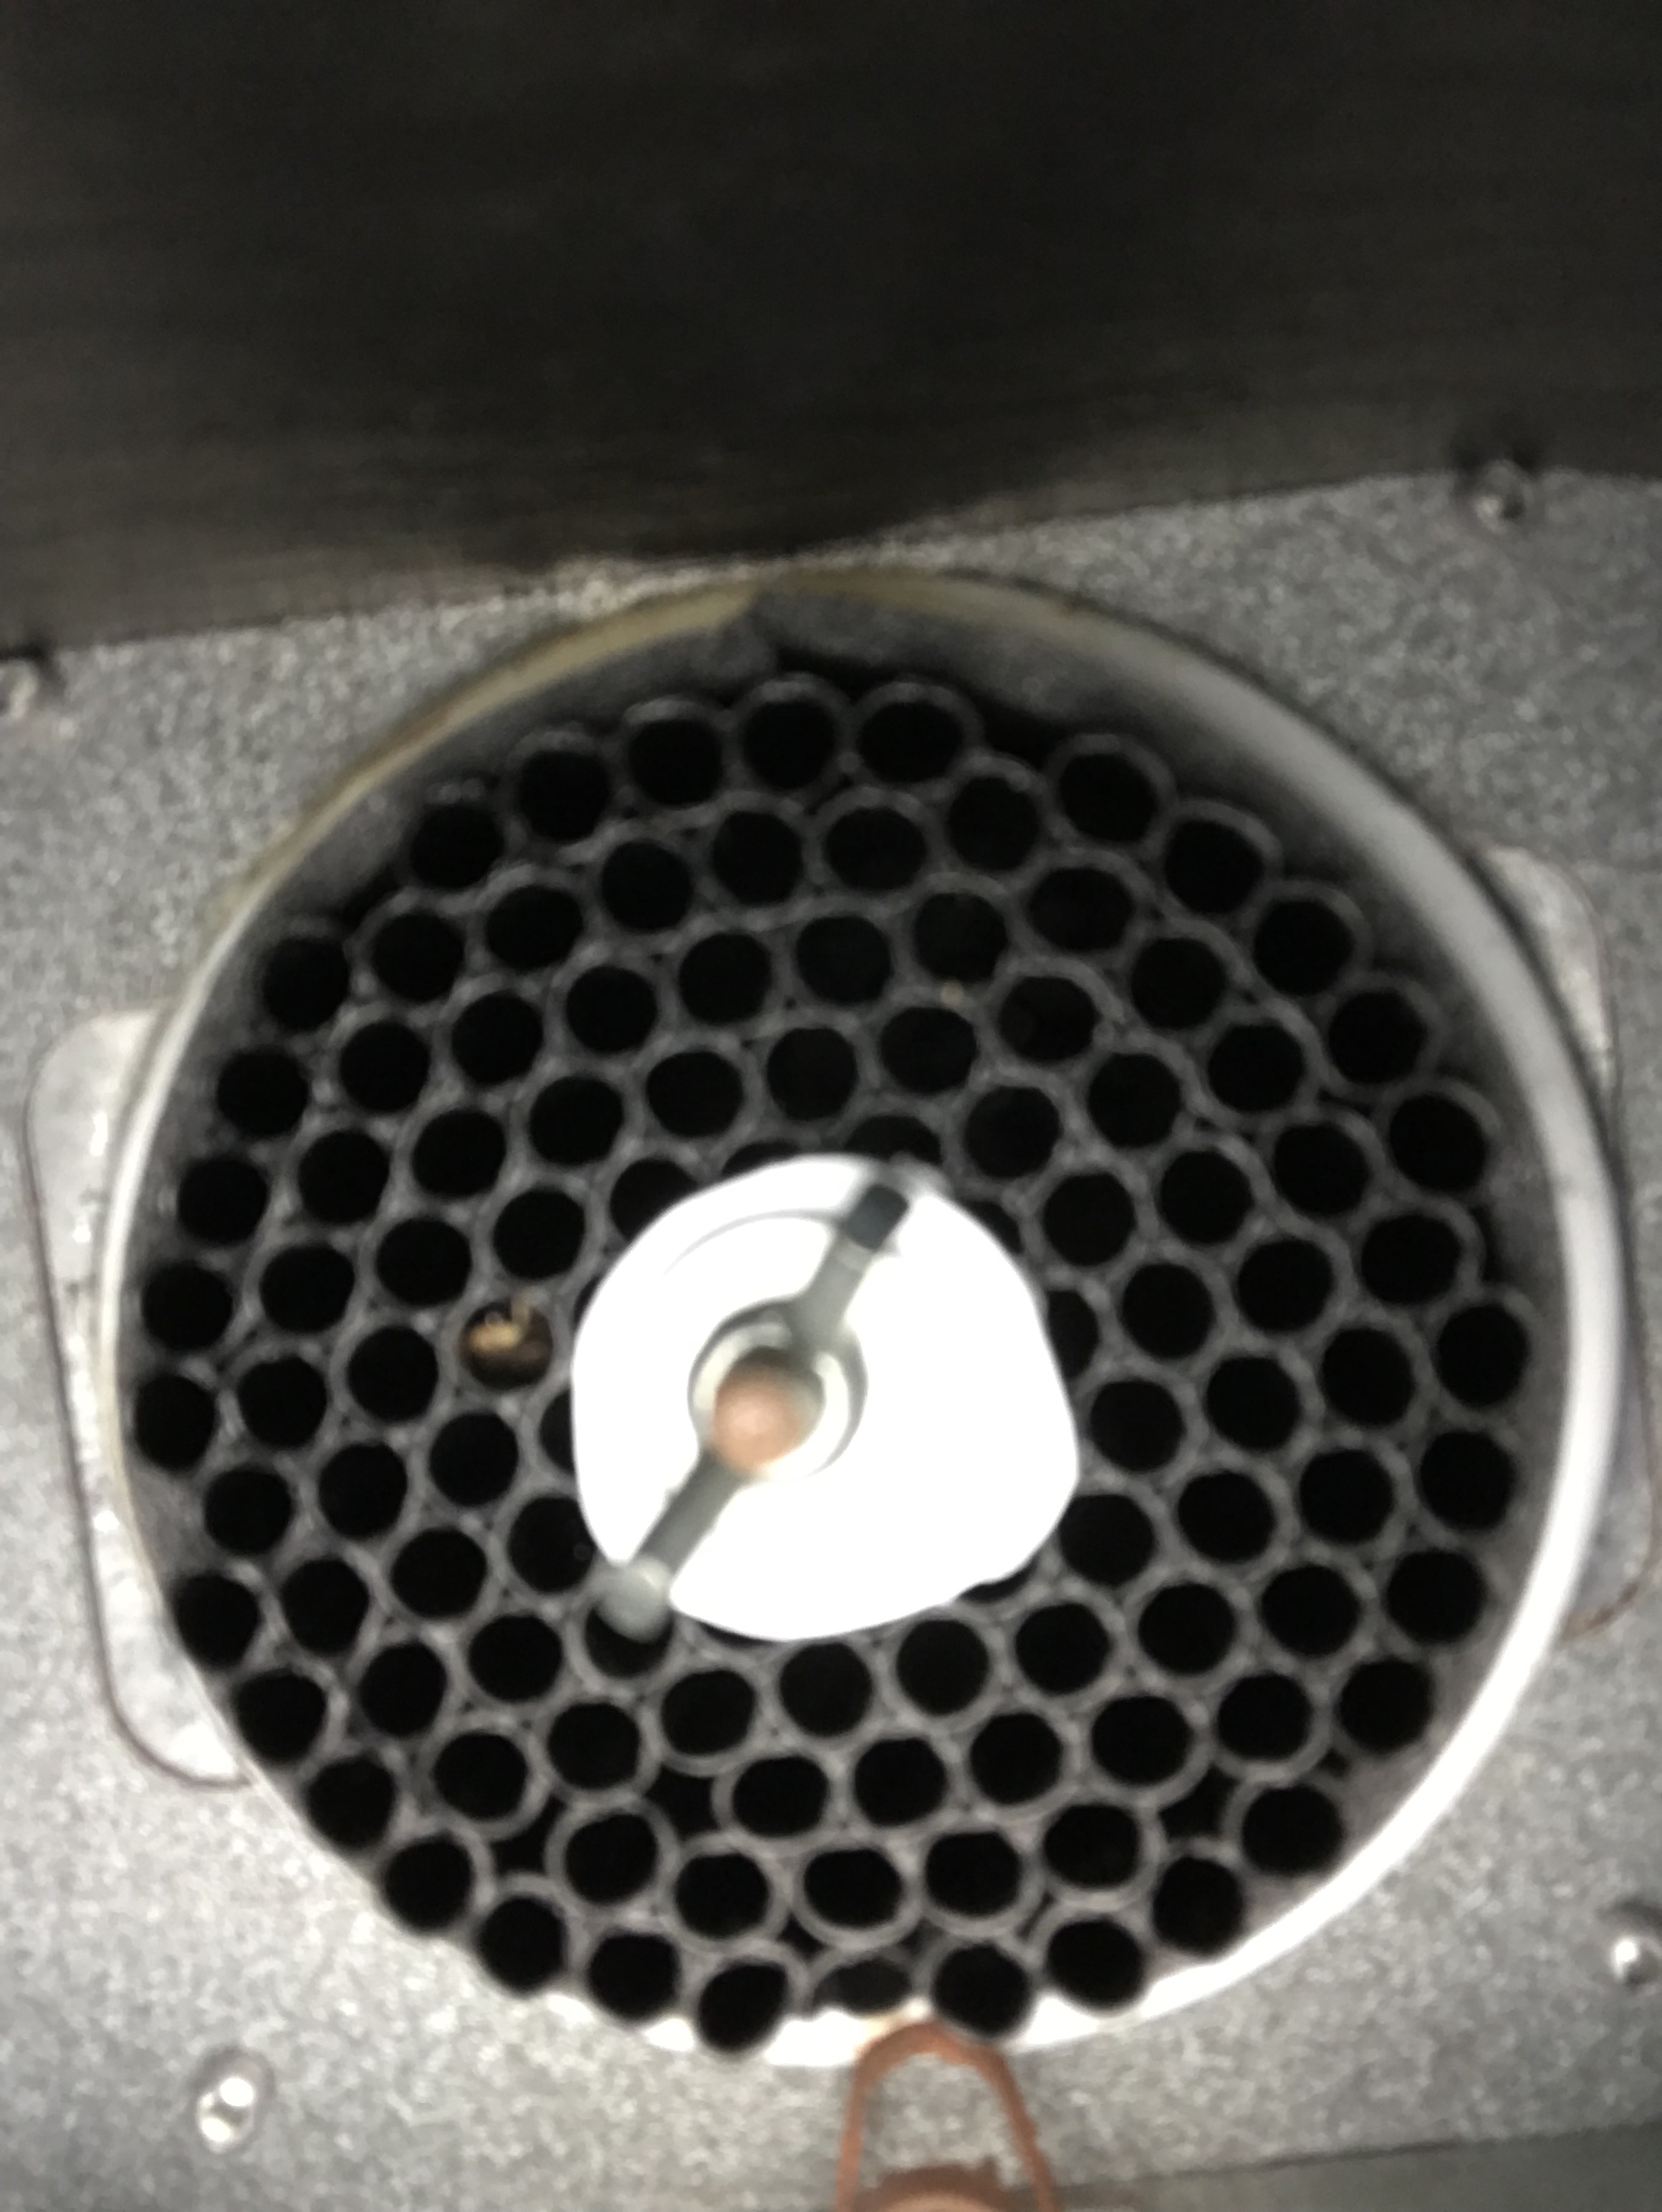
Fresh Air (Supply) Diffuser After Adjustment

Install Fine Particle Filter

Next phase of this project required climbing into the attic to Install the yellow particle filter (MERV 15) in the ComfoWell, upstream of the activated carbon filter. While I was in there, I replaced the activated carbon filter. We’ve been calling this “charcoal filter” and can’t get ourselves to call it by the correct name.
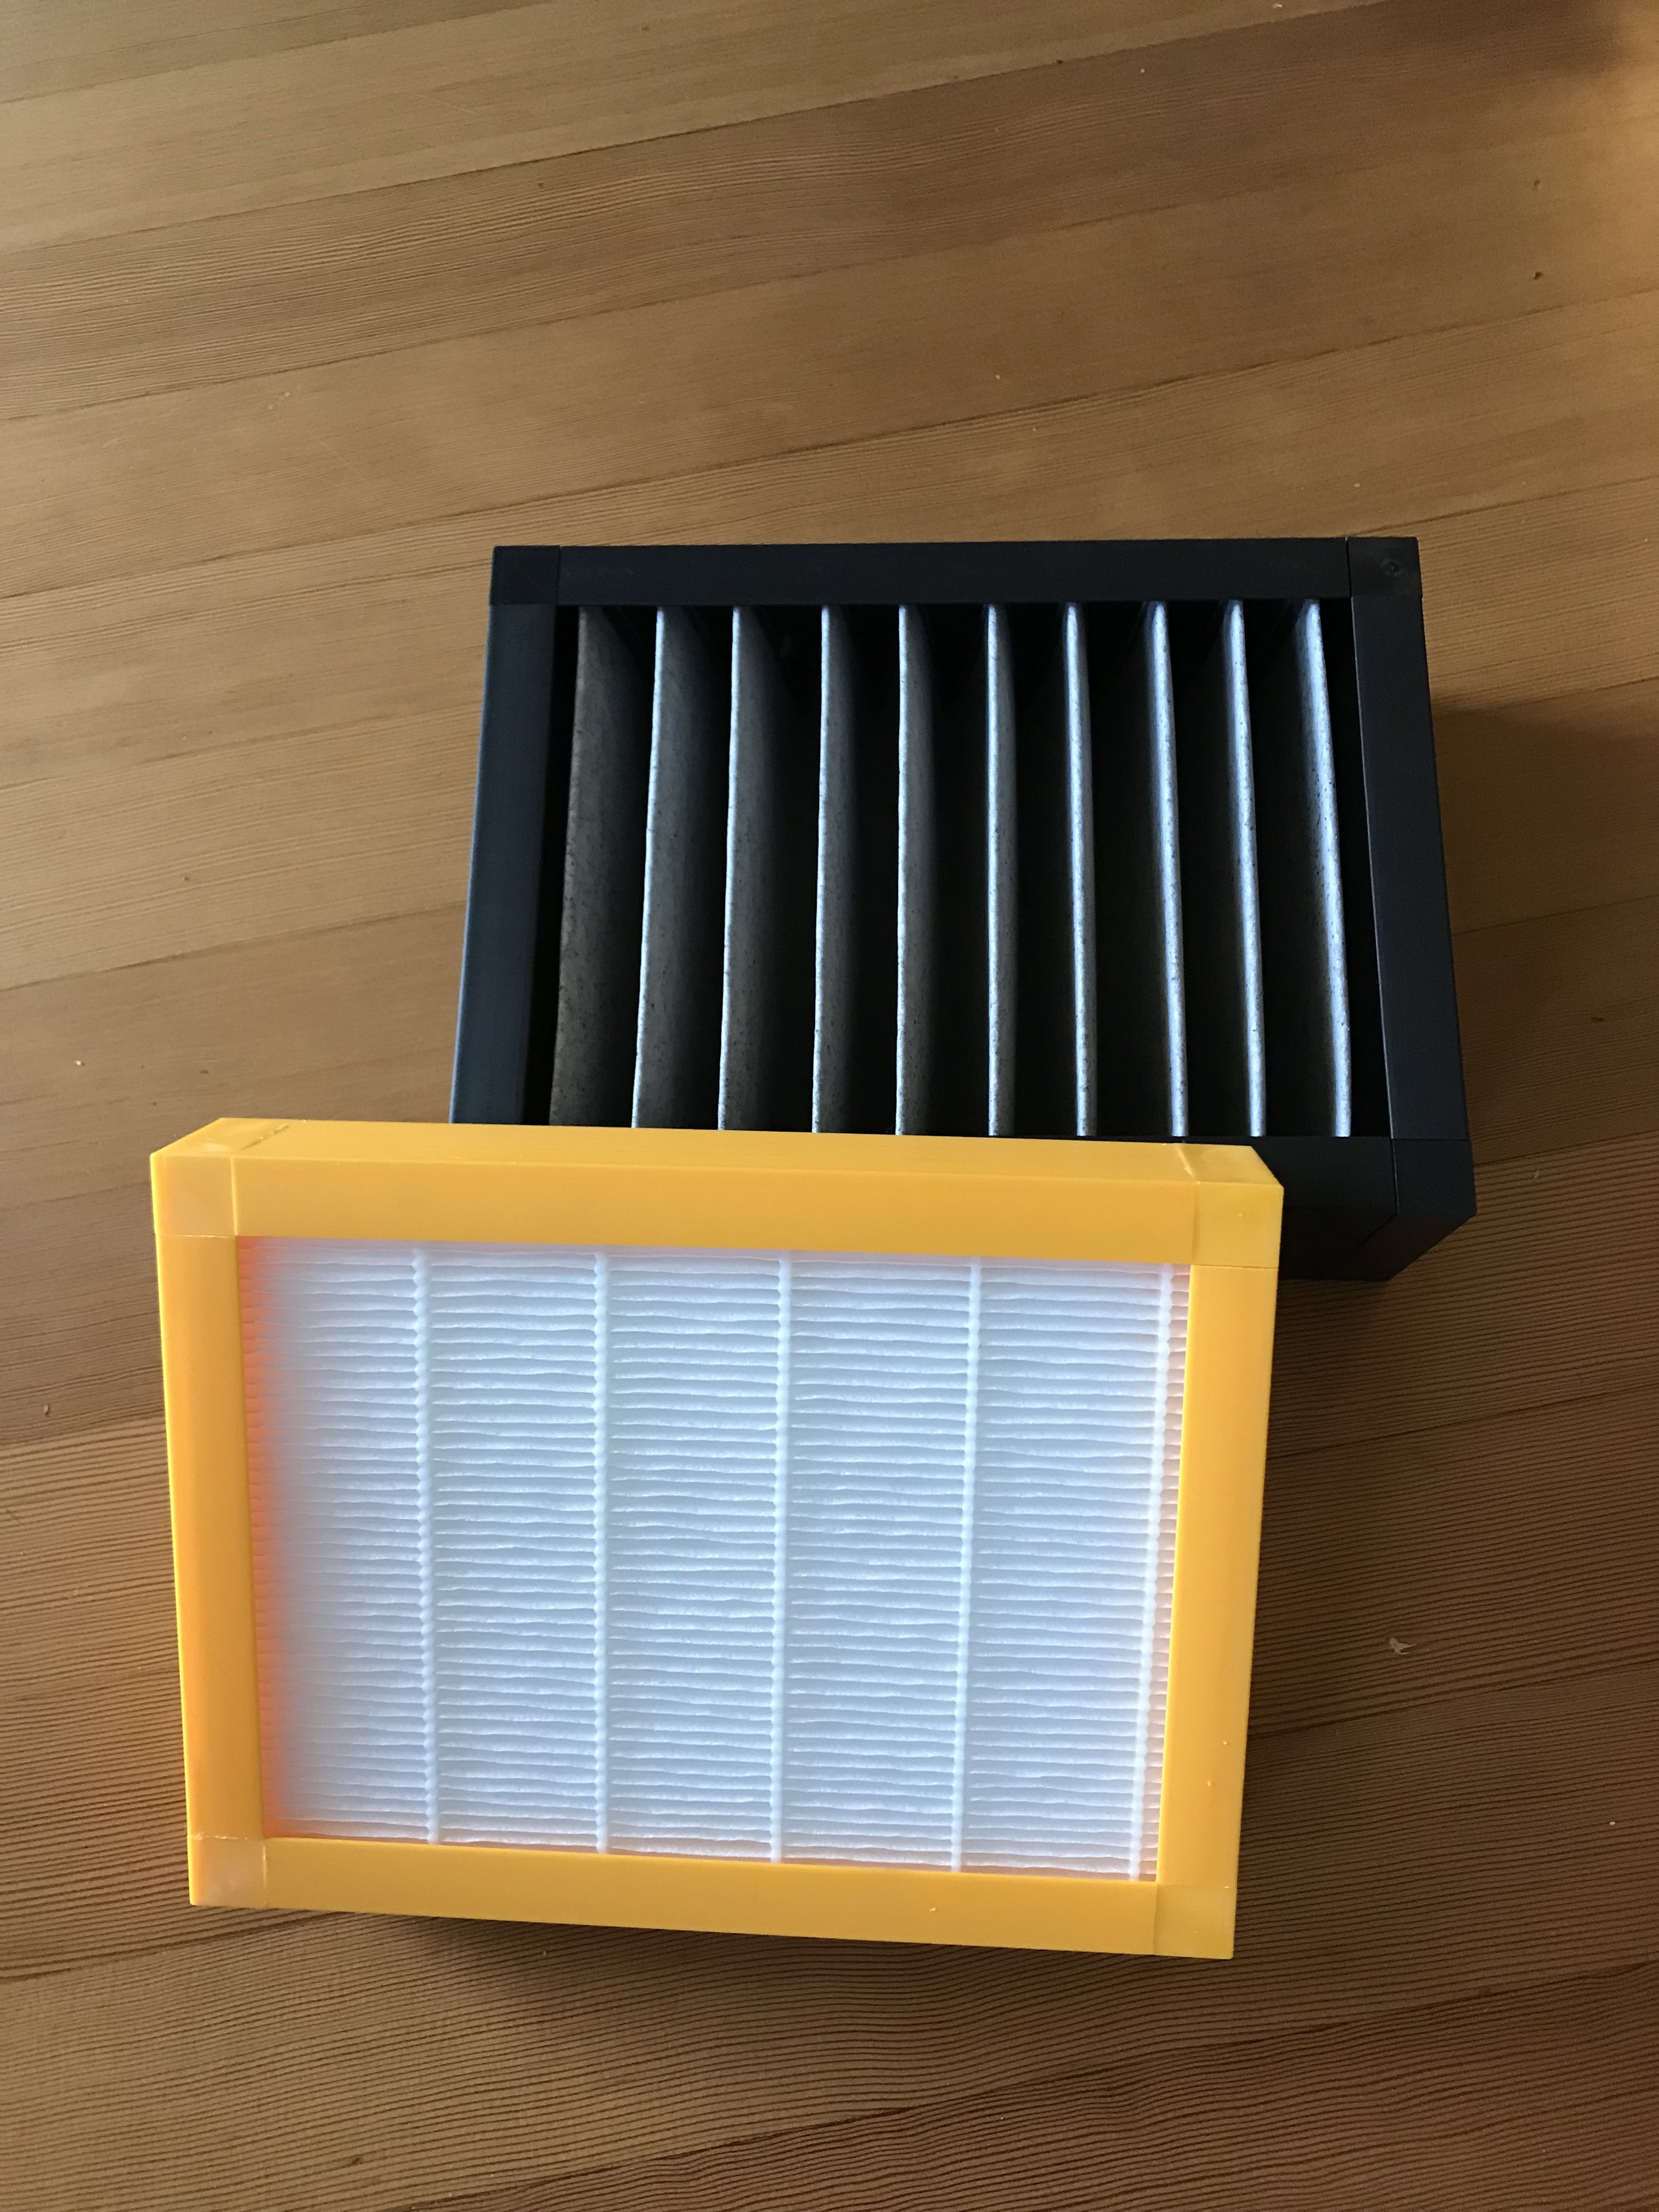
Fine Particle Filter and Activated Carbon Filter
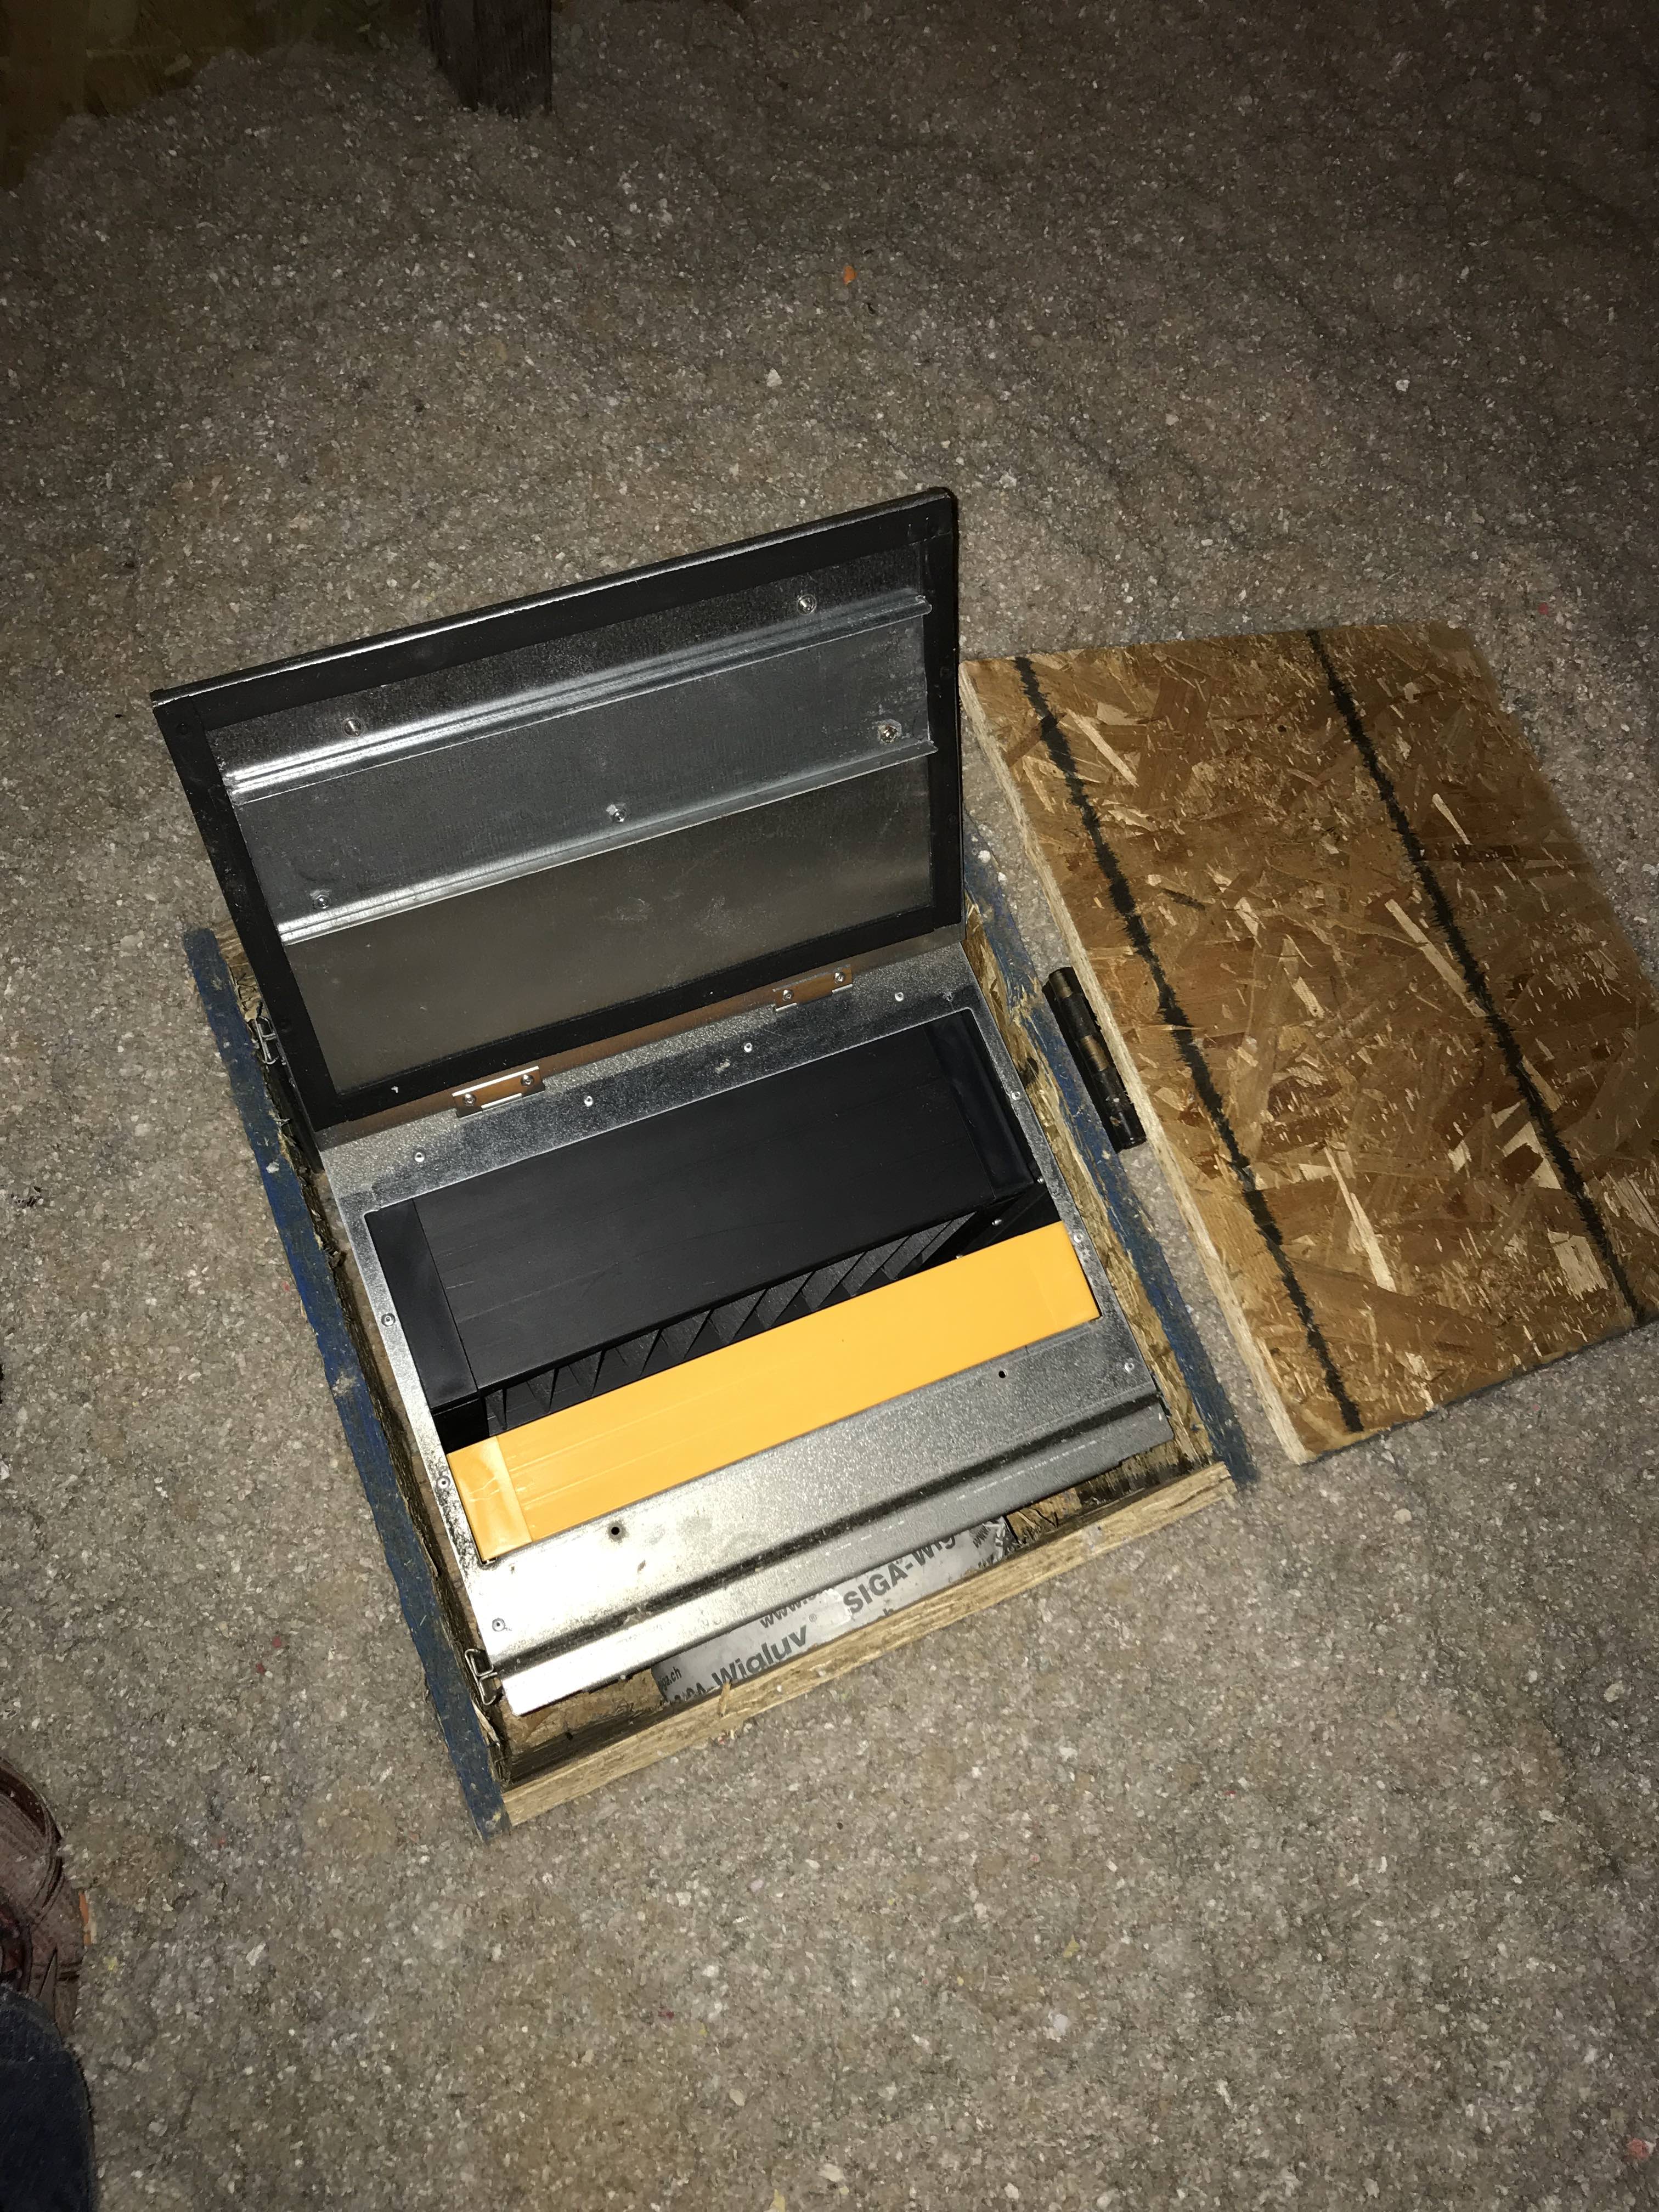
ComfoWell with Activated Charcoal Filter and Fine Particle Filter

Adjust Fan Setting Values

The total fresh air (supply) measurement dropped by about 3 CFM after the installation of the additional yellow particle filter. The total return air (exhaust) measurement was still about 20 CFM greater than the total fresh air (supply) measurement at medium fan setting. Next step was to adjust the fan speed.

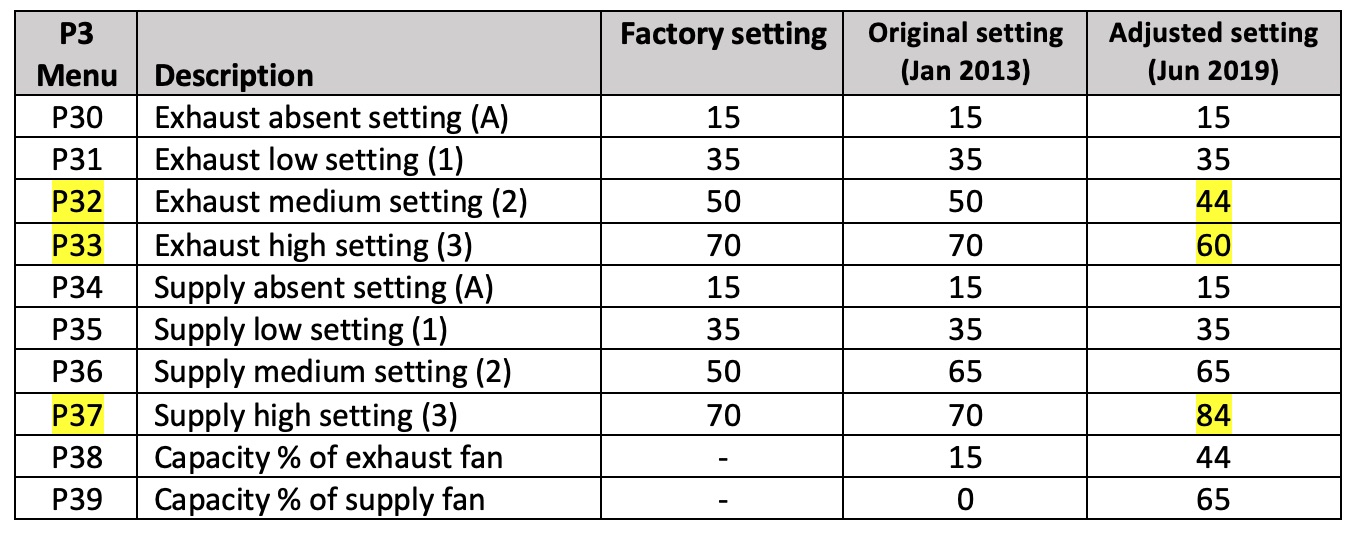
I followed the instruction on page 9 of Zehnder Installation Manualto access P3 (ventilation program) menu. I lowered the fan values for exhaust medium setting (P32) and exhaust high setting (P33). I raised the fan value for supply high setting (P37).
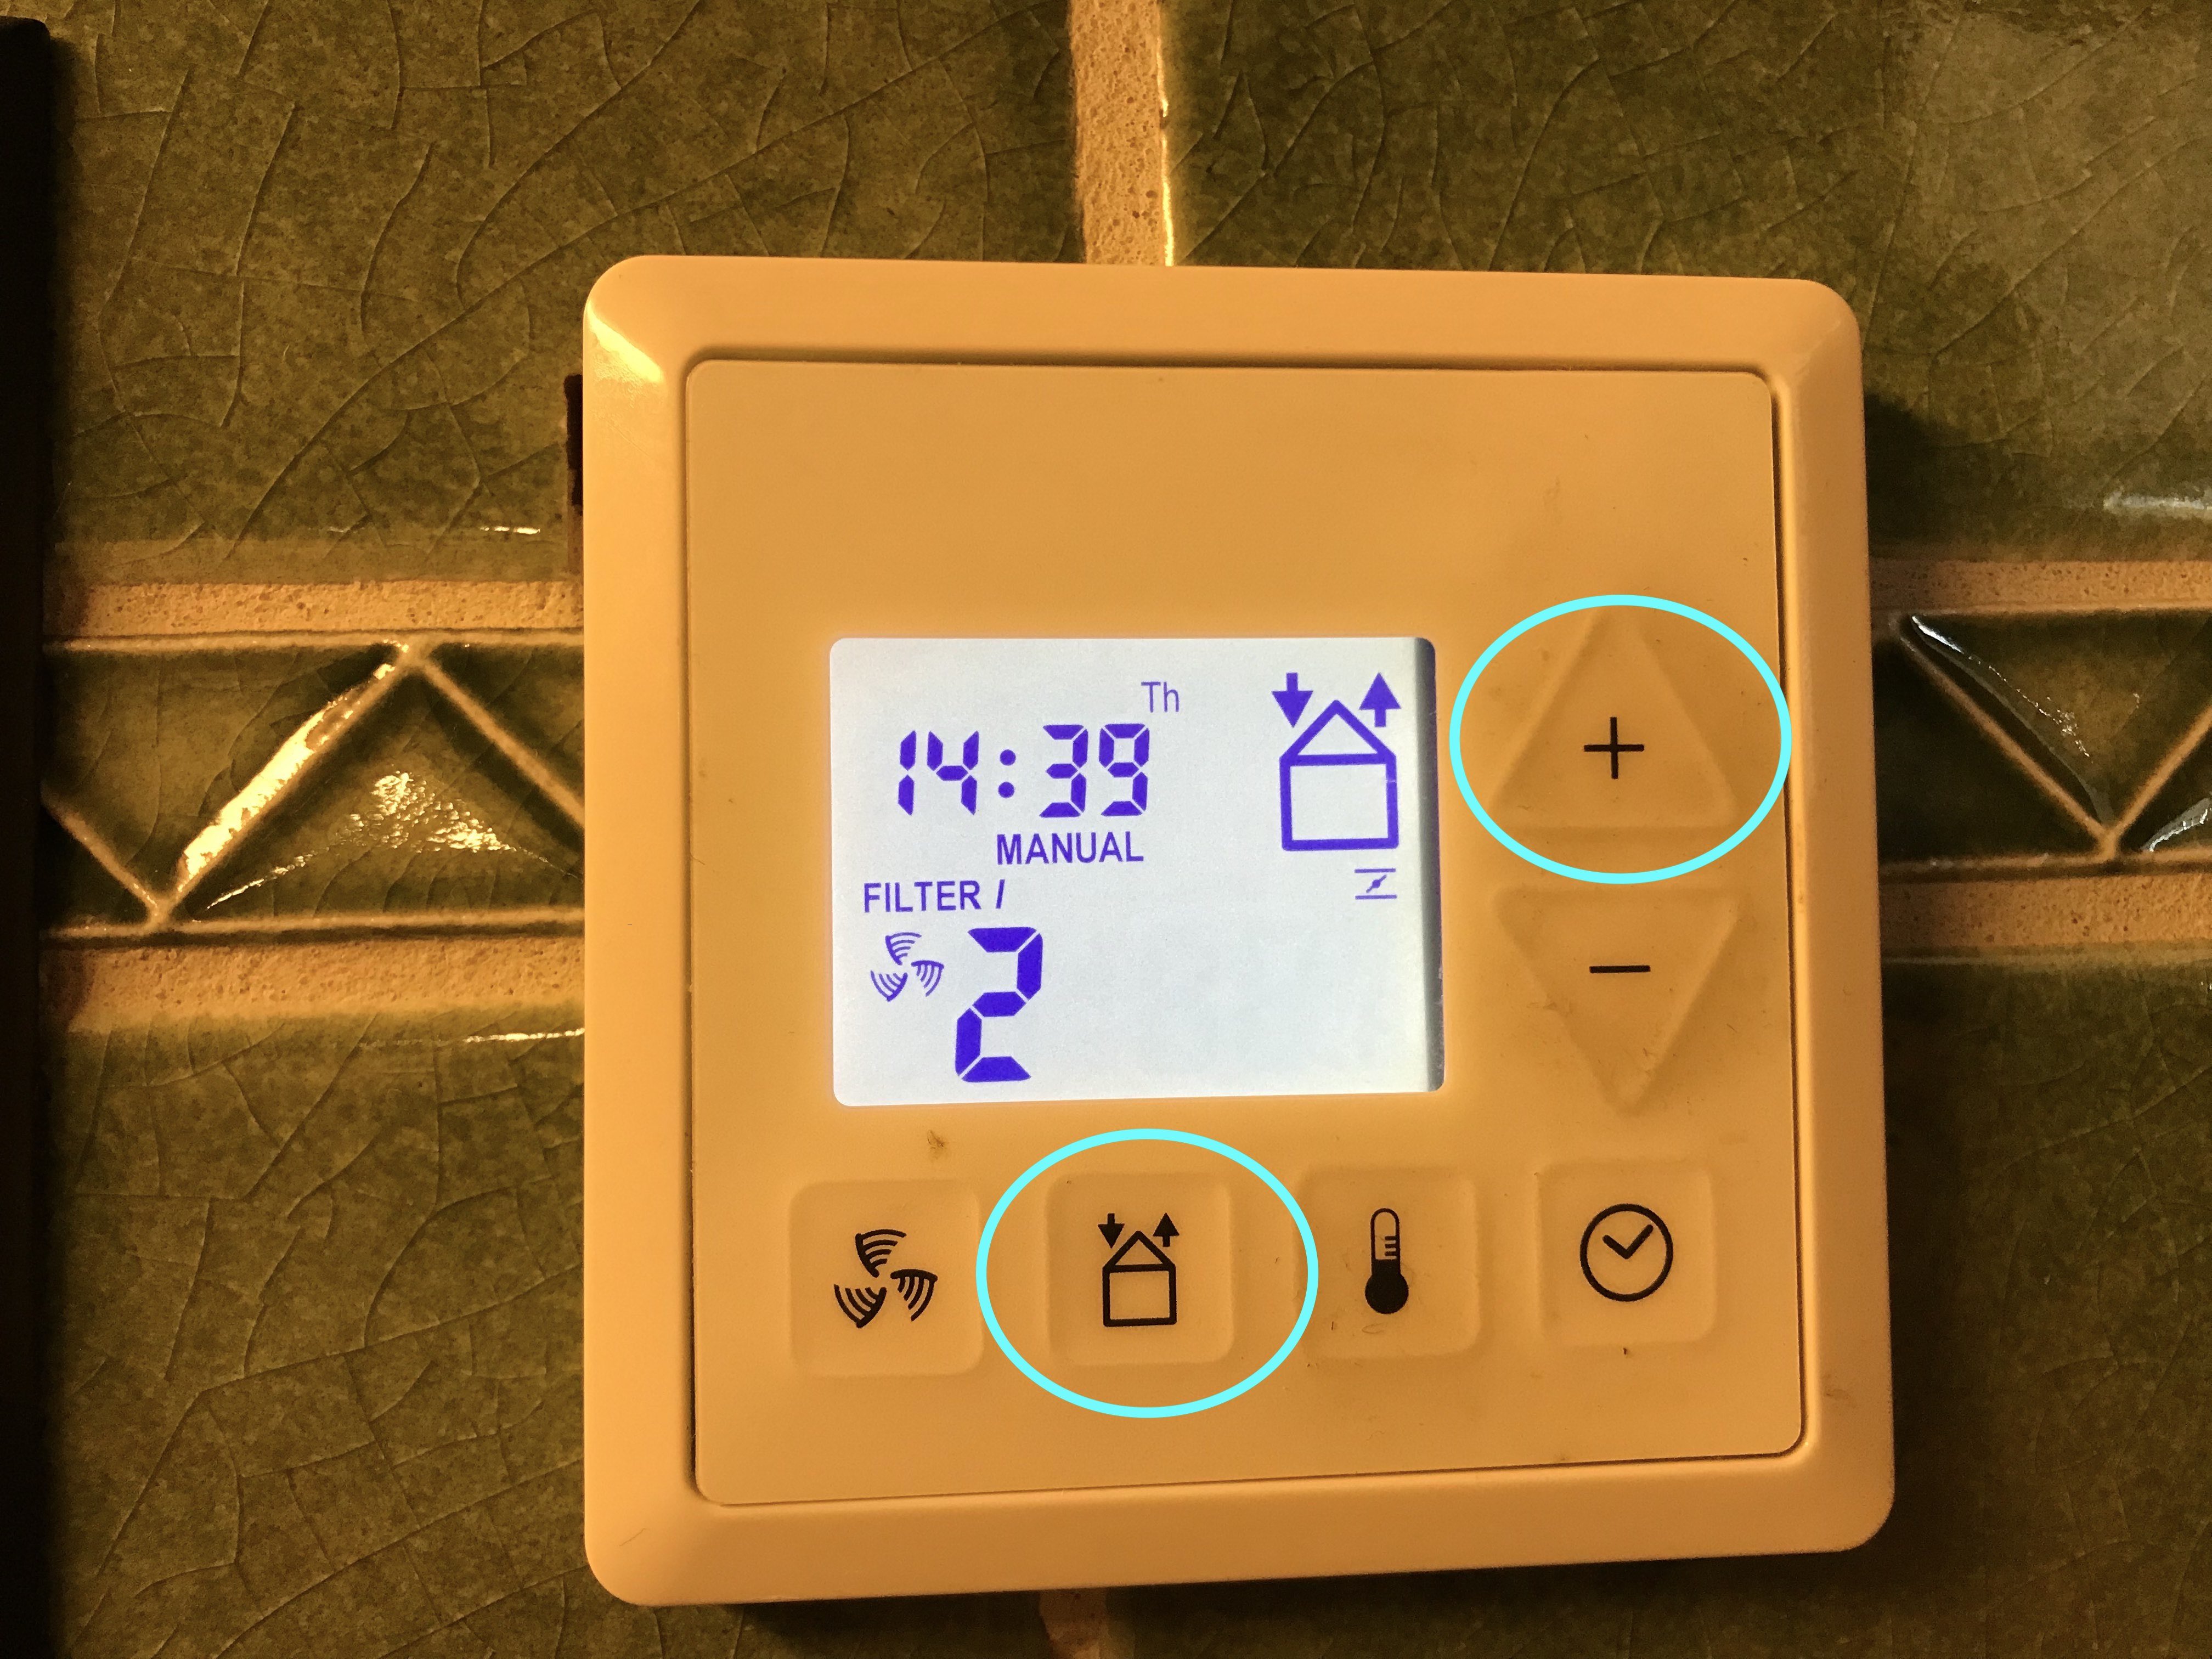
Press the supply/exhaust button and the plus button simultaneously
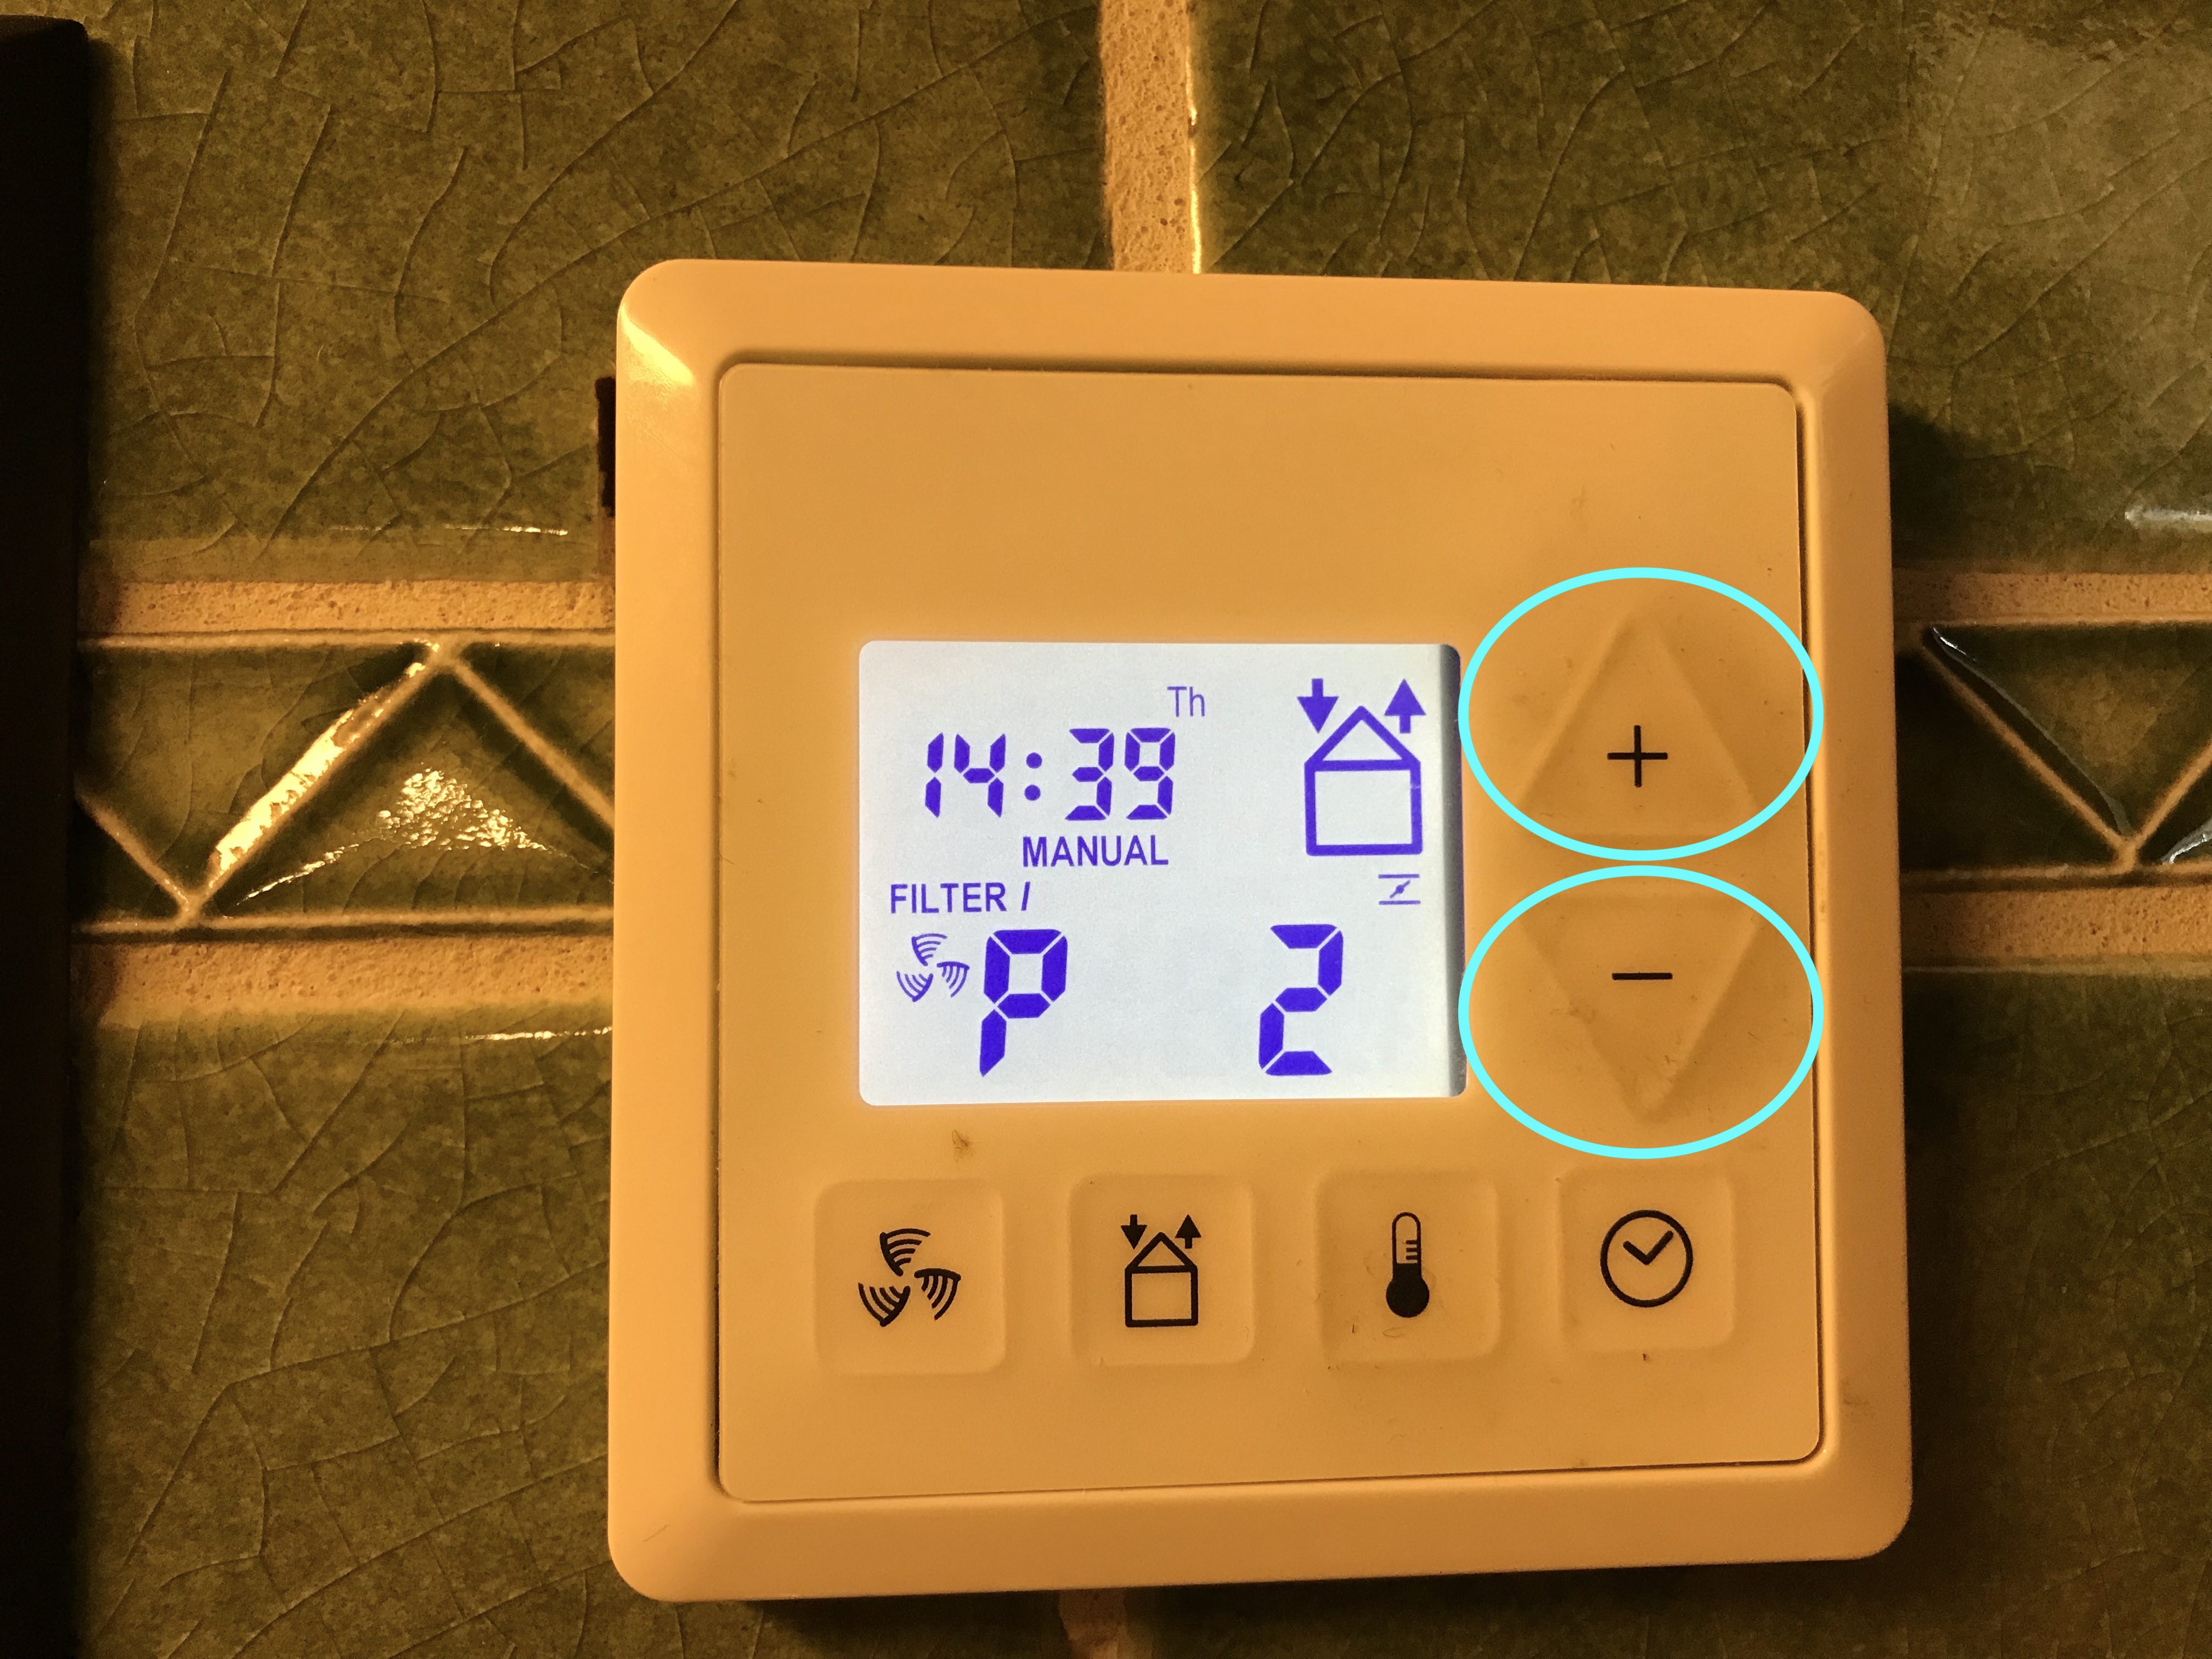
Press plus and minus button simultaneously
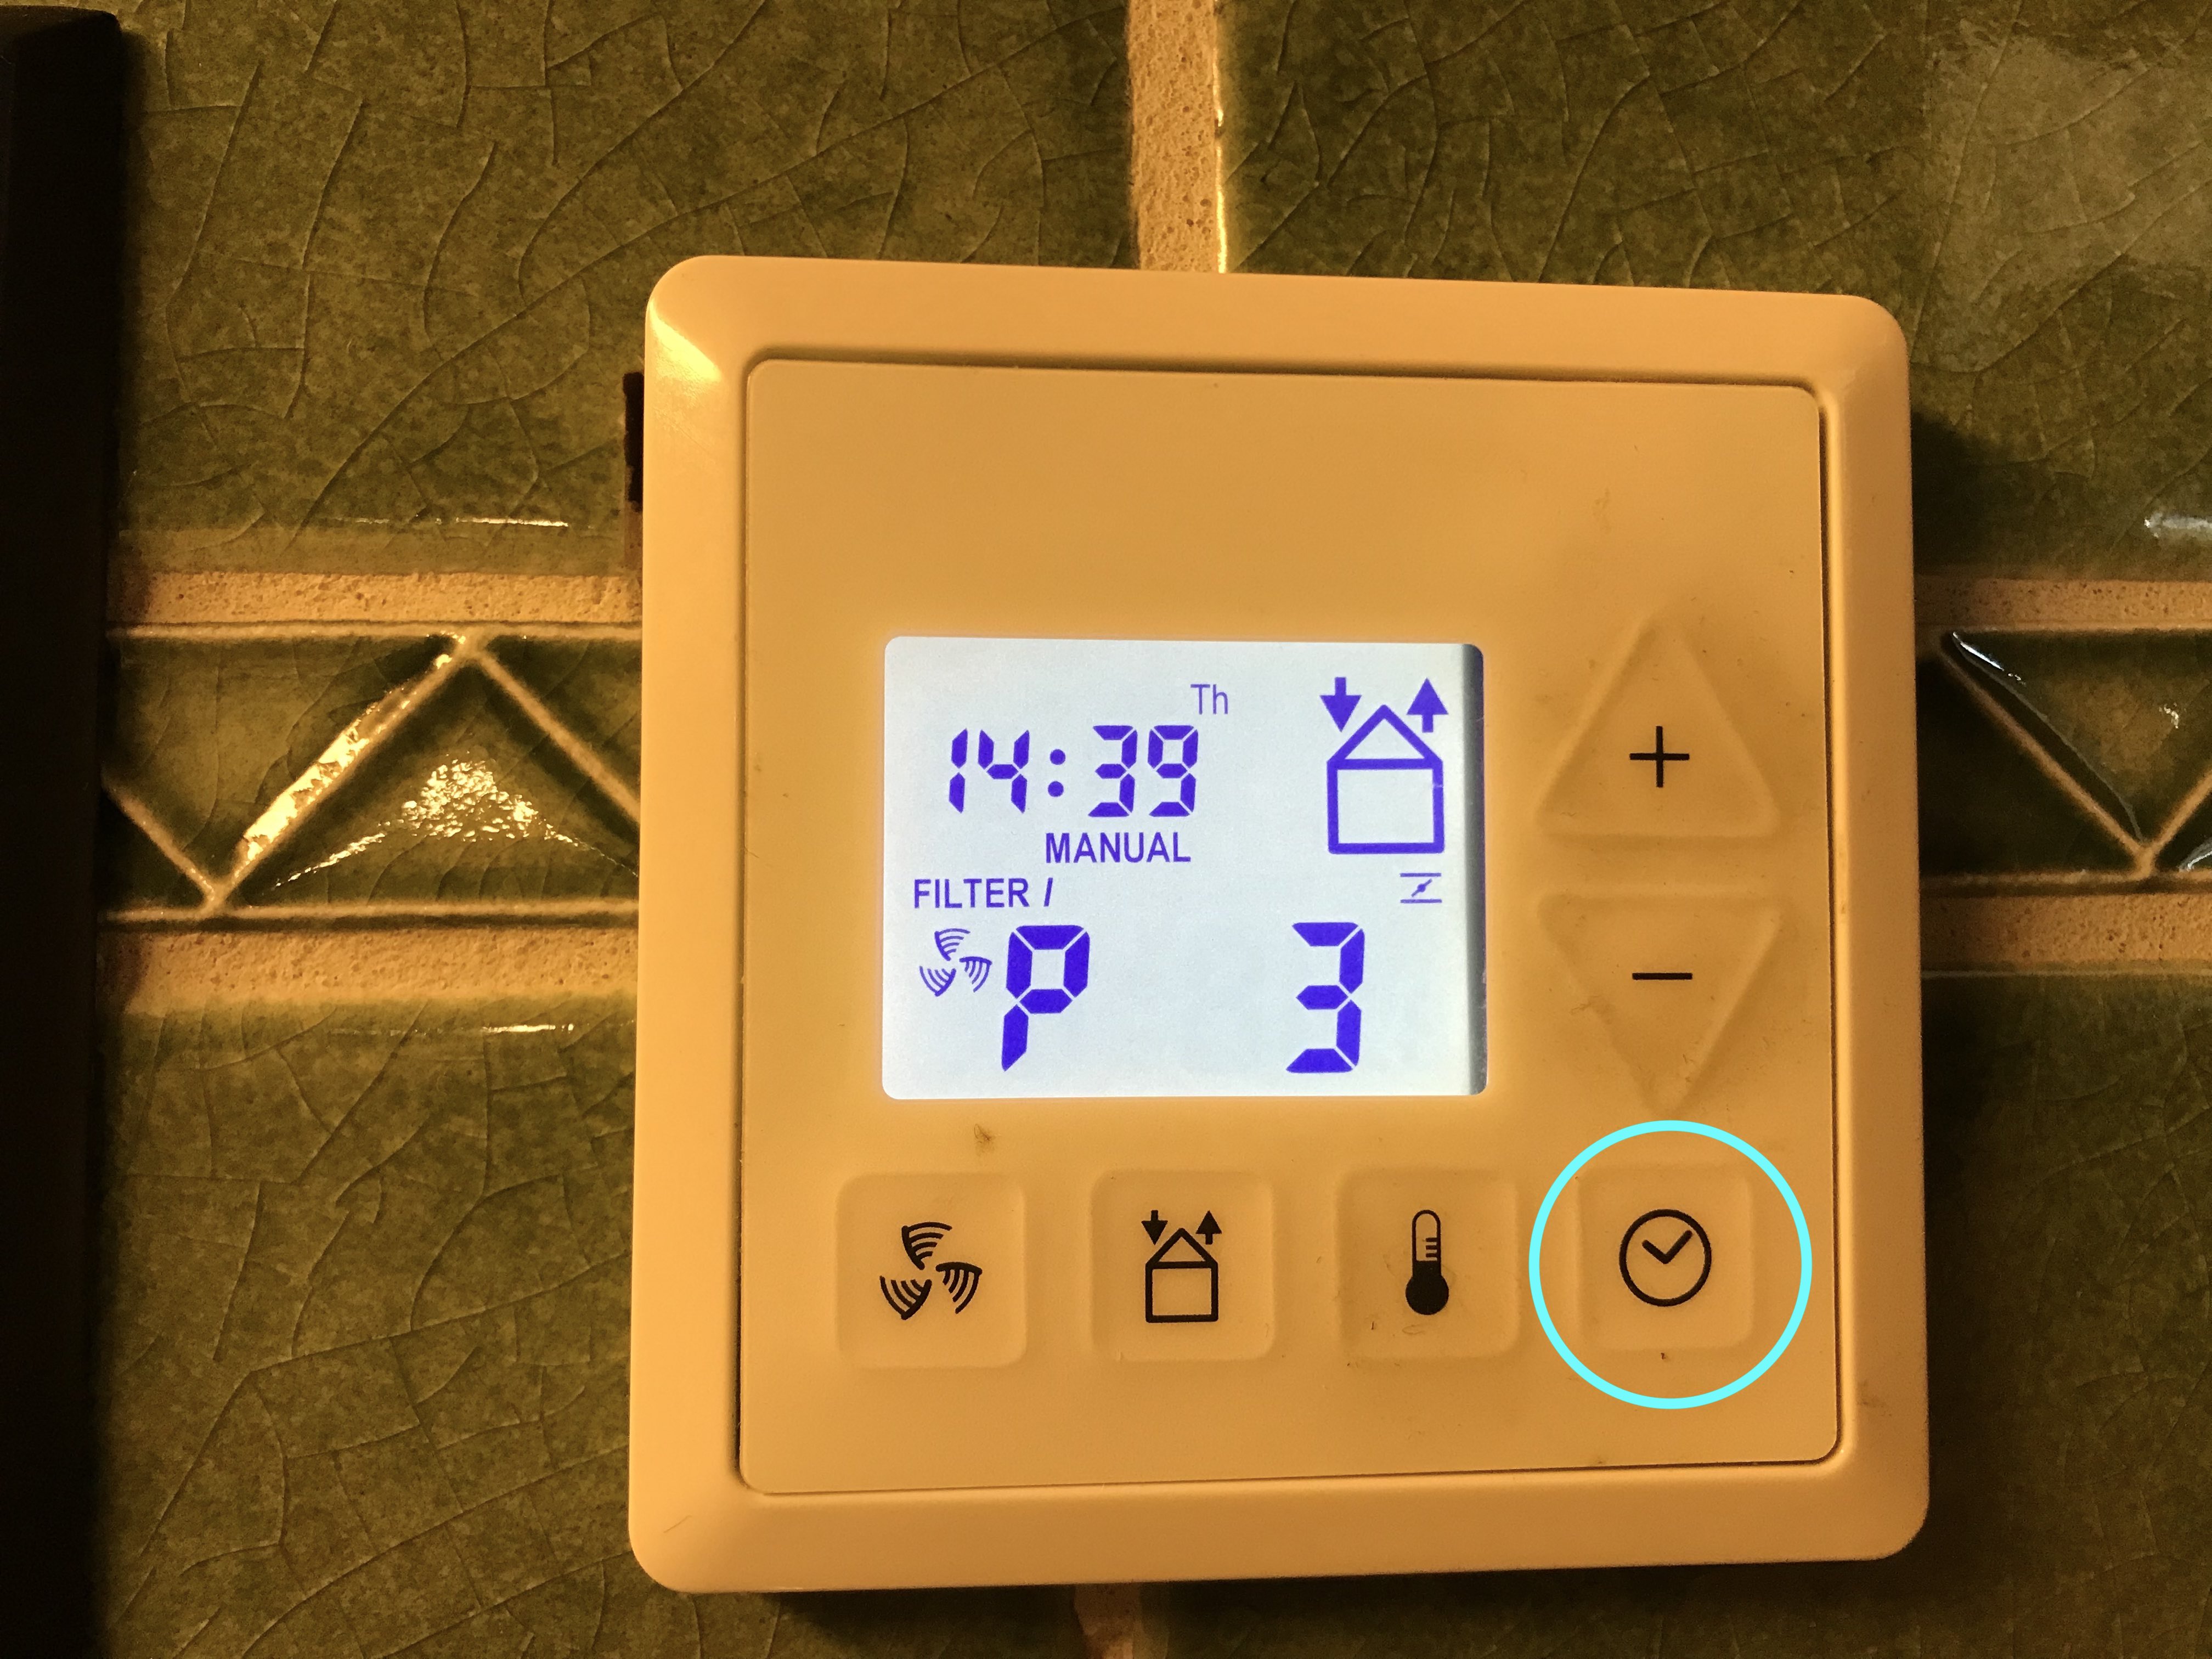
Press clock button
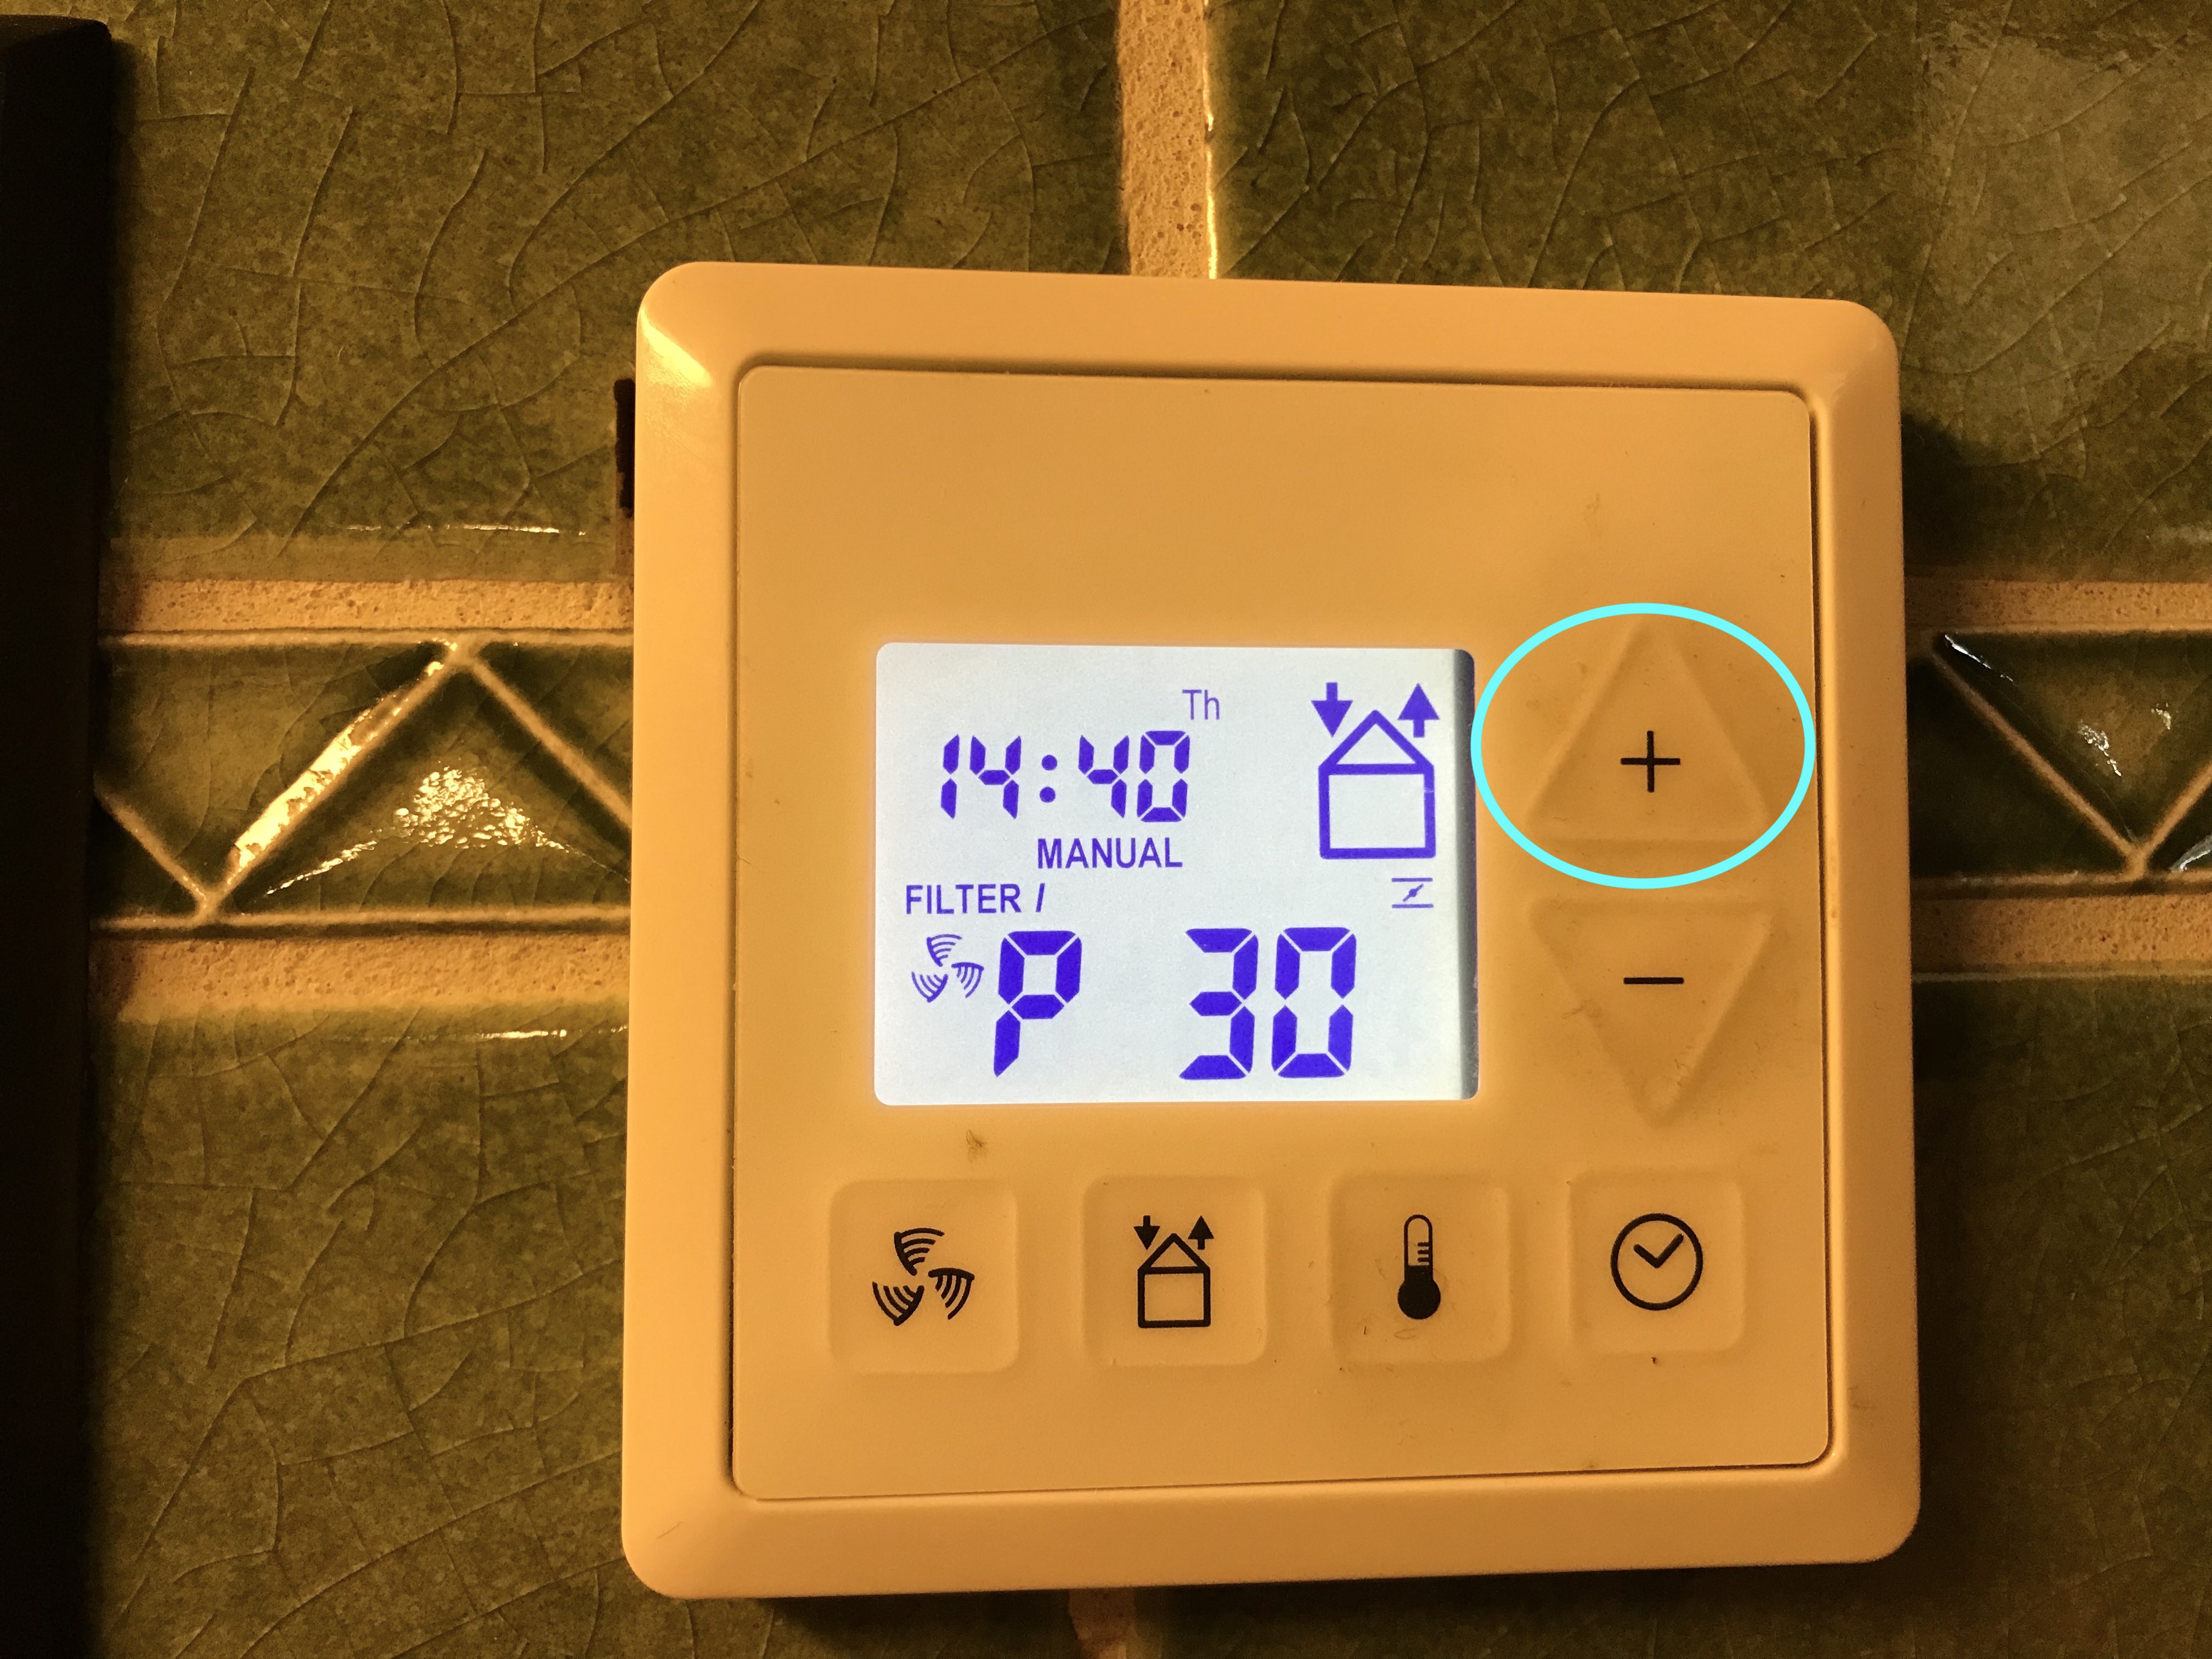
Press plus button to step through P3 menu
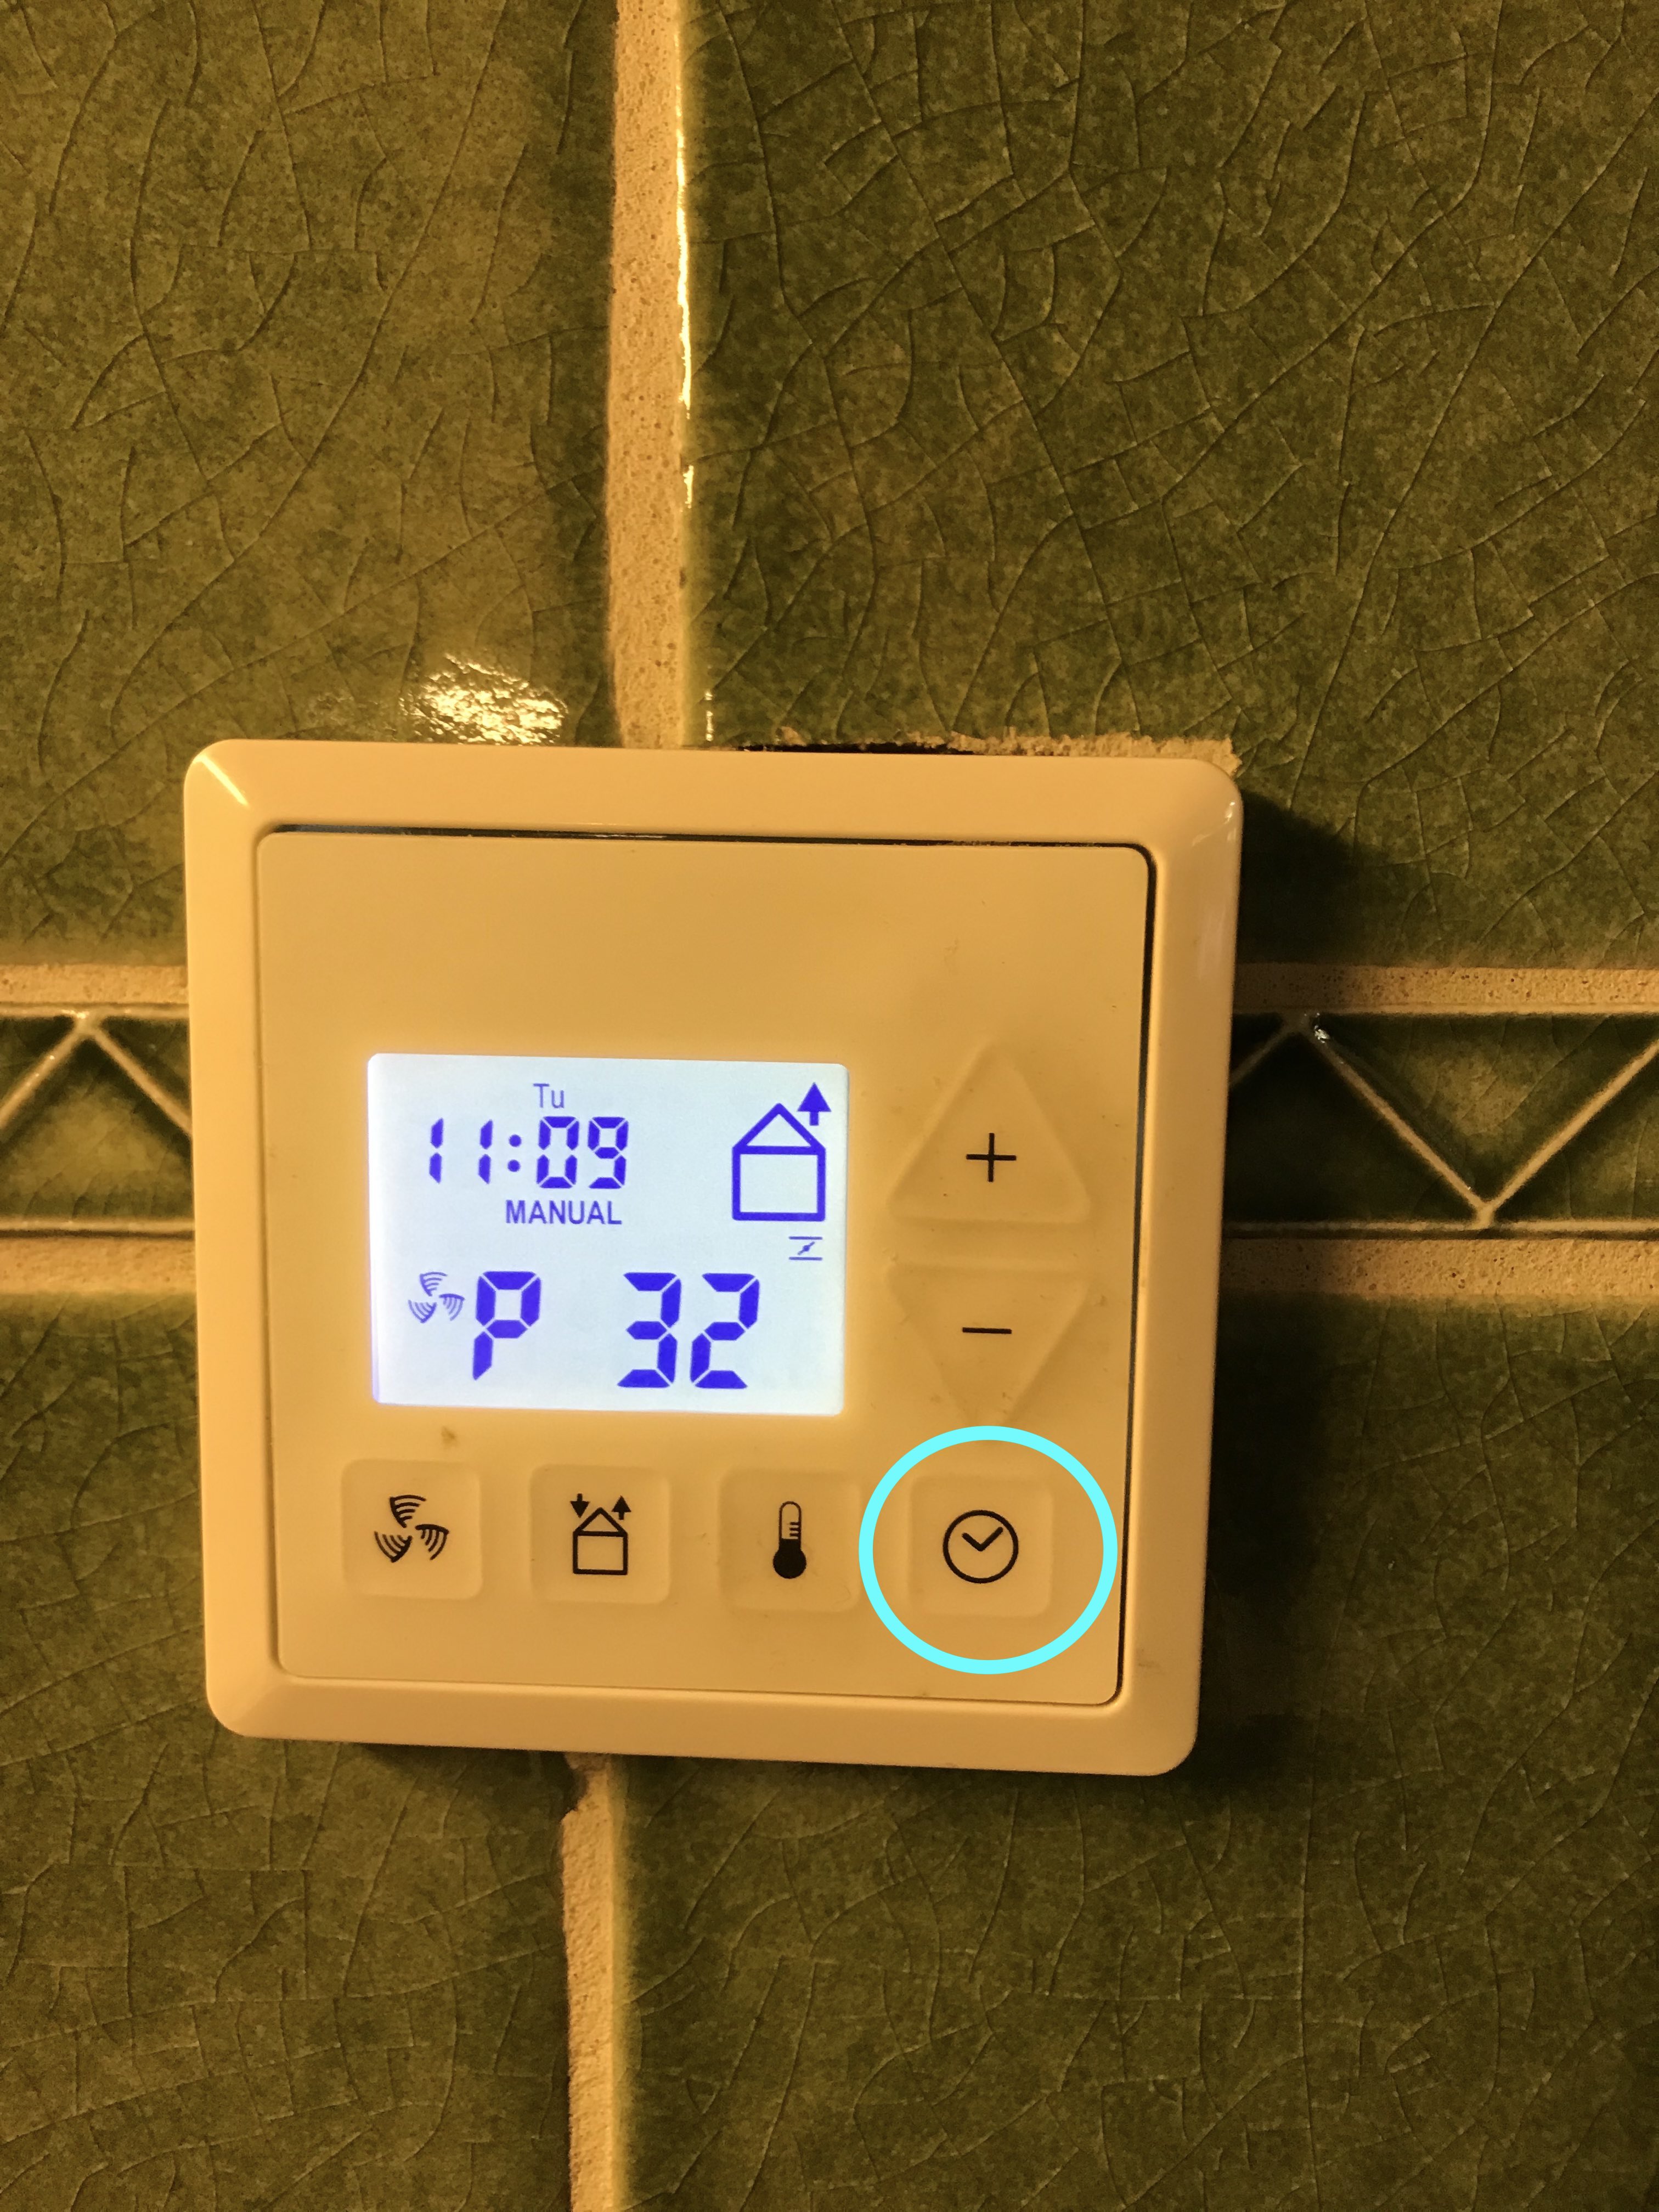
Press clock button to view/adjust value
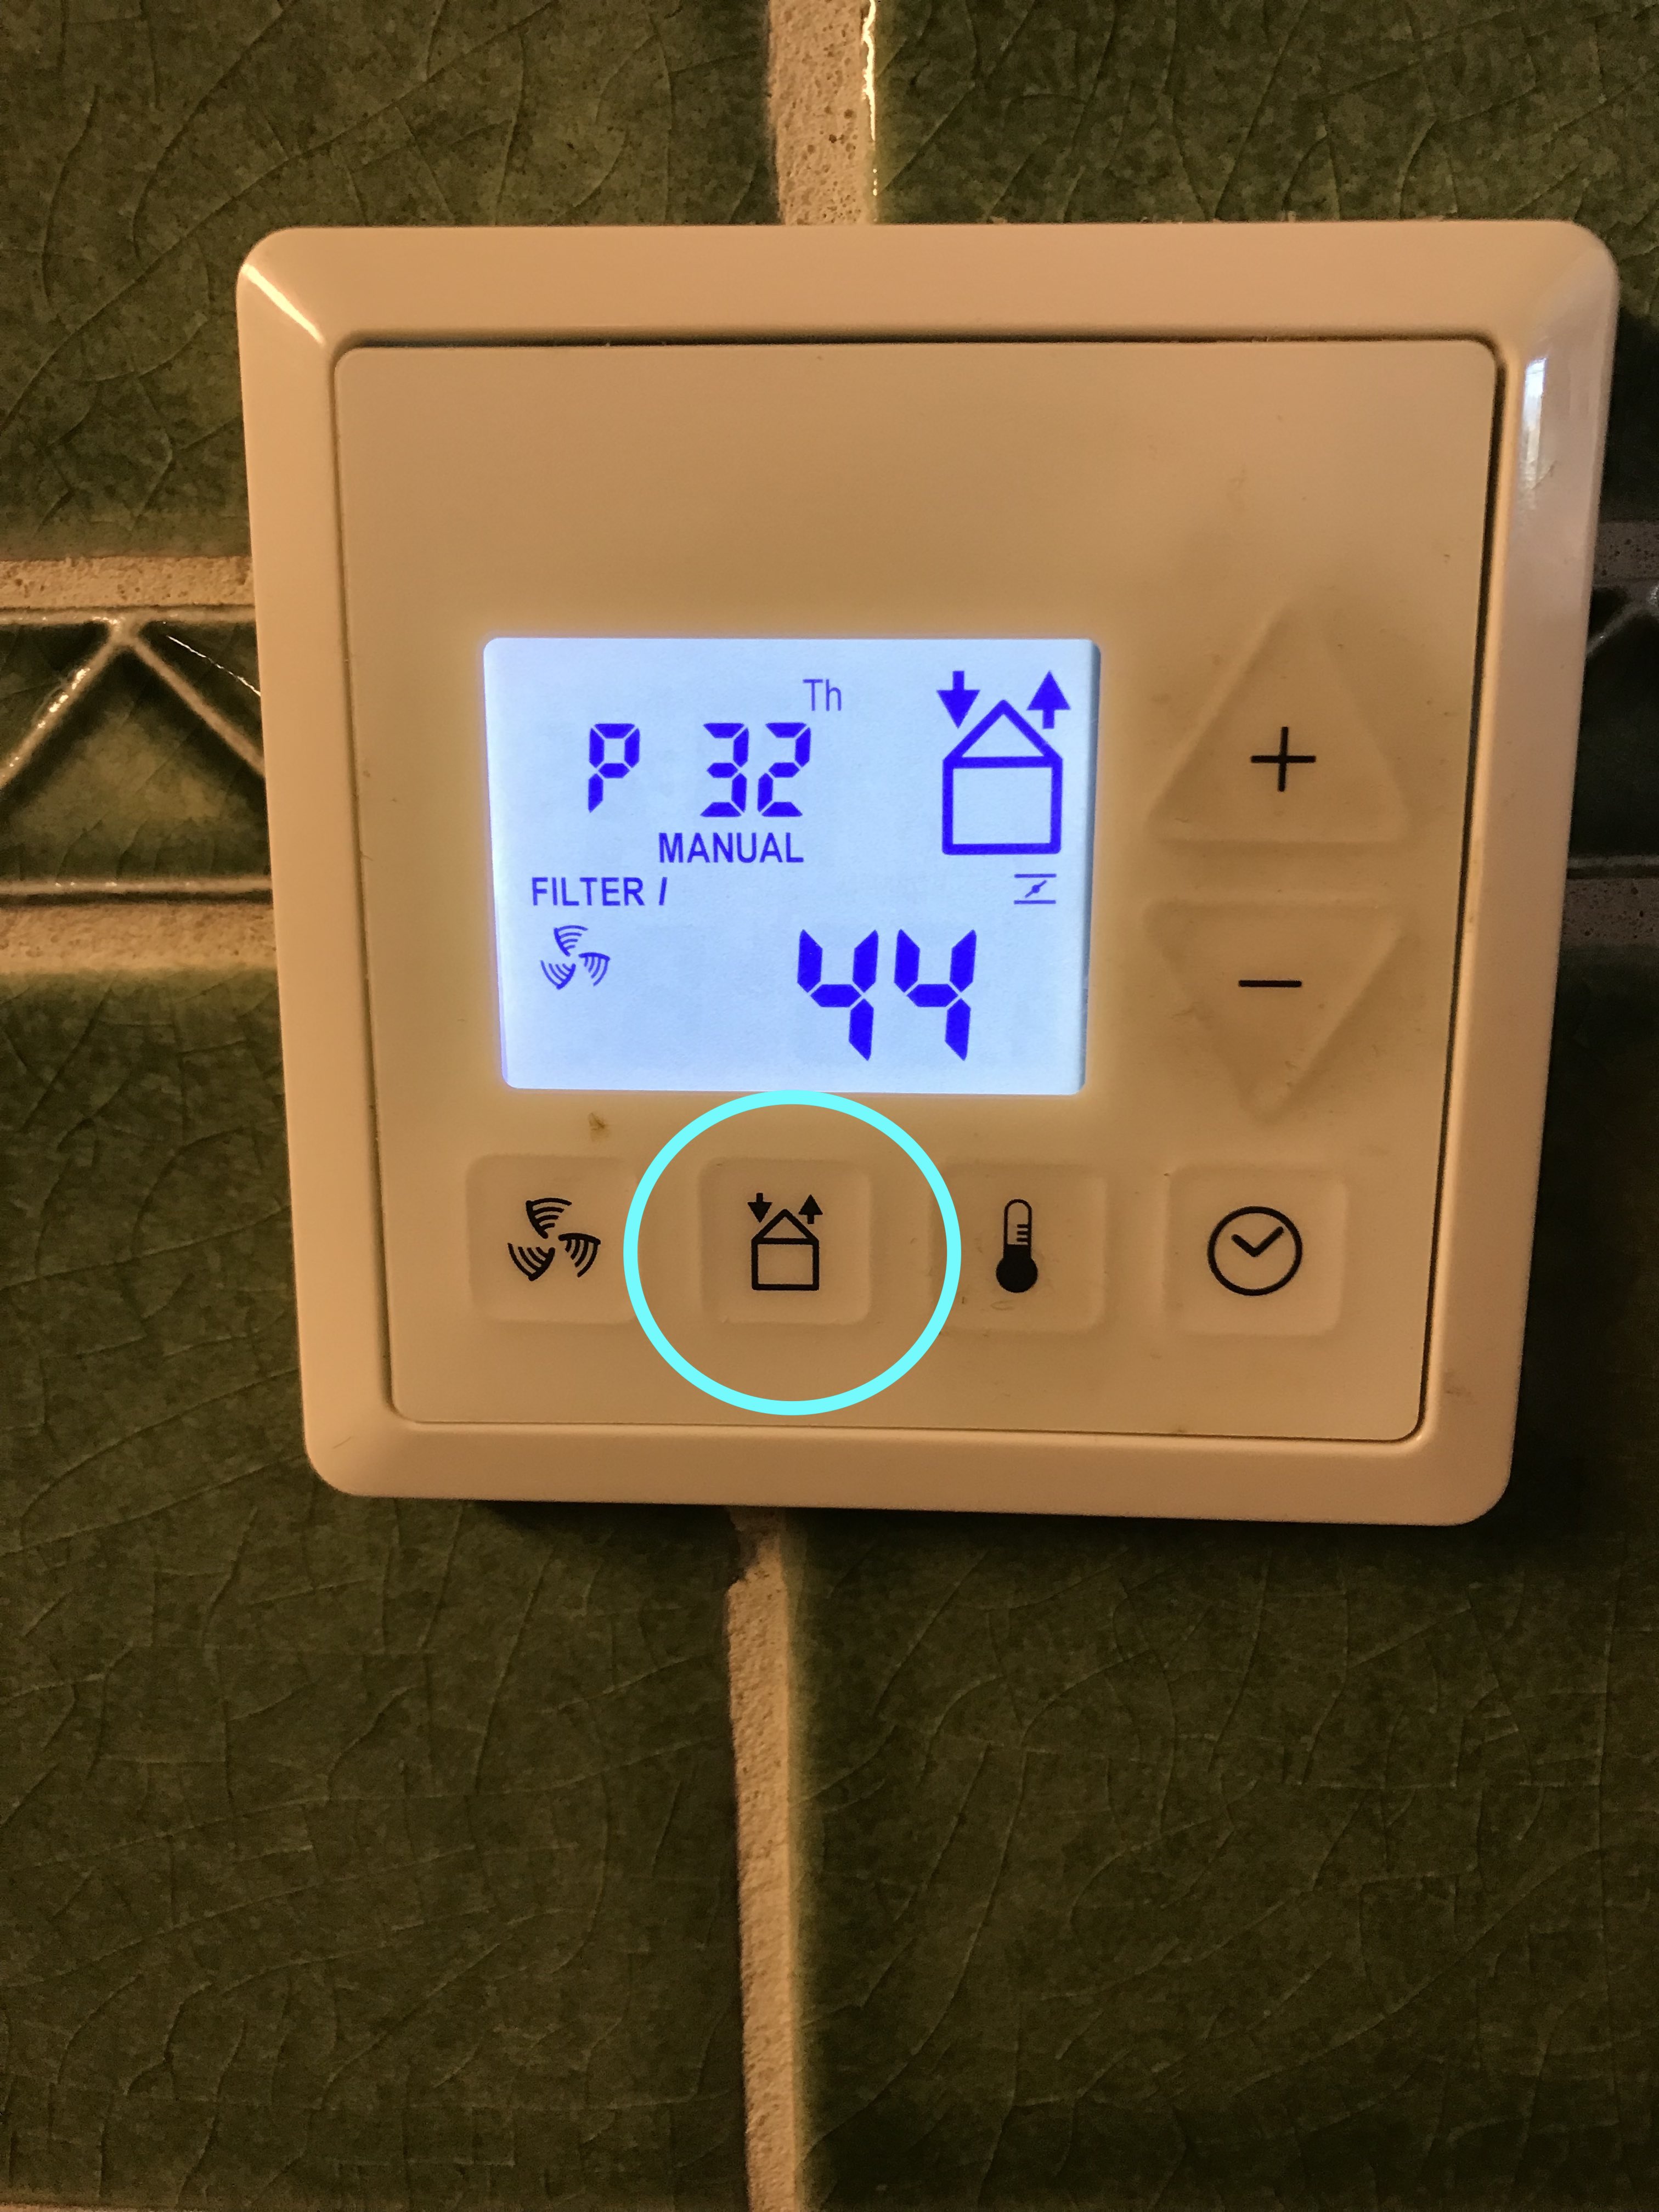
Press Supply/Exhaust button to return to previous menu

Summary of changes made to the P3 menu.
Final Measurement

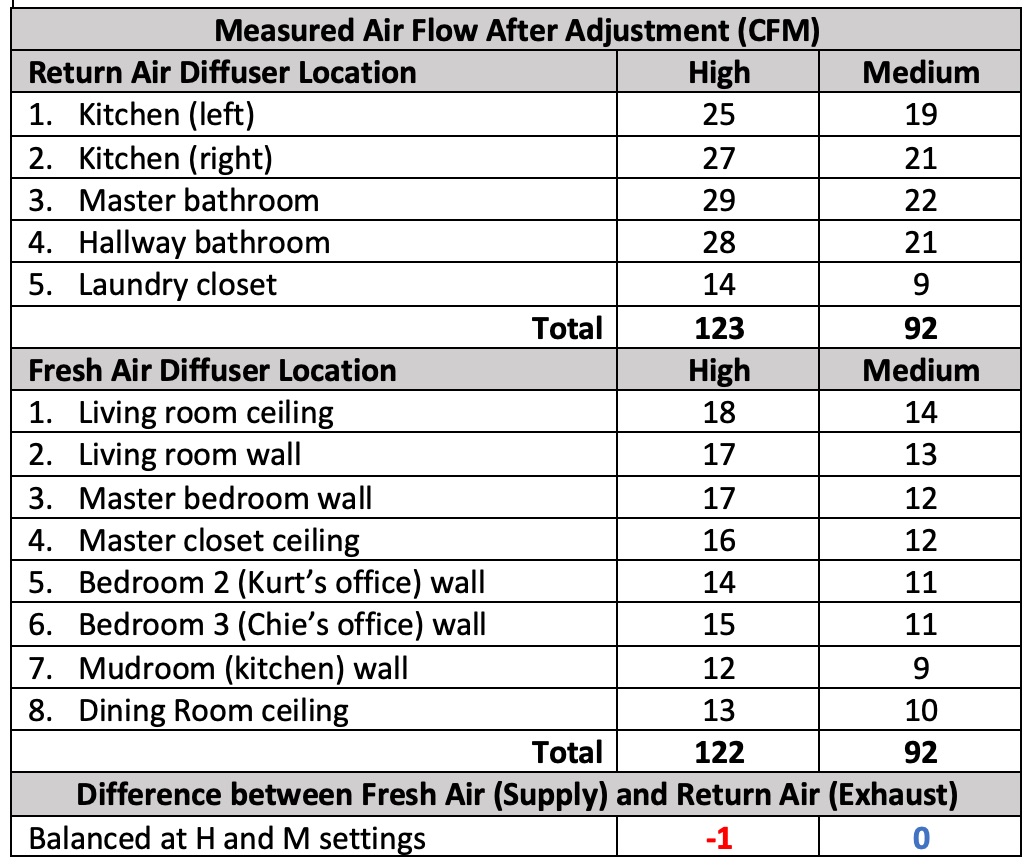
I measured the air flow at each of the 13 diffusers using the balometer and recorded the airflow. It’s pretty well balanced now.
Result: Better Indoor Air Quality

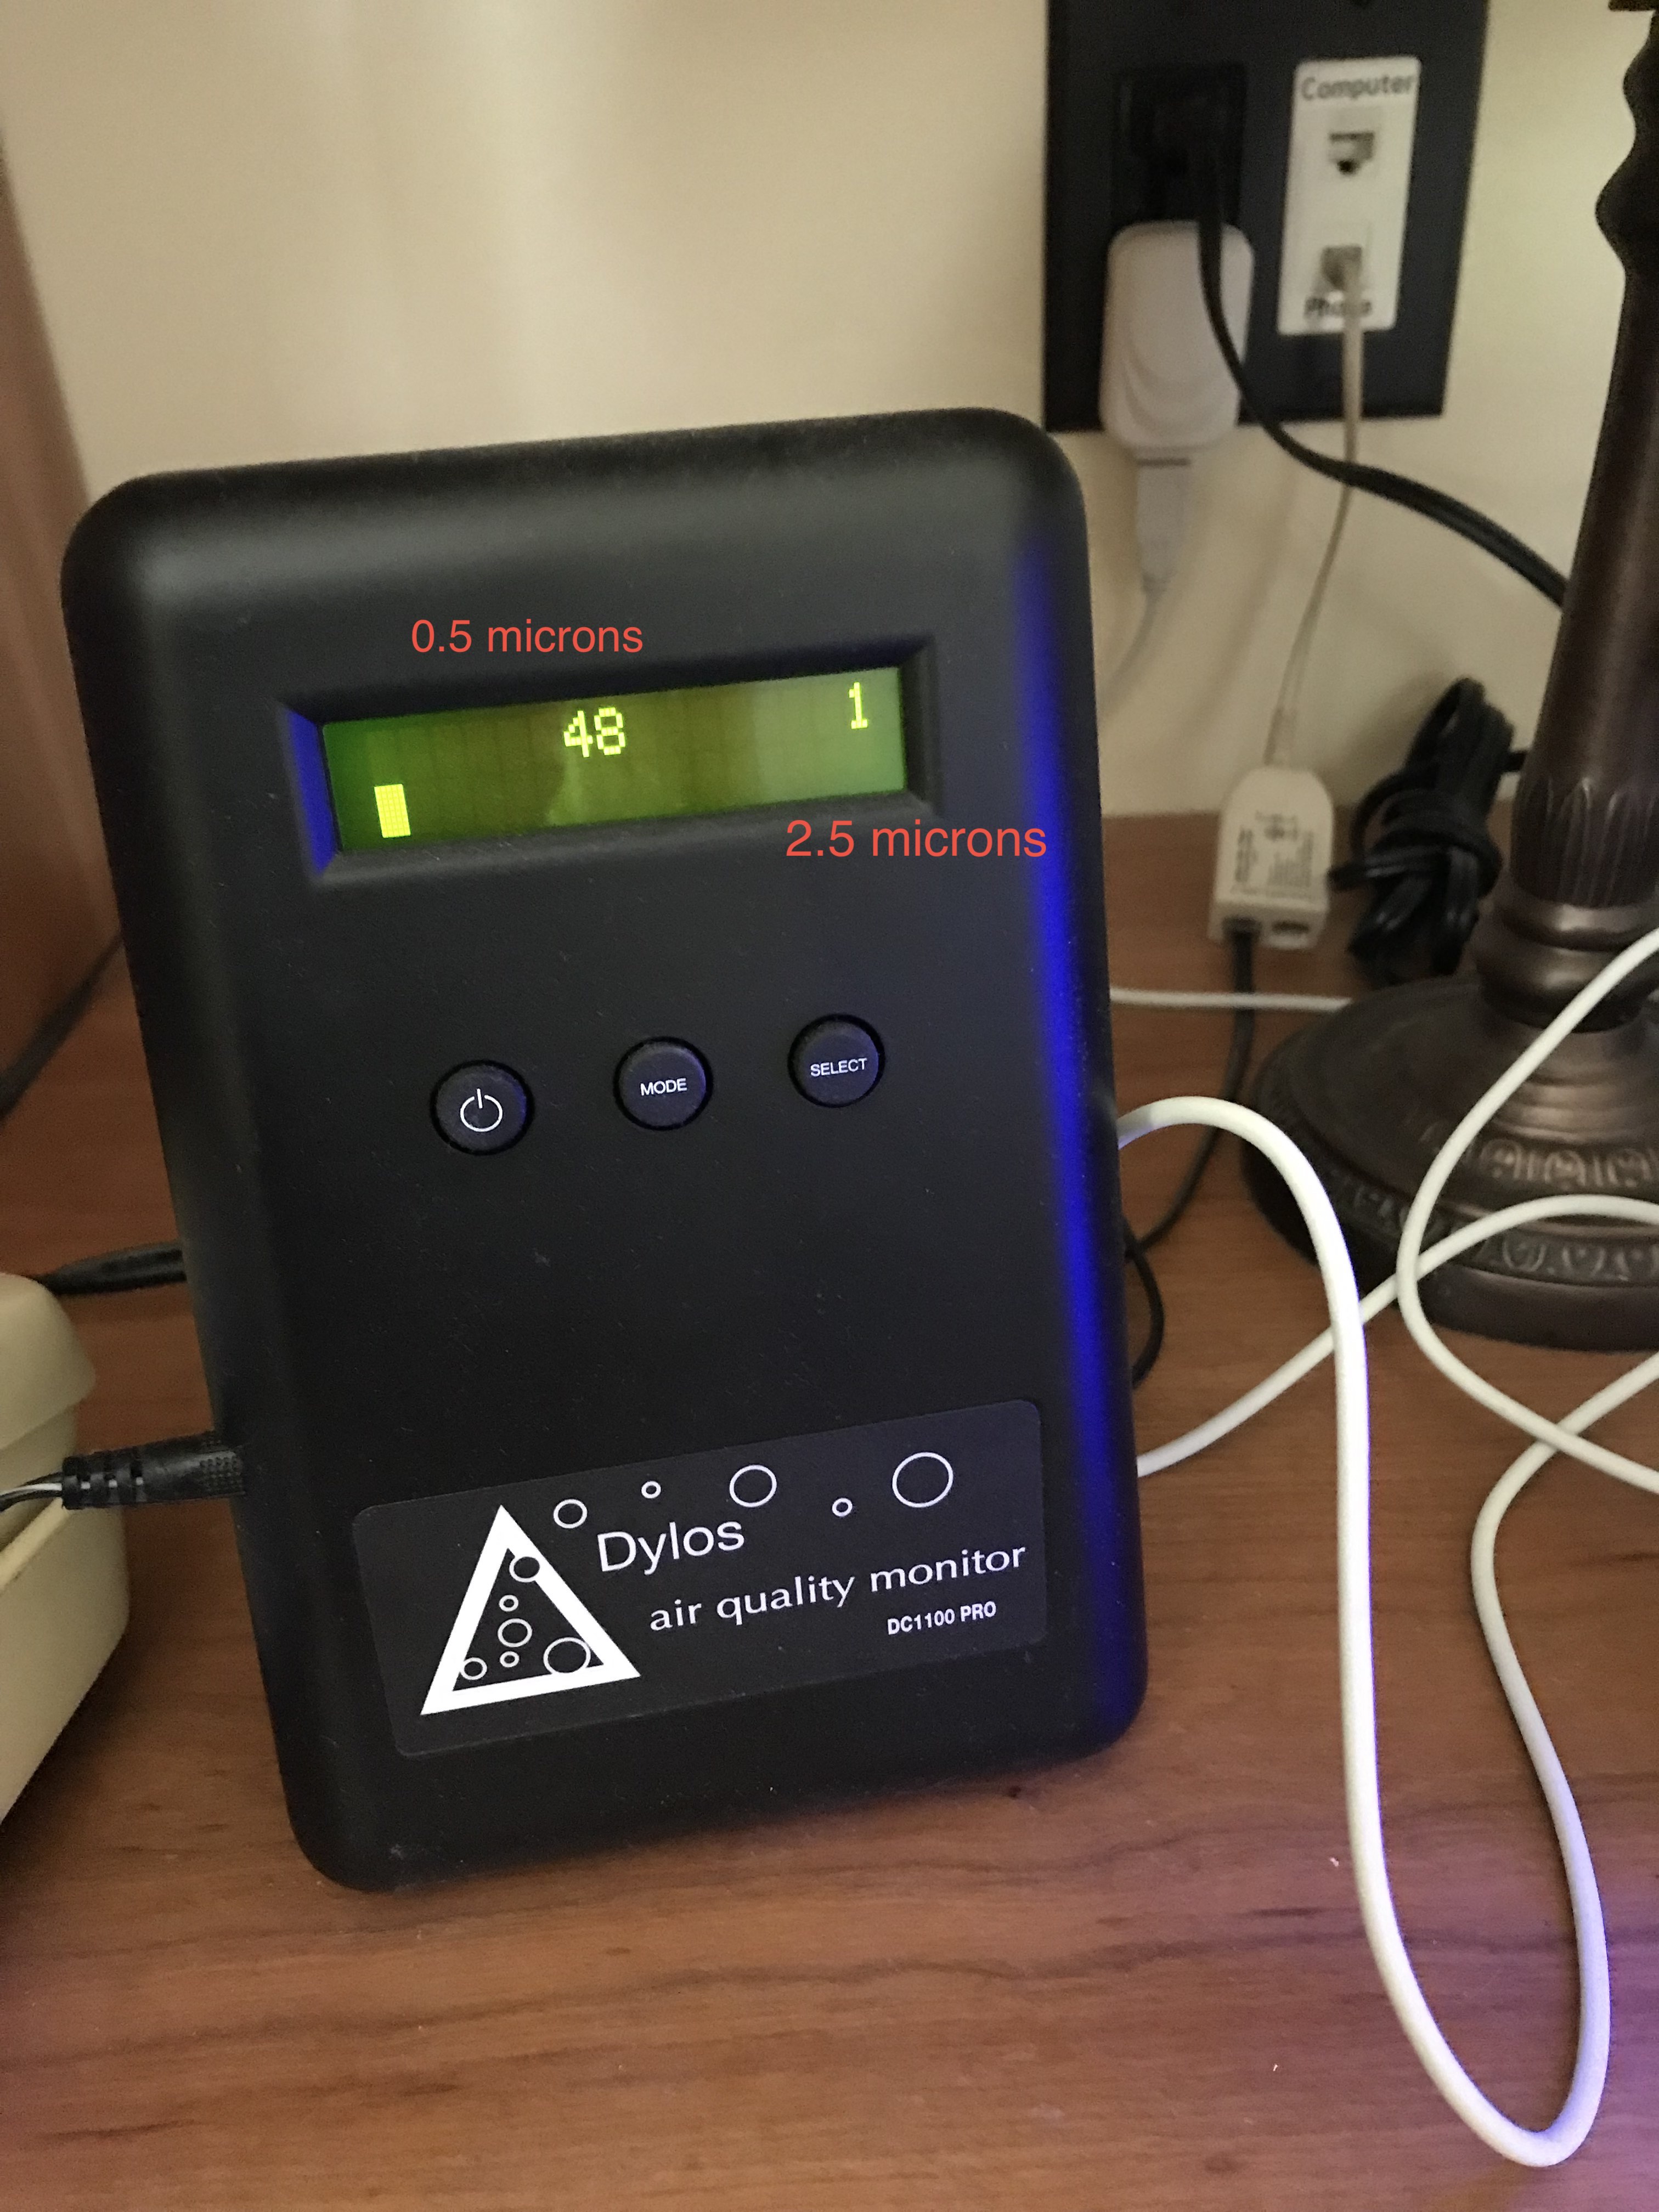
The indoor air quality is better after installing the extra filter. How much better? We haven’t seen numbers this low on the Dylos Air Quality Monitor. We feel better too!
Managing Indoor Air Quality

November 19, 2018

We learned during our first winter in our passive house that some smoke particles enter our house through the ventilation system. The smoke particles are so small that the filter doesn't catch all of it. For the last five years, our indoor air quality management routine had been unplugging our Zehnder ComfoAir 350 heat recovery ventilator (HRV) when we smelled smoke inside the house. In the last couple of weeks, we had to refine our seasonal practice because the outdoor air quality had been poor due to large fires in California.

Here's what we are doing at Midori Haus to manage our indoor air quality:

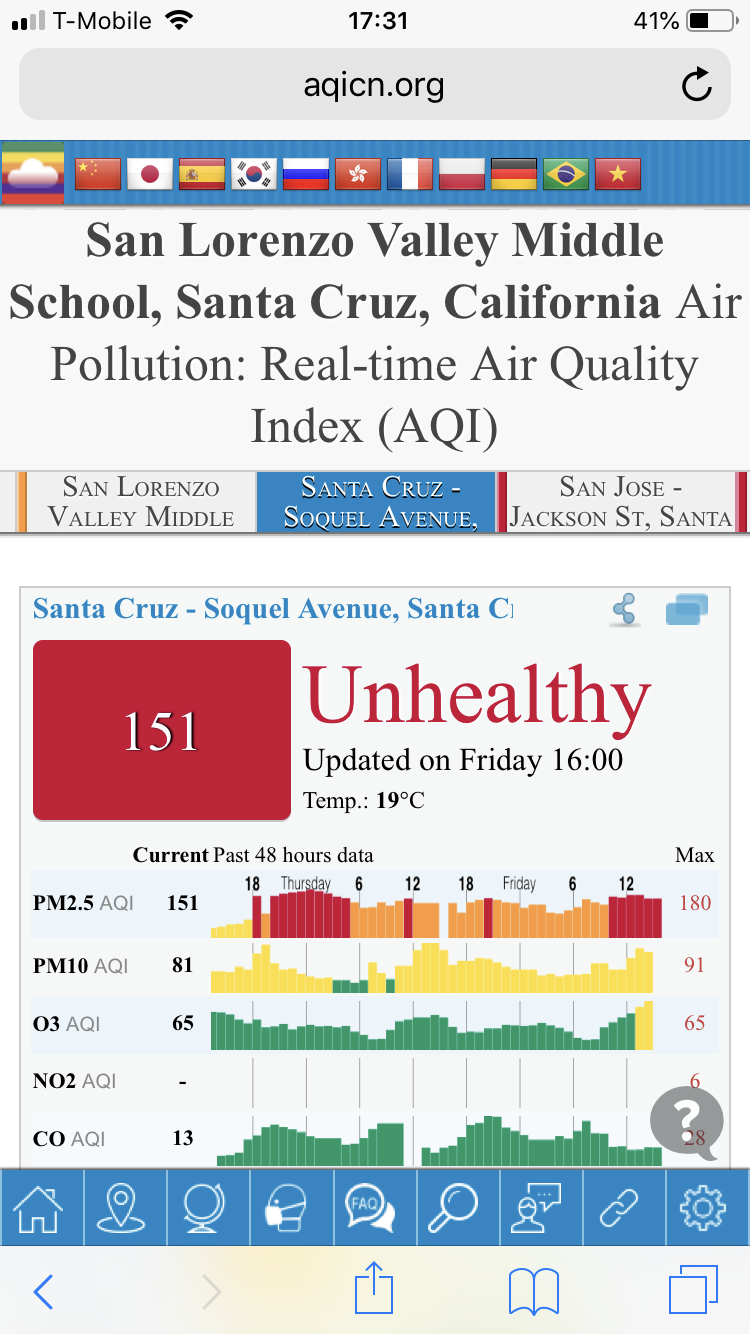
1. External air quality check. We look at the real time air quality index to see what our air quality index number is. If it’s good (green 1-50) then we leave on our heat recovery ventilator (HRV) and operate it as normal. Our normal operation is HRV fan set on medium speed and boosting up to high when we’re cooking in the kitchen. If the air quality is unhealthy (151 -200) or worse, we unplug our HRV. If the air quality is moderate (51-100) we stick our nose outdoor and sniff the air to decide whether to unplug our HRV or not. Just like temperature, there are micro variations of air quality within a given city. For example, last night we noticed and felt the air quality on the east side of out city to be much worse than on the west side. 

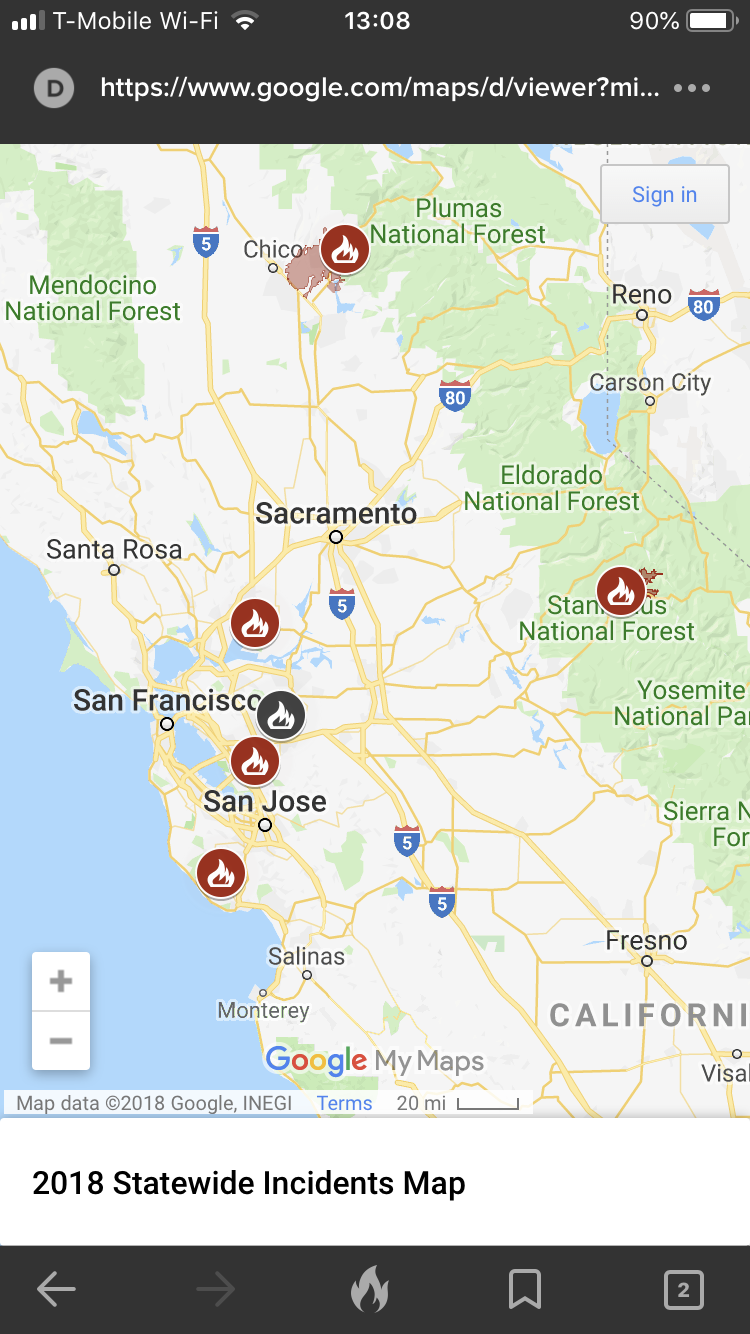
2. Check for major fires and wind direction. We look at the California statewide fire map to see what fires are burning nearby. Depending on the size and number of the fires, we may be affected by fires burning over 100 miles away. The wind pattern makes a difference, so we look at the weather data to find out the wind direction. The 10-day forecast section is useful because it will show the change in forecasted wind pattern. With may fires burning north and east of us, winds blowing from south and west bring us relief, especially since those directions are over the ocean.

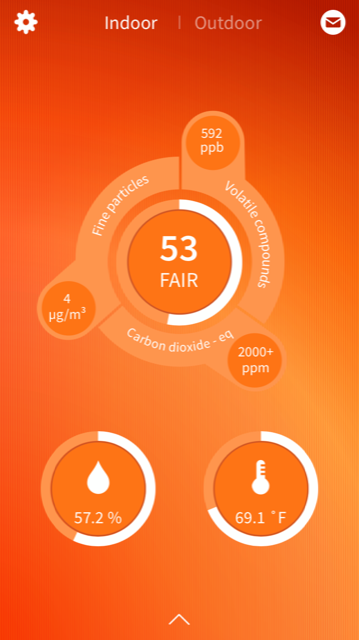
3. Check air quality levels inside the house. We look at the data from our FooBot. This is a relatively inexpensive air quality monitor for homes. We have it placed in the kitchen near the HRV supply vent. The device glows orange when air quality is bad and glows blue when it’s good. I can see the data and history on the FooBot app on my iPhone. This screen shot shows the state of our indoor air quality after leaving the HRV turned off overnight. The composite score is 53 (a score based on some algorithm) and the breakdown of the air quality components are: Fine particles (4 is great), Volatile compounds (592 is poor), and Carbon dioxide (2000 is poor). We've noticed that Volatile compounds level spikes up when we cook. We have a recirculating venthood in our kitchen, so we rely on the HRV to evacuate the cooking smells. The only way to rapidly clear the air in the kitchen is to open the windows, but we don't want to do that when the outdoor air quality is bad. When we turn off the HRV for an extended period of time, Carbon Dioxide level builds up, like on this screenshot. At these times we turn on the HRV for a short while to flush out the VOC and CO2. During this time the particle count goes up, but we let the air purifier handle that.

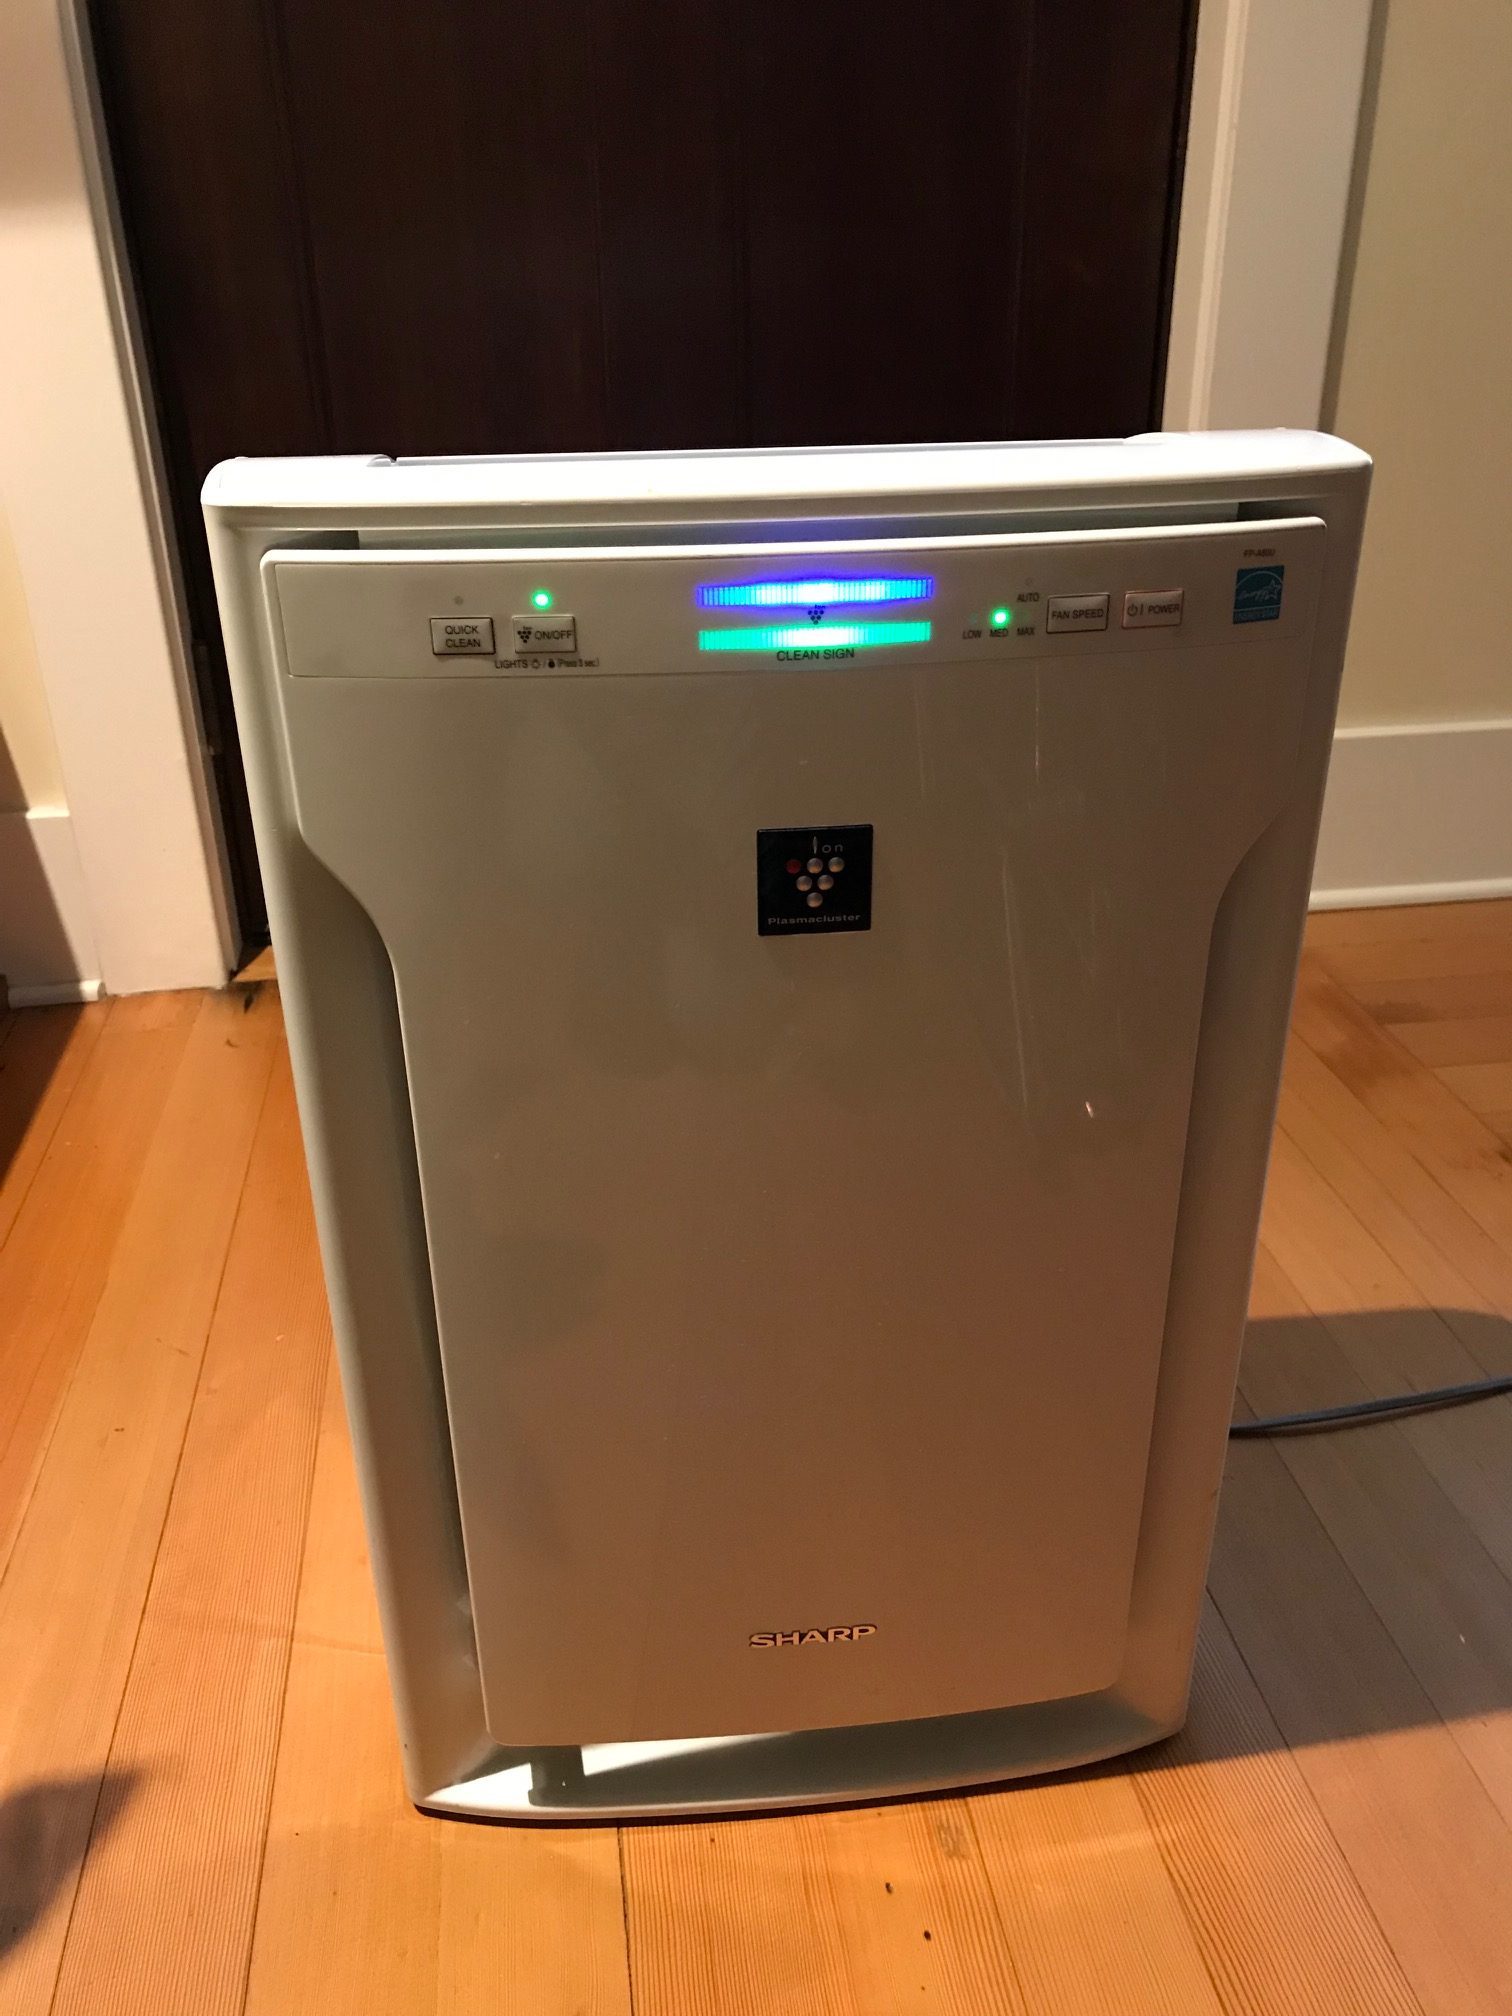
4. Run an air purifier. Couple of years ago, Kurt did some research and bought a Plasmacluster Ion technology air purifier from Sharp. Most of the time it sits in his office at work, but recently he’s been hauling this back home in the evening and weekends. This cleans the air and we can feel it. We have recent experience where this device changed our panic to calm. On the morning of Saturday November 10 our house stank of skunk in addition to the smoke. Our neighbor’s dog got sprayed in the middle of the night and HRV sucked in the skunk smell in addition to the smoke. The smoke and skunk particles are so small that they get through despite the layers of filters we have. We were about to host an open house and tour for the International Passive House Days event and we were worried about the indoor air quality. We ran the air purifier for 10 - 30 minutes in each room and it cleared up nicely.

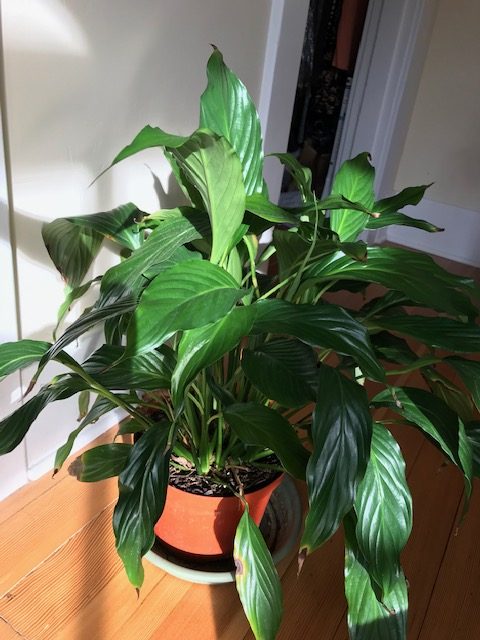
5. House plants in place to clean the air. We have house plants in every room. Plants provide oxygen and absorb carbon dioxide. Several years ago, Kurt bought a lot of peace lily plants after learning that the plant removes chemicals such as benzene and formaldehyde. These plants also help with the humidity. This post from Tips Bulletin has photos and descriptions of the different plants. 

We enjoy living in Midori Haus built to the Passive House (Passivhaus) standard. The tightly sealed enclosure, about 10 times tighter than conventionally built houses, keeps random air from coming in from random places. The heat recovery ventilator provides us with continuous filtered fresh air. Only during these extended bad air quality days do we need to pay special attention to our ventilation system to keep our indoor air clean. Our next experiment will be to install the Zehnder ComfoWell F9 filter (yellow filter that has MERV 15 rating) at the air intake, next to the charcoal filter. If it arrives before the outdoor air clears up, we’ll be able to measure the result of this new filter.

>