Heatwave During Wildfire: Indoor Air Quality Decisions

October 8, 2020

My husband and I looked at each other in the pre-dawn darkness on September 5, 2020. The thing we were worried about was happening. Weather forecast showed heatwave for the next few days in midst of heavy air pollution from wildfire smoke. This meant the two strategies we’ve used to manage thermal comfort and indoor air quality were at odds. We asked ourselves how do we manage this? Which do we prioritize?

Here’s the background to frame the situation we faced.

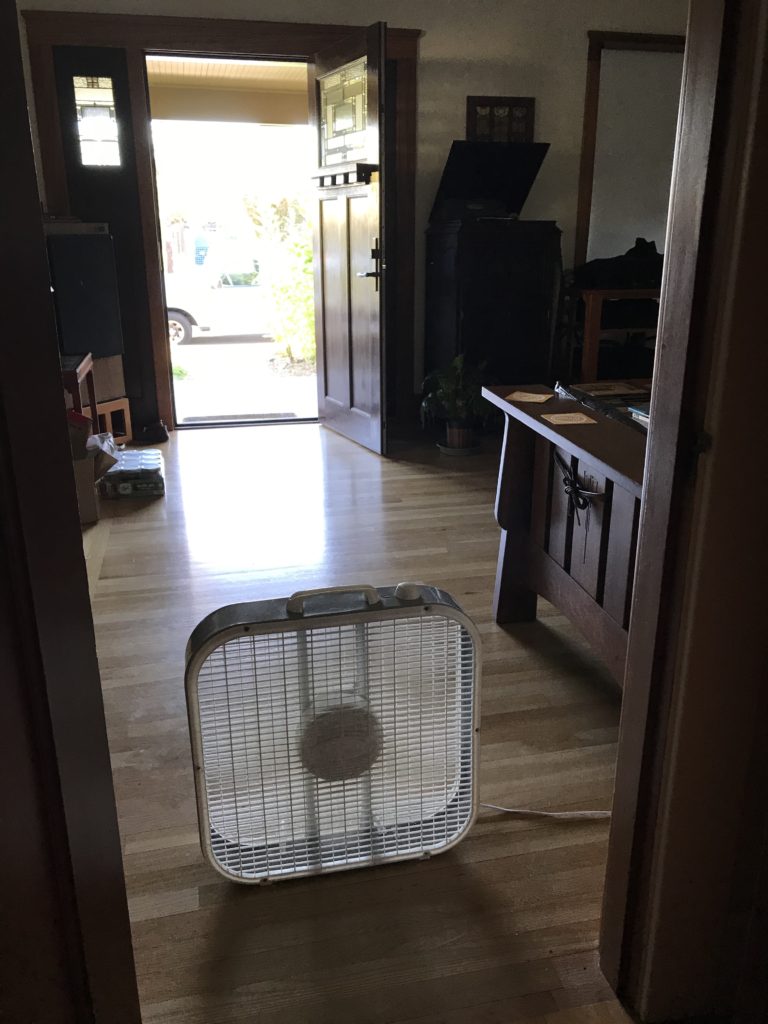
We don’t have an air conditioner to cool the house. The mild climate we have in the central coast of California allows us to hum along in comfort with the heat recovery ventilator (HRV) in our Passivhaus. When we do have a heatwave where the daytime temperature soars to about 100F (38C), we pre-cool the house during the early morning hours by blowing a box fan in the hallway after opening all of the doors and windows. Some call this strategy “night flushing,” and it works for us because our coastal climate lowers the overnight outdoor temperature to about 63F (17C).

Our air pollution routine is the opposite of the night flushing routine. When the outdoor air is bad, we turned off the HRV and wait it out. This works for a temporary event in the winter when neighbors light up their fireplaces. We turned the HRV back on after a few hours. This had been effective in the winter.  

It’s early September when we faced this decision, but first let’s rewind to the beautiful lightning show of August 16. I saw several friends post beautiful photos of the lightning storm like this one.

Photo by Clay Butler

Over 11,000 lightning struck that night and started several wildfires. The closest one to me was the CZU Lightning Complex Fire that started on August 16, 2020 and eventually burnt 86,509 acres (35,009 hectares) and destroyed 1,490 buildings. At one point, the fire was less than 10 miles away from my house and we had considered a voluntary evacuation. Smoke filled the air. Ashes covered my car. As flecks of ash clung to our clothing and hair, I appreciated the mask I was wearing for COVID-19. The air quality during the first few weeks of the fire varied, depending on the direction of the wind. Early on when the wind was blowing from the ocean, the outdoor air was good. When the wind shifted, we got not only the ashes from the CZU fire, but several other wildfires burning in the 200-mile radius.  

20 days after the CZU Lightning Complex Fire started, the heatwave came. On the morning of September 5, 2020, we prioritized thermal comfort over indoor air quality. Why? Because we could deal with the dirty air inside the house by running air purifiers inside the house, but we don’t have another way to cool the house. Purple Air map showed the air quality in our neighborhood to be moderate (Air Quality Indicator range 80-90), so we went ahead with the night flushing.
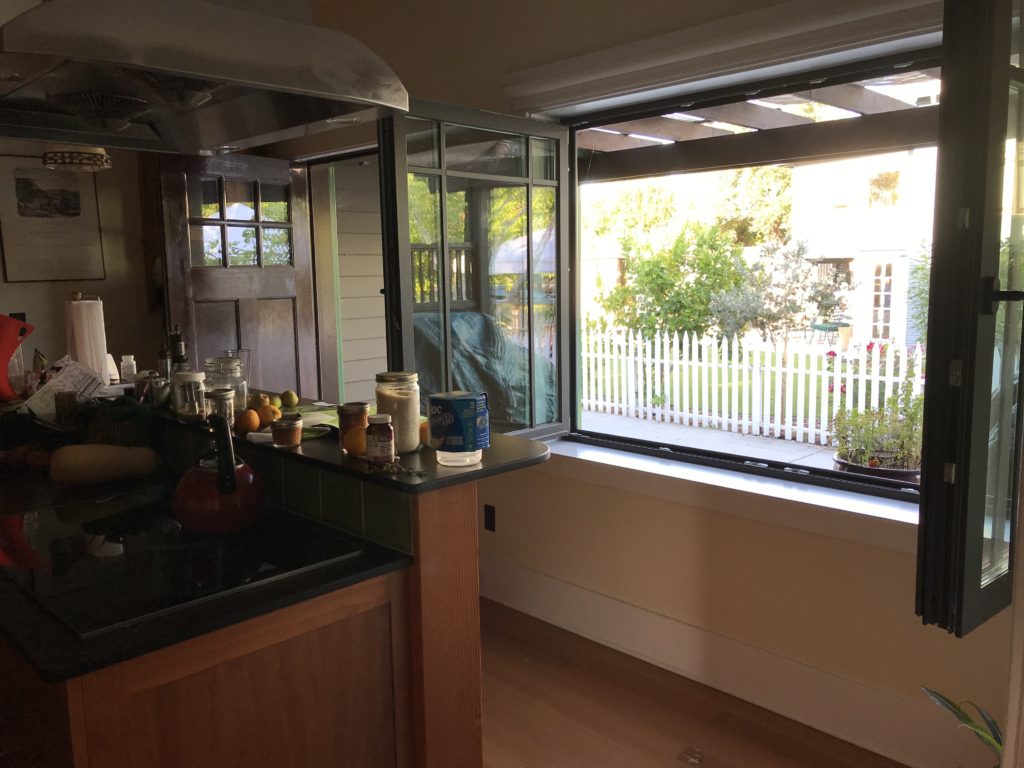
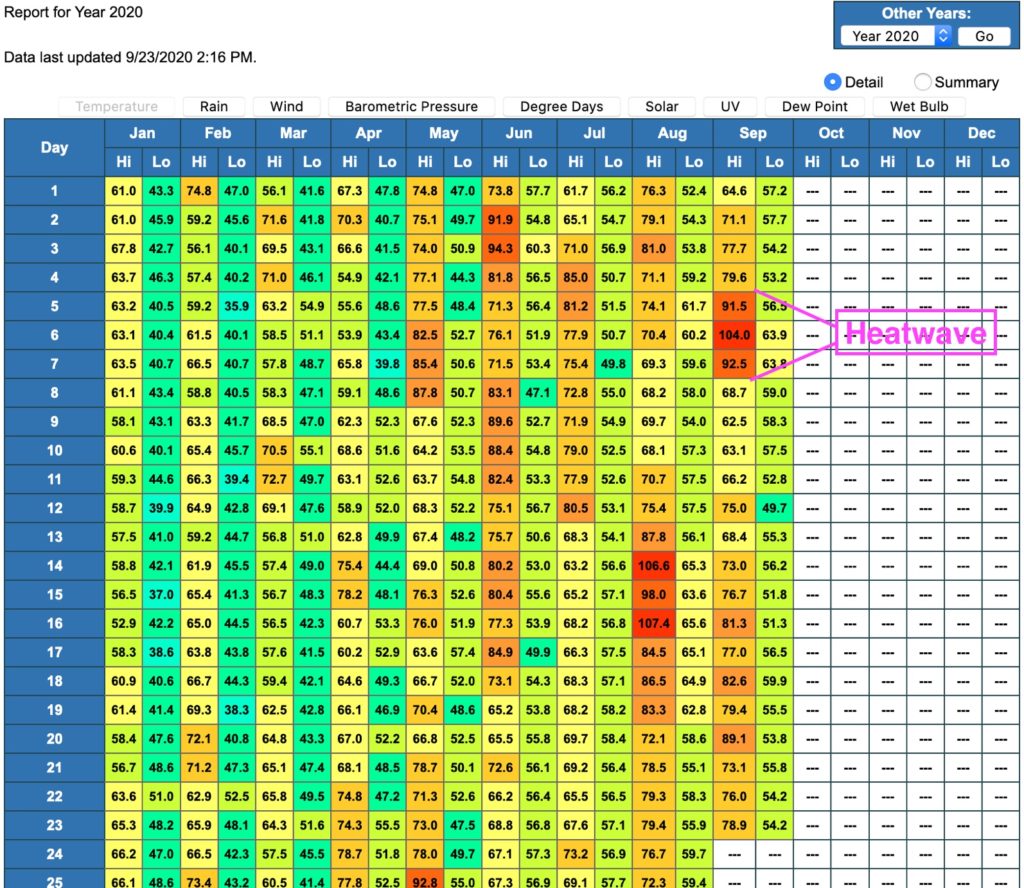
Night flushing was effective. It allowed us to maintain comfortable air temperature inside the house. Here’s the temperature snapshot on the second day of the heatwave.

We repeated this night flush routine during the heatwave. See temperature chart below. This is from my favorite local weather station weathercat.net.

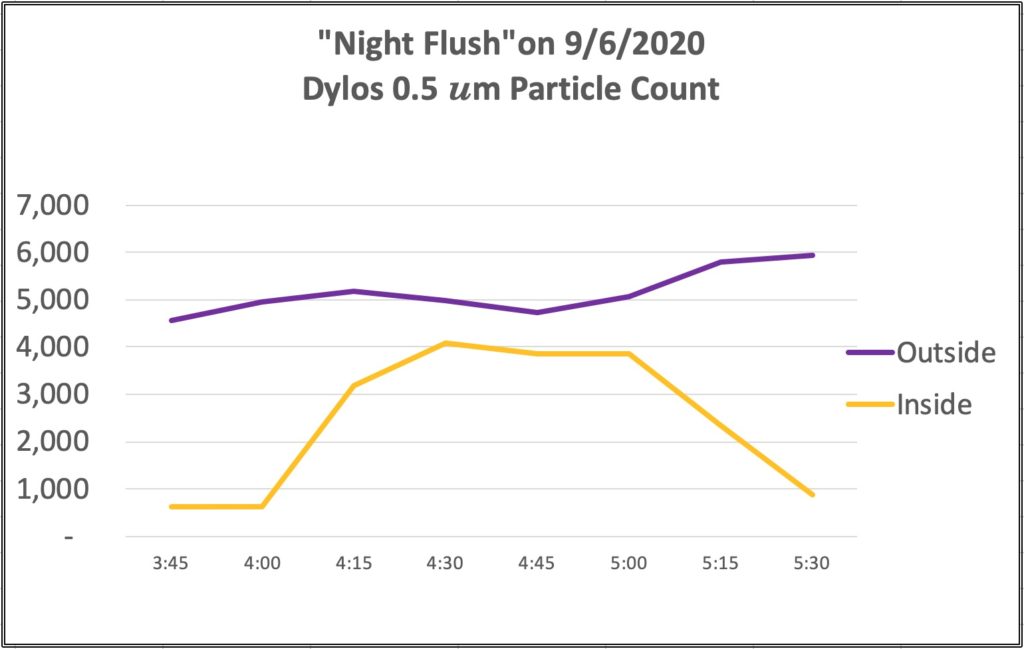
We used Dylos DC1700 to measure the air quality outside and inside the house. Here’s a graph showing the particle count rising when we did the night flush. Indoor particle count dropped with the air purifiers running on high after the windows and doors were closed.
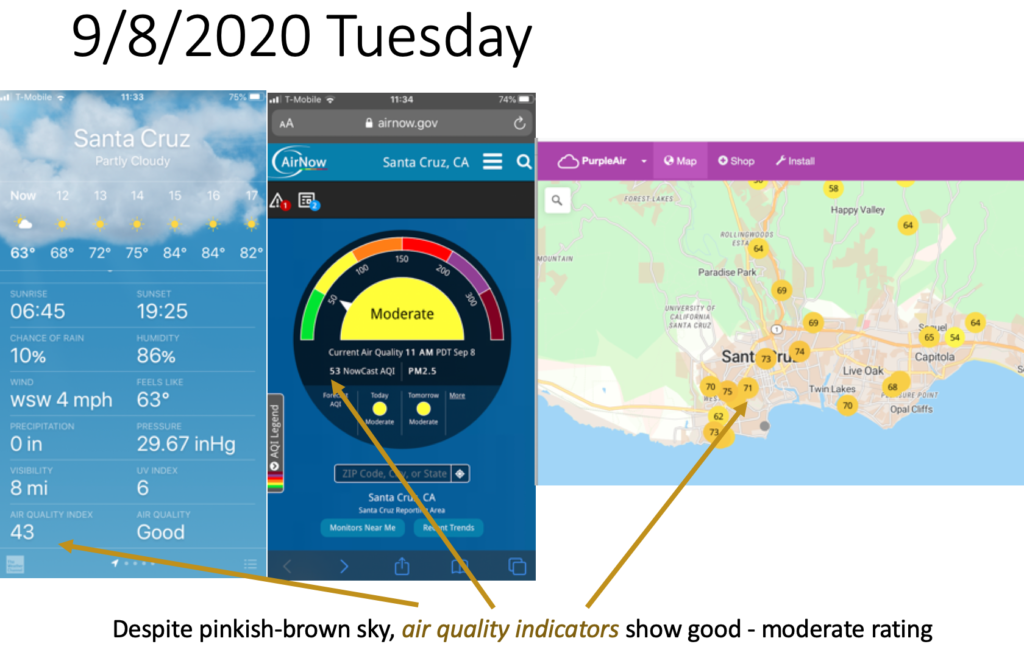
On September 8, 2020, something strange happened. The heatwave that was forecasted abruptly ended. The sky got dark. Brownish-orange sky all day. There was so much pollution in the air that the sun could not get through and we were spared from the heatwave. Eerie images filled social media.
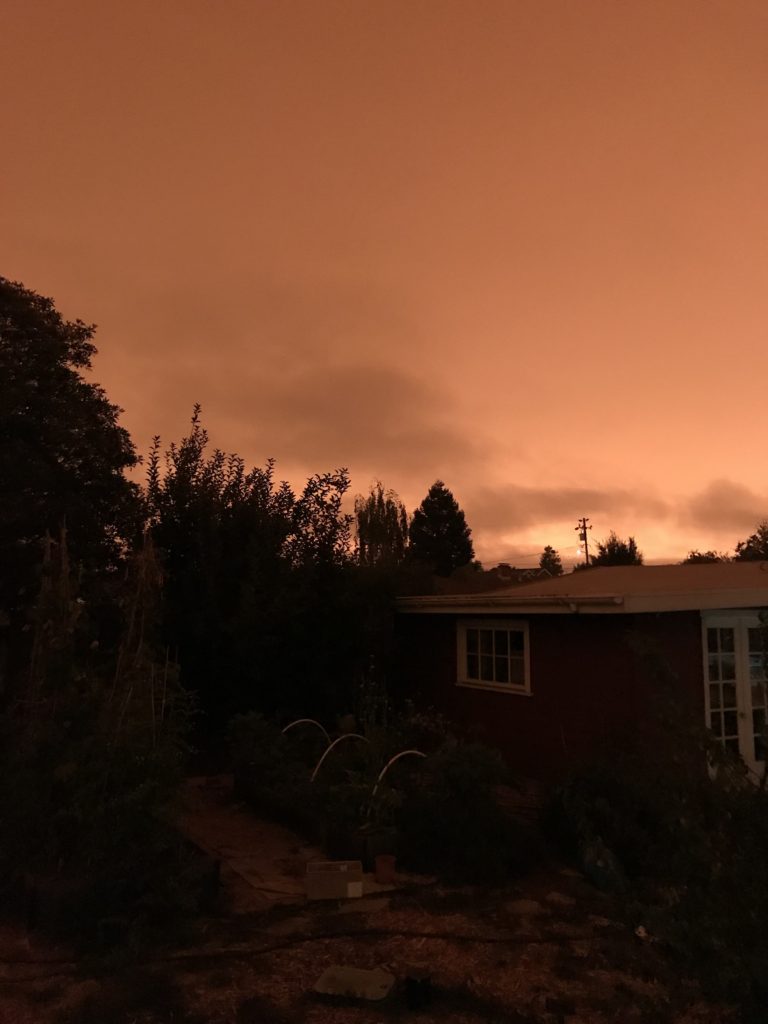
Brownish-orange sky from backyard of Midori Haus on 9/8/20

The depressingly dark sky felt foreboding, but the air quality at the surface level didn’t get much worse.
I suspect the smoke particles floating about at higher elevation took a few days to fall to the ground because that’s when the particle count shot way up. How much did it increase? That will be in the next post.

Save Electricity and Make Money

I just bought a compact emergency radio. It has a solar charger, a flash light, an USB port to charge my phone, and a hand crank to charge the battery when there is no power. The best part? It was it was almost free. I used the points accumulated in my Ohm Connect account and converted the points to a gift card on Amazon. I earn points whenever I participate in Ohm Hour to reduce my energy use.

Ohm Hour is a program that incentivizes participants to avoid using electricity for an hour (or two) at the time of day when it counts. Usually, this is when the sun is going down and we power up our appliances in our homes for the evening routine.

When I receive a message (text and email) for an upcoming Ohm Hour 24-hours before the event, I plan my evening routine with my husband. We shift our evening activities such as cooking, laundry, and using electronics around the Ohm Hour. Often, we eat our dinner in the garden or go for a walk in the neighborhood.

We participate in this program because we know that we can make a bigger impact by being strategic about when we cut down on the use of our power. Why? Because of the duck curve. This short video explains what a duck curve is, and how incentivizing evening energy use reduction fits into the solution.

If you don’t want to convert your points for an Amazon gift card, you can donate it to Sierra Club. I’ve done both.

If you live in California and receive electric service from PG&E, SCE or SDG&E, check out the Ohm Hour program. If you have a friend who participates in Ohm Hour, ask them for their referral code. They’ll receive a bonus when you sign up and start participating in the program. You can click here for my referral code.

Home Tour Q&A

December 11, 2019

Almost 400 people visited Midori Haus on December 8th and 9th 2019. Midori Haus was one of the five homes featured on the home tour organized by the Santa Cruz Symphony League. We were happy to support our local classical musicians by opening our door for this 43rd annual event.

Visitors appreciated the beauty of the classic Arts and Crafts style and marveled at the comfort and low energy use. A visitor stepping inside the door said, "It smells good in here."  We had a lot of fun demonstrating our induction cooktop, steam oven, murphy bed, and a hand-cranked gramophone. The abundant signage around the house was adequate for a self-guided tour, but some people had specific questions.

Q: Where did you get the stained-glass windows?

A: We got the “Meyda Tiffany 97961 Corn Mission Window” from thebrightspot.com

Q: What does “Midori” mean?

A: Midori is the Japanese word for green.

Q: Who did your solar thermal installation?

A: The original installation was done by Wilson Hydronics, but he’s now retired and moved to Mexico. Tim Pettet, a general contractor who specializes in hydronic radiant and solar heat, maintains our system.

Q: Where did you get your lighting fixtures?

A: We found thebrightspot.com to have a nice assortment of reasonably priced lighting fixtures in the vintage style.

Q: Does the Paperstone countertop scratch?

A: Yes, it does. For shallow scratches you can buff it out with the burgundy Scotch Brite scrubber and apply Paperstone Finish over it.

Q: Where did you get the murphy bed?

A: We got it from Wilding Wallbeds. They have a wide selection of sizes, styles, finishes, and options.

Do you have questions? Send them to Chie at Midorihaus.com or visit us at a future tour.

Balancing Airflow in our Zehnder HRV System

This post is about the adjustments I’ve made to our heat recovery ventilator (HRV) system to balance the incoming and outgoing airflow. While you may find this post helpful, please consult your HRV professional before making any adjustments to your system. I wrote this post mainly to remember what I did.

Our Zehnder ComfoAir 350 HRVwas installed about 6 years ago. Our home, Midori Haus, is a certified Passivhaus so the house is very airtight (0.6ACH50). Having an effective ventilation system is important for comfort and health. My husband and I wanted to install the yellow particle filter, rated at MERV15, near the air intake. After experiencing extended poor outdoor air quality days during the 2018 California wildfire season, we thought this was prudent. Adding an extra air filter would increase the resistance in the incoming airflow. We expected the incoming air flow be reduced, but didn’t know how much, so we measured it.

Equipment Used

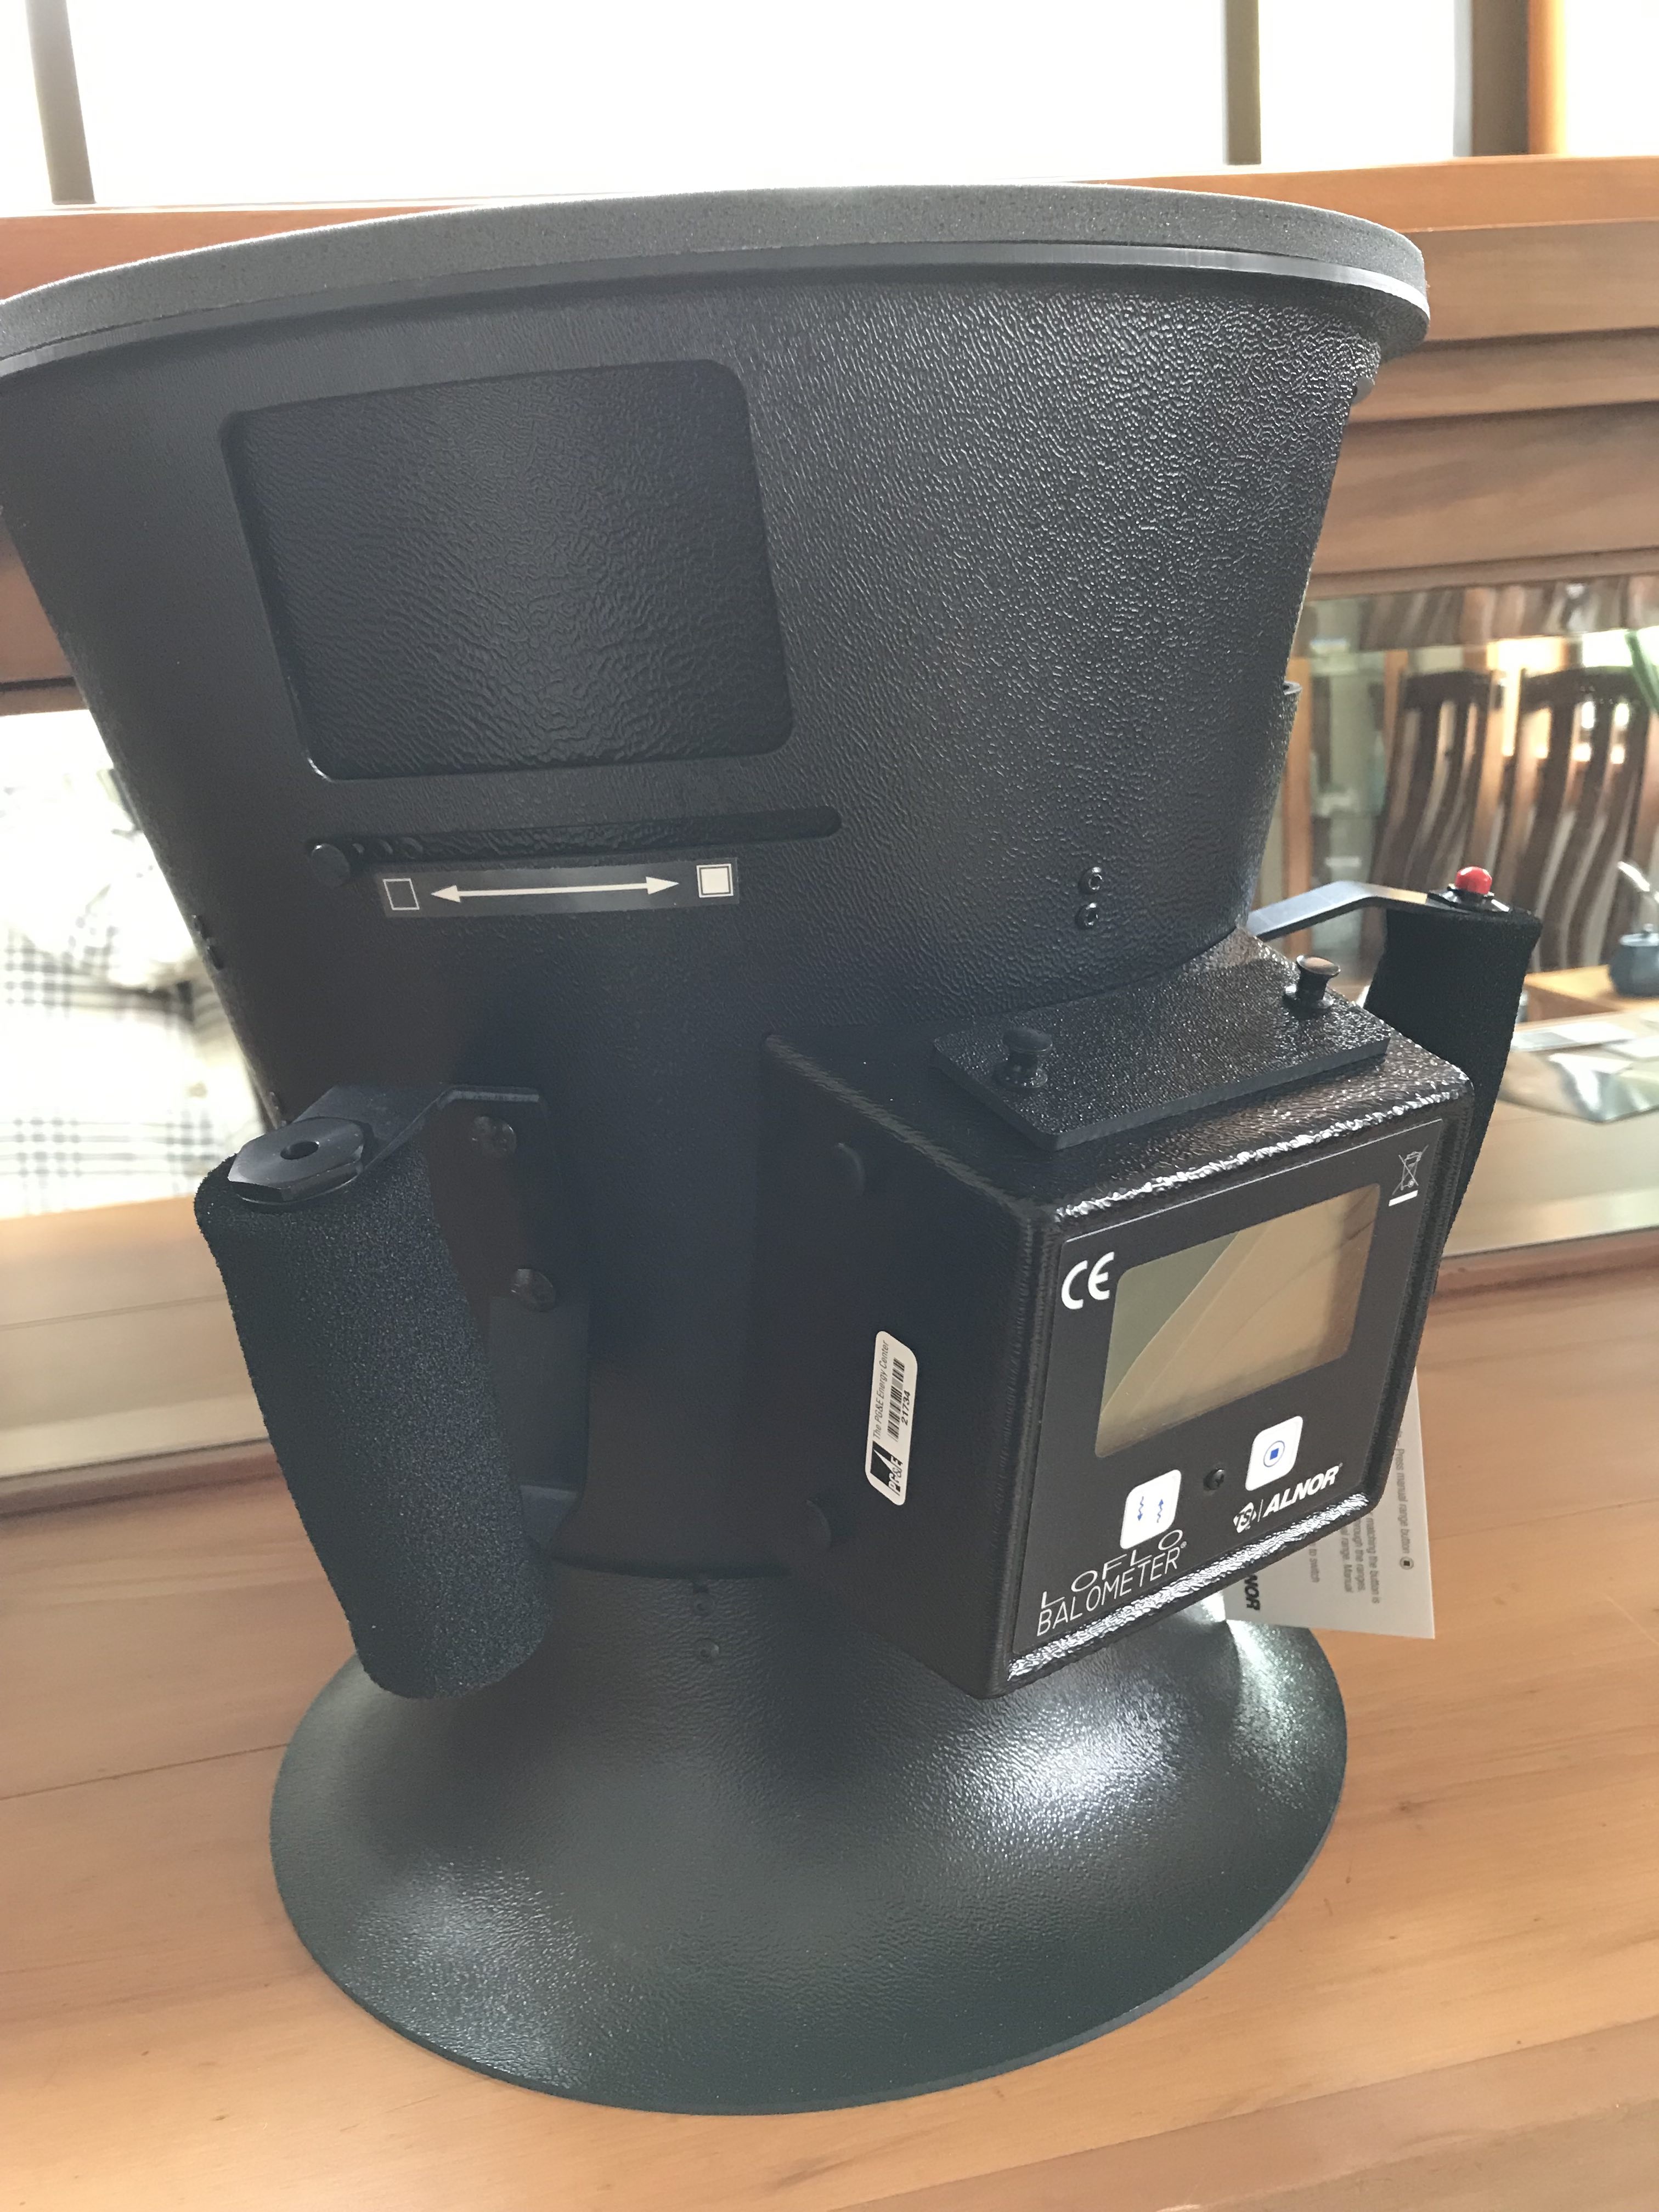
I did the work myself. Tools used for this work included:

  • Ladder – to reach diffusers installed in 9-foot ceiling

The system we have in place is a Zehnder ComfoAir 350 HRV with F7 red filter (MERV 13)for supply, G4 black filter (MERV 7 / 8)for exhaust, and CW-FC 320 activated carbon filterin ComfoWell.

Baseline Measurement

First task was to take a baseline measurement before installing the new filter. I took the balometer to each of the 13 diffusers inside the house and measured the airflow.


Alnor Loflo balometer (6200D)

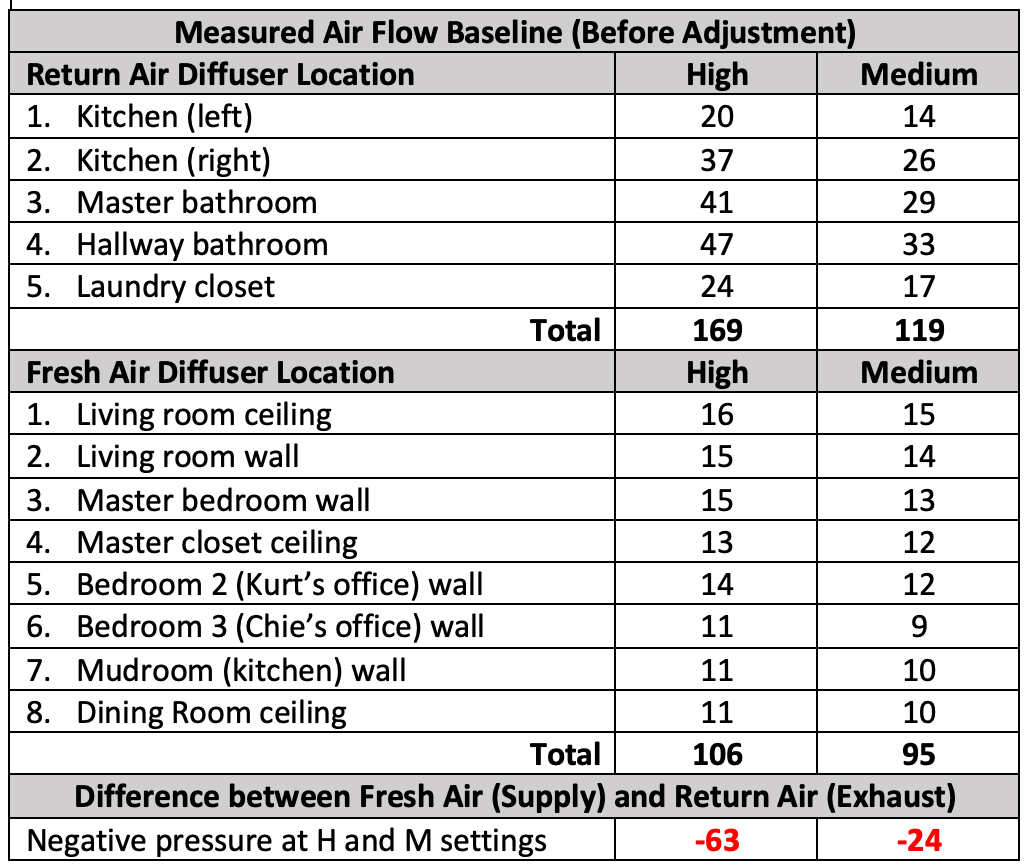
Here is the baseline measurement:


Though I suspected there would be a slight negative pressure, I was surprised to see these numbers confirming it. I compared these numbers to the commissioning report from January 2013 and noticed that:

  • Return Air (Exhaust) total was much higher (25%) than the original commissioning numbers. I suspect we caused this when we cleaned the dust out of the diffuser, we didn’t place them back to their original setting.
  • Fresh Air (Supply) total was slightly lower (2% ~ 6%) than the original commissioning numbers. This can be attributed to the installation of the activated carbon filter near the supply intake. The ComfoWell box was installed in October 2013 and we haven’t balanced the air flow at that time.

Note to self: Next time you clean the diffuser, put them back to the same settings as you found them!

Adjust Return Air (Exhaust) Diffuser Opening

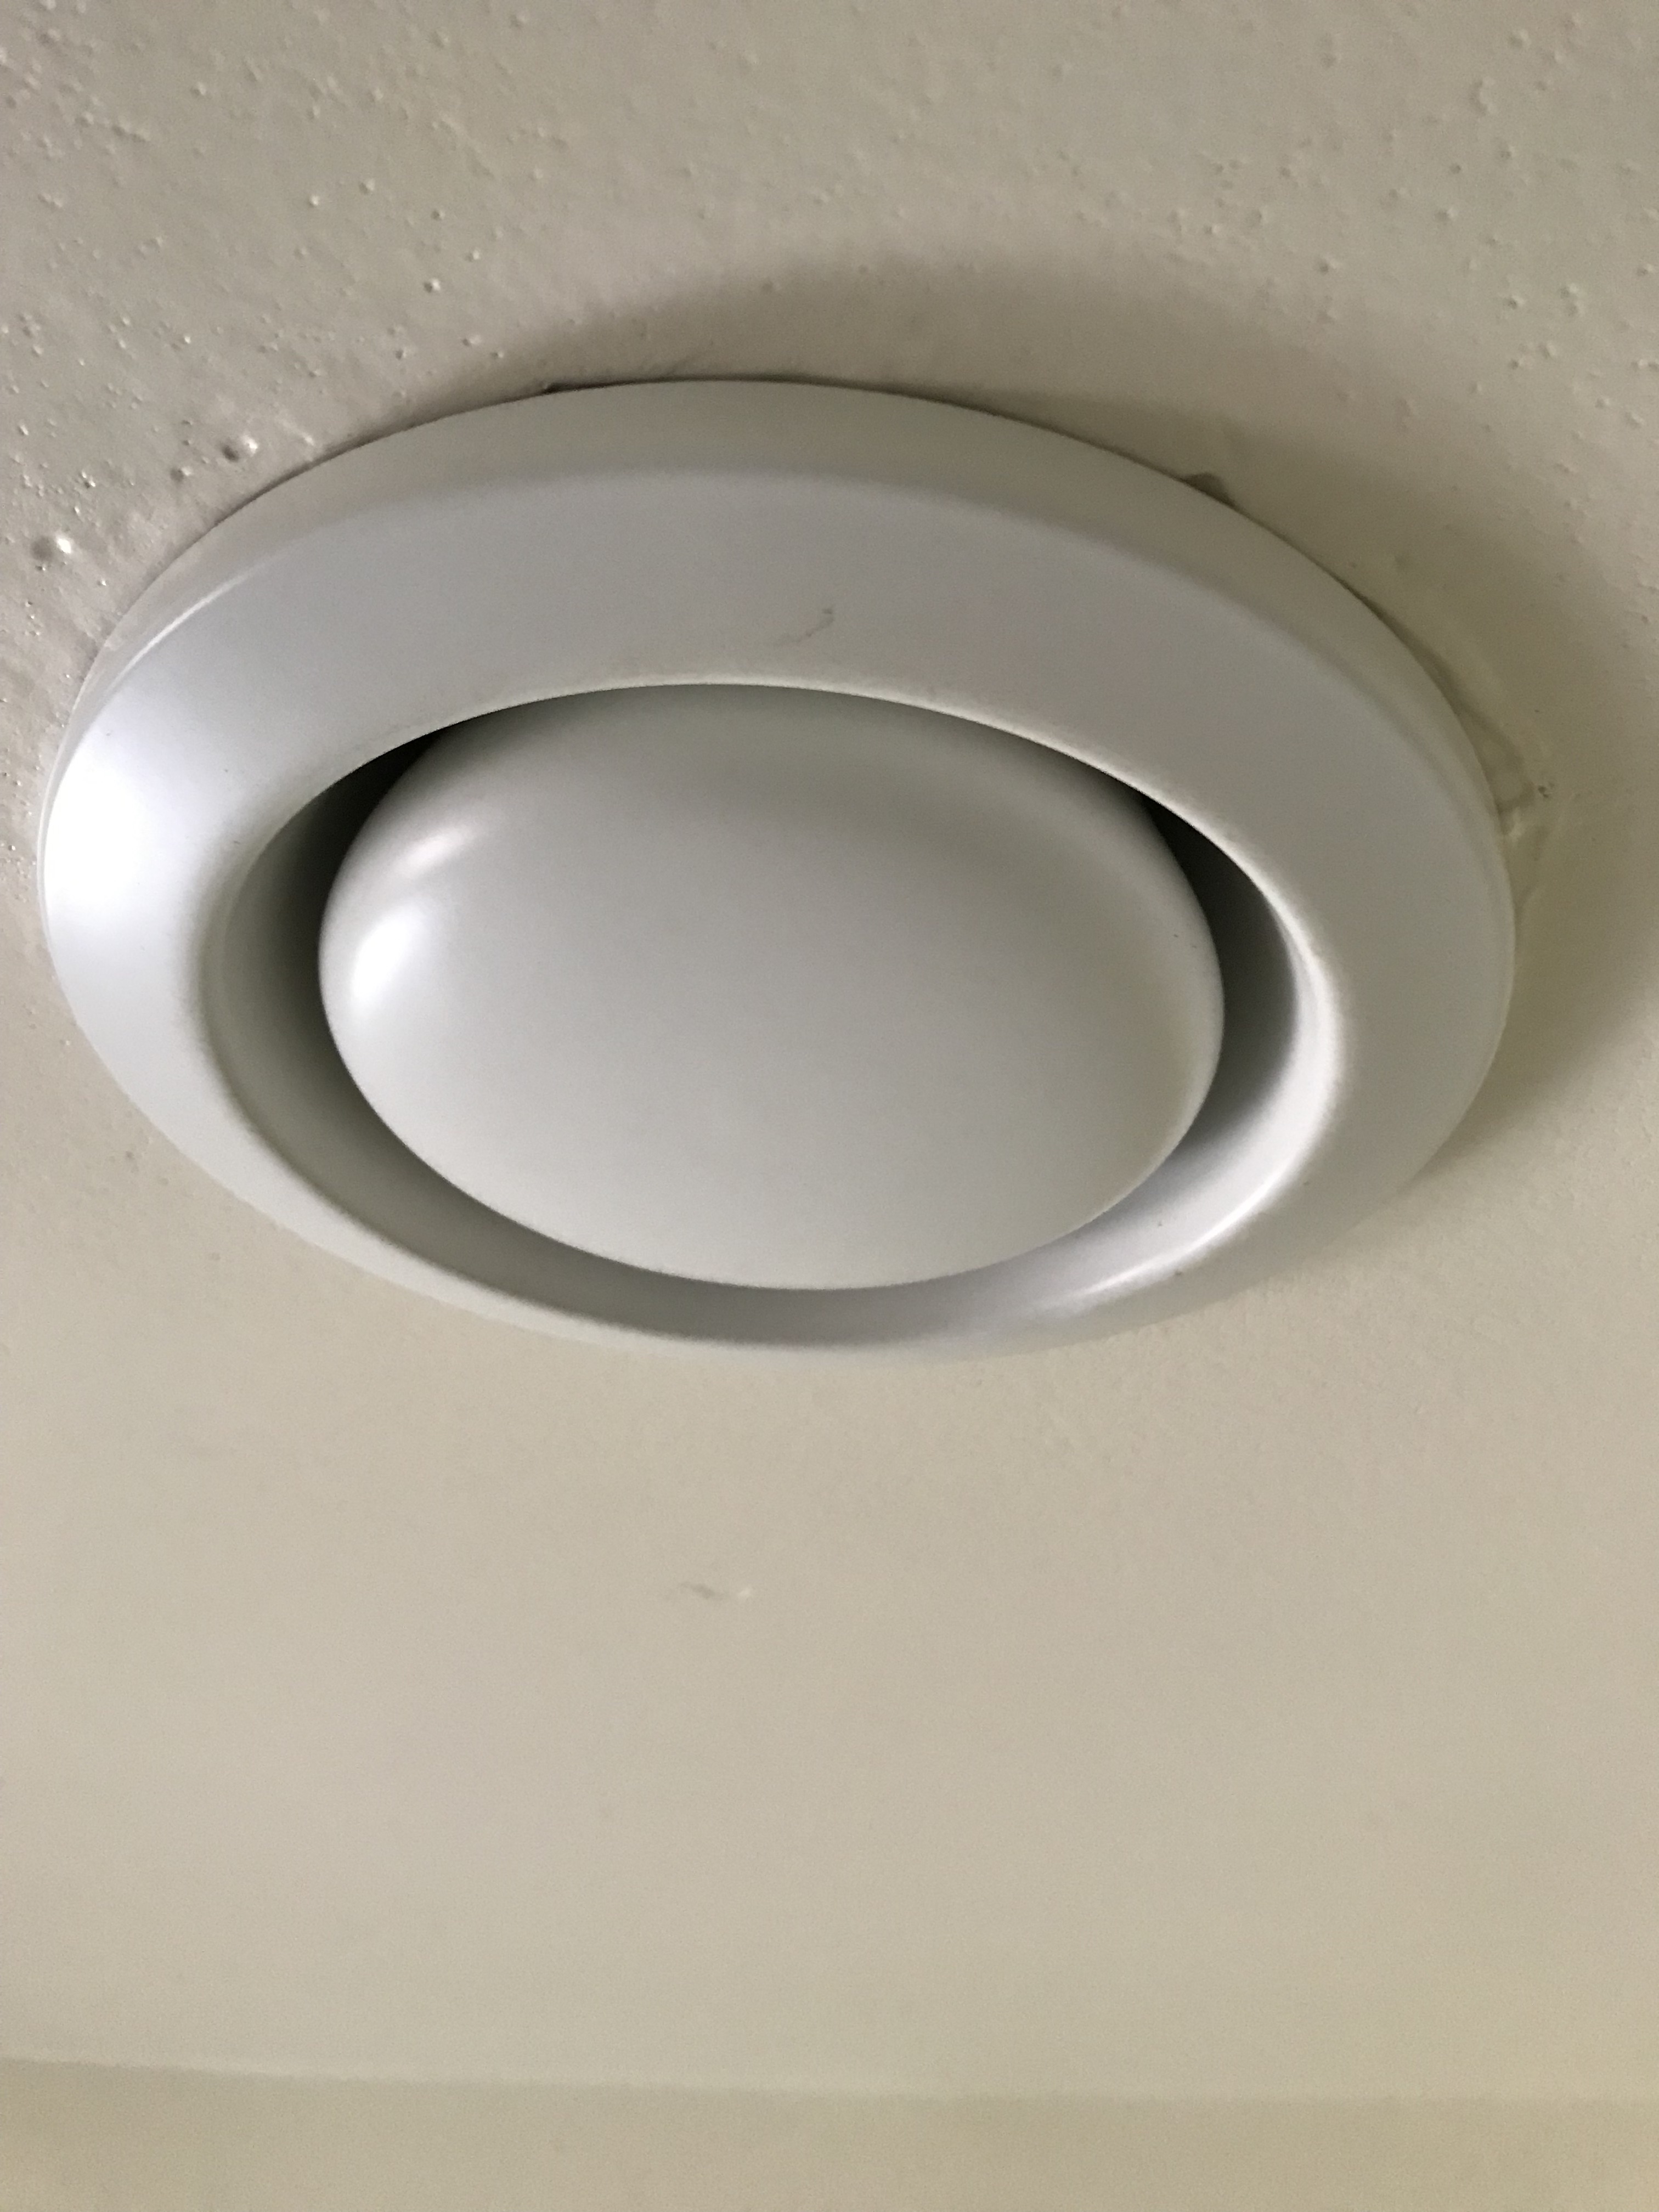
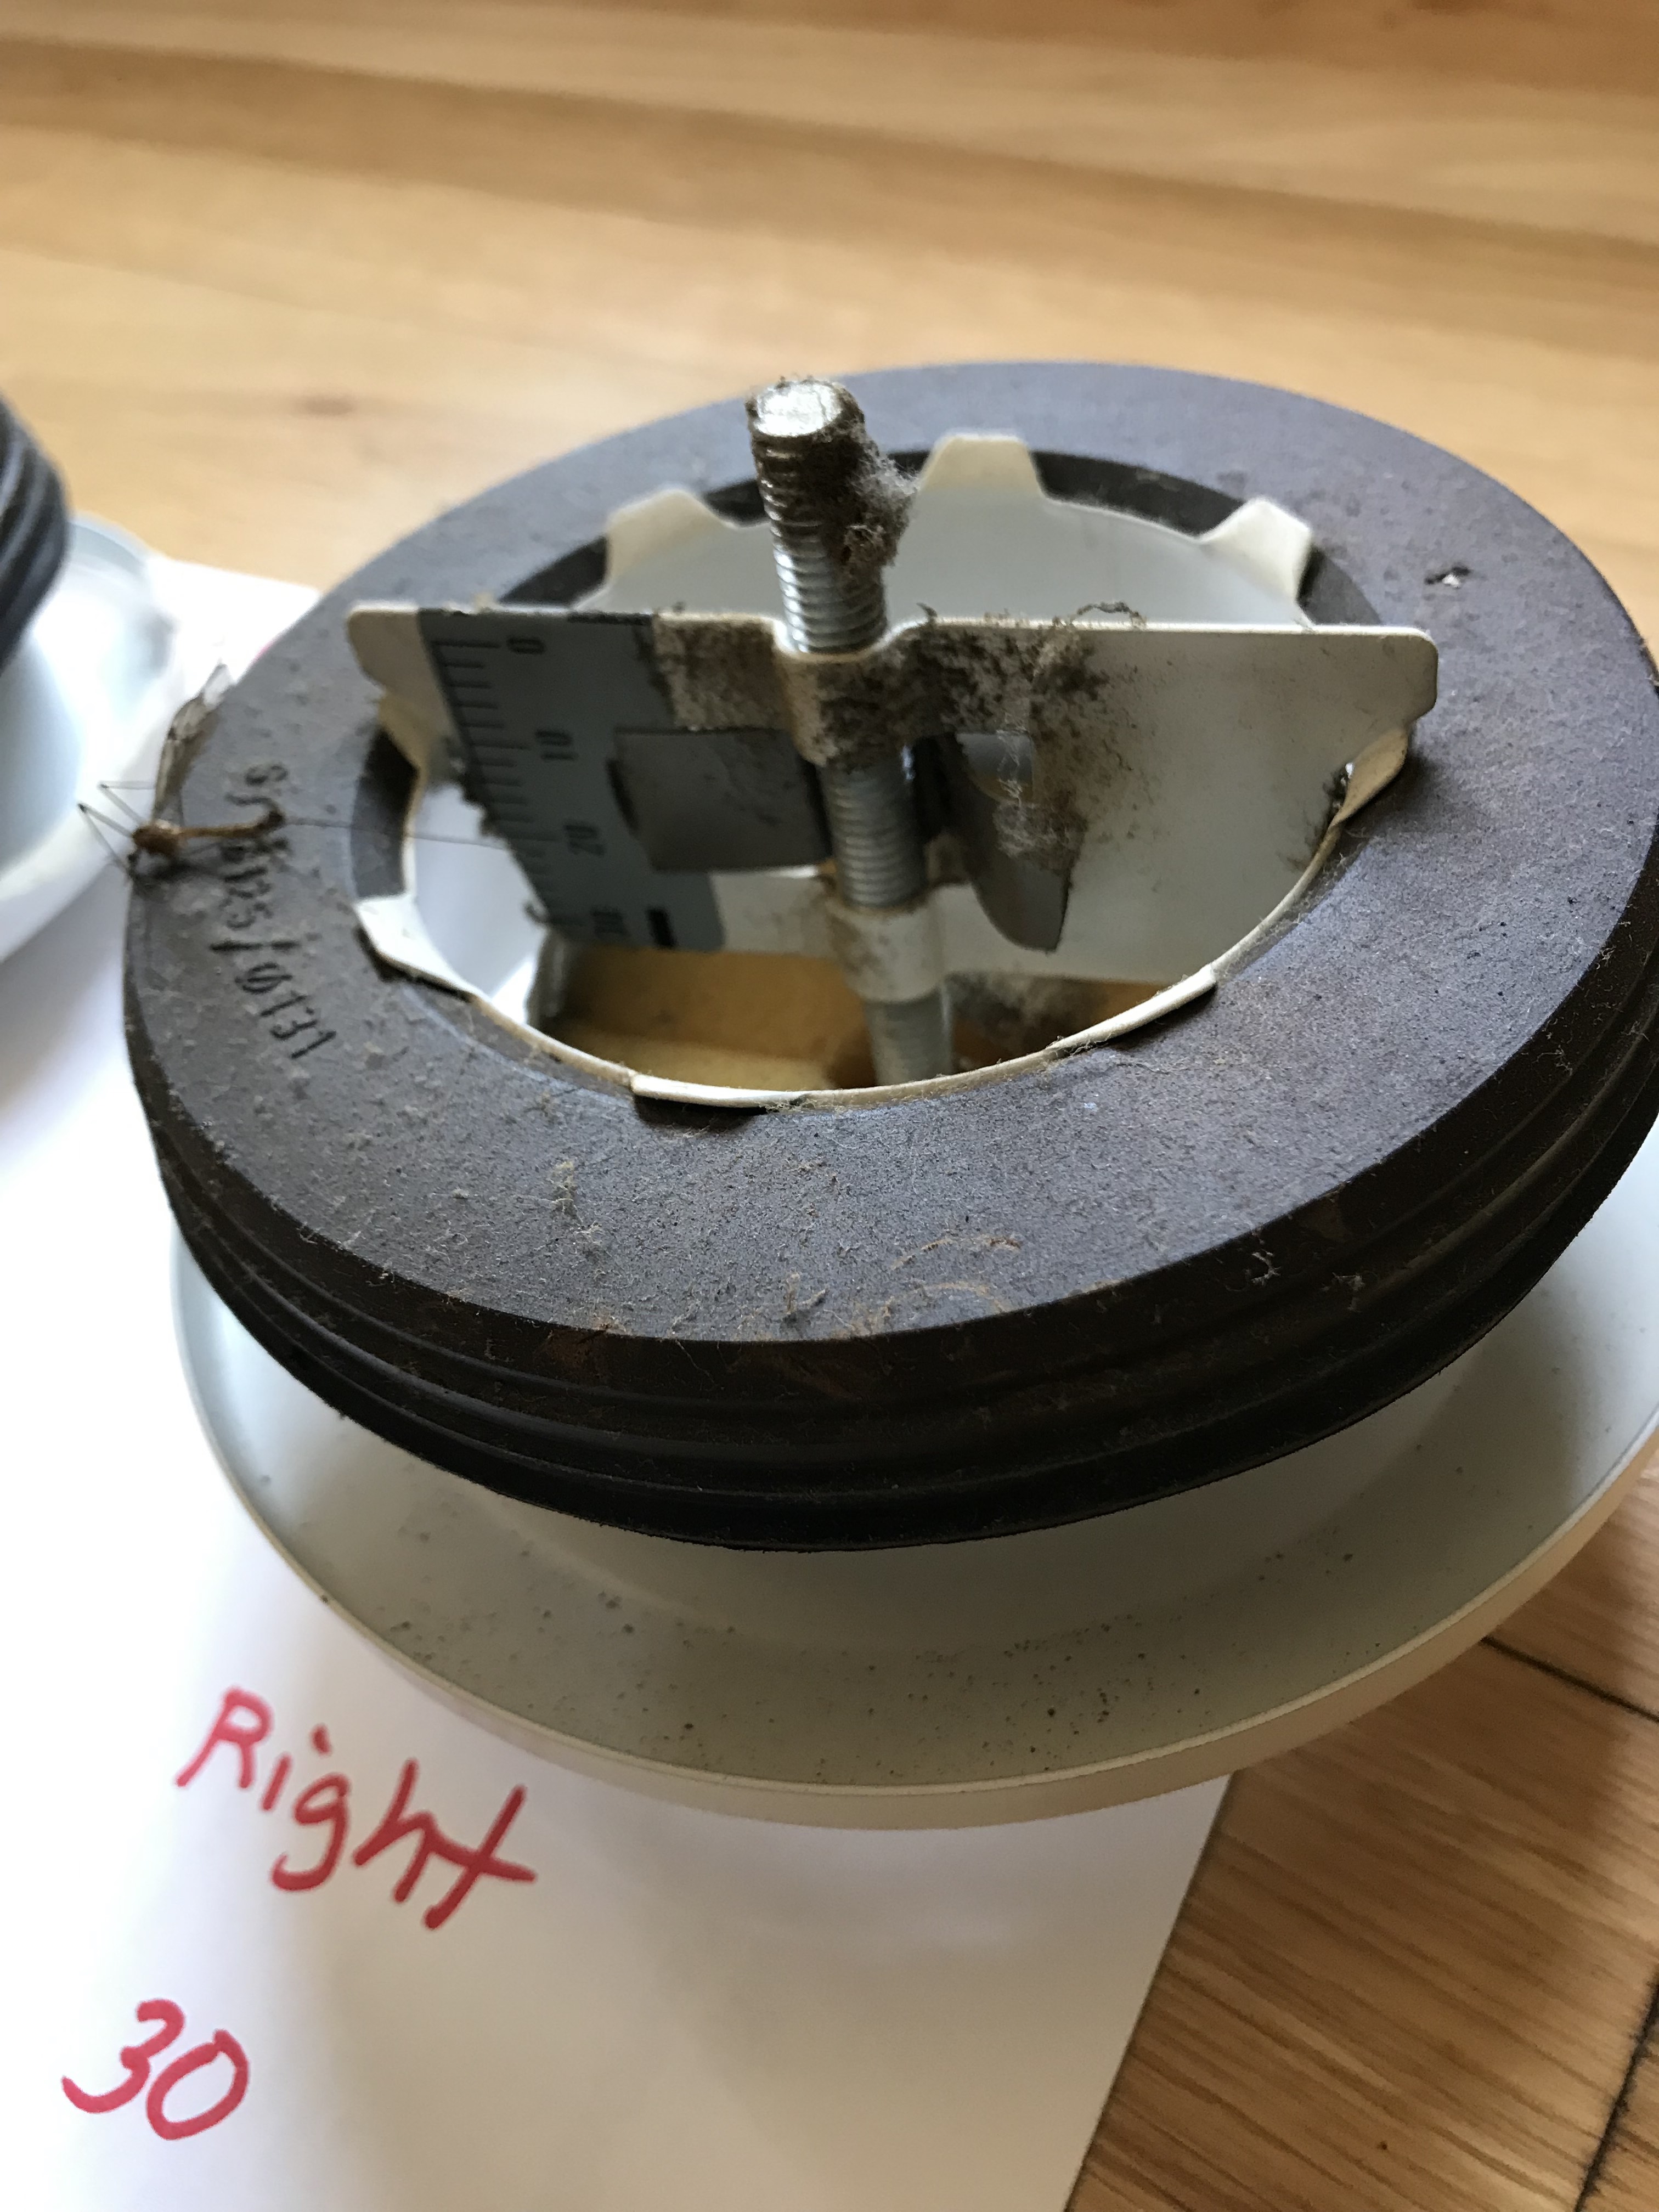
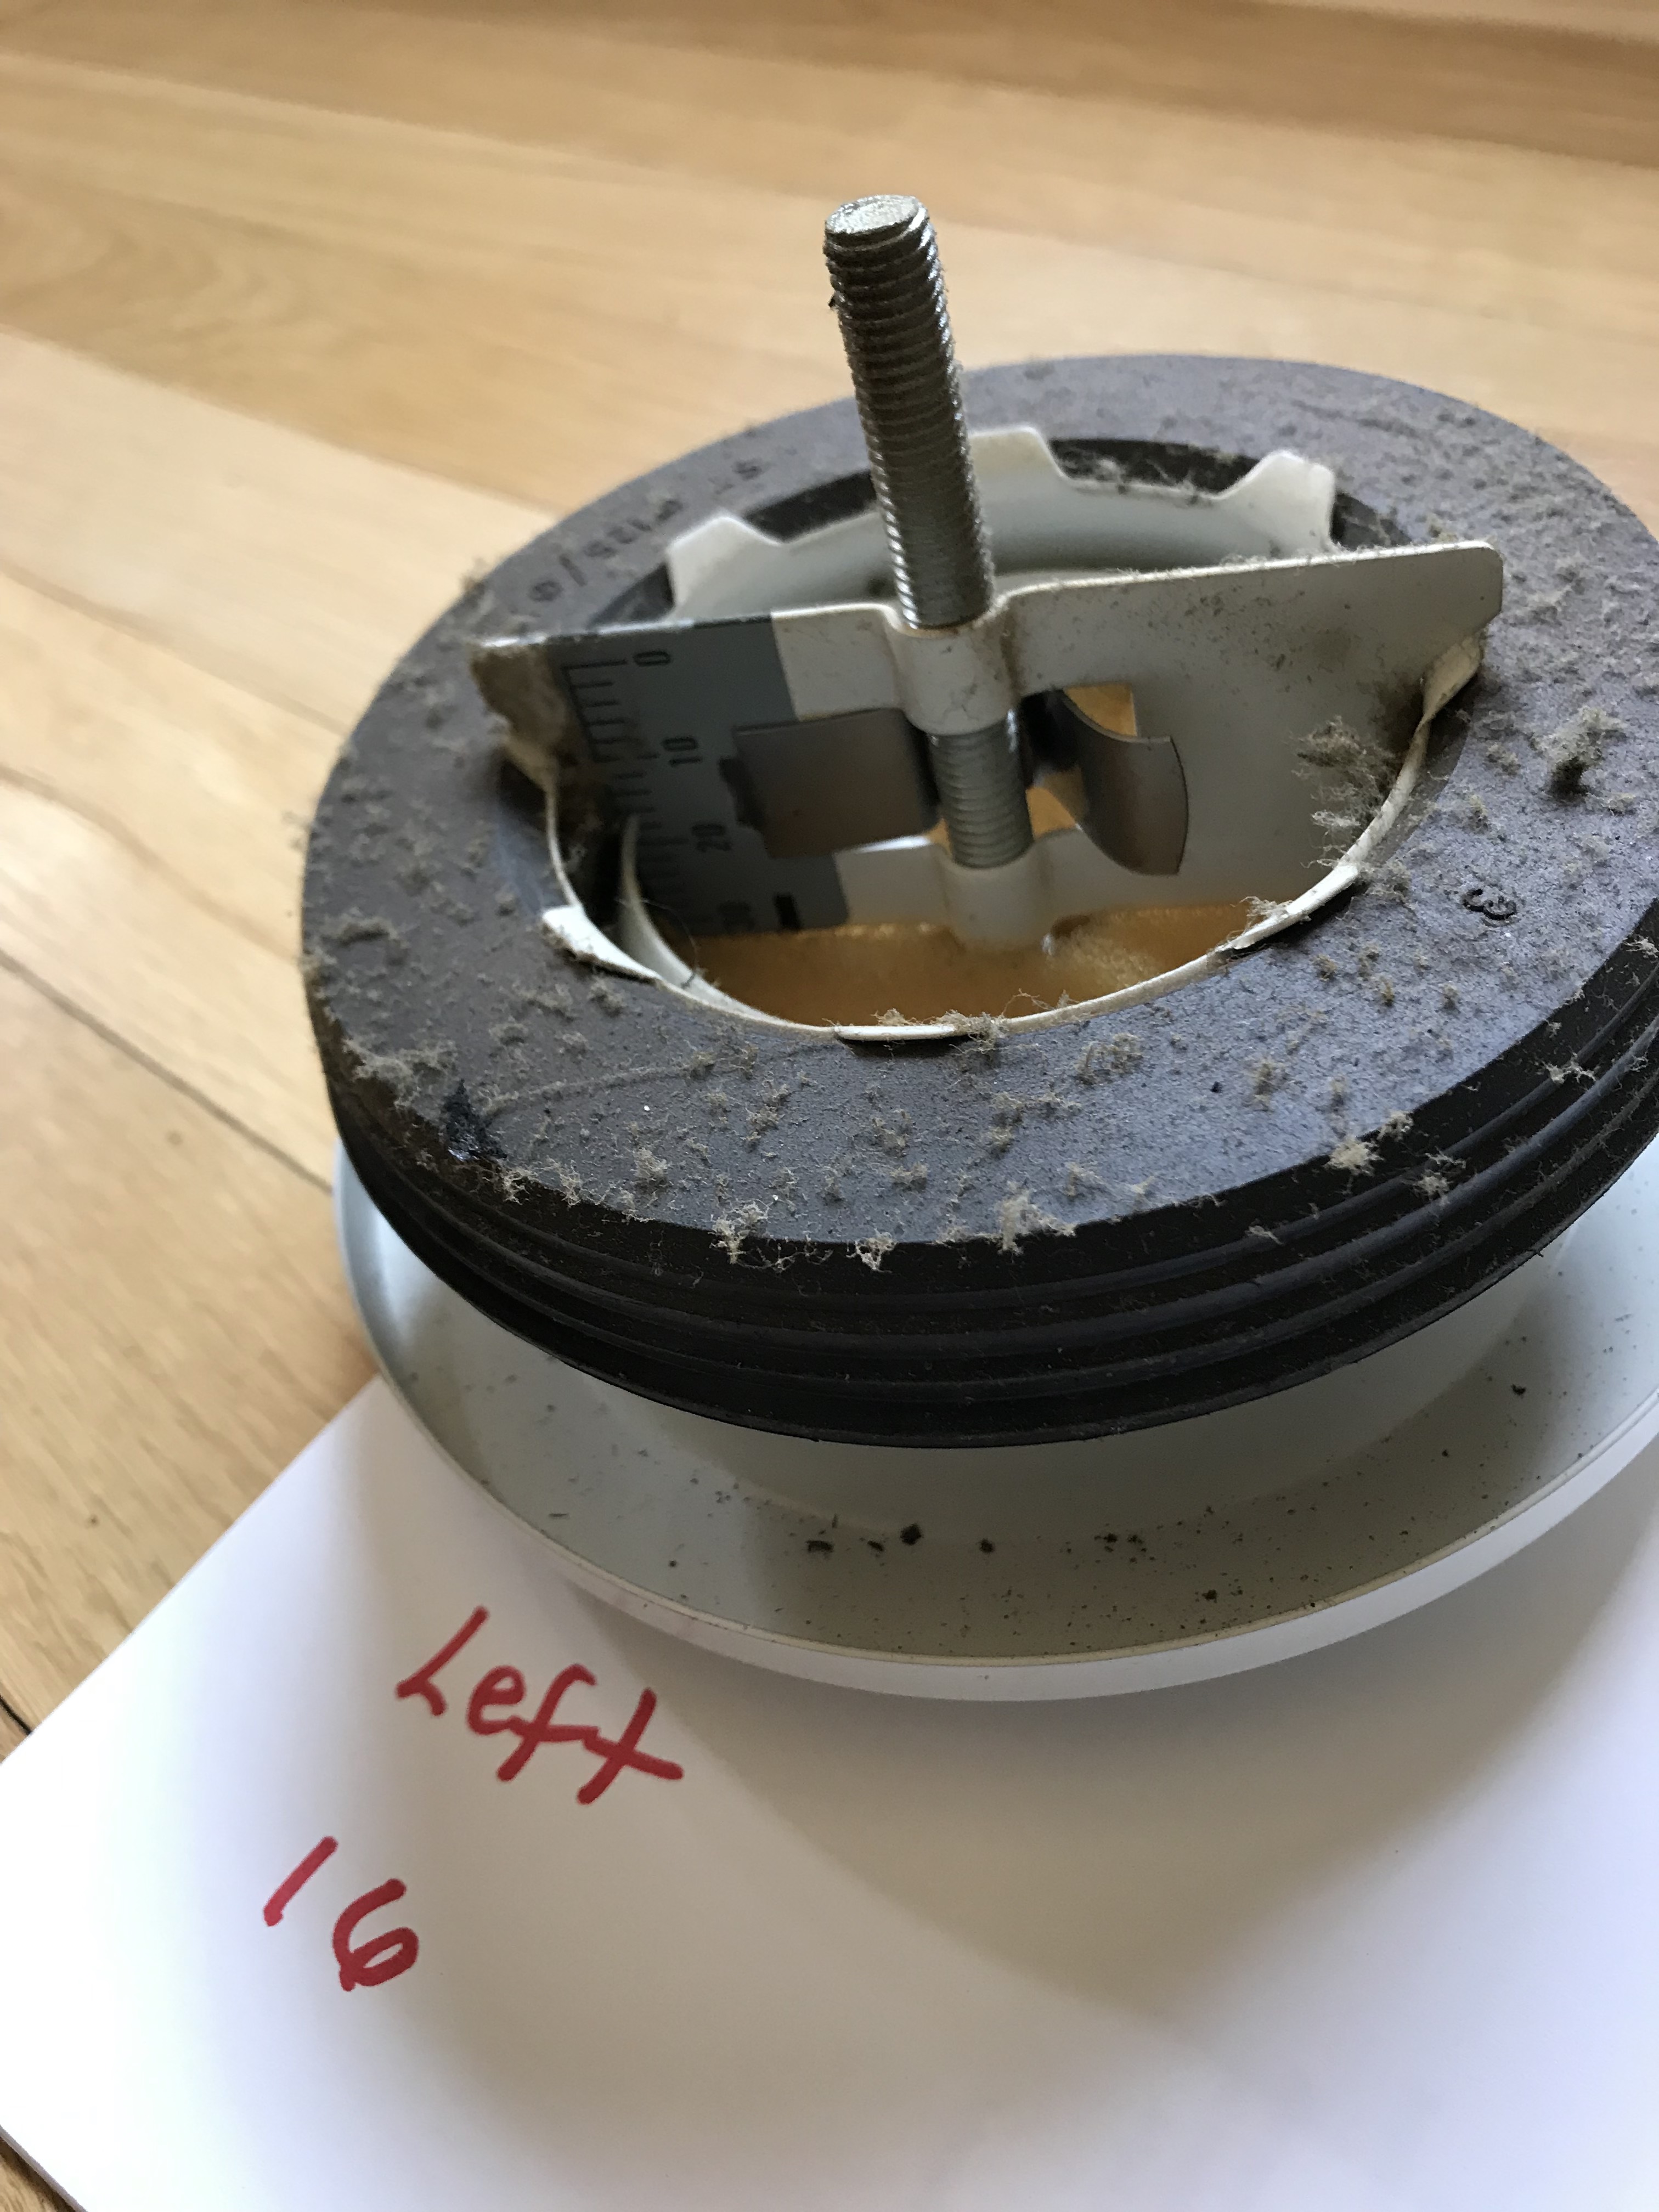
This is what the Return Air diffusers they looked like when I pulled them out, before the adjustment and cleaning:


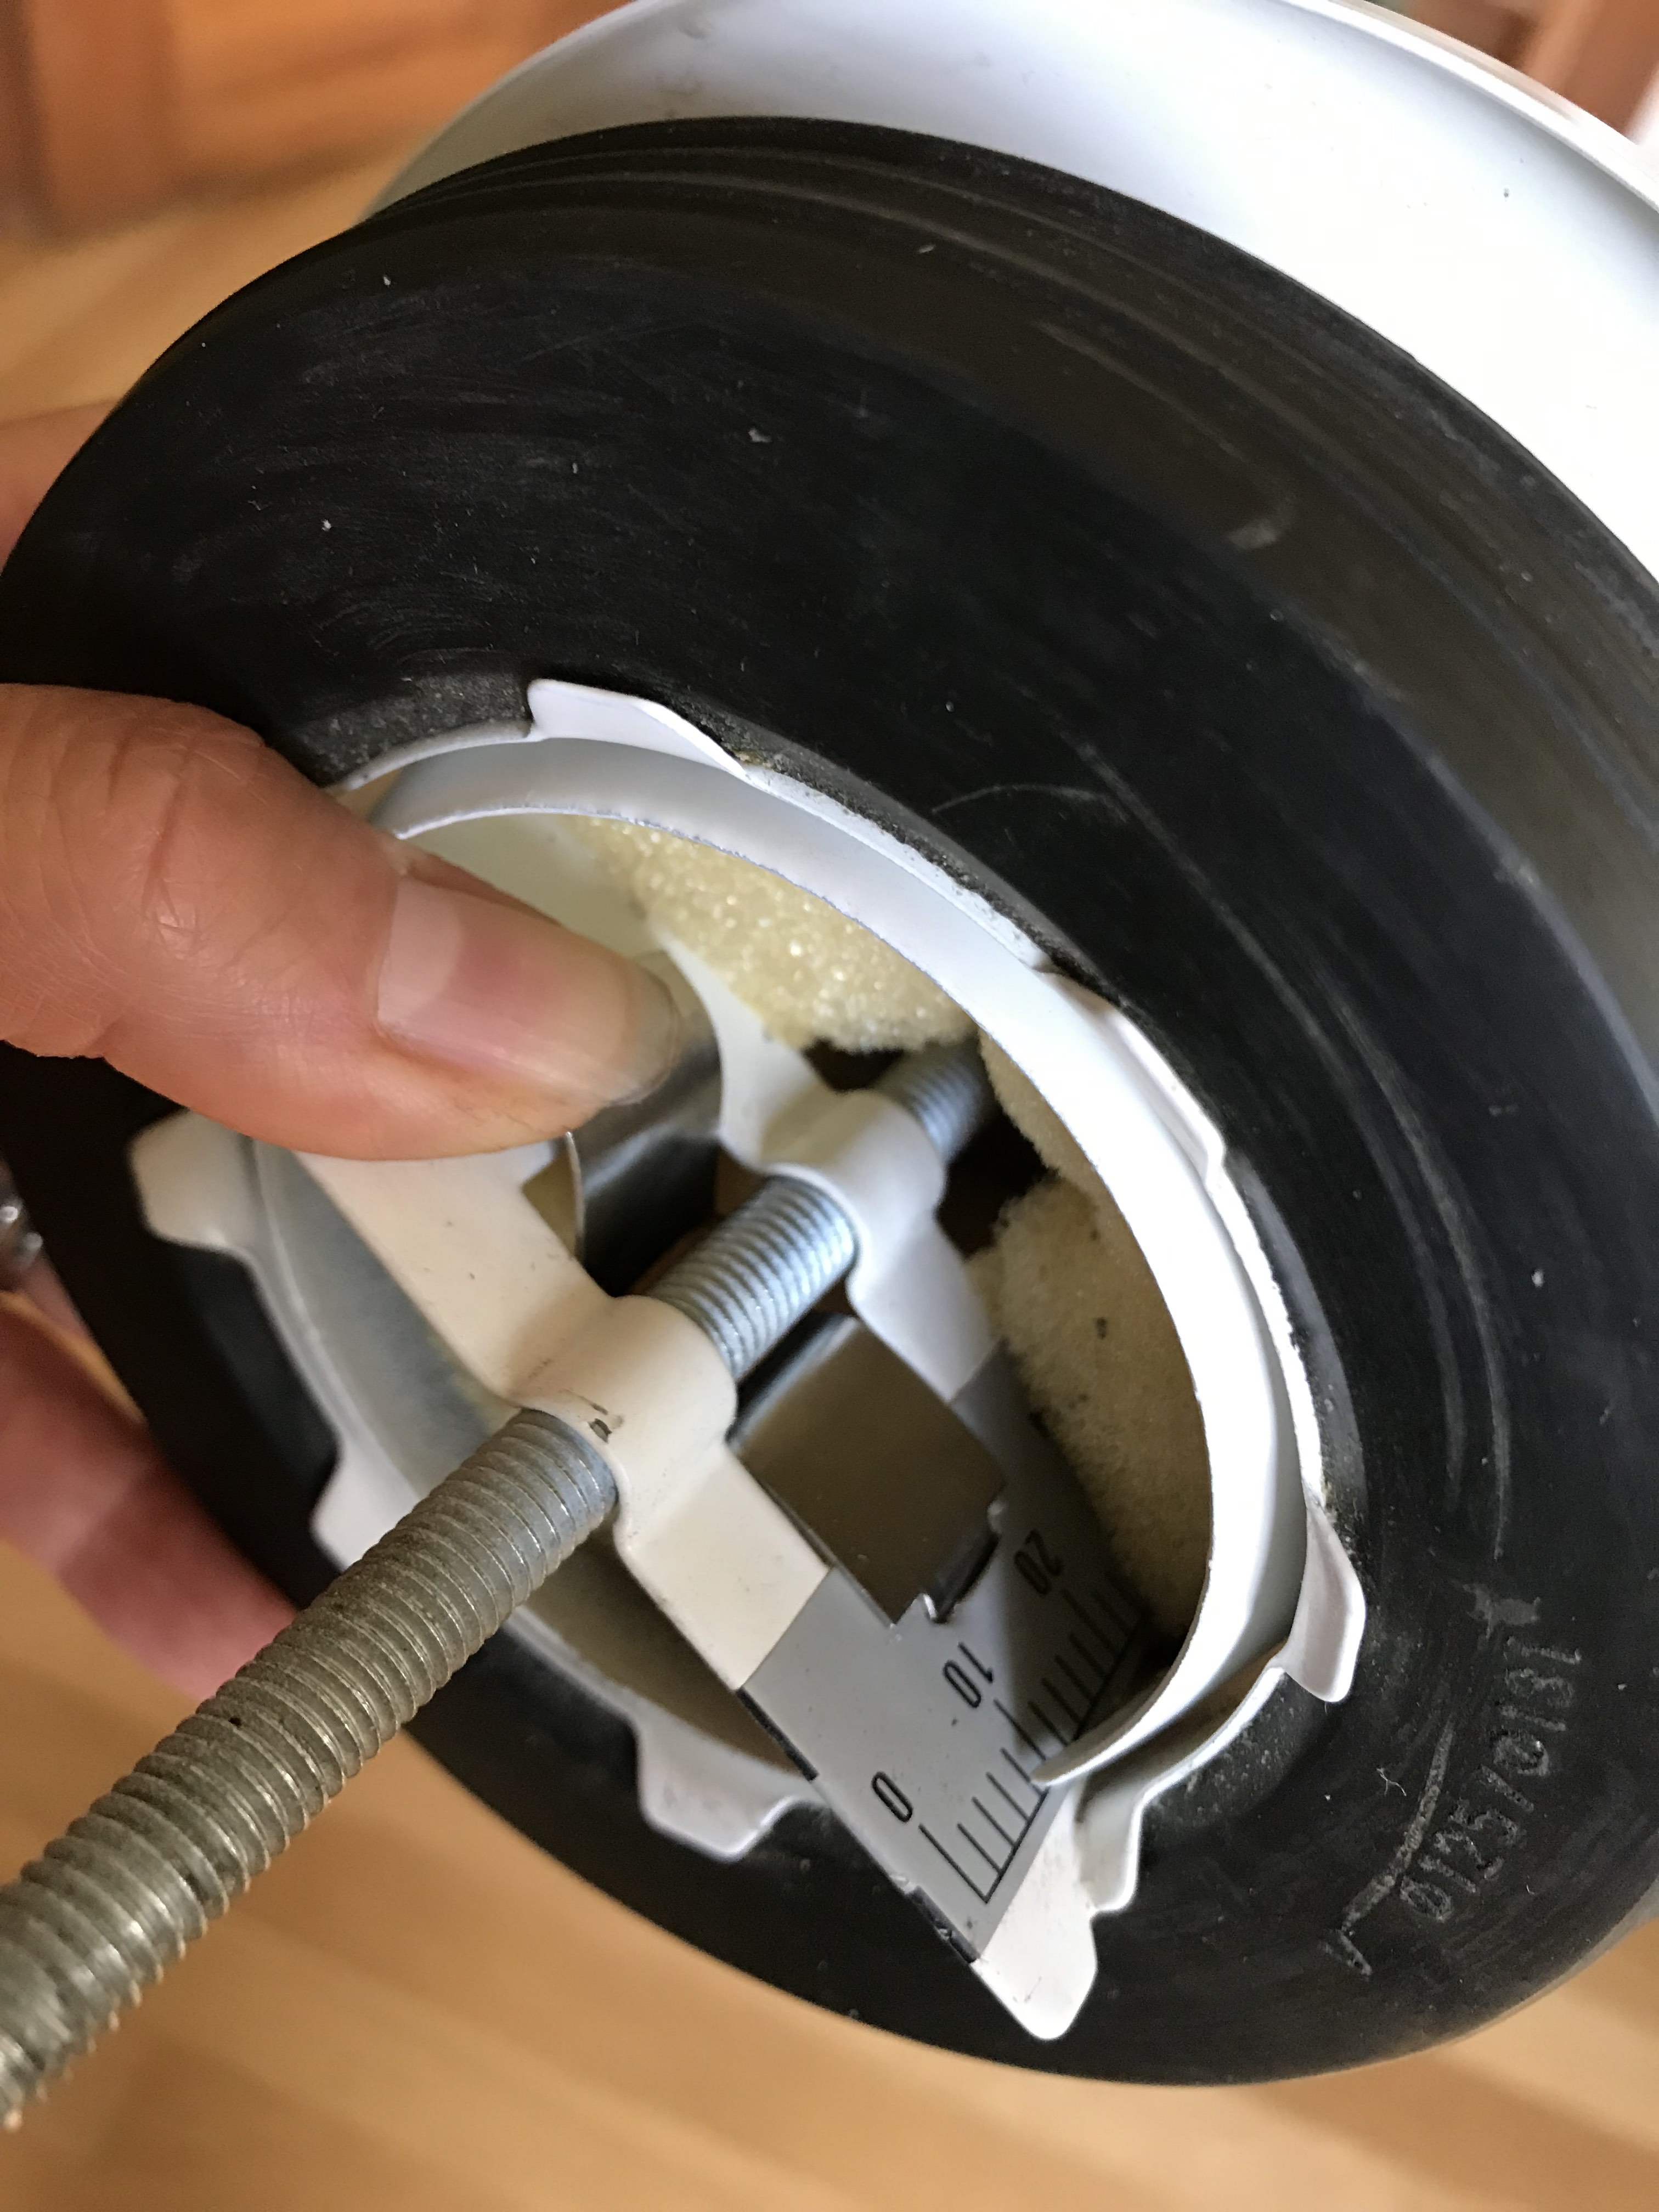
Adjusted the opening size by pressing the tongue and pushing in the inner fitting. The size of the smaller opening in the photo below is 8 on the gauge. This roughly corresponded to the air volume measured (in CFM) at the medium HRV setting.


Press down tab and adjust


Adjust Supply Diffuser

I adjusted the supply diffuser in one room to slightly increase the flow. The smallest ring was in place. I removed the ring and cut it smaller. This increased the flow by 2 CFM.


Fresh Air (Supply) Diffuser before adjustment


Fresh Air (Supply) Diffuser After Adjustment

Install Fine Particle Filter

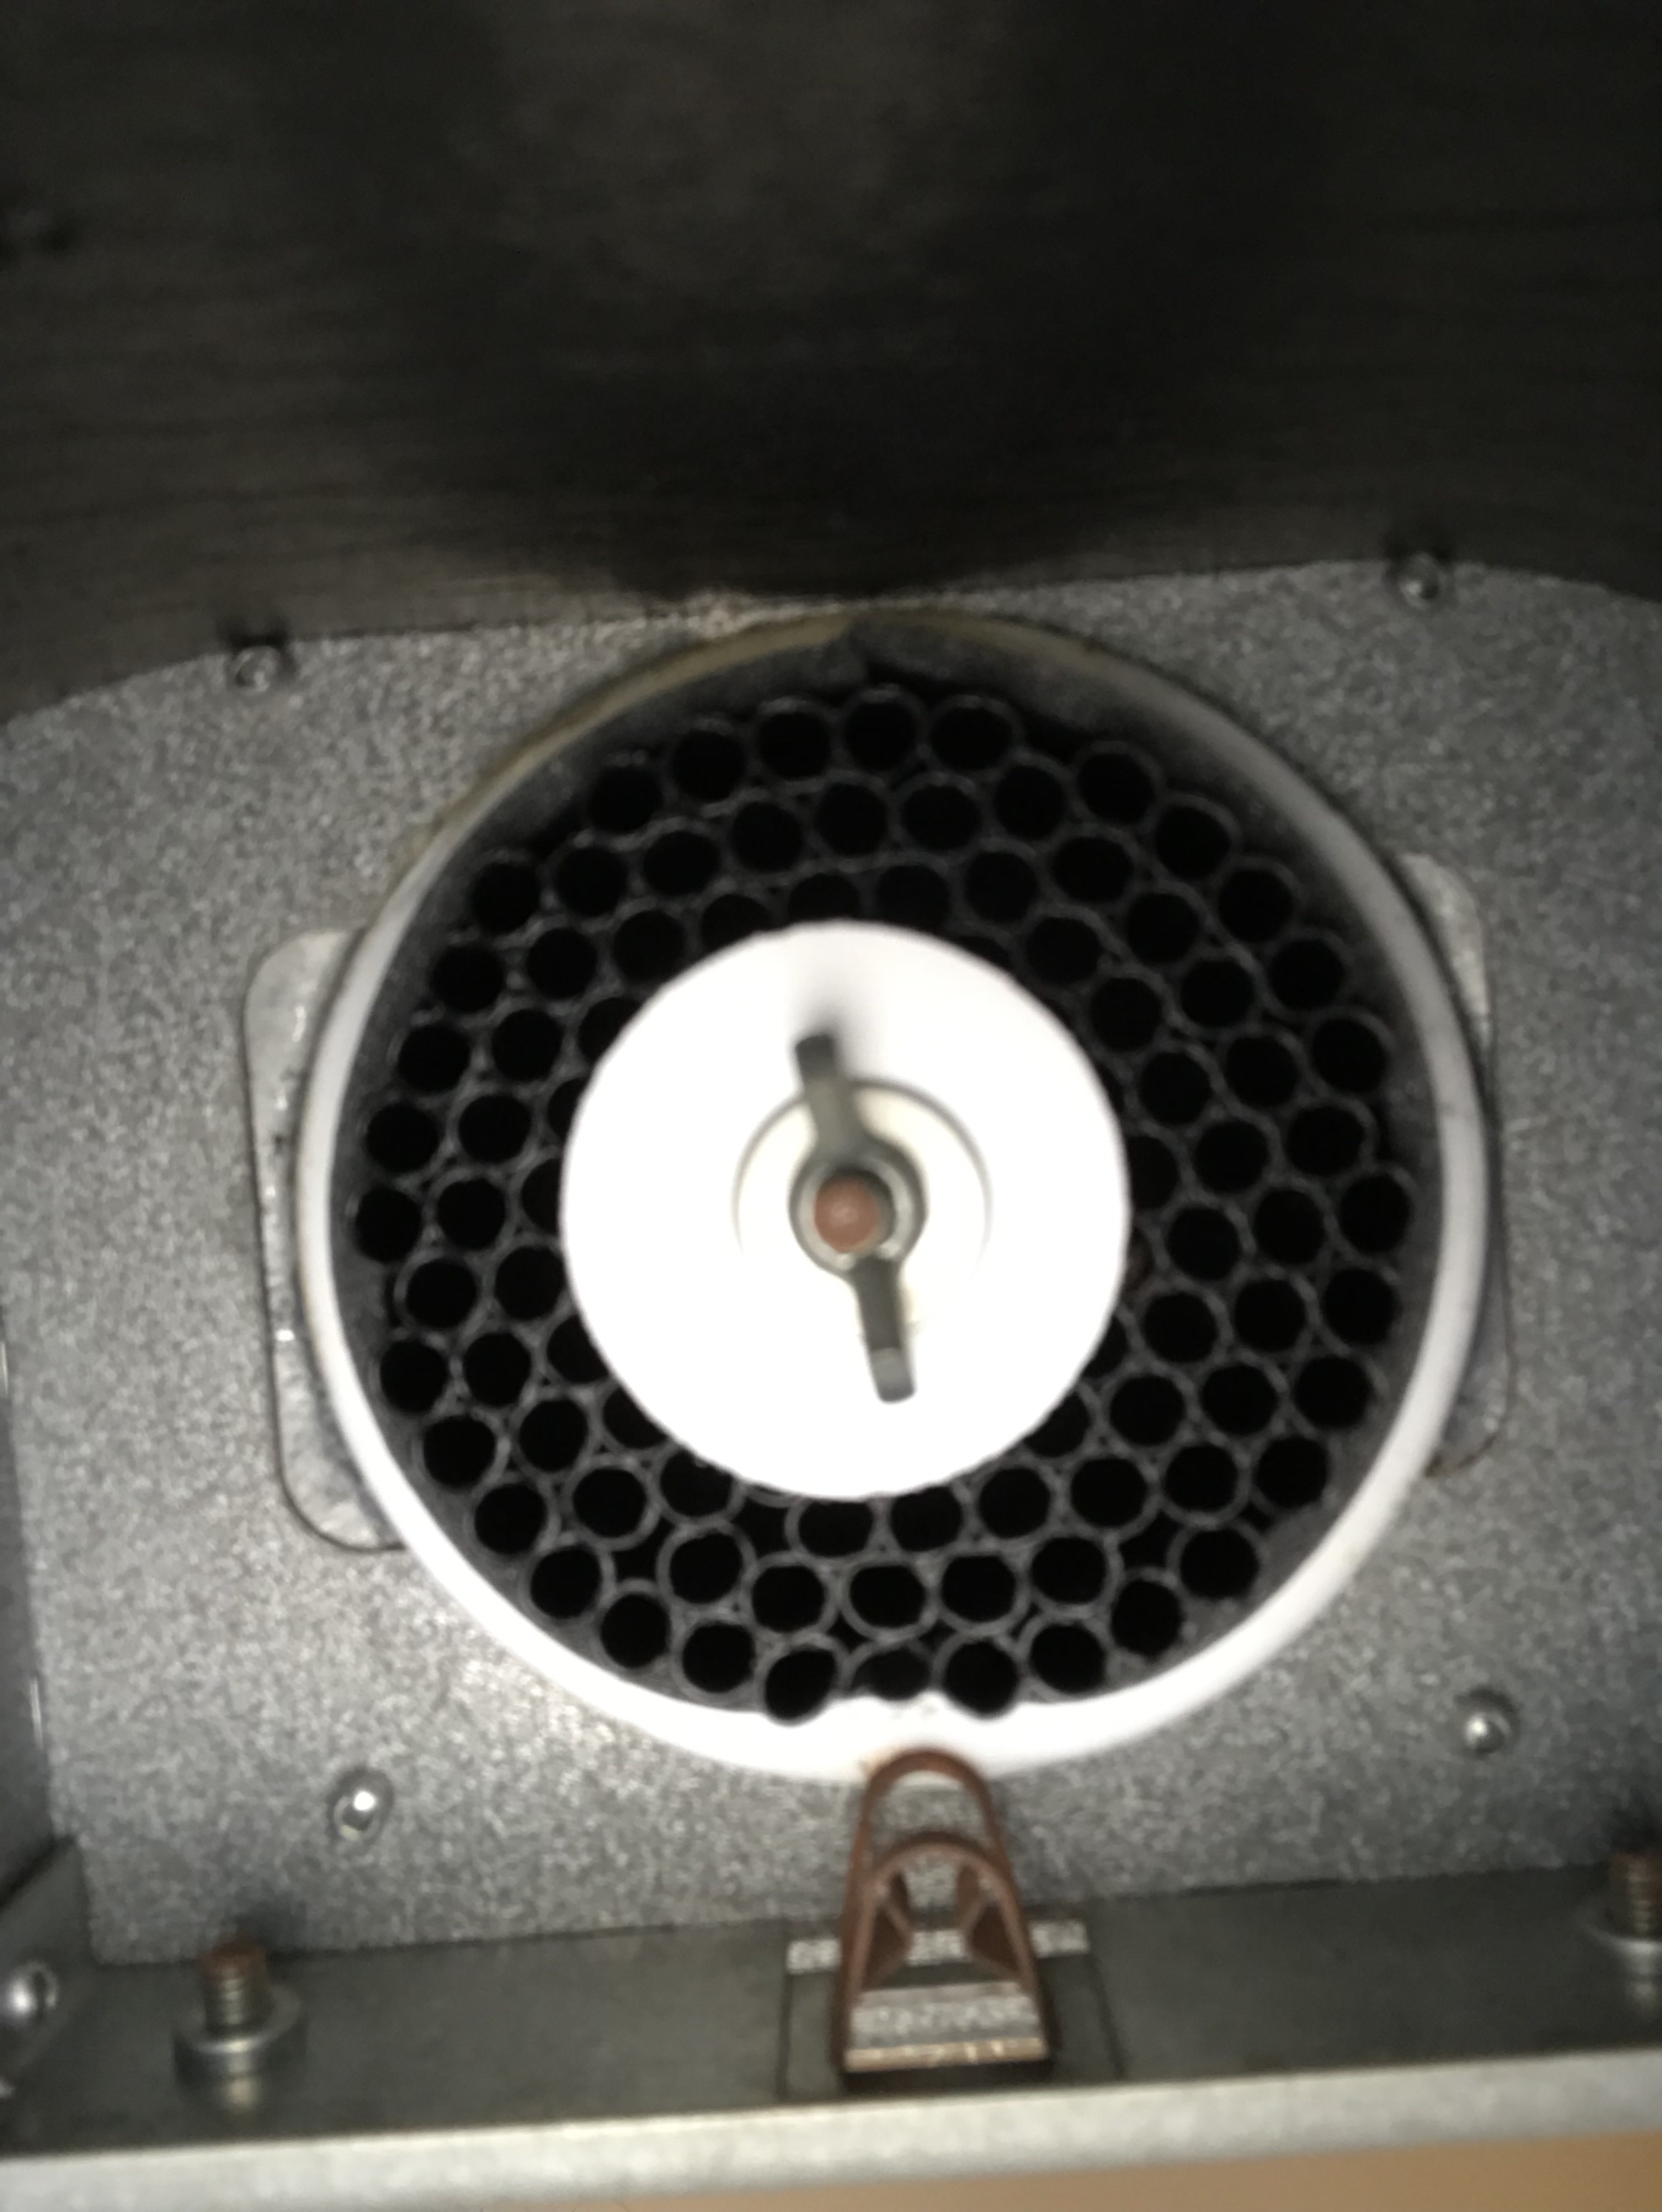
Next phase of this project required climbing into the attic to Install the yellow particle filter (MERV 15) in the ComfoWell, upstream of the activated carbon filter. While I was in there, I replaced the activated carbon filter. We’ve been calling this “charcoal filter” and can’t get ourselves to call it by the correct name.


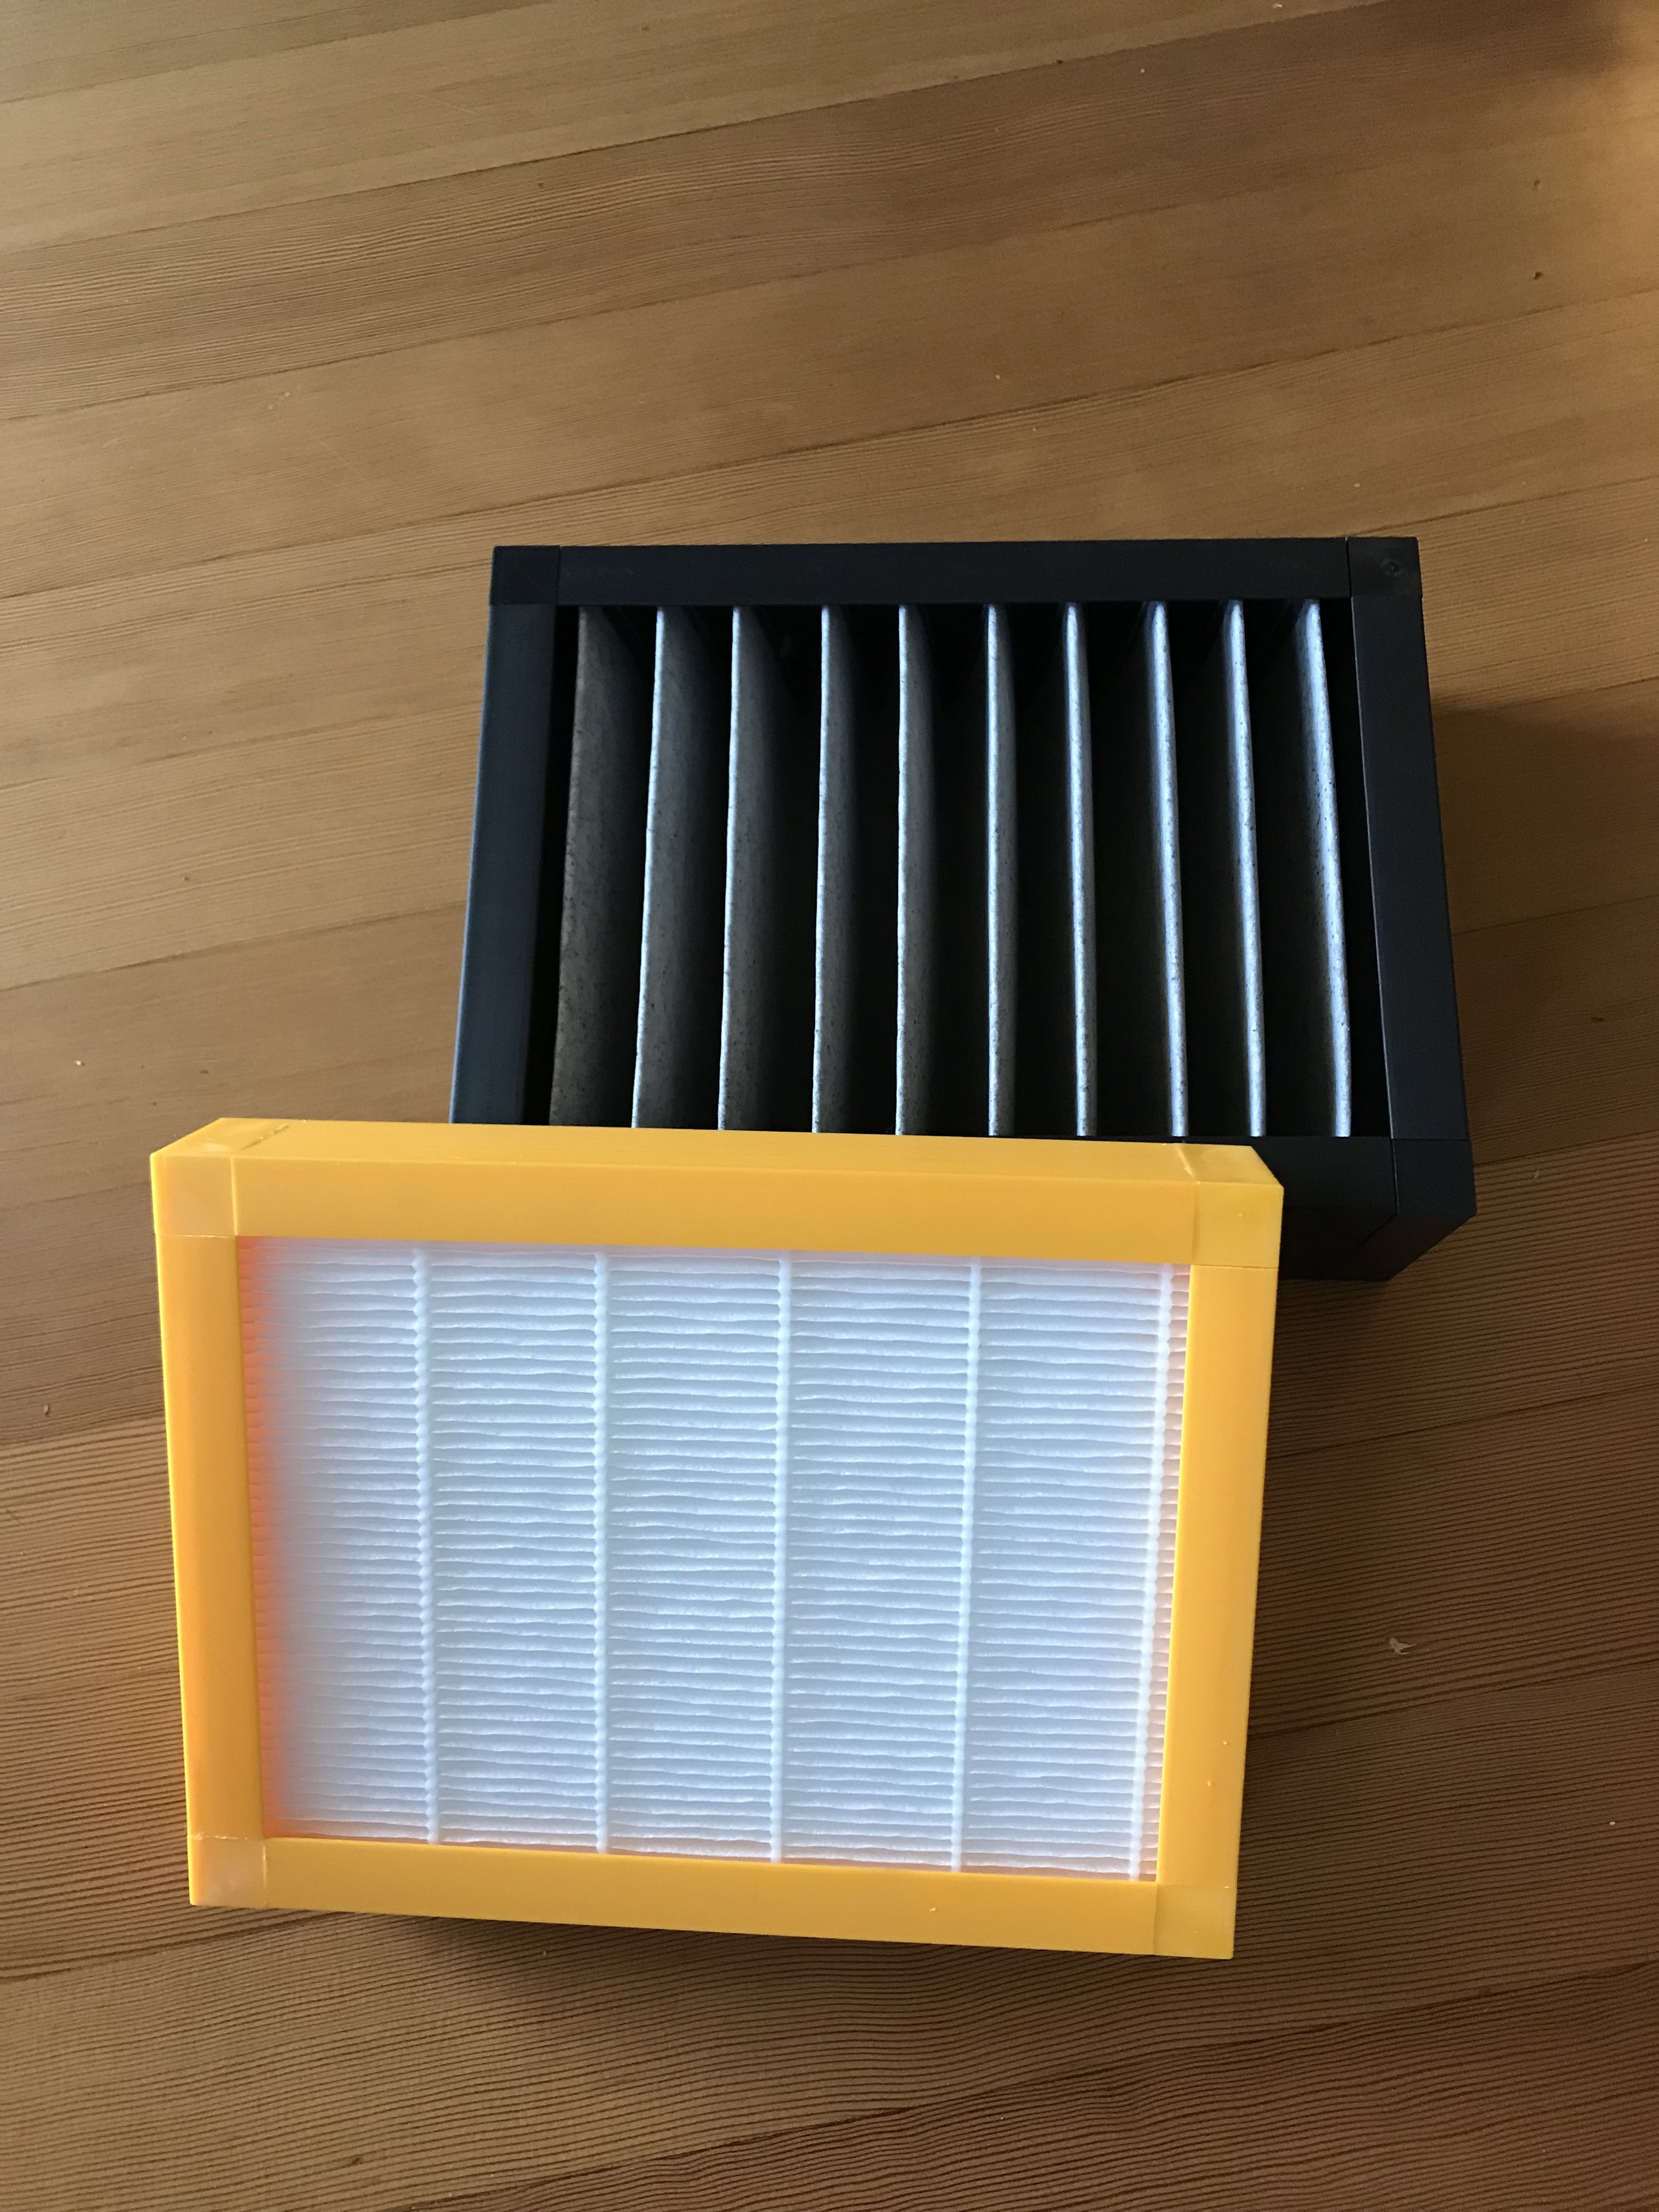
Fine Particle Filter and Activated Carbon Filter


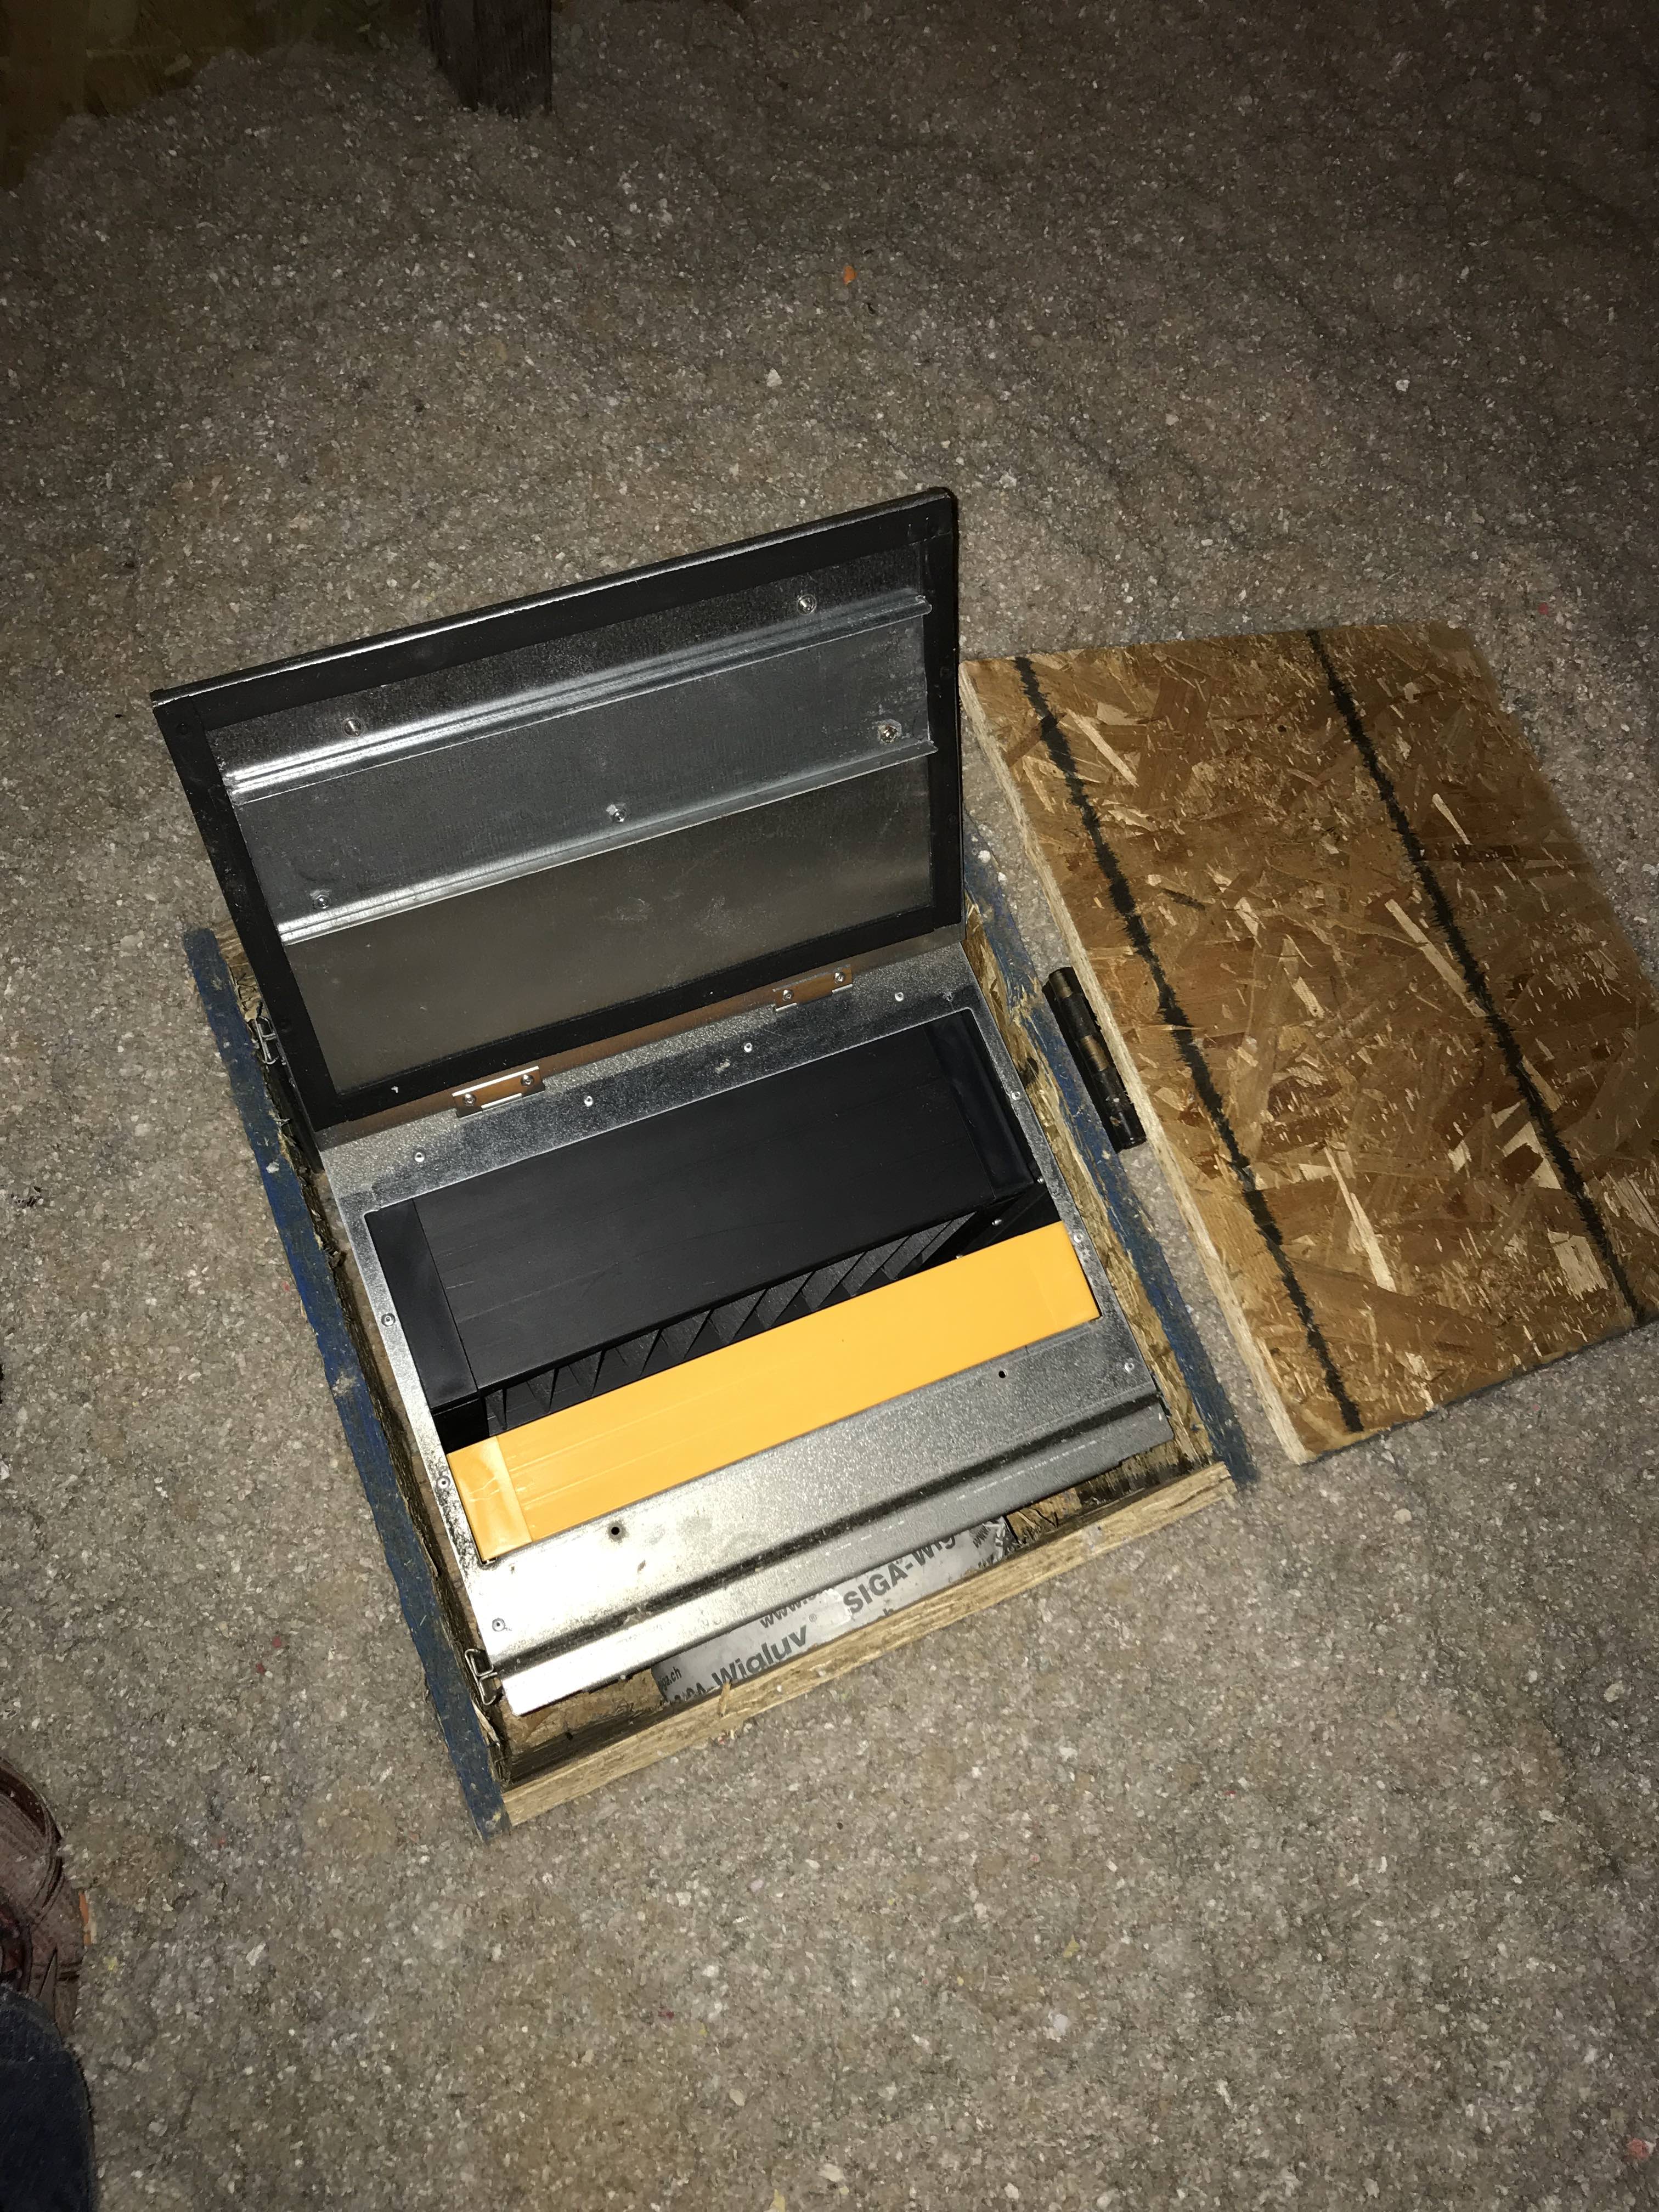
ComfoWell with Activated Charcoal Filter and Fine Particle Filter

Adjust Fan Setting Values

The total fresh air (supply) measurement dropped by about 3 CFM after the installation of the additional yellow particle filter. The total return air (exhaust) measurement was still about 20 CFM greater than the total fresh air (supply) measurement at medium fan setting. Next step was to adjust the fan speed.

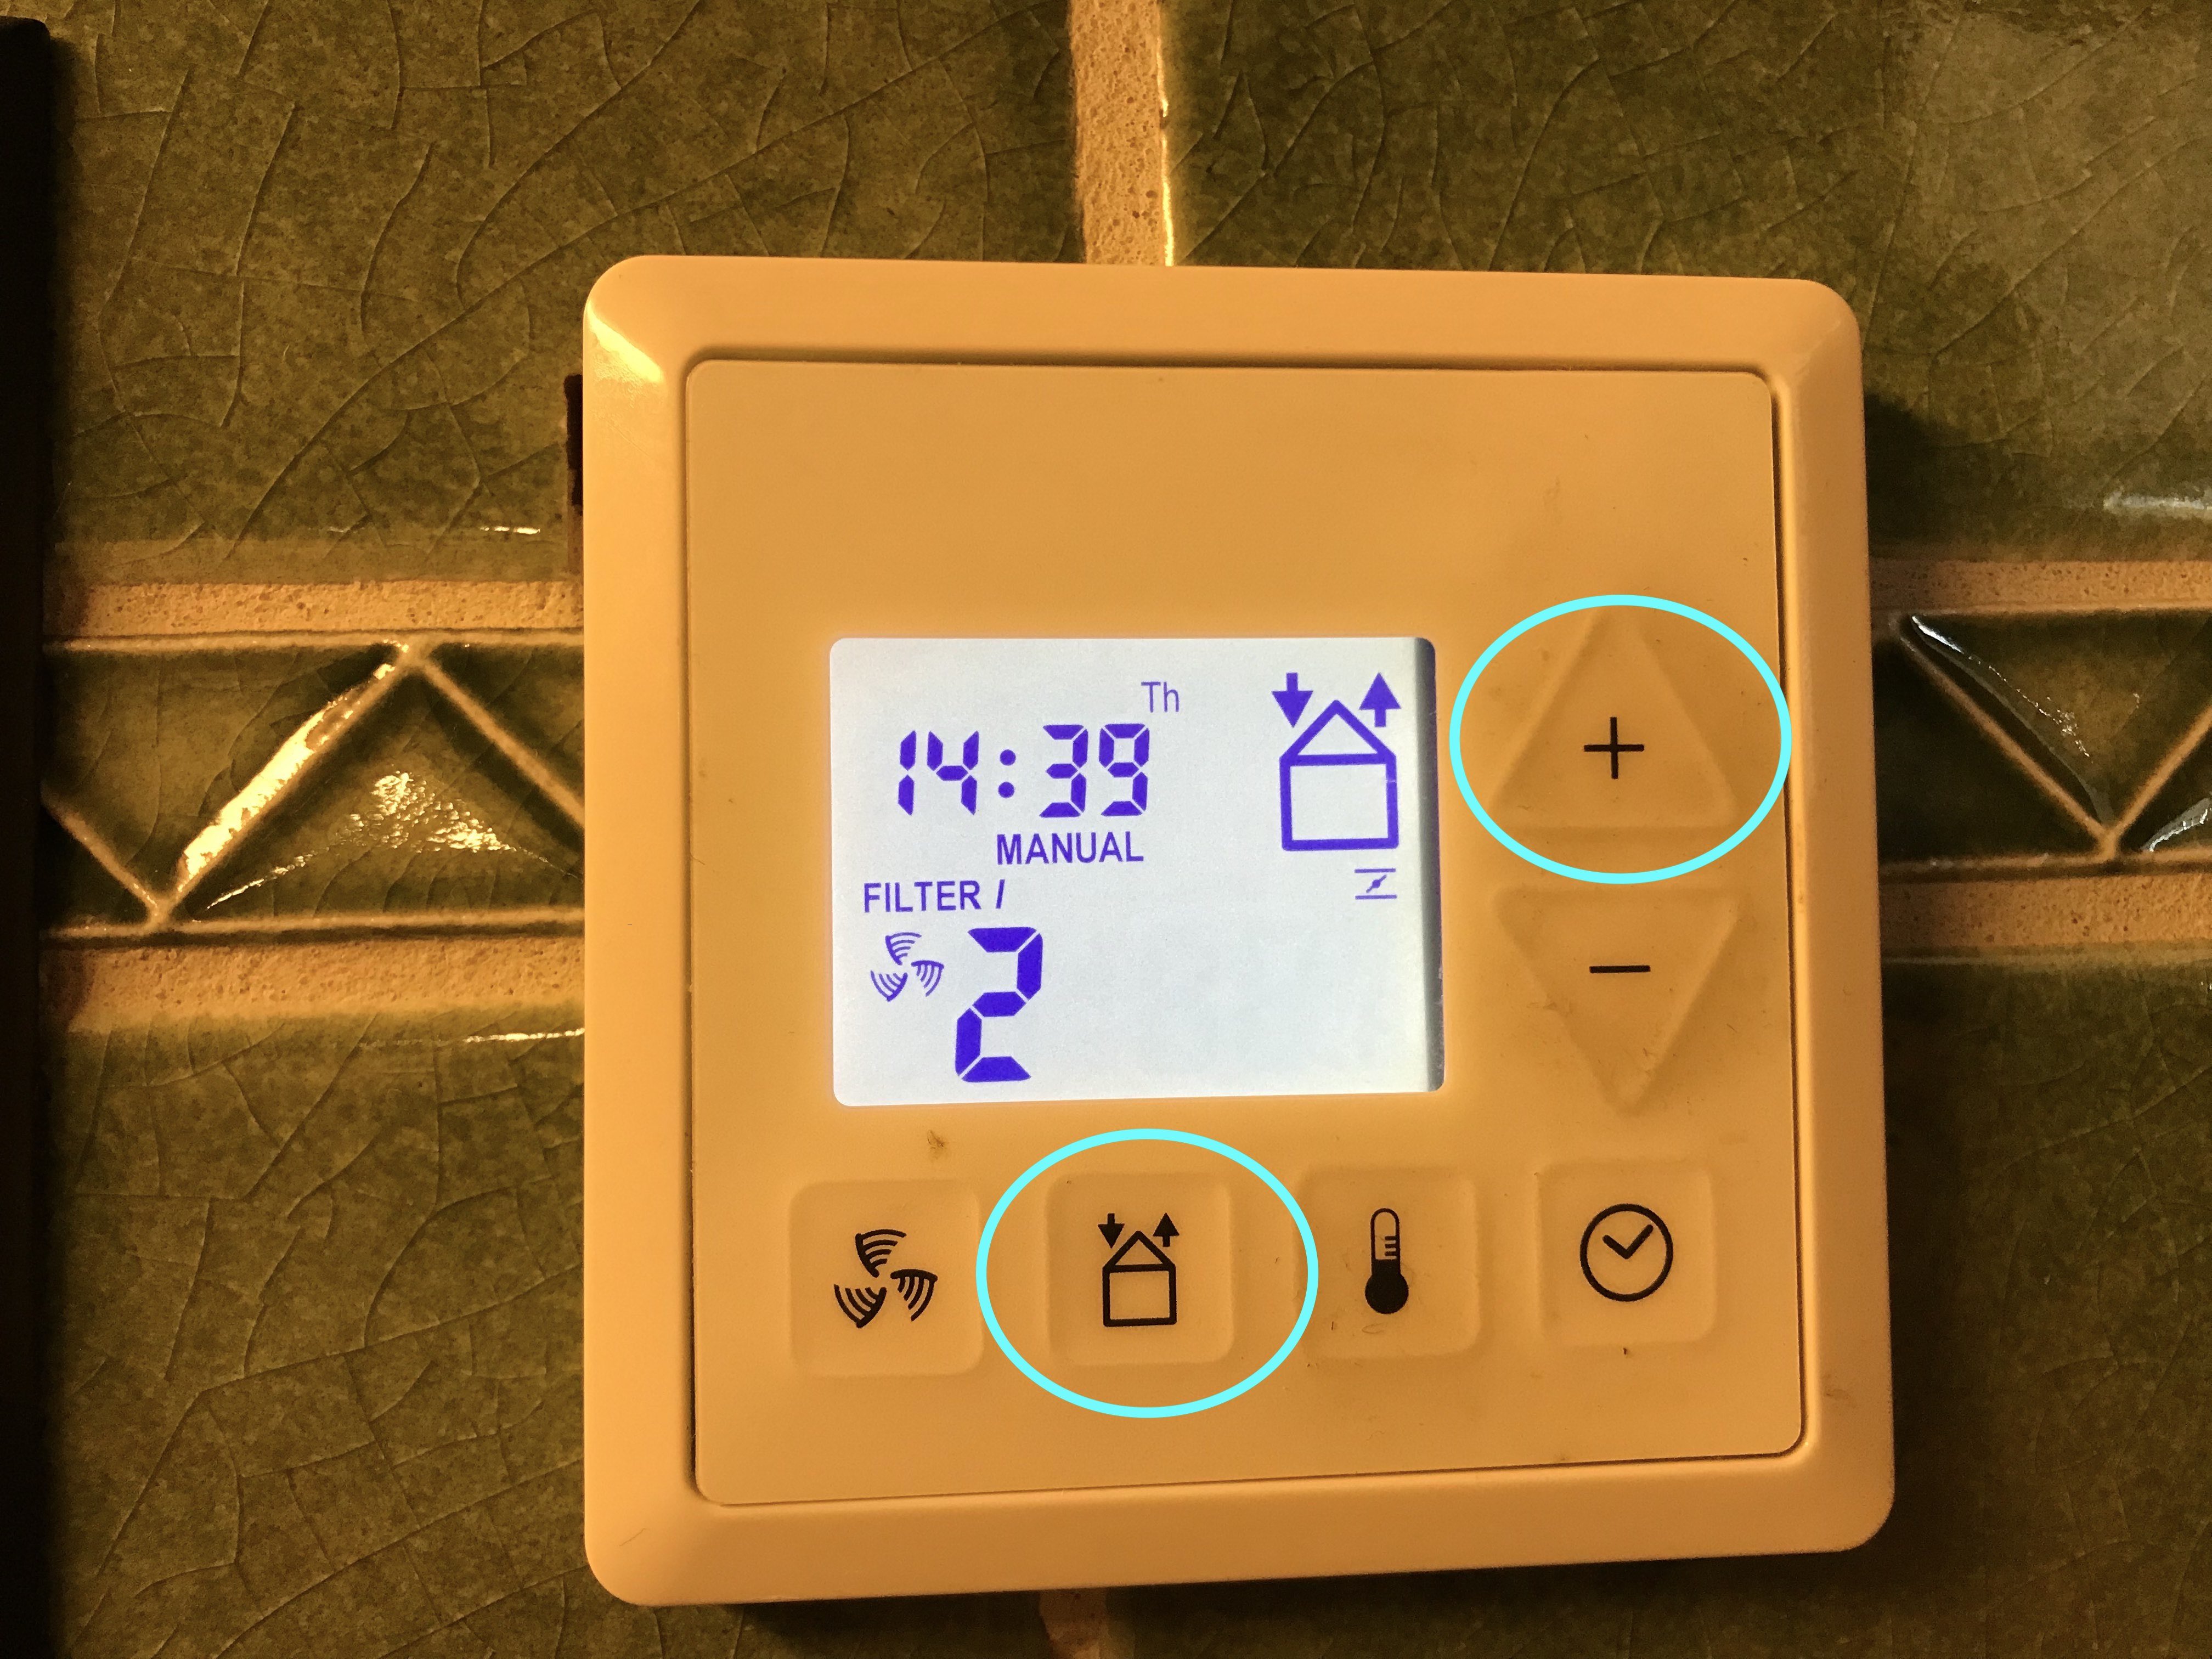
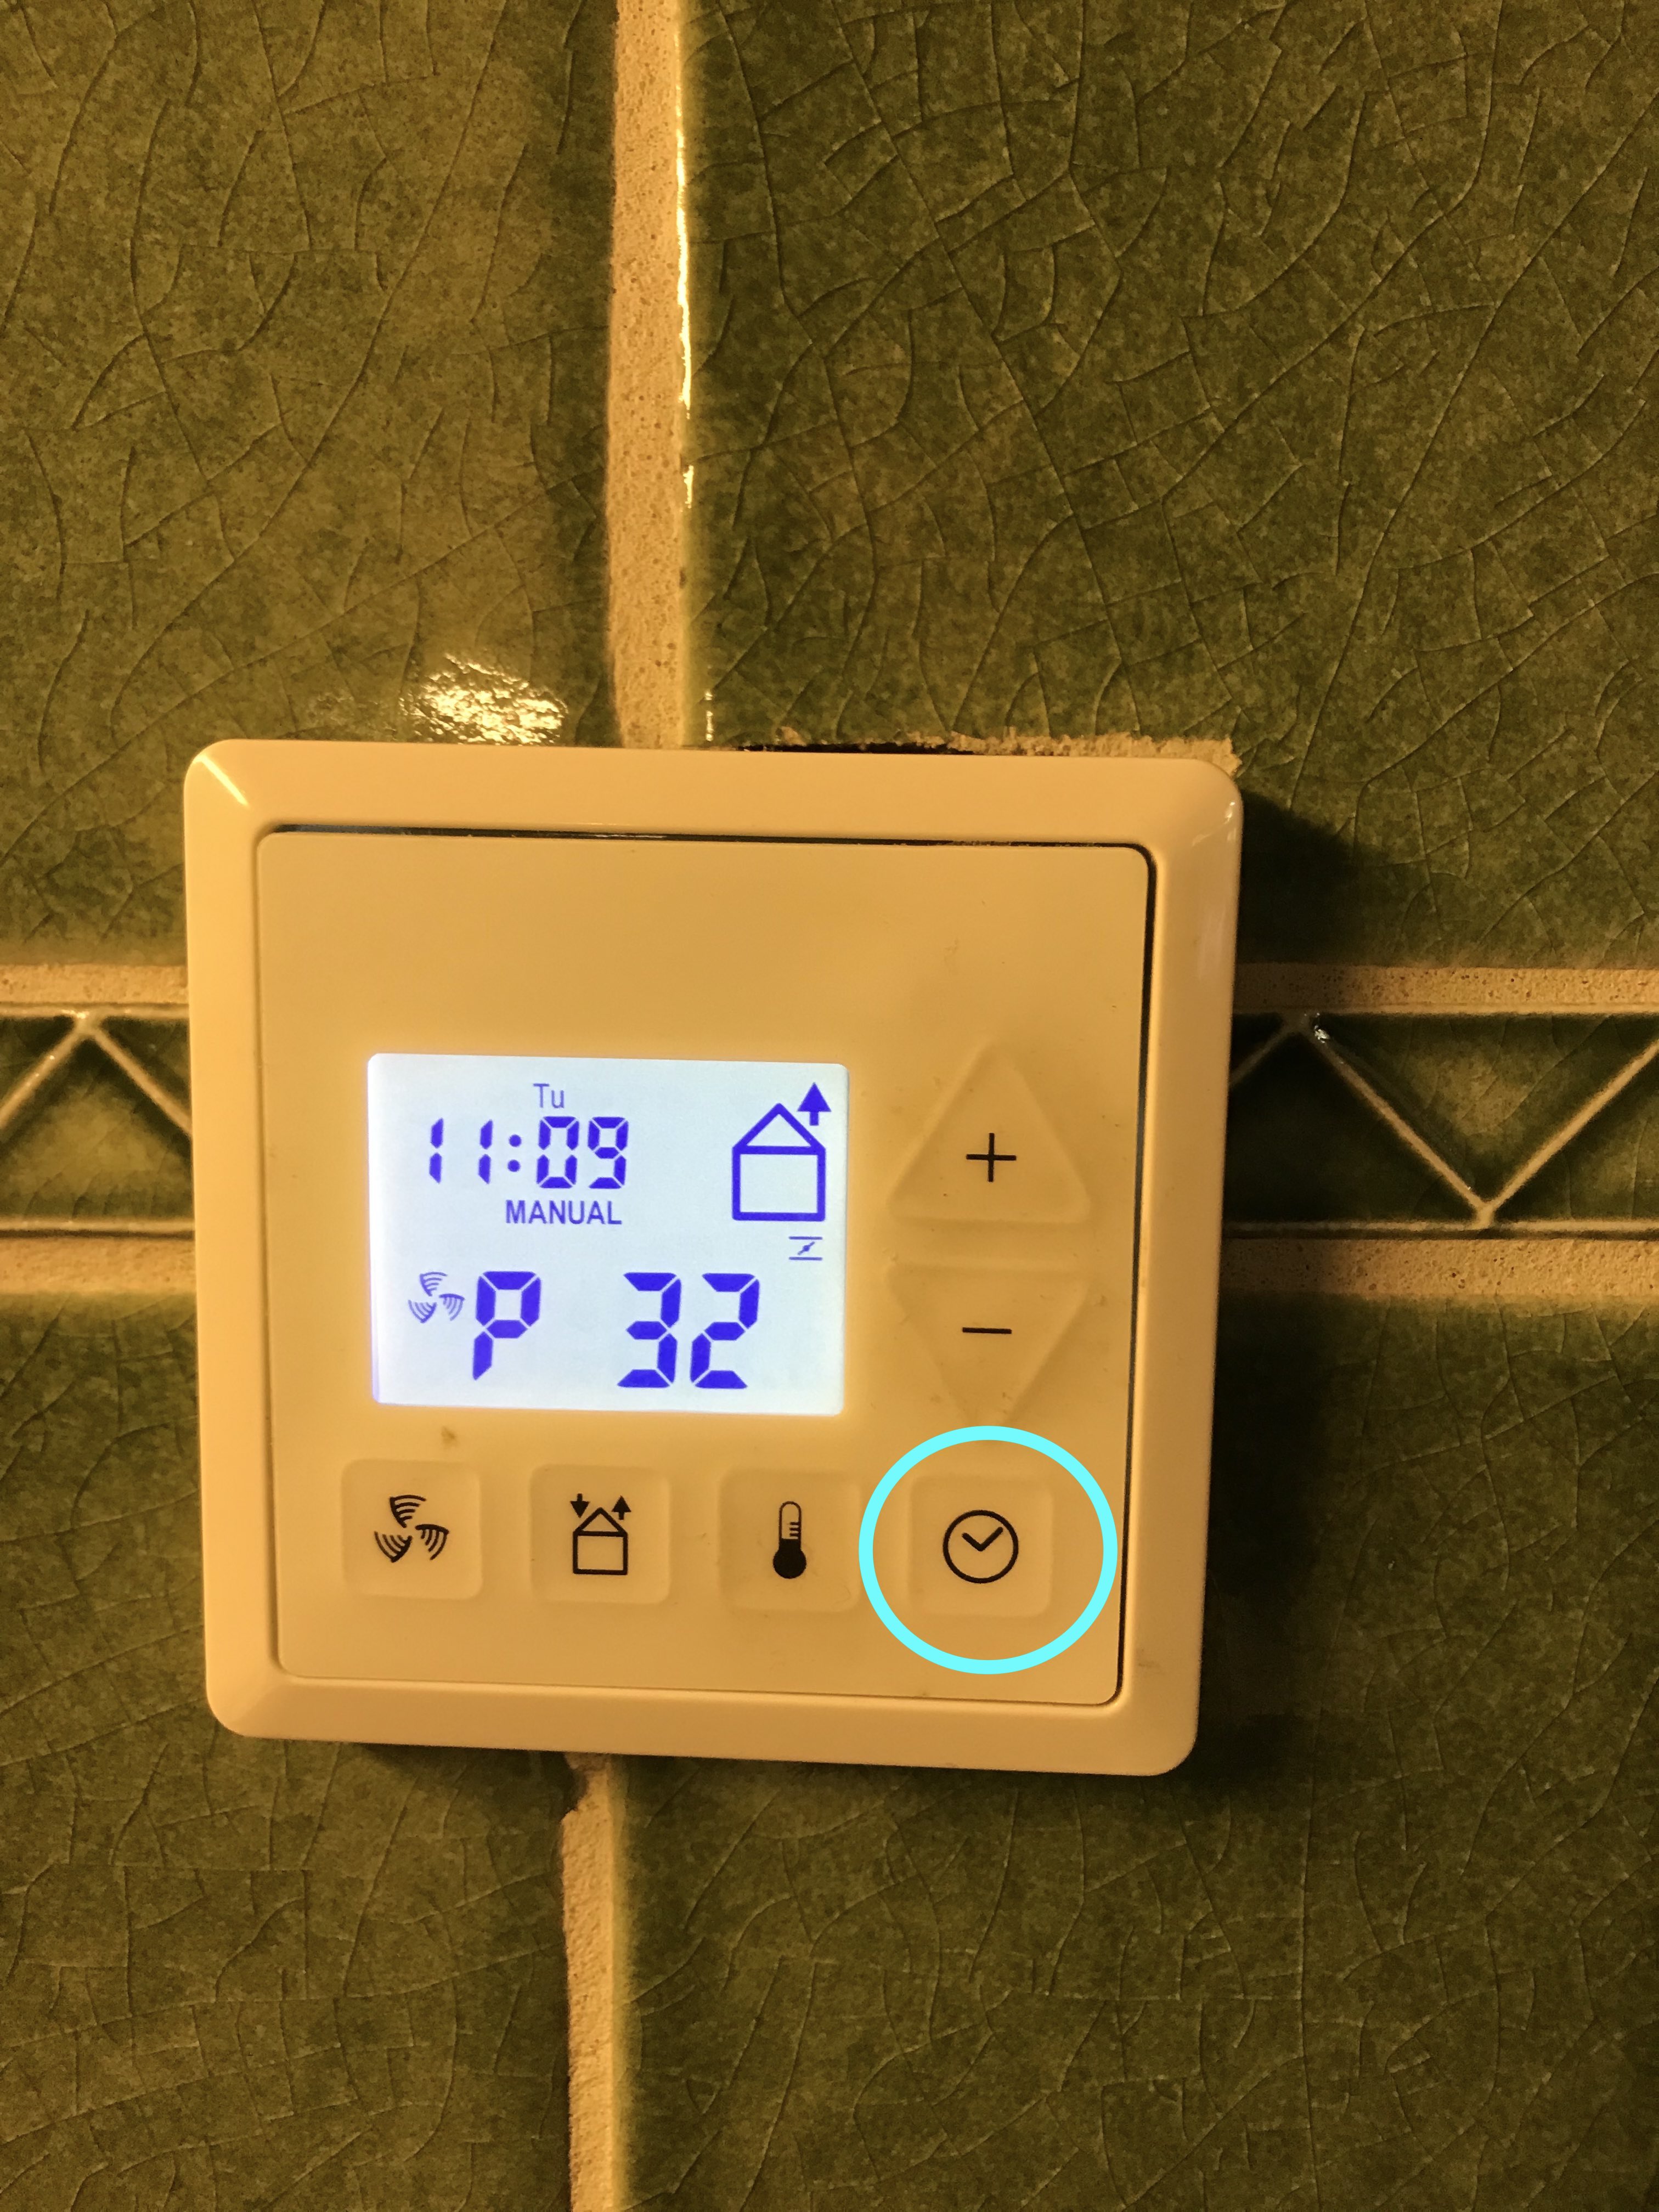
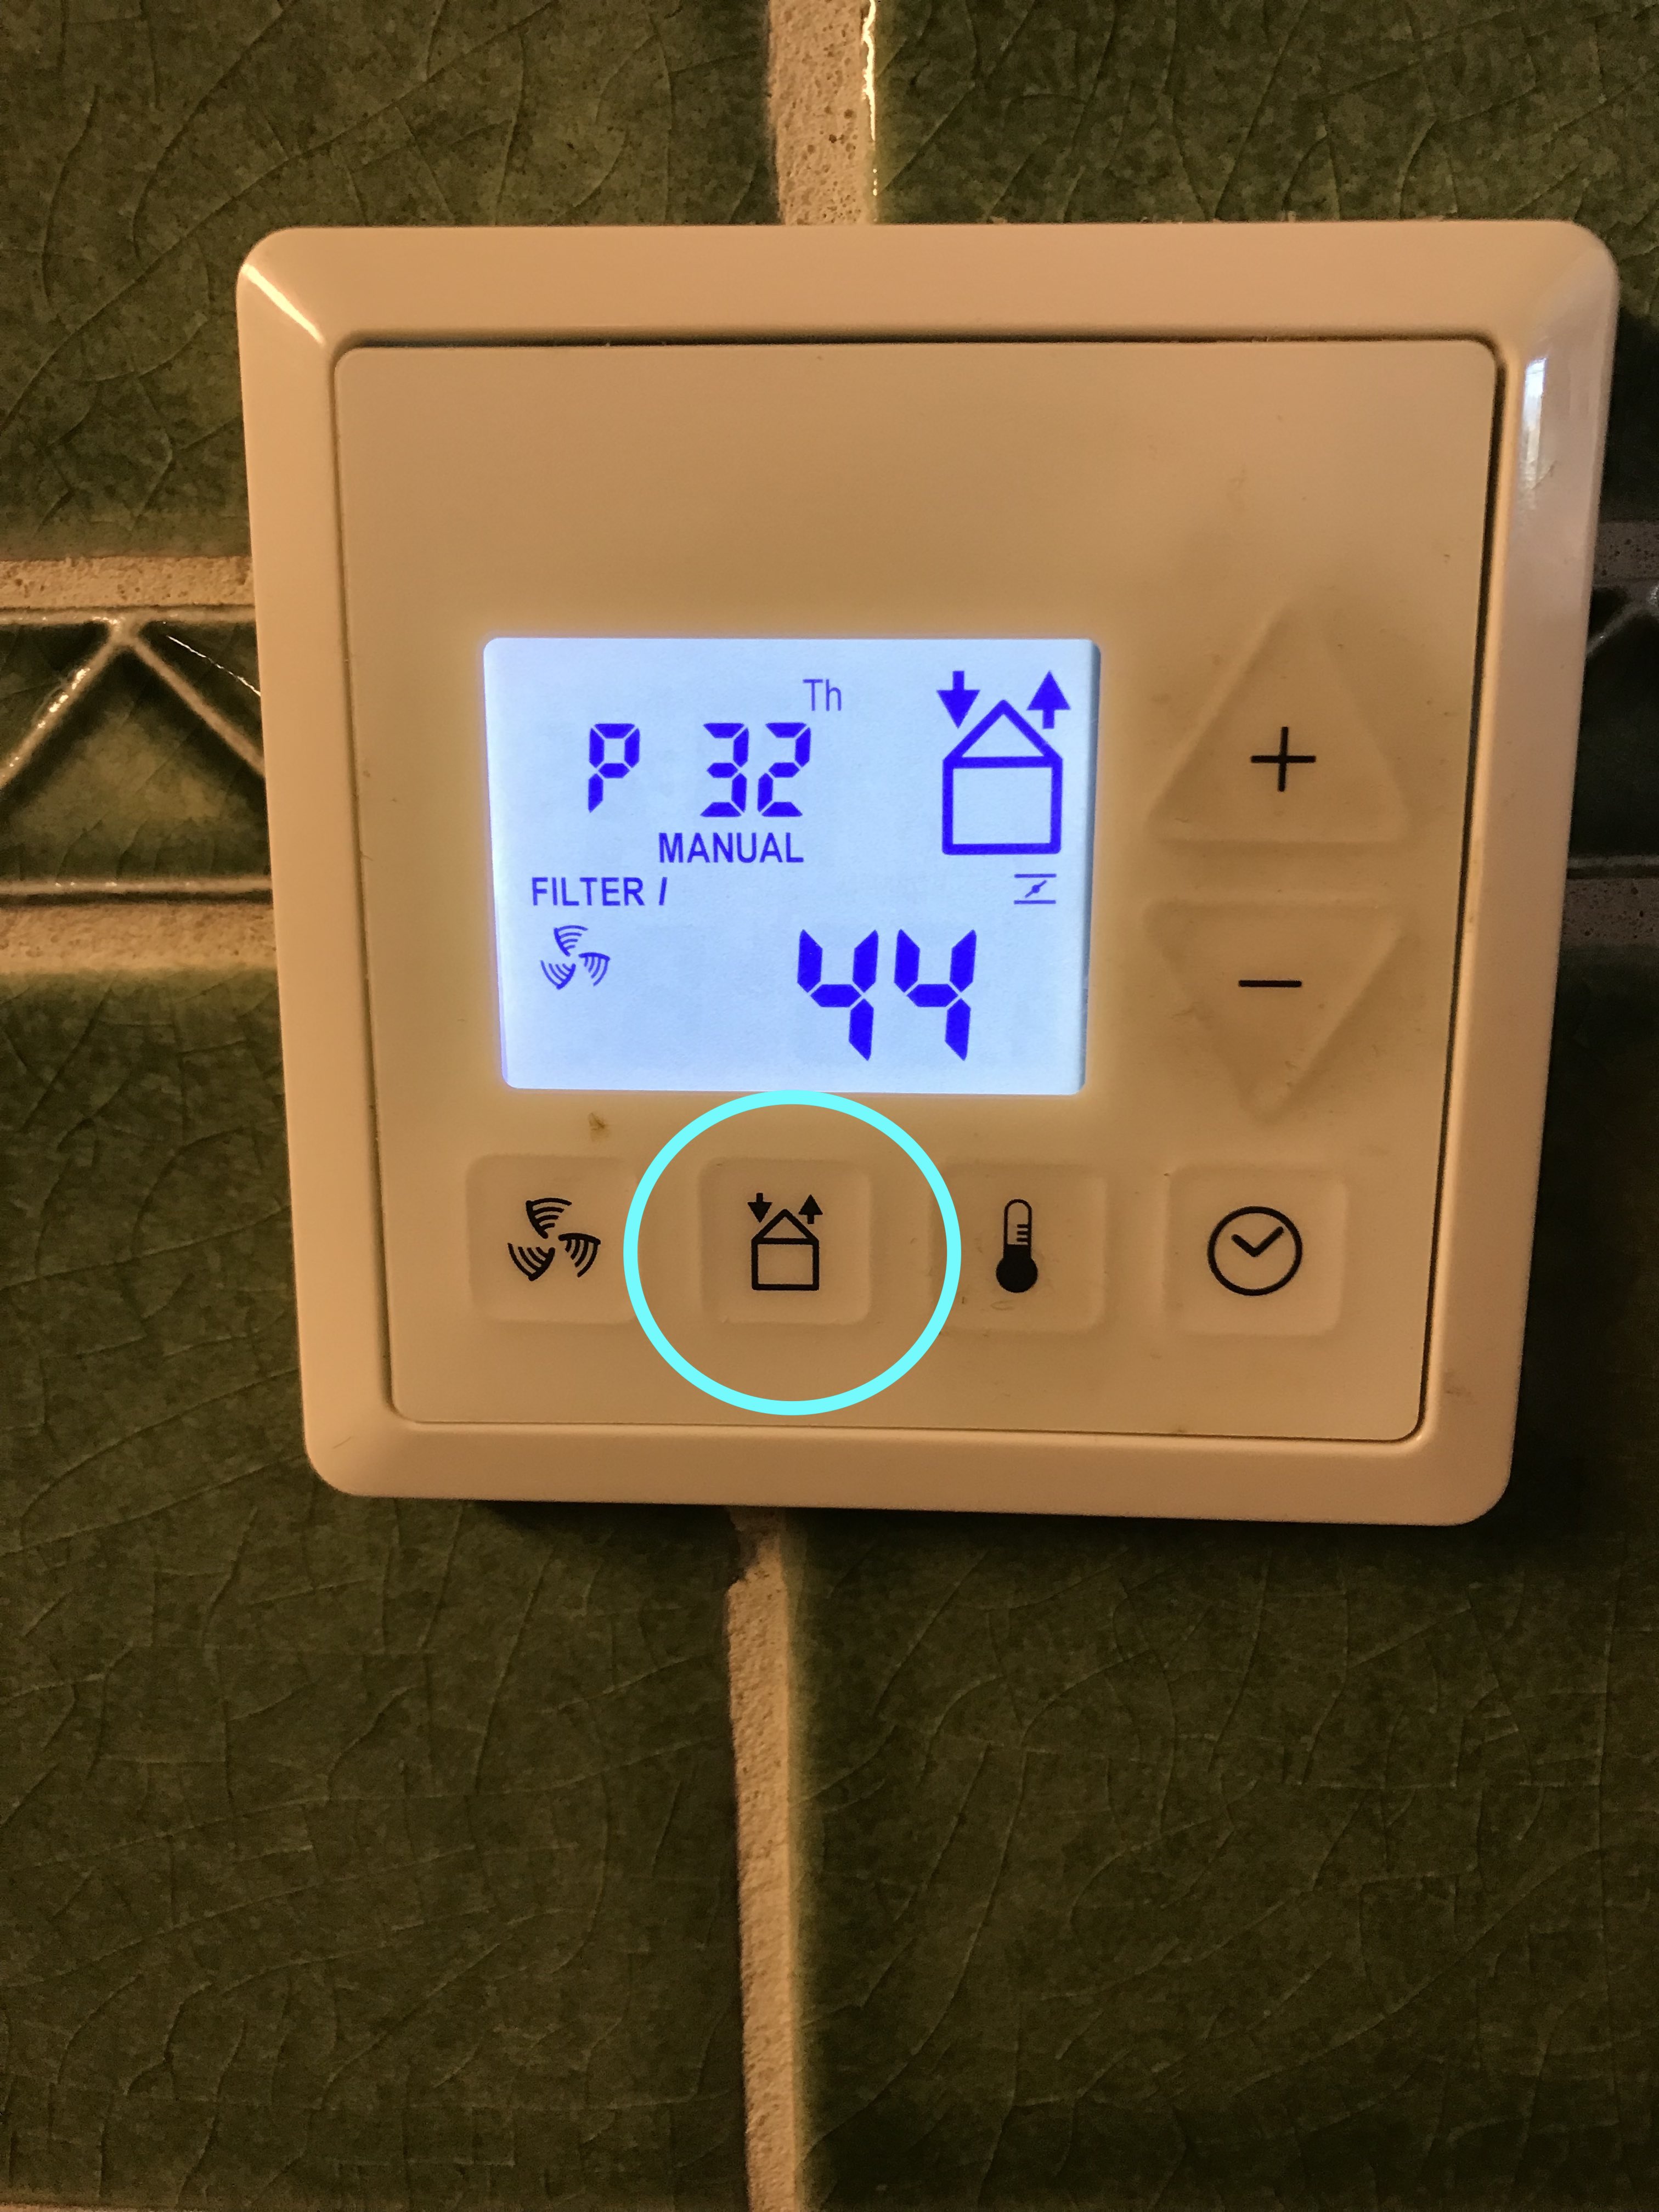
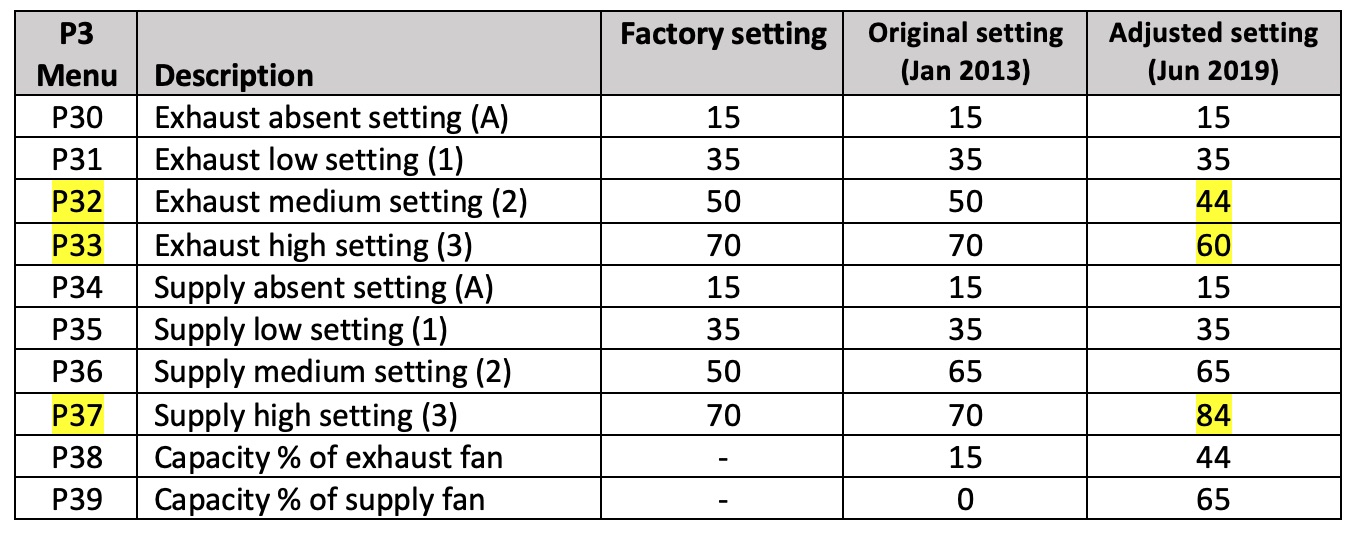
I followed the instruction on page 9 of Zehnder Installation Manualto access P3 (ventilation program) menu. I lowered the fan values for exhaust medium setting (P32) and exhaust high setting (P33). I raised the fan value for supply high setting (P37).


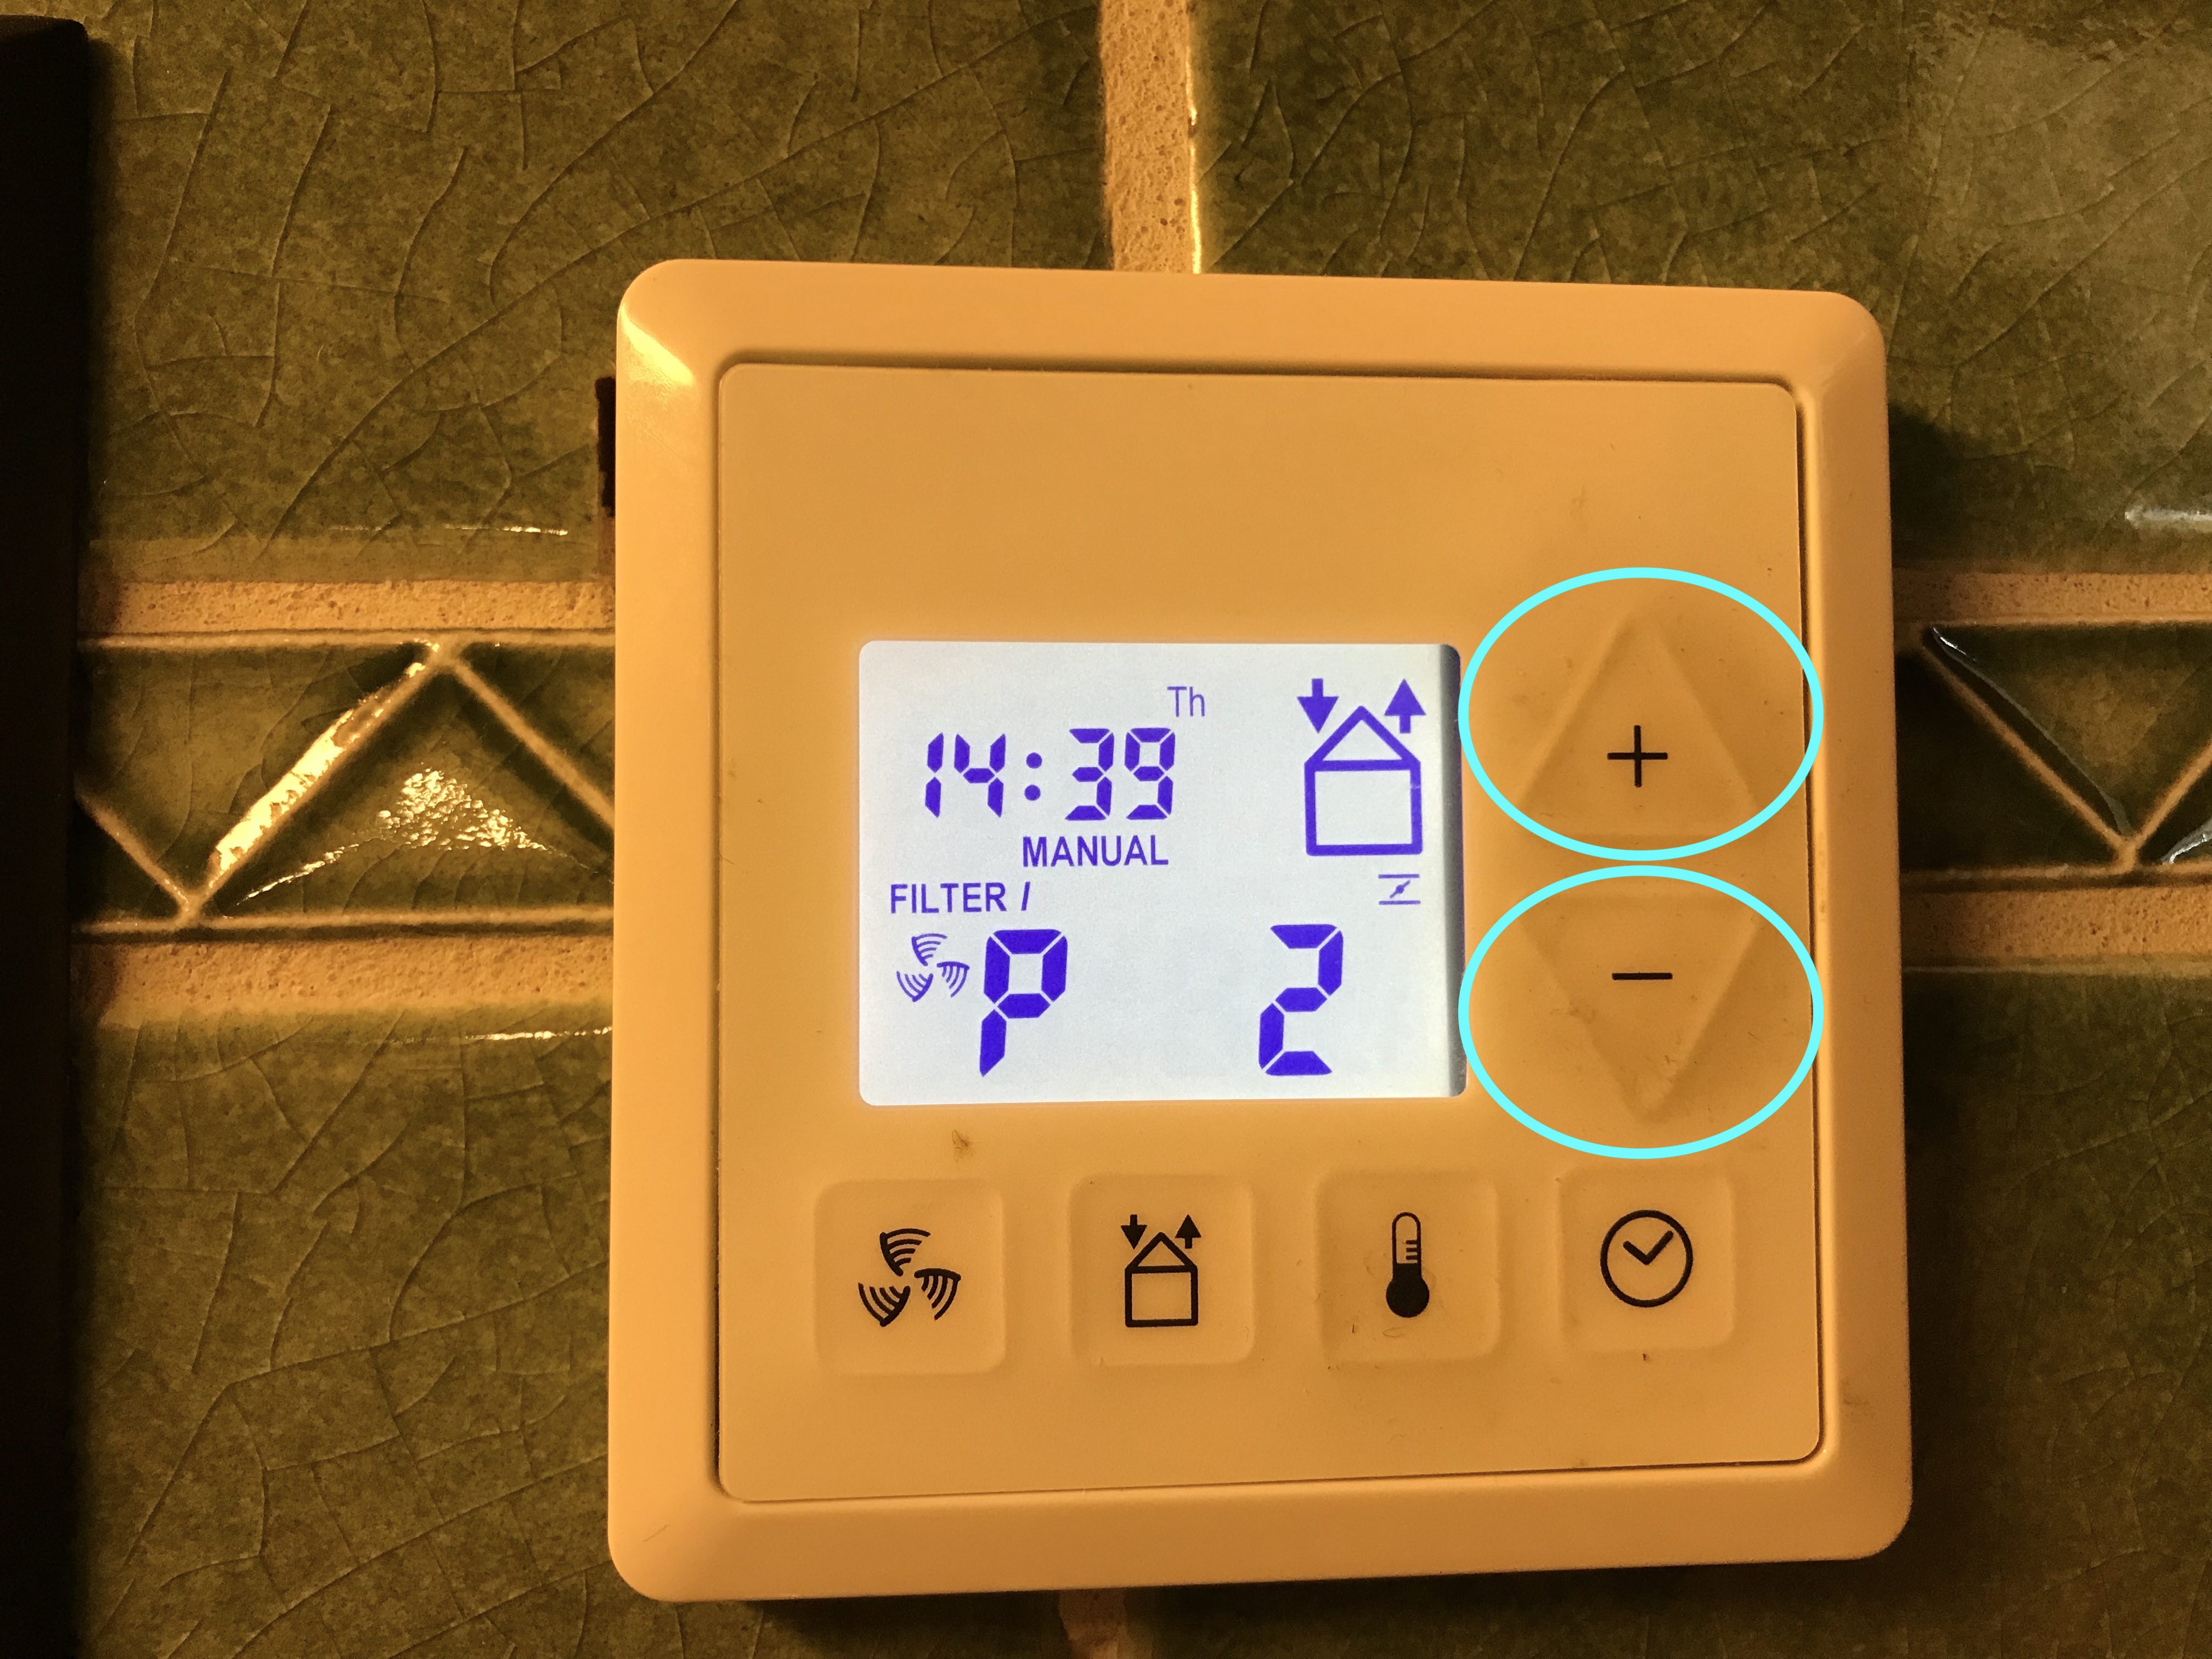
Press the supply/exhaust button and the plus button simultaneously


Press plus and minus button simultaneously


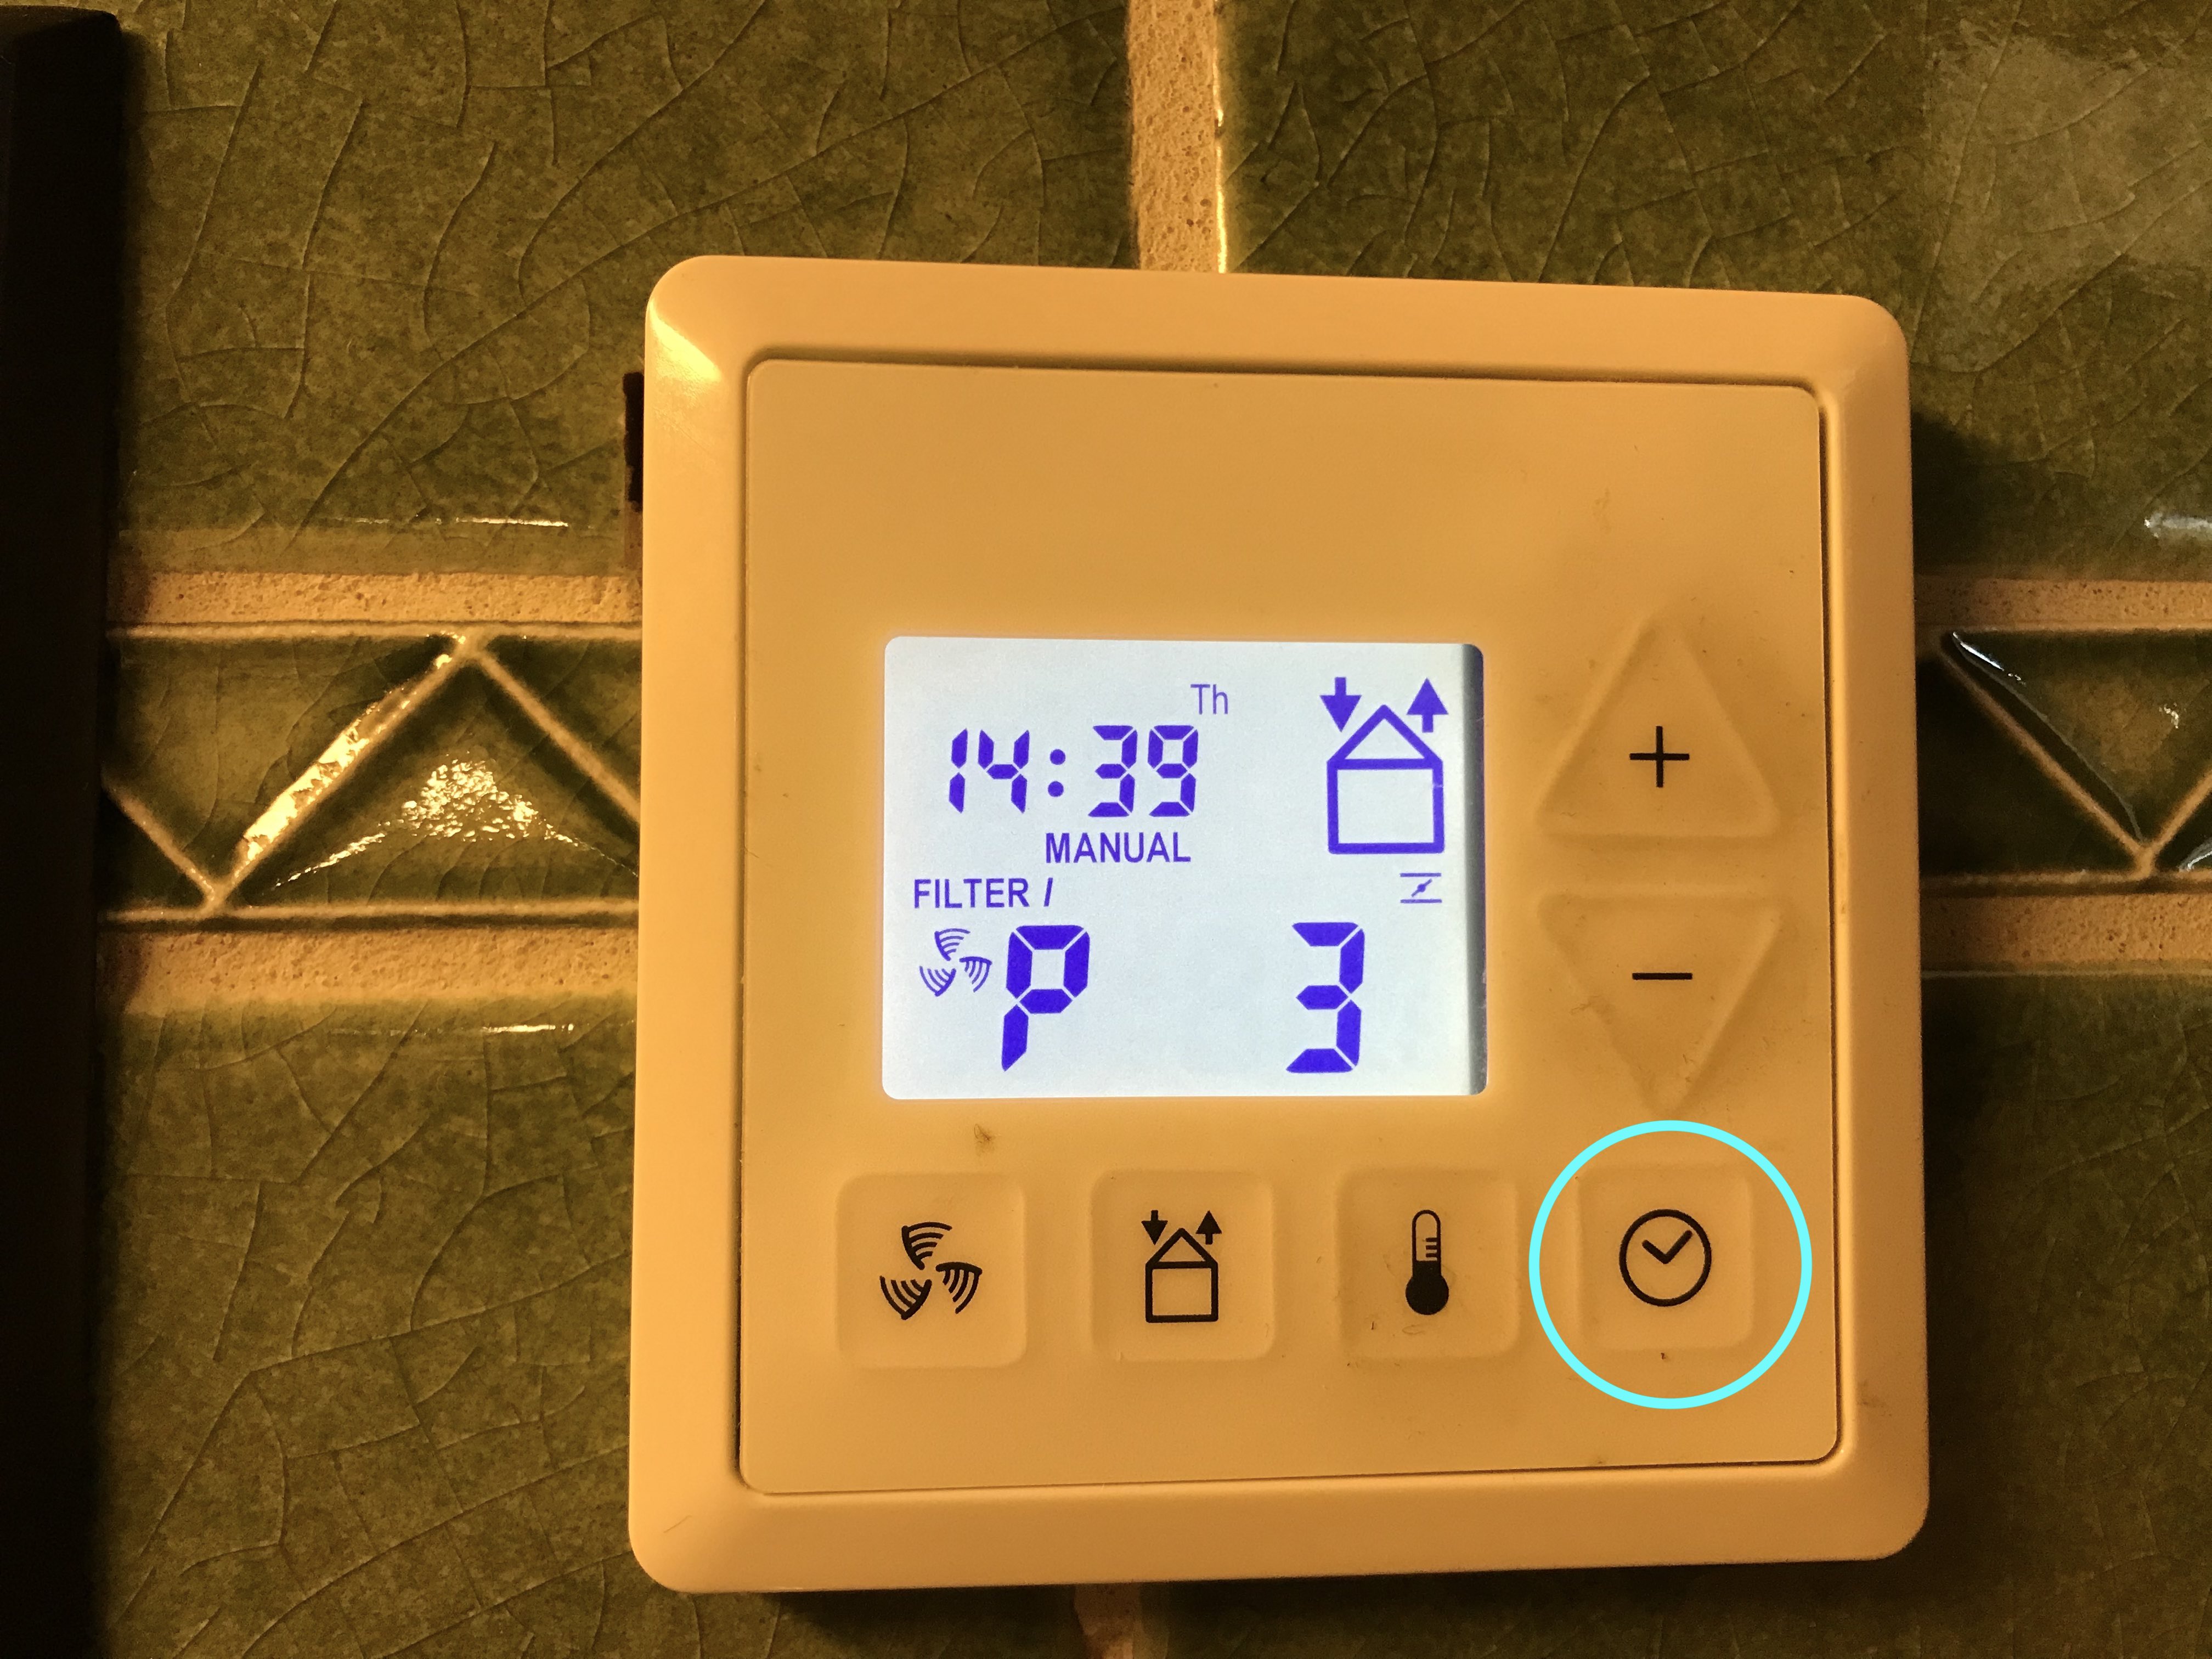
Press clock button


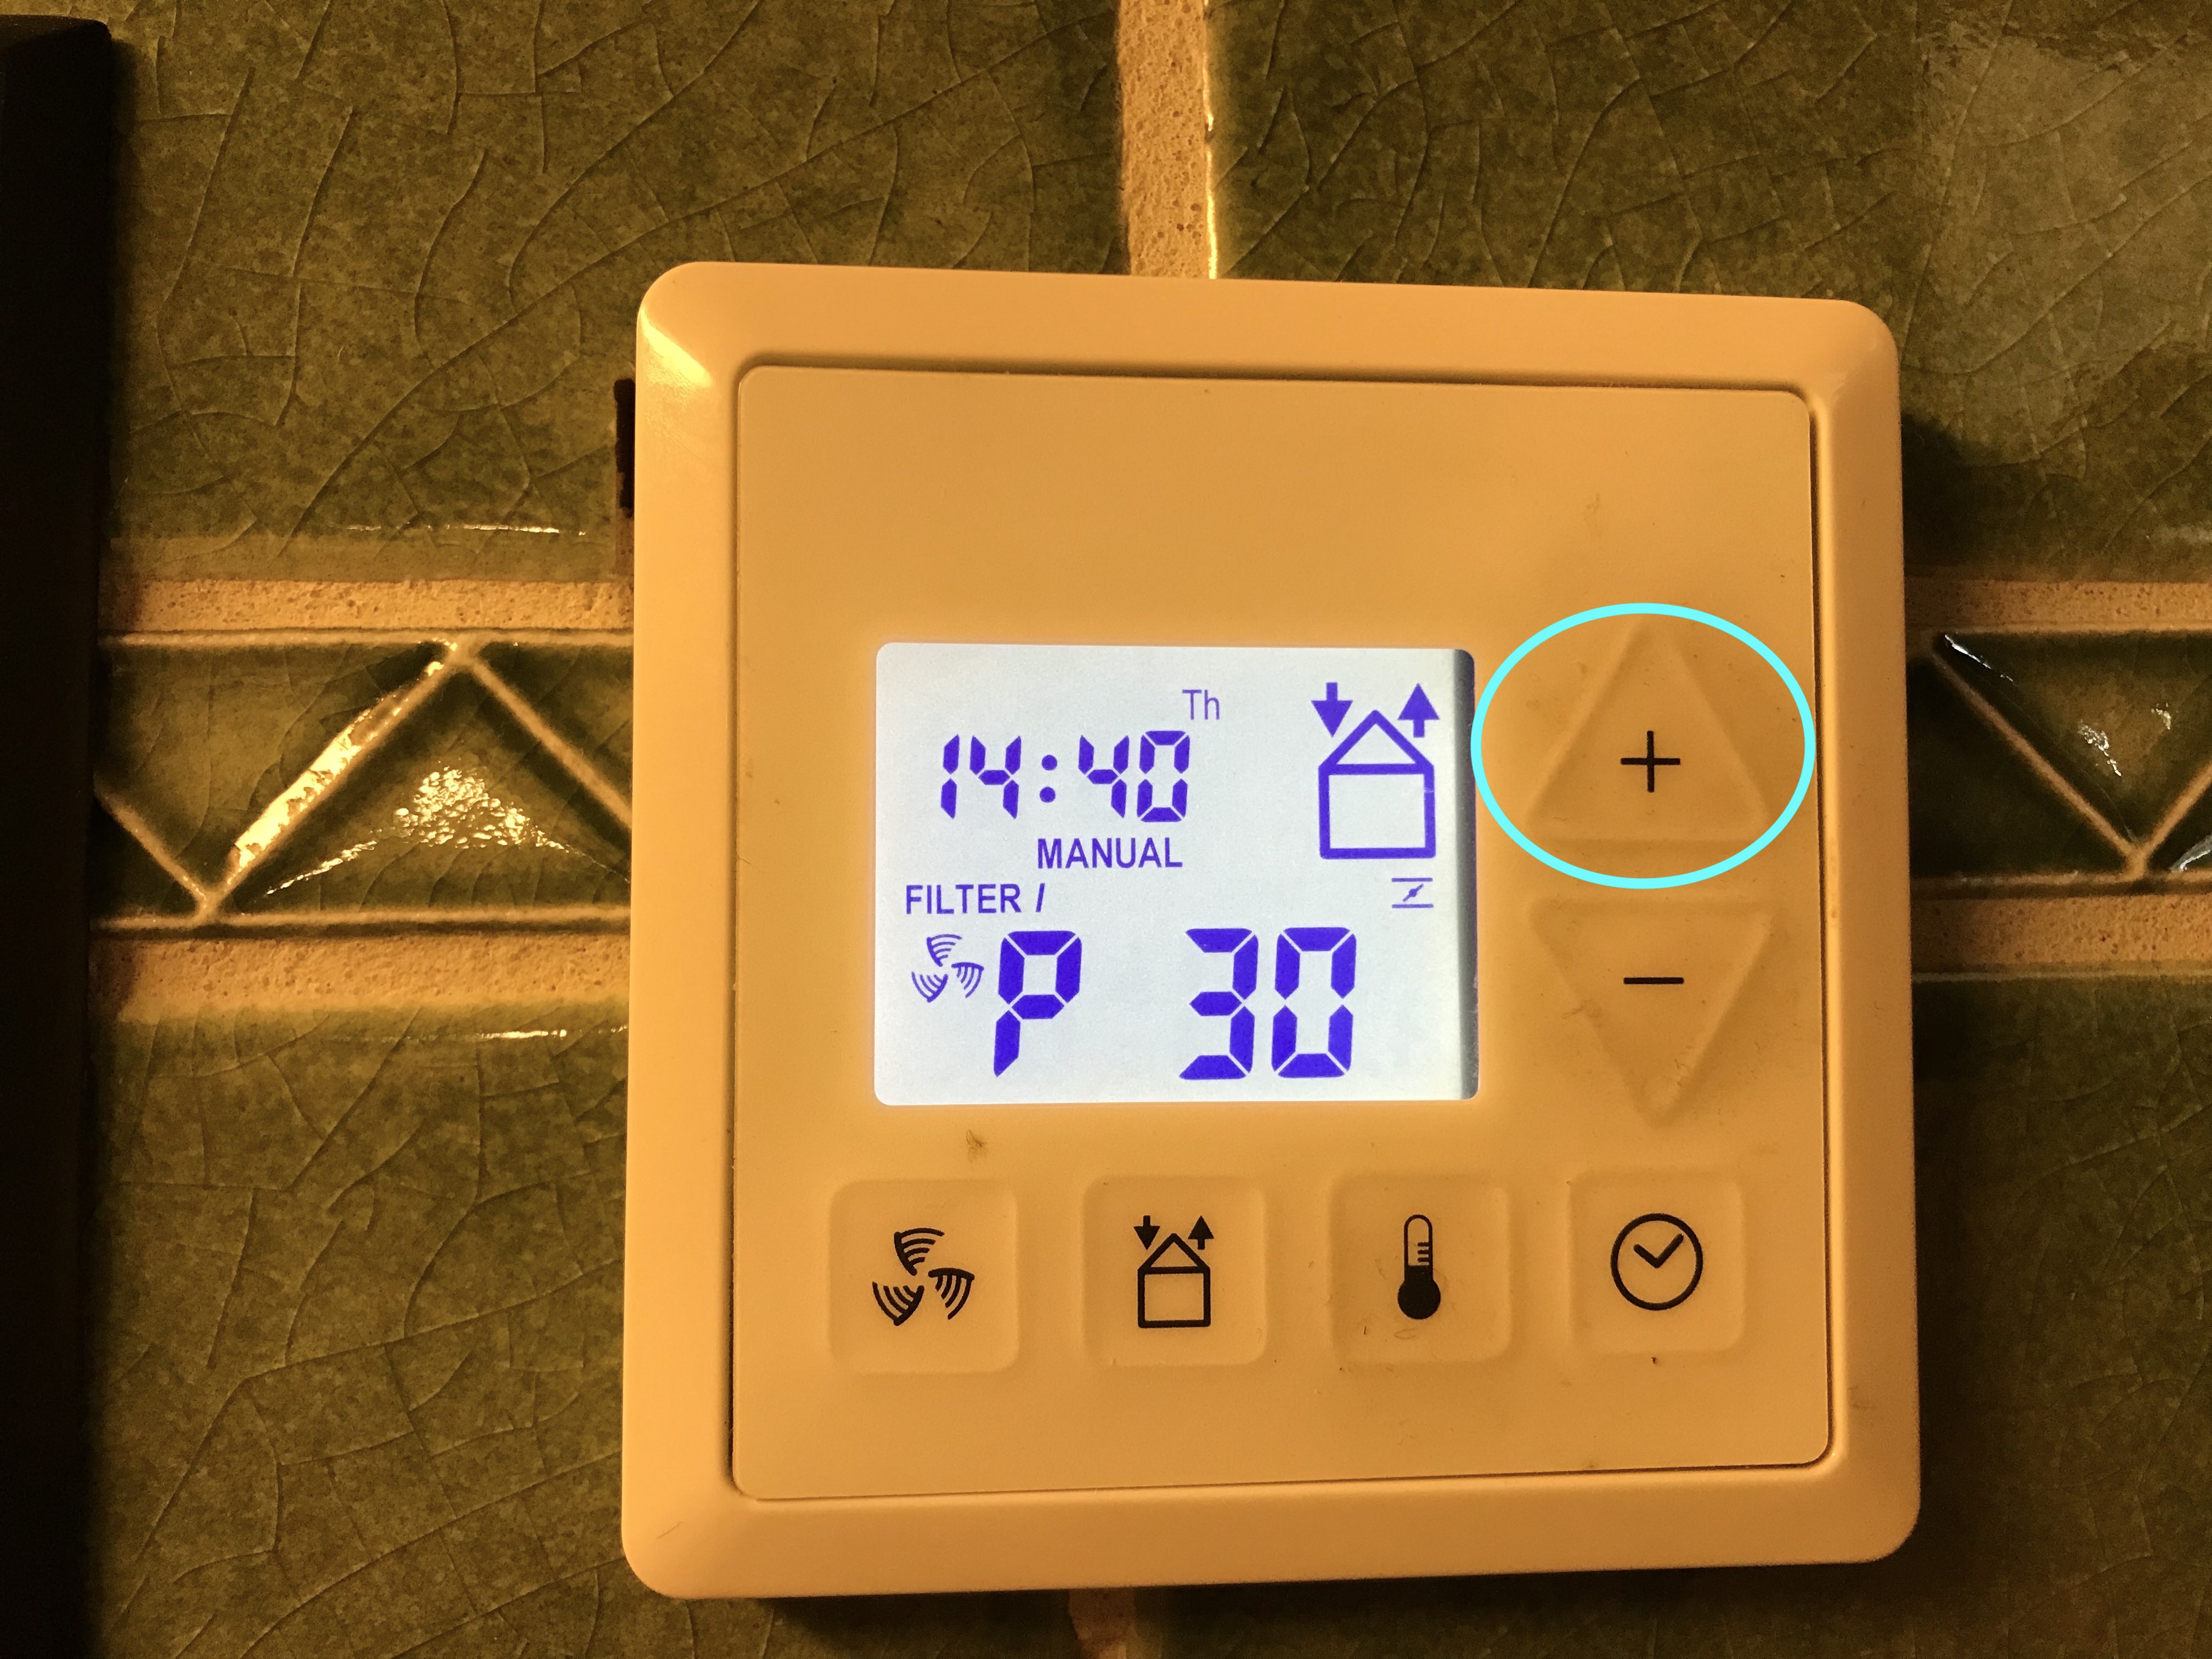
Press plus button to step through P3 menu


Press clock button to view/adjust value


Press Supply/Exhaust button to return to previous menu

Summary of changes made to the P3 menu.


Final Measurement

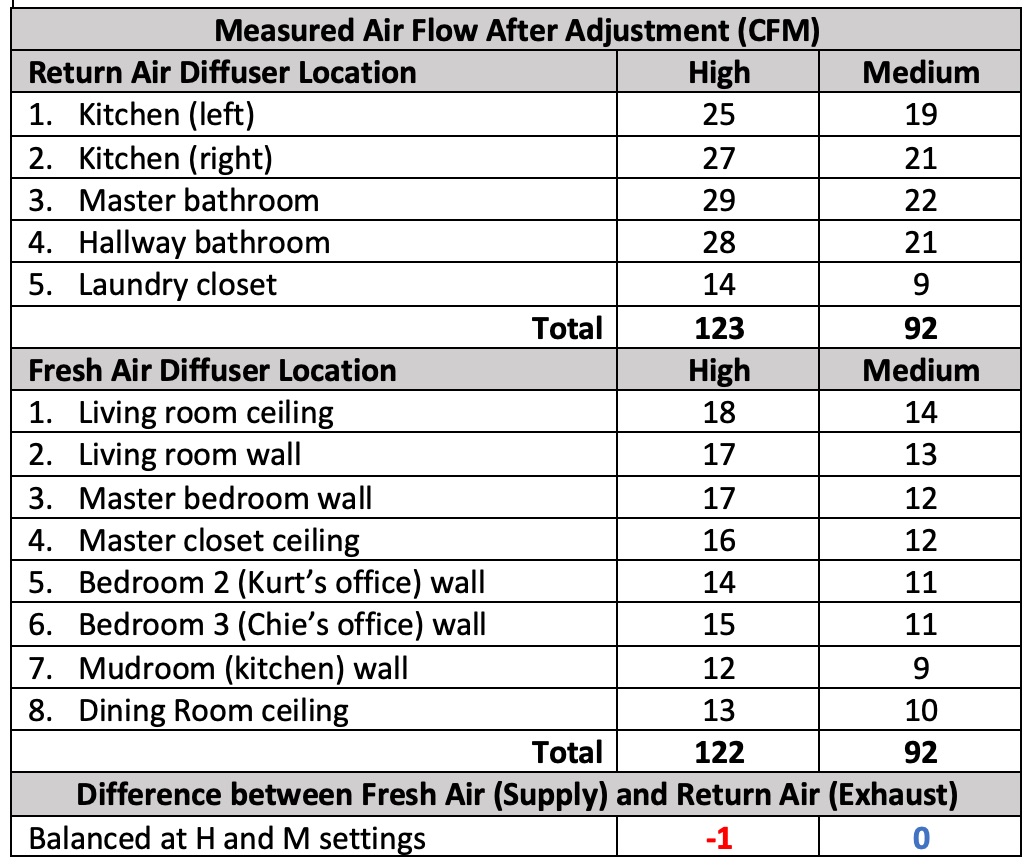
I measured the air flow at each of the 13 diffusers using the balometer and recorded the airflow. It’s pretty well balanced now.


Result: Better Indoor Air Quality

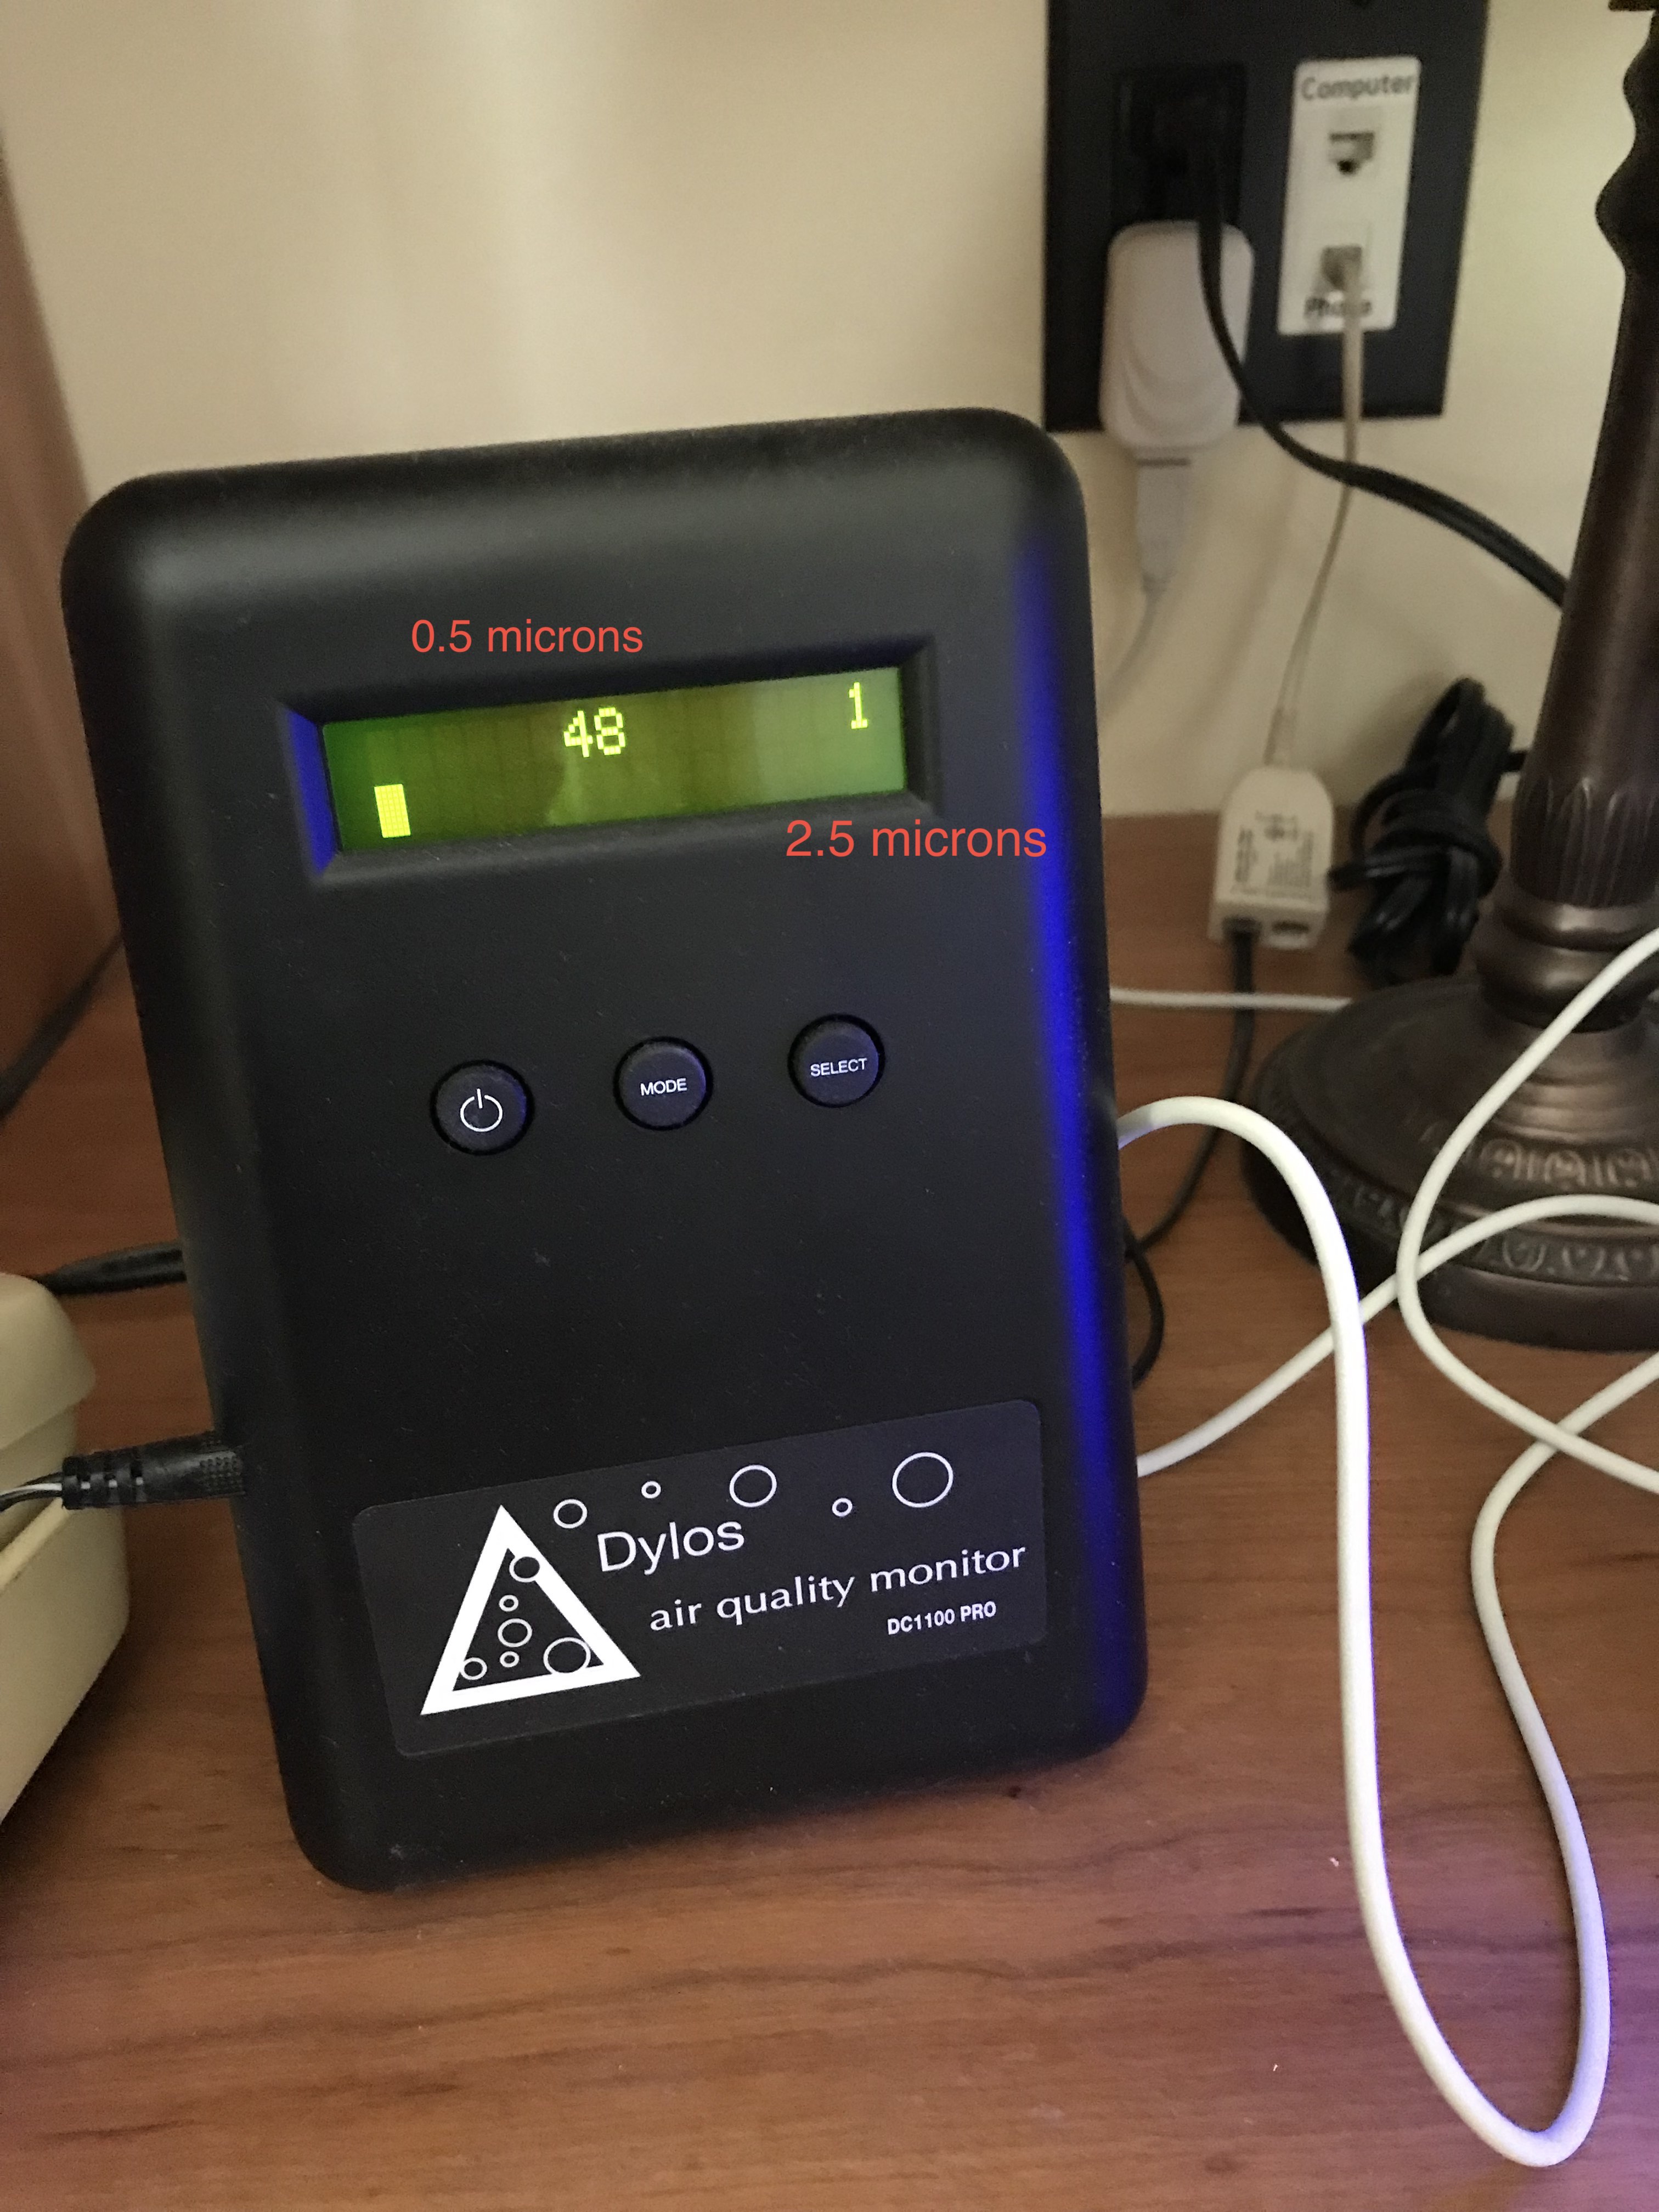
The indoor air quality is better after installing the extra filter. How much better? We haven’t seen numbers this low on the Dylos Air Quality Monitor. We feel better too!


Air Purifier

January 7, 2019

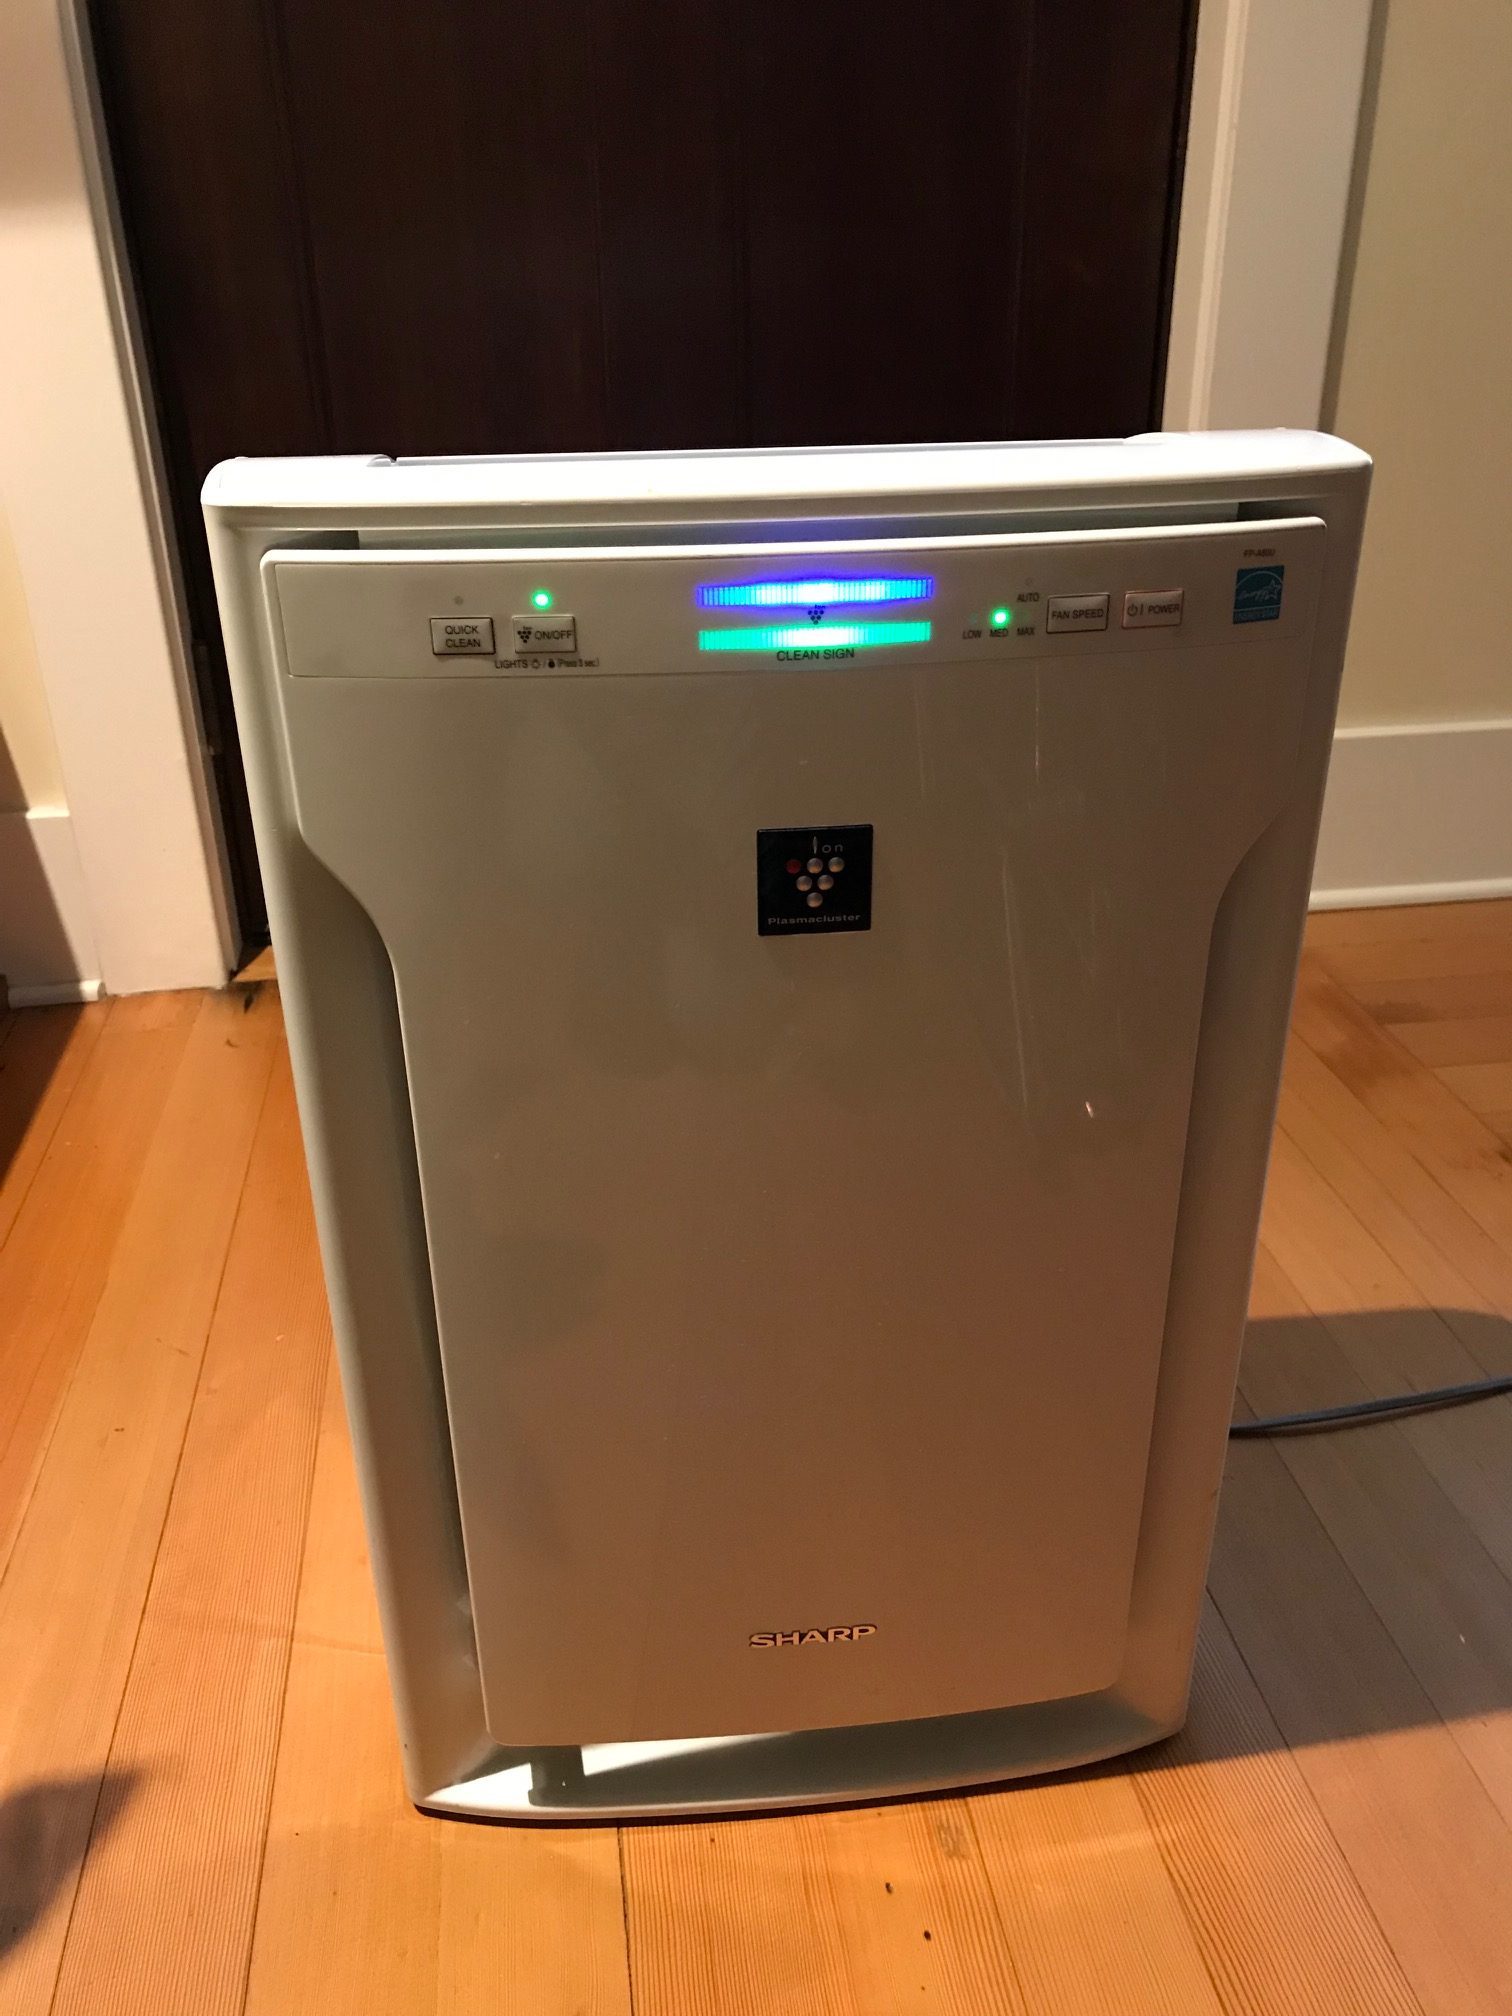
I used to think I didn’t need an air purifier appliance, but that changed in November 2018 when we experienced extended period of unhealthy outdoor air quality due to the wildfires in California. Living in a passivhaus, we knew that our indoor air quality was good. Our home, Midori Haus, is very airtight and the heat recovery ventilator (HRV) system continuously delivers filtered fresh air throughout the house and extracts stale air from the bathrooms and kitchen. Having lived through a bad wildfire season where heavy concentration of smoke traveled for hundred of miles, I now believe that air purifier is beneficial in a high performance home like passivhaus. In this post I will share my experience with an air purifier (FP-F60UW air purifier made by Sharp) and the simple experiment I did in my kitchen to measure the efficacy.

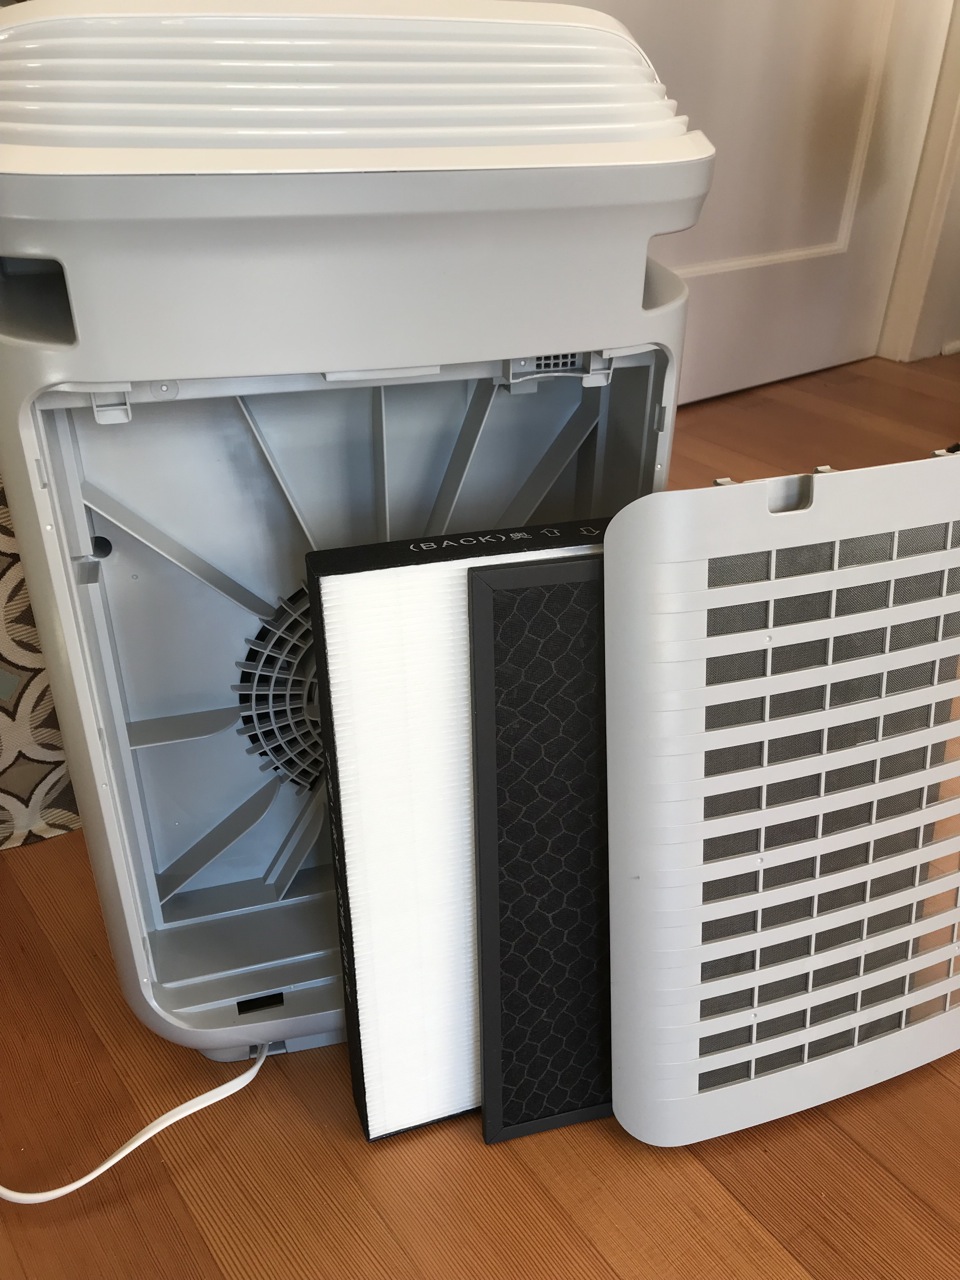
Here is the back view of the air purifier: small opening where fan pulls in air, large HEPA filter, large charcoal filter, and back cover that keeps dusts out.


Air purifier is beneficial because it gives us an additional tool for scrubbing the air to reduce malodorous smell and dirty air. Smoke particles and skunk spray particles are so small that they can slip through the filters we have in place in our ventilation system.

We especially appreciate using an air purifier during these times:

1. Unhealthy outdoor air quality. During the recent California wildfire season, the air quality index in Santa Cruz hovered around 179 (unhealthy) and we could smell the smoke inside the house. In the past, we simply turned off the HRV when we detected fire smoke from fireplaces in the neighborhood. This strategy didn't work for us when the smoke lingered outside for over a week. Running the air purifier helped reduce the tiny smoke particles that came into the house.

2. Skunk spraying in the neighborhood. On November 10, 2018, we woke up to a stinky smell inside our house after our neighbor’s dog got sprayed by a skunk in the middle of the night. We worried about the smell lingering during the day because we were about to receive over 20 visitors for a house tour. That worry dissipated after we ran an air purifier (FP-A80UW) for about 10 minutes in each room.

3. Cooking indoors when it is very cold or very hot outside. We often open our windows in the kitchen to quickly flush out the cooking smells. This has the side effect of quickly raising the kitchen temperature (during a summer heatwave) or quickly lowering the kitchen temperature (during a coldsnap). For us, the summer heatwave is more difficult to deal with because we don’t have air conditioning. Using an air purifier speeds up clearing the air in the kitchen. The HRV can remove the cooking odors only so fast.

How effective was the  FP-F60UW air purifier in my kitchen? These are the key observations from my kitchen experiment:

Observation 1. Air purifier cut down the time to clear the air in the kitchen by half. This is compared to the baseline of running a recirculating range hood and having the HRV extract the air out of the kitchen.

Observation 2. Air quality is much better when the air purifier is turned on at the start of cooking. Trying the clean up accumulated dirty air post-cooking takes much longer.

Observation 3. The Plasmacluster Ion Technology feature seems to have a greater impact on particles than VOC.

Observation 4. I can still smell the cooking odors in the kitchen even after the air quality monitors indicate a low number. This is probably due to the small particles stuck on the cabinets, walls, and my clothes. Plus our nose is more sensitive than monitoring equipment.

Observation 5. The use of the recirculating range hood over the cooktop didn't seem to help. In fact, it appeared to lengthen the time it takes to clear the air. Perhaps this range hood is due for cleaning and filter change.

Observation 6. The fastest way to clear the air in the kitchen is to open the window. This is best when the outdoor air quality is good.

Observation 7. The air in the rest of the house smells clean. Closing the various doors between the rooms is effective. Our old-house style room layout has a door between the kitchen and the dining room, between the dining room and the living room, and between the living room and the hallway. 

Rest of this post will go into the details of my kitchen experiment. If you're curious about them (criteria, method, and equipment) read on. If you're satisfied with the summary above, feel free to stop here.

Kitchen Environment

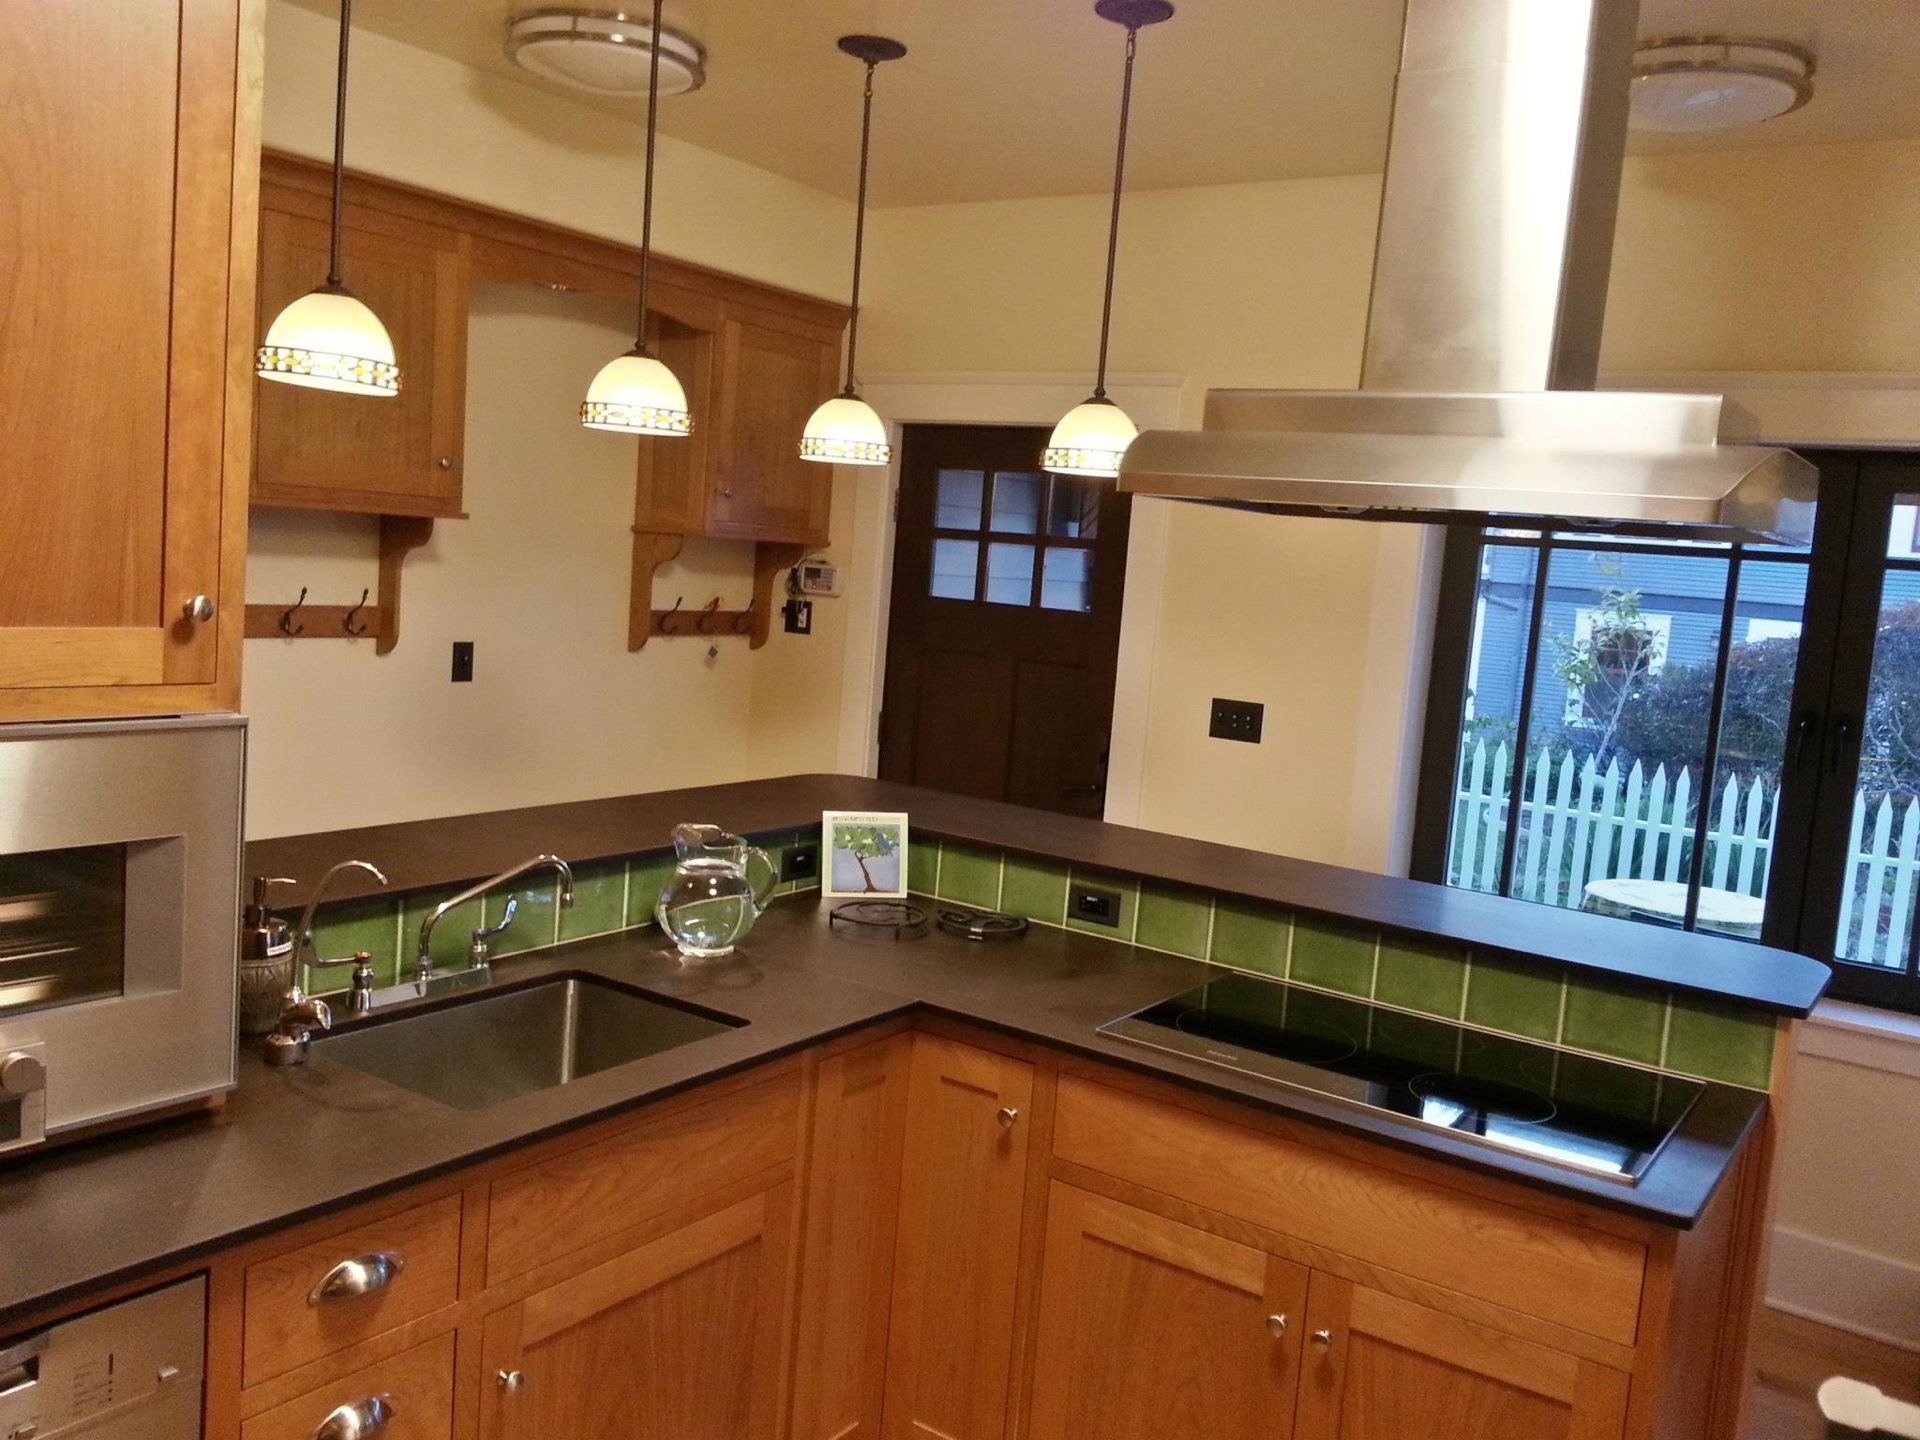
Unlike modern home with a great room layout, our kitchen is a self-contained room. A pocket door separates the kitchen from the dining room. There is a small gap in the pocket door which allows air from the dining room to be pulled into the kitchen when there is a negative pressure in the kitchen when the HRV is on. There are two houseplants (peace lily and spider plant) in the kitchen. The induction cooktop faces the window and the island range hood hovers over the cooktop.

Area: 206 square feet

Ceiling height: 9 feet

Window: 29 square-foot opening


Appliances Used

Miele Induction Cooktop is not a gas cooktop, so no combustion byproducts created during cooking.

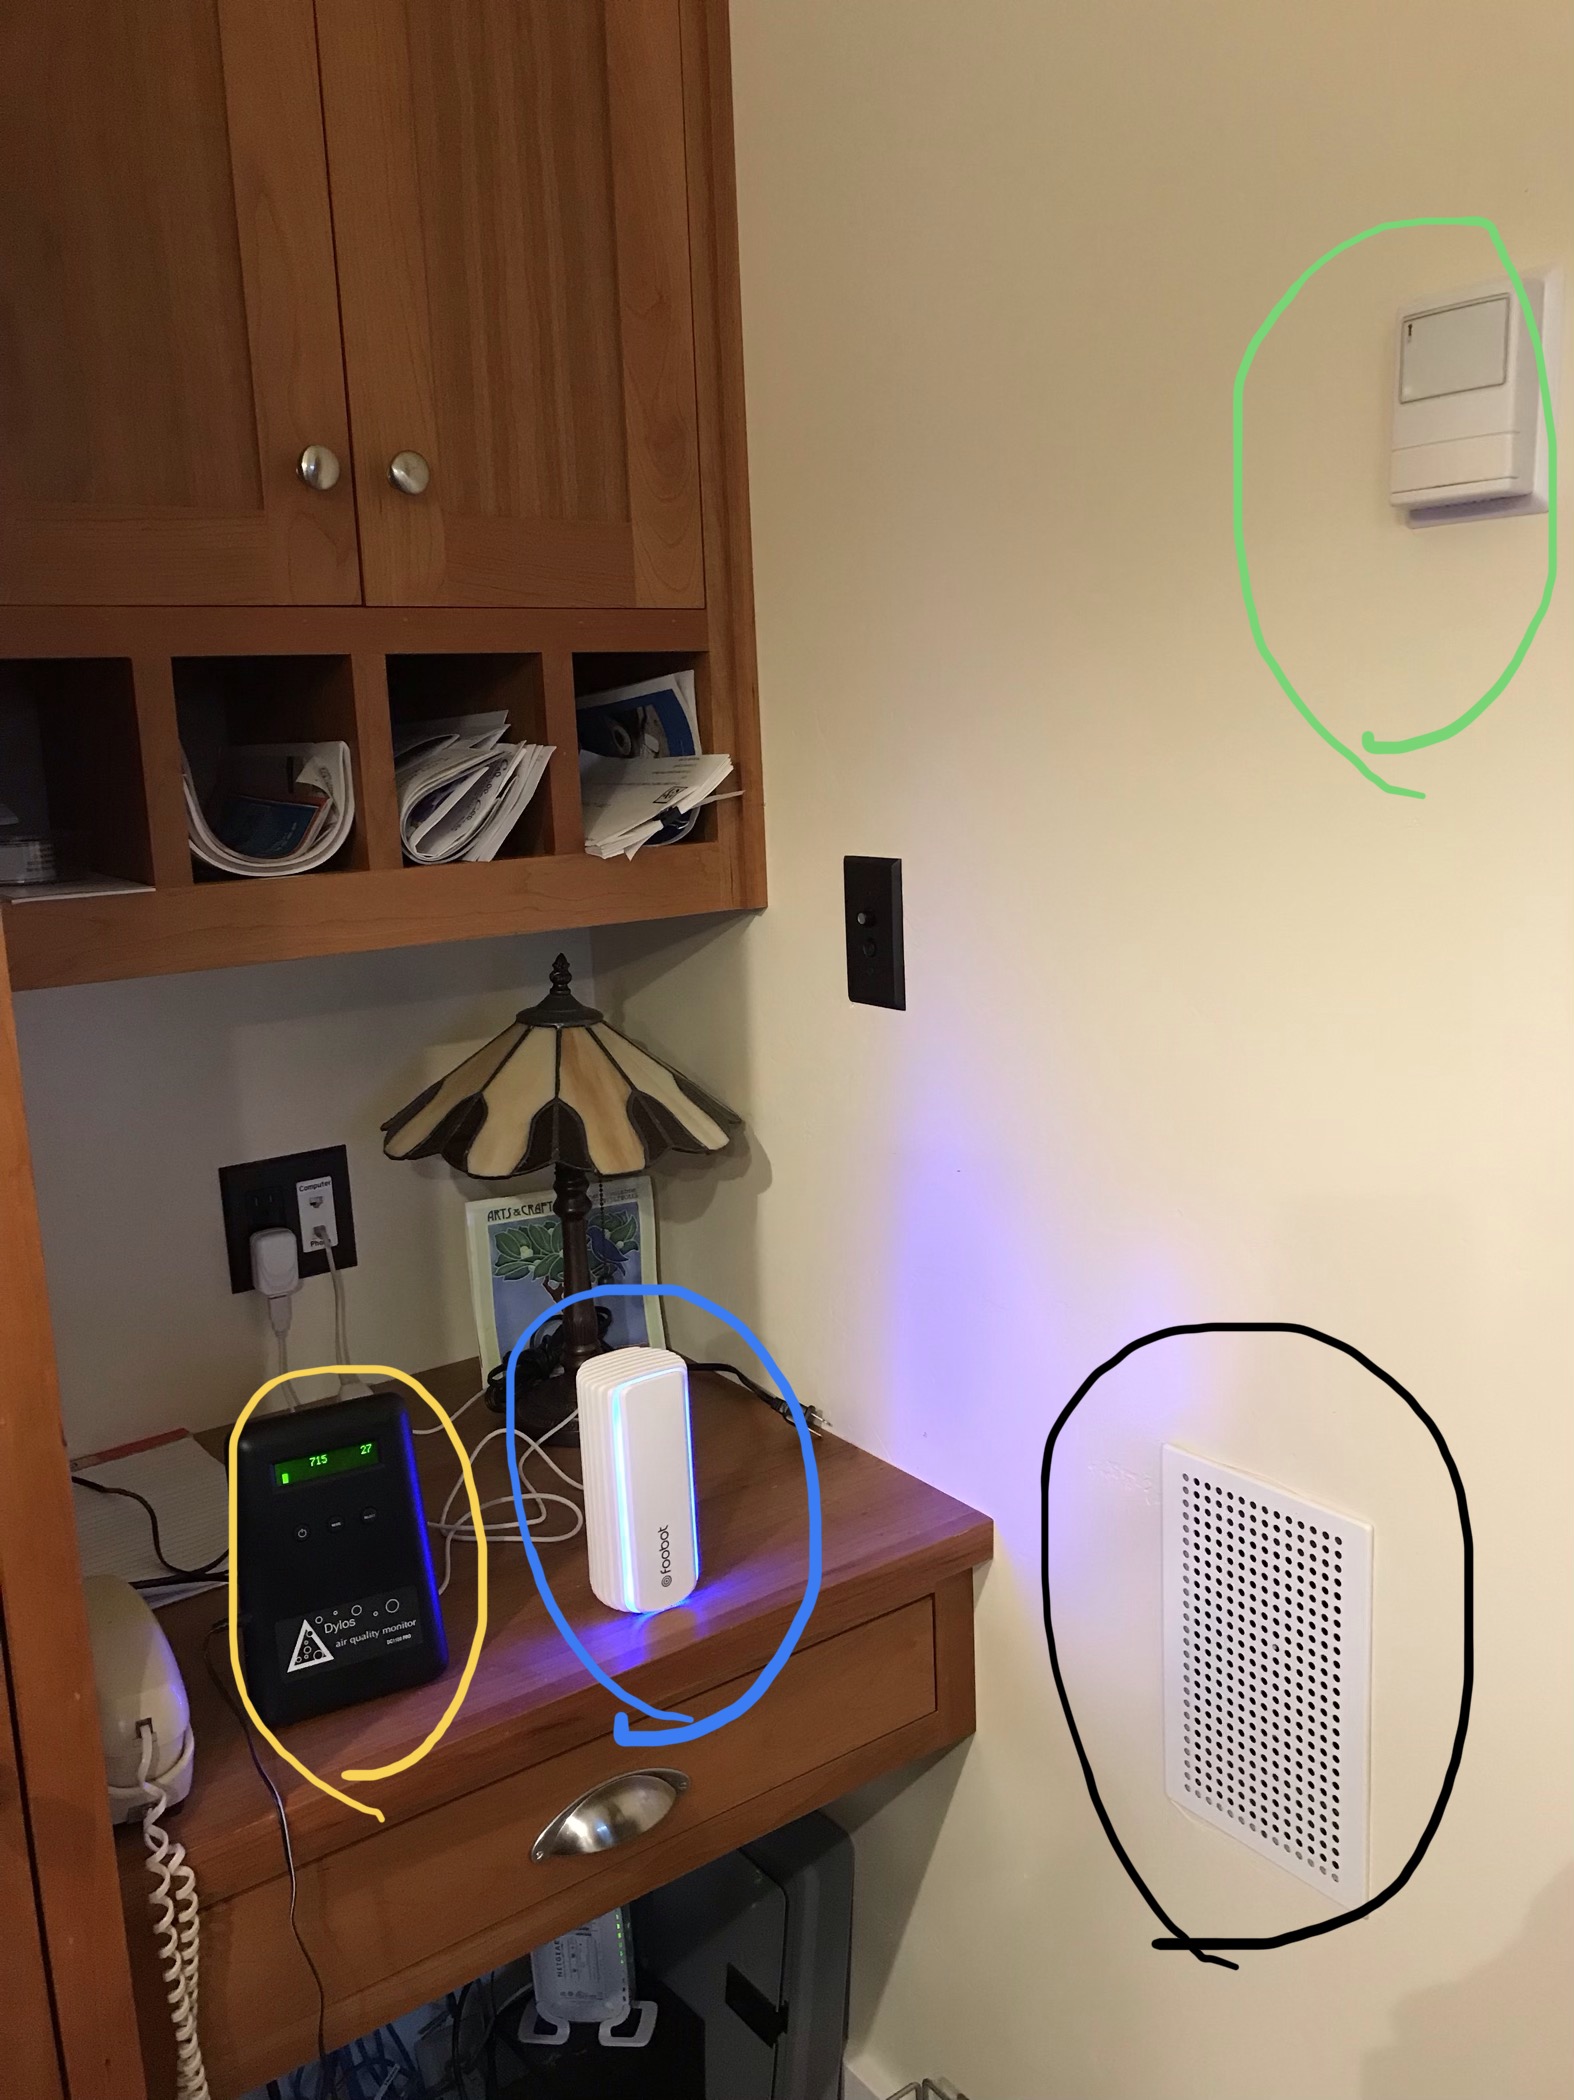
Zehnder ComfoAir 350 HRV: In the kitchen there are two exhaust registers for extracting a total 47 CFM on high; one supply register supplying 13 CFM. See this post for the filters installed in the HRV system. (Supply register circled in black in the photo below)

Kobe Recirculating Range Hood: 400 CFM on high. This island type recirculating range hood is no longer made.

Sharp FP-F60UW air purifier: This unit is recommended for a room that is 280 square feet or smaller. 400 CFM on high used for kitchen experiment. This high speed setting measured 48W on my Kill A Watt. At low setting, the 44 CFM fan speed is quiet enough to run it in the bedroom overnight.

Air Quality Monitors

We have three devices in the corner of our kitchen to measure air quality. For description on these and other air quality monitors, take a look at this article from Energy Smart Home Performance.

Dylos Pro measures concentration of particles. The larger number represents a count of particles greater than 0.5 microns. The smaller number represents a count of particles greater than 2.5 microns. (circled in yellow)

FooBot measures particles and volatile organic compound (VOC). (Circled in blue)

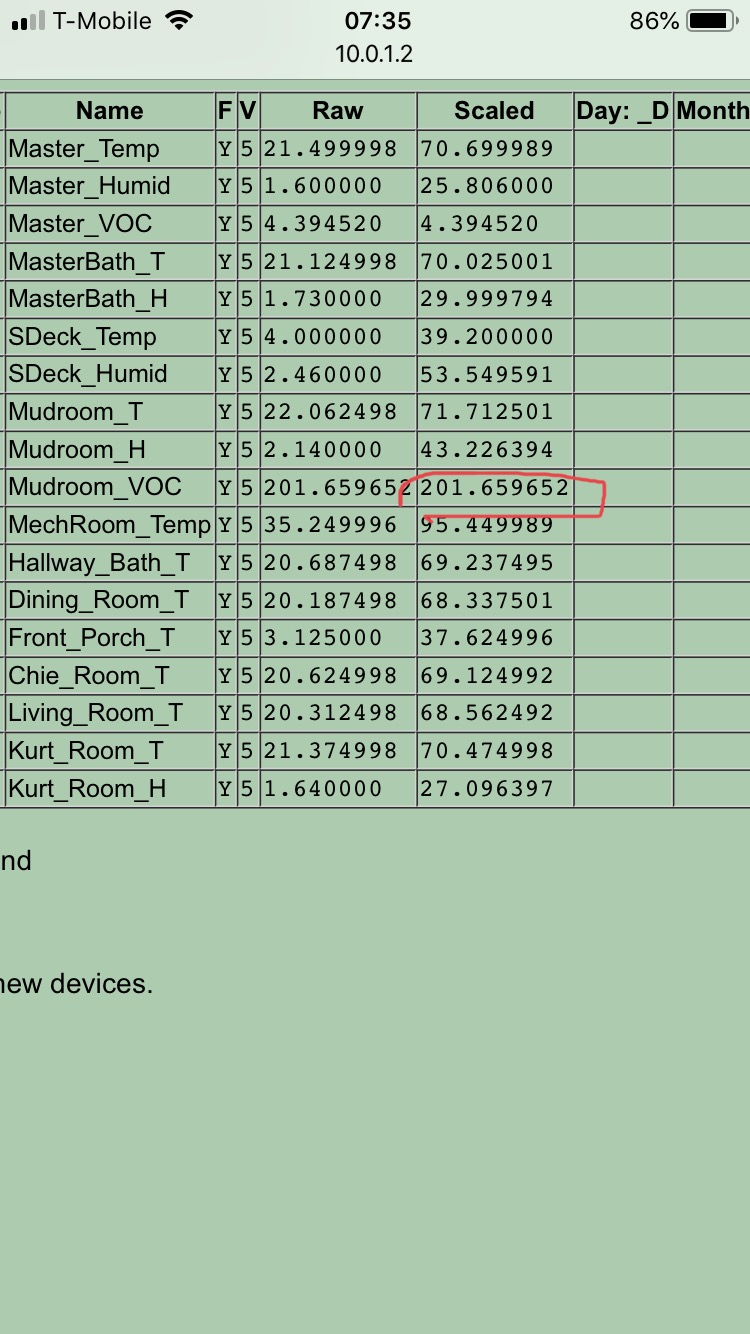
WELserver measures and collects temperature, humidity and VOC measures using a custom sensor. (Circled in green)


Criteria for “clean air”

I’ve used visual indicator of Foobot. It glows blue when air quality is good and orange when air quality is bad. Measurement was taken at various intervals until Foobot turned blue.

Experiment senarios

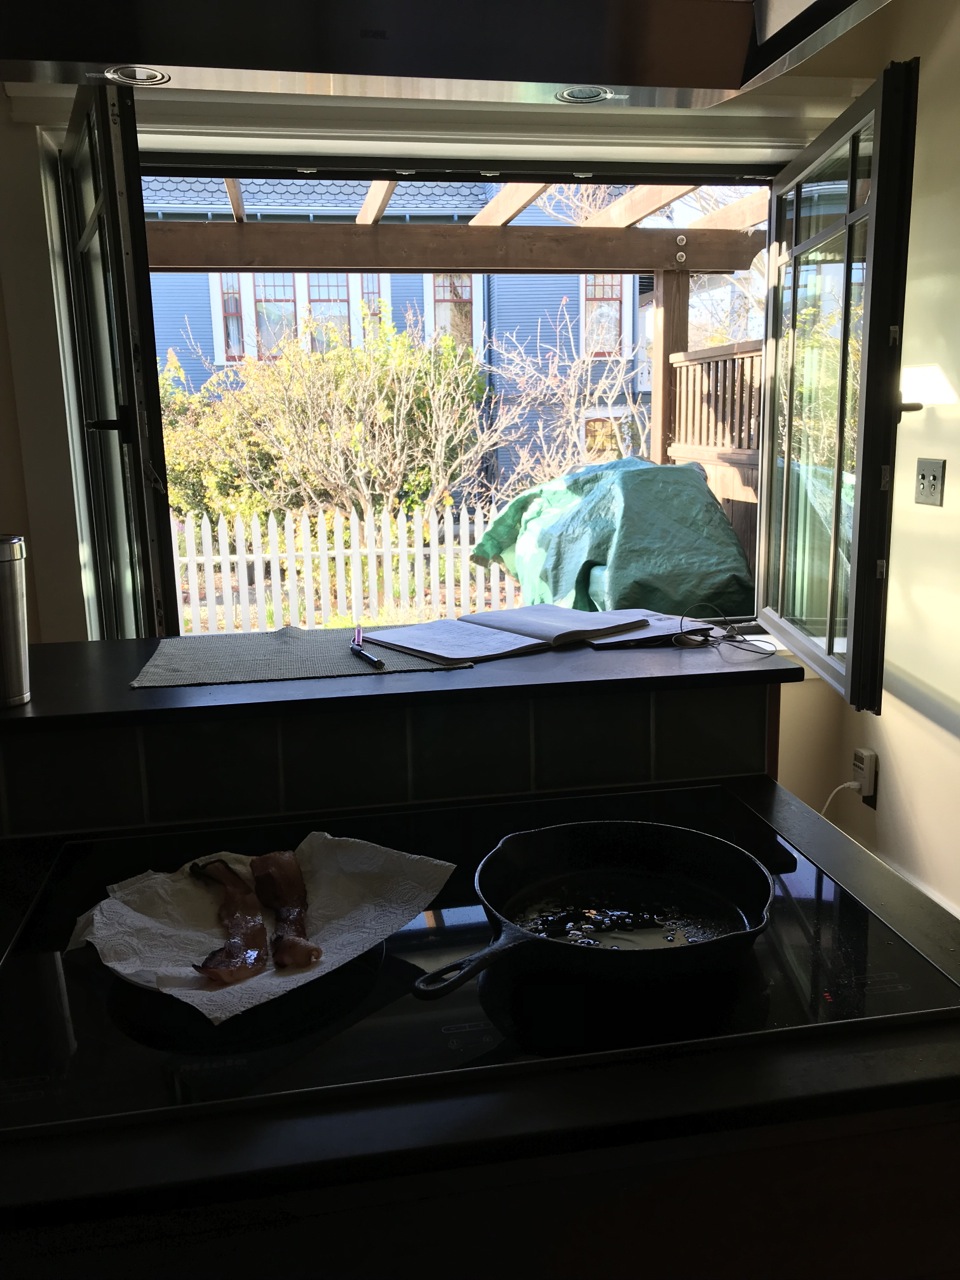
For scenarios 1, 2, and 3, two strips of bacon were fried for six minutes total (3 minutes each side) in a cast iron skillet on induction cooktop, then transferred to a plate. Air clearing actions, timing, and measurement began when cooking ended. This measured the efficacy of air clearing action on accumulated dirty air.

For scenarios 4, 5, and 6, two scallion pancakes were cooked in a cast iron skillet each for 14 minutes (7 minutes each side), then transferred to a plate. Air clearing action, timing, and measurement began when cooking started.

Scenario 1: Baseline

This scenario answered the question, “How long does it take to clear the air in our default mode?”

2 strips of bacon

HRV on high

Range hood on high

Measurement started at the end of cooking

35 minutes to clear the air.


Scenario 2: Open Window

This scenario answered the question, “How long does it take to clear the air by opening the windows at the end of cooking?”

2 strips of bacon

HRV on high

Range hood on high

Opened window and started measurement started at the end of cooking.

External air temperature was 58F, kitchen temp dropped from 73F to 72F.

10 minutes to clear the air.


Scenario 3: Air Purifier (Ion on)

This scenario answered the question, “How long does it take to clear the air if the air purifier was used end of cooking?”

2 strips of bacon

HRV on high

Range hood on high

Turned on air purifier (with Ion on) and started measurement started at the end of cooking.

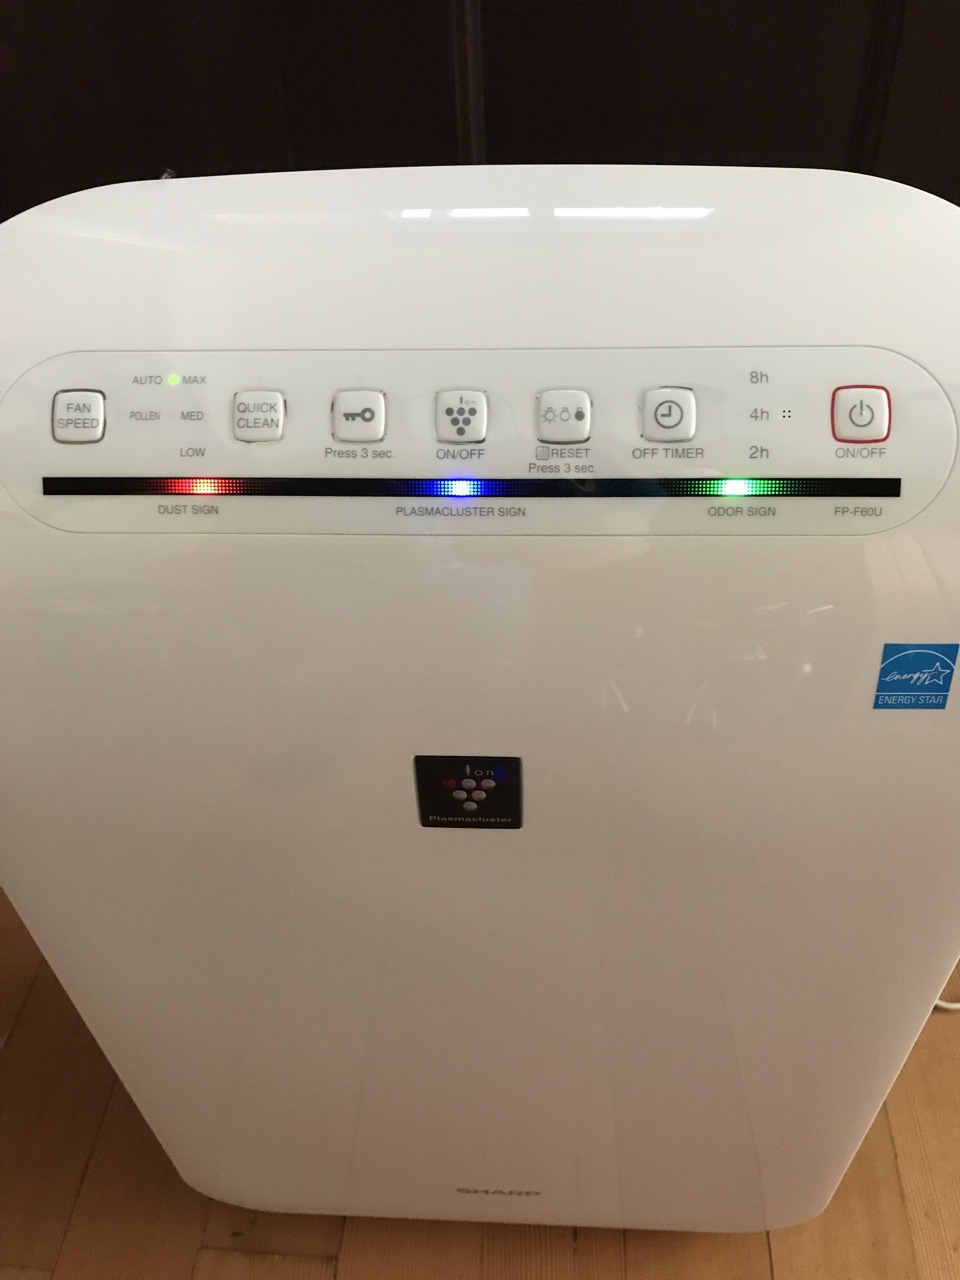
The dust sign on the air purifier turned red, indicating dirty air.

17 minutes to clear the air


Scenario 4: Air Purifier (Ion on), HRV off, range hood on

This scenario answered the question, “How long does it take to clear the air if the air purifier was used at the start of cooking with the HRV off?”

2 scallion pancakes

HRV off

Range hood on high

Turned on air purifier (with Ion on) and started measurement started at the start of cooking

43 minutes to clear the air


WELserver data display

Scenario 5: Air Purifier (Ion on), HRV on, range hood off

This scenario answered the question, “How long does it take to clear the air if the air purifier (with Ion on) was used at the start of cooking with the HRV on and range hood off?”

2 scallion pancakes

HRV on high.

Range hood off

Air purifier (Ion on) was turned on at the beginning of cooking.

Initial measurement was taken at the beginning of the cooking.

Air was clean the entire time. (Foobot never turned Orange!)


Scenario 6: Air Purifier (Ion off), HRV on, range hood off

This scenario answered the question, “How long does it take to clear the air if the air purifier (with ion OFF) was used at the start of cooking with the HRV on and range hood off?”

2 scallion pancakes

HRV on high.

Range hood off

Air purifier (Ion off) was turned on at the beginning of cooking.

Initial measurement was taken at the beginning of the cooking.

Air was clear the entire time. (Foobot never turned Orange!)


If you're still reading and are curious about the test data, take a look at this Google Docs spreadsheet.

Thank you for reading this post. This air quality measurement experiment gave me a better insight to the effects of cooking and indoor air quality. I hope it's helpful to other homeowners and to home performance professionals.

Managing Indoor Air Quality

November 19, 2018

We learned during our first winter in our passive house that some smoke particles enter our house through the ventilation system. The smoke particles are so small that the filter doesn't catch all of it. For the last five years, our indoor air quality management routine had been unplugging our Zehnder ComfoAir 350 heat recovery ventilator (HRV) when we smelled smoke inside the house. In the last couple of weeks, we had to refine our seasonal practice because the outdoor air quality had been poor due to large fires in California.

Here's what we are doing at Midori Haus to manage our indoor air quality:

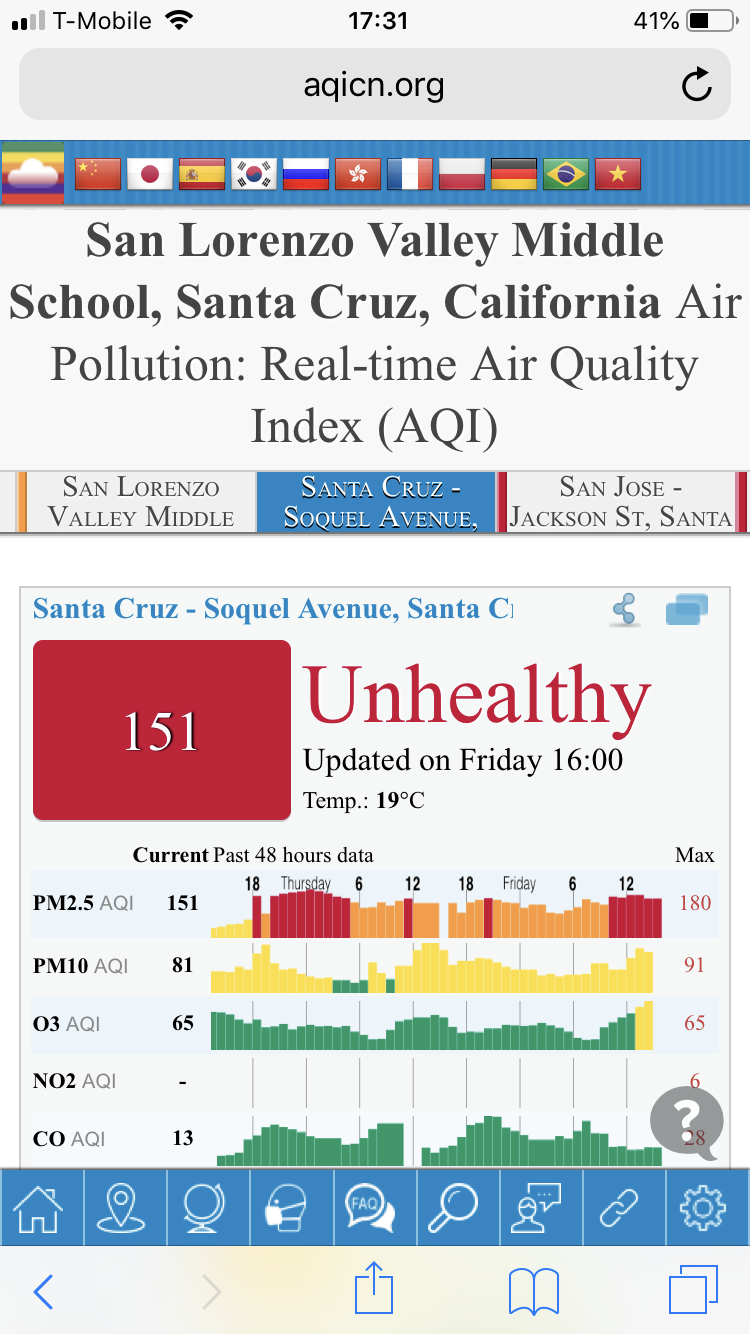
1. External air quality check. We look at the real time air quality index to see what our air quality index number is. If it’s good (green 1-50) then we leave on our heat recovery ventilator (HRV) and operate it as normal. Our normal operation is HRV fan set on medium speed and boosting up to high when we’re cooking in the kitchen. If the air quality is unhealthy (151 -200) or worse, we unplug our HRV. If the air quality is moderate (51-100) we stick our nose outdoor and sniff the air to decide whether to unplug our HRV or not. Just like temperature, there are micro variations of air quality within a given city. For example, last night we noticed and felt the air quality on the east side of out city to be much worse than on the west side. 


2. Check for major fires and wind direction. We look at the California statewide fire map to see what fires are burning nearby. Depending on the size and number of the fires, we may be affected by fires burning over 100 miles away. The wind pattern makes a difference, so we look at the weather data to find out the wind direction. The 10-day forecast section is useful because it will show the change in forecasted wind pattern. With may fires burning north and east of us, winds blowing from south and west bring us relief, especially since those directions are over the ocean.


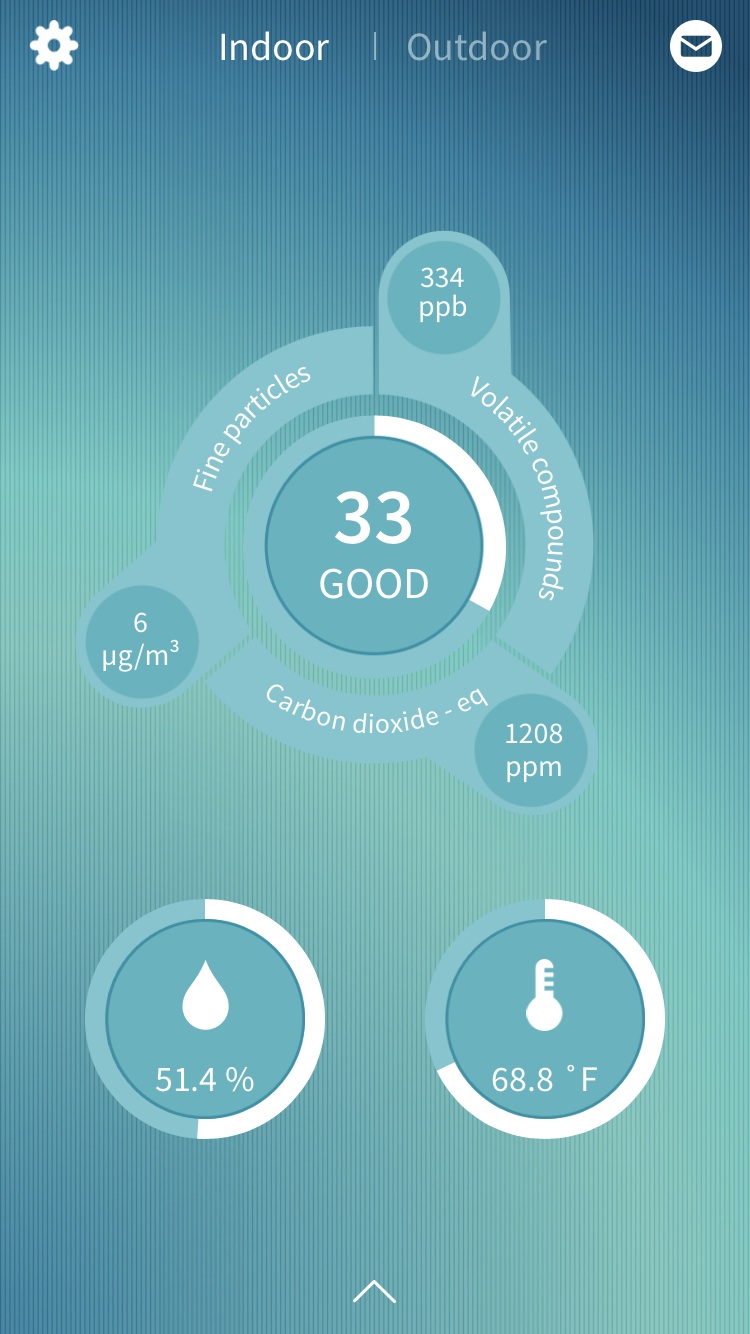
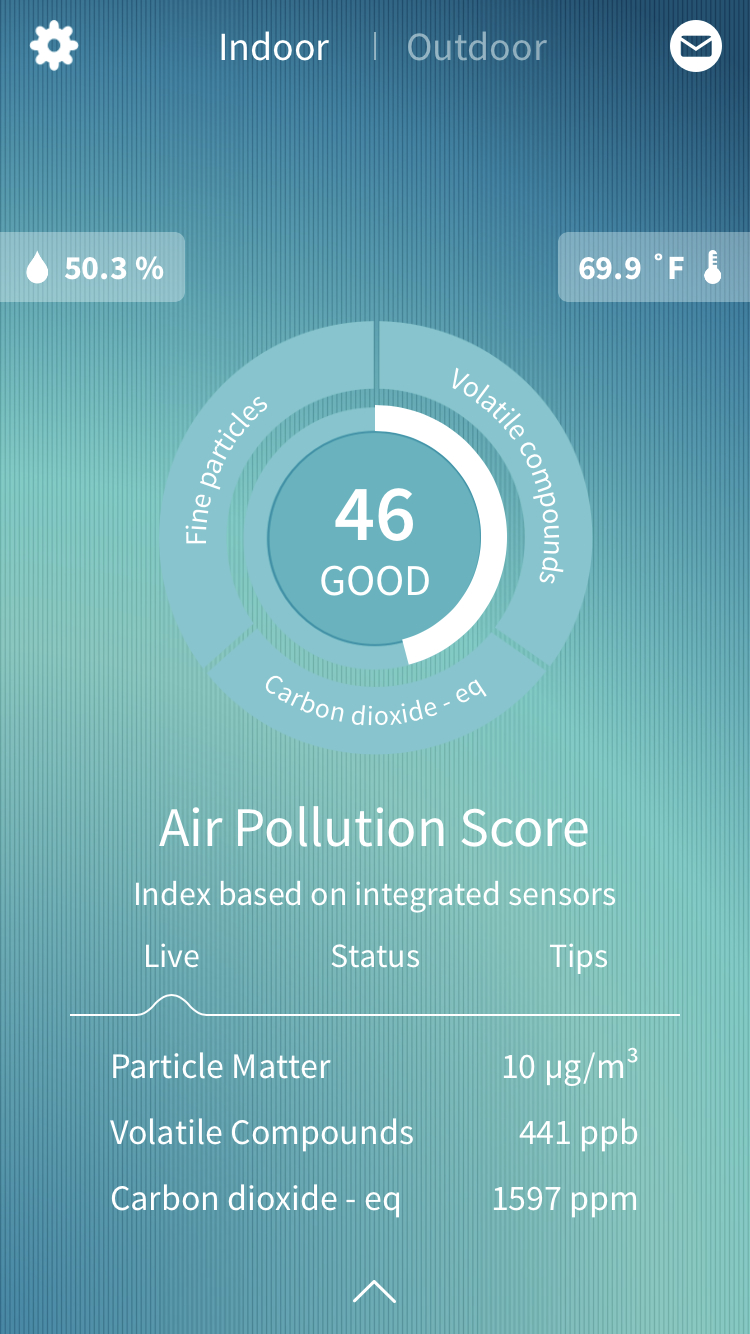
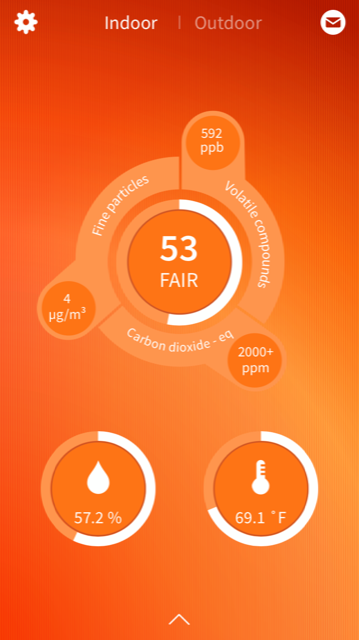
3. Check air quality levels inside the house. We look at the data from our FooBot. This is a relatively inexpensive air quality monitor for homes. We have it placed in the kitchen near the HRV supply vent. The device glows orange when air quality is bad and glows blue when it’s good. I can see the data and history on the FooBot app on my iPhone. This screen shot shows the state of our indoor air quality after leaving the HRV turned off overnight. The composite score is 53 (a score based on some algorithm) and the breakdown of the air quality components are: Fine particles (4 is great), Volatile compounds (592 is poor), and Carbon dioxide (2000 is poor). We've noticed that Volatile compounds level spikes up when we cook. We have a recirculating venthood in our kitchen, so we rely on the HRV to evacuate the cooking smells. The only way to rapidly clear the air in the kitchen is to open the windows, but we don't want to do that when the outdoor air quality is bad. When we turn off the HRV for an extended period of time, Carbon Dioxide level builds up, like on this screenshot. At these times we turn on the HRV for a short while to flush out the VOC and CO2. During this time the particle count goes up, but we let the air purifier handle that.


4. Run an air purifier. Couple of years ago, Kurt did some research and bought a Plasmacluster Ion technology air purifier from Sharp. Most of the time it sits in his office at work, but recently he’s been hauling this back home in the evening and weekends. This cleans the air and we can feel it. We have recent experience where this device changed our panic to calm. On the morning of Saturday November 10 our house stank of skunk in addition to the smoke. Our neighbor’s dog got sprayed in the middle of the night and HRV sucked in the skunk smell in addition to the smoke. The smoke and skunk particles are so small that they get through despite the layers of filters we have. We were about to host an open house and tour for the International Passive House Days event and we were worried about the indoor air quality. We ran the air purifier for 10 - 30 minutes in each room and it cleared up nicely.


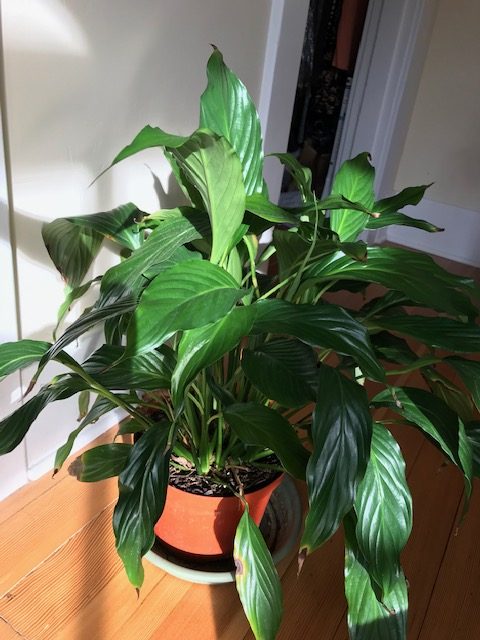
5. House plants in place to clean the air. We have house plants in every room. Plants provide oxygen and absorb carbon dioxide. Several years ago, Kurt bought a lot of peace lily plants after learning that the plant removes chemicals such as benzene and formaldehyde. These plants also help with the humidity. This post from Tips Bulletin has photos and descriptions of the different plants. 


We enjoy living in Midori Haus built to the Passive House (Passivhaus) standard. The tightly sealed enclosure, about 10 times tighter than conventionally built houses, keeps random air from coming in from random places. The heat recovery ventilator provides us with continuous filtered fresh air. Only during these extended bad air quality days do we need to pay special attention to our ventilation system to keep our indoor air clean. Our next experiment will be to install the Zehnder ComfoWell F9 filter (yellow filter that has MERV 15 rating) at the air intake, next to the charcoal filter. If it arrives before the outdoor air clears up, we’ll be able to measure the result of this new filter.

Filter Change to Keep Out Dust, Pollen, and Smell

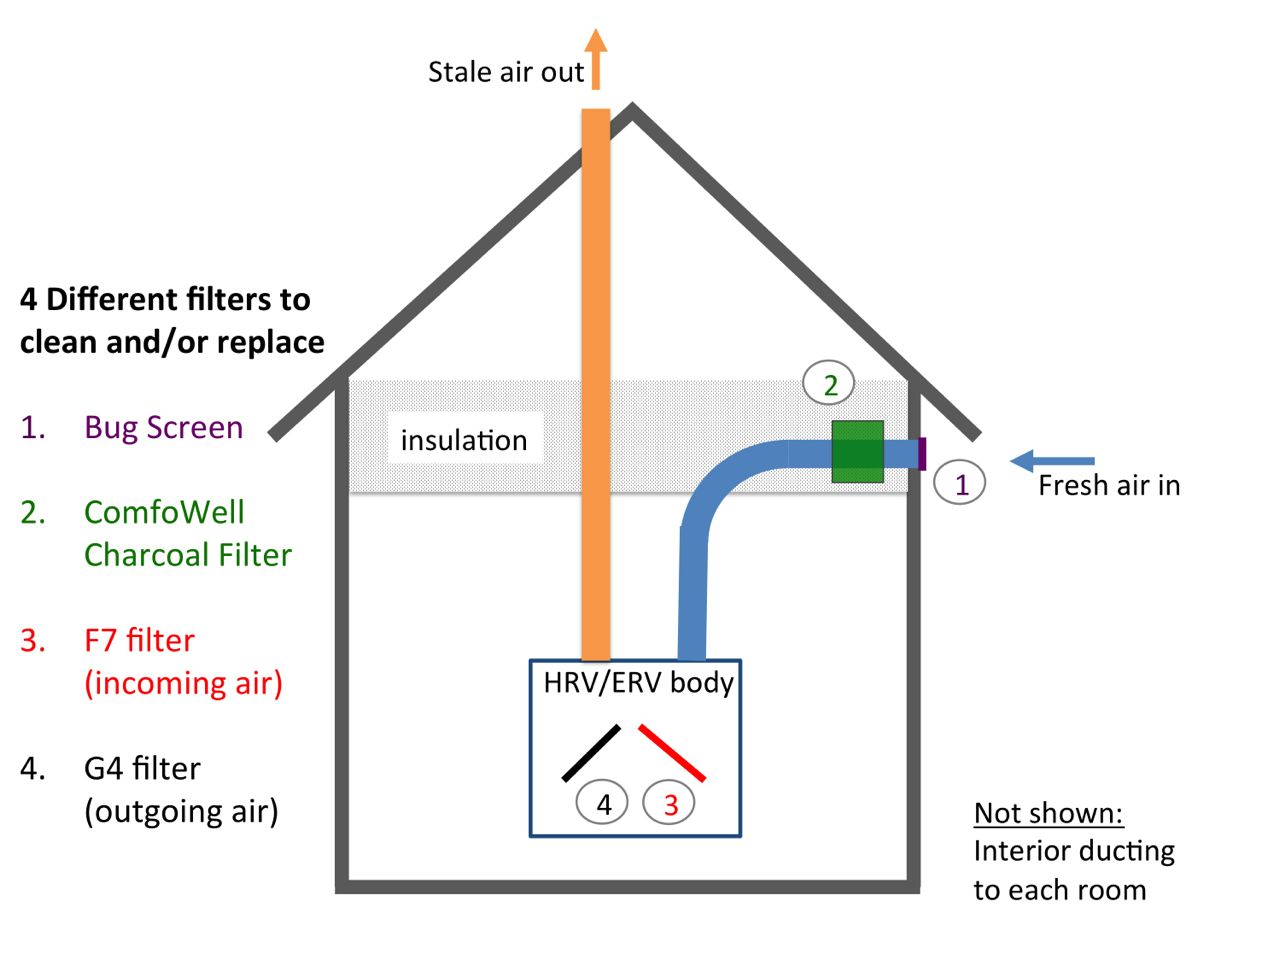
Each year the spring blossoms in the garden serve as a visual reminder to change the air filters at Midori Haus. We have multiple layers of protection to keep out bugs, pollen, dust, and unpleasant smells in the neighborhood. In this post I'll share the maintenance activity we did in April and May: 1) Cleaning the bug screen; 2) Replacing the activated charcoal filter in the ComfoWell; 3) Replacing the Red filter for supply air; 4) Replacing the Black filter for the return air.

Below is a simple diagram (not to scale) showing the 4 filter locations.


We have the ComfoAir 350 model from Zehnder. It is a heat recovery ventilator (HRV) that is continuously providing fresh air into the house and expelling stale air out of the house. In the winter, we change out the HRV core with the energy recovery ventilator (ERV) core. The ERV recovers moisture as well as heat, making the house less dry in the winter.

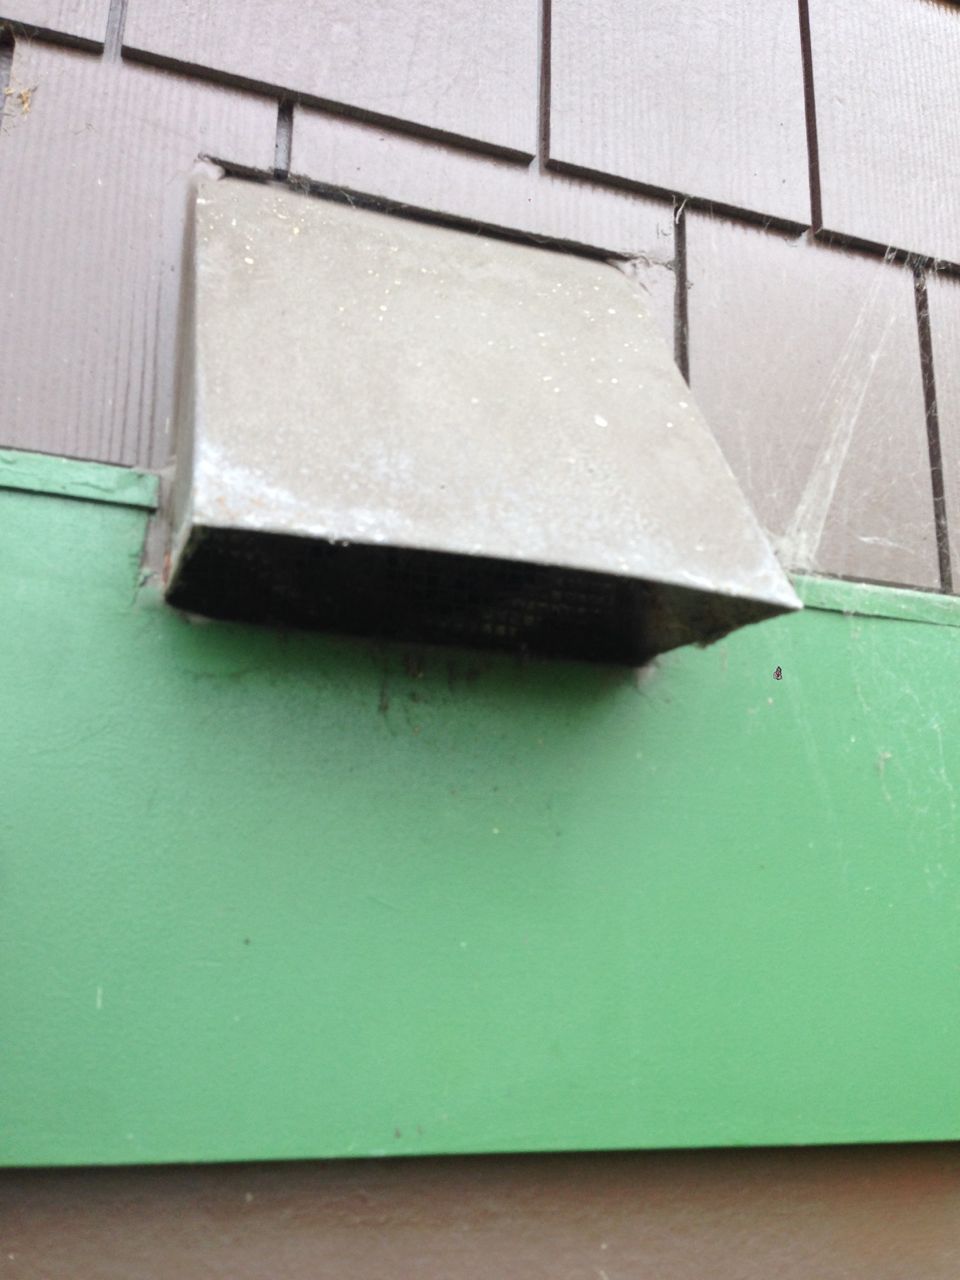
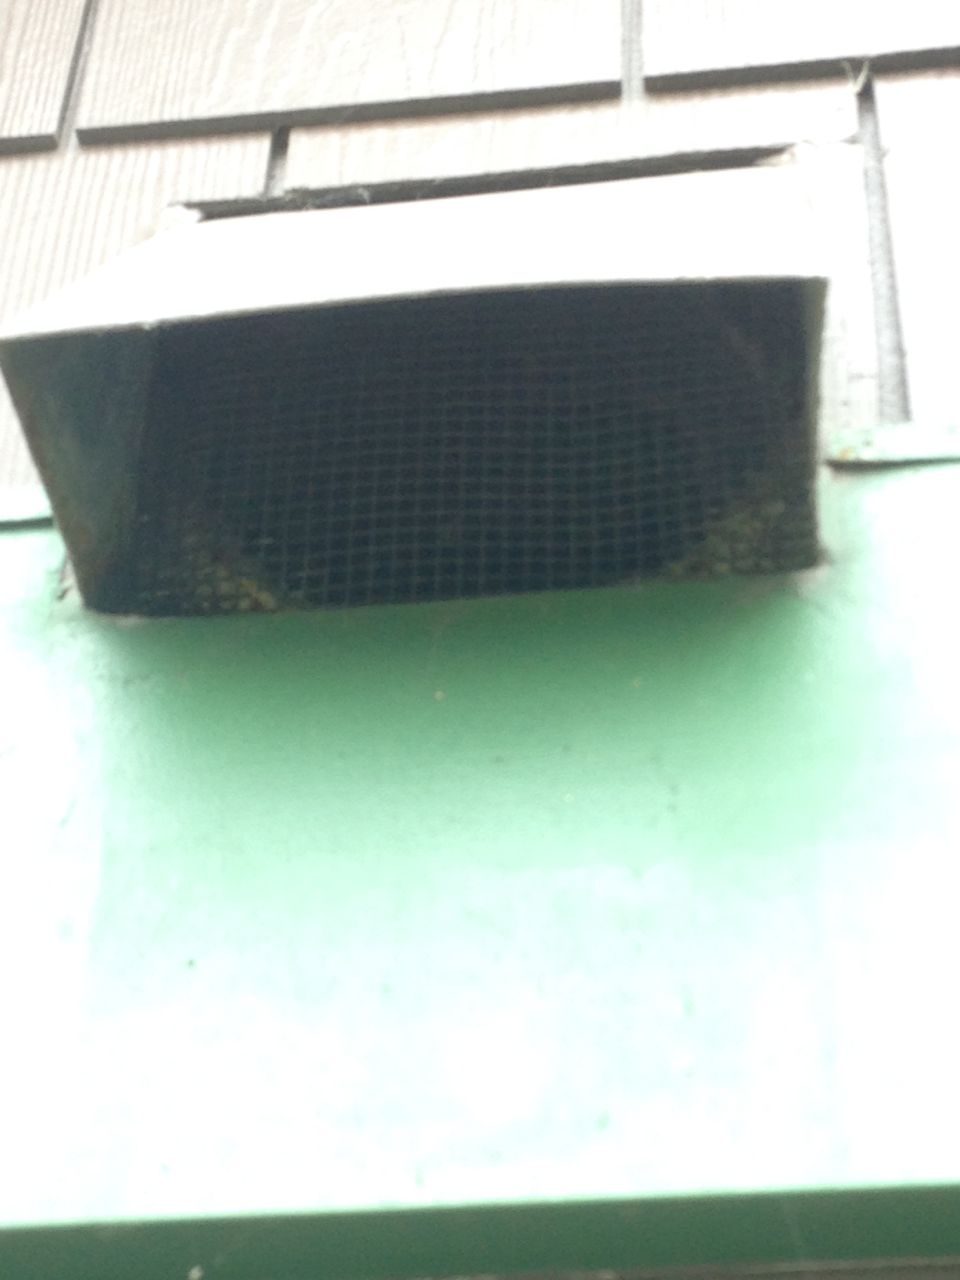
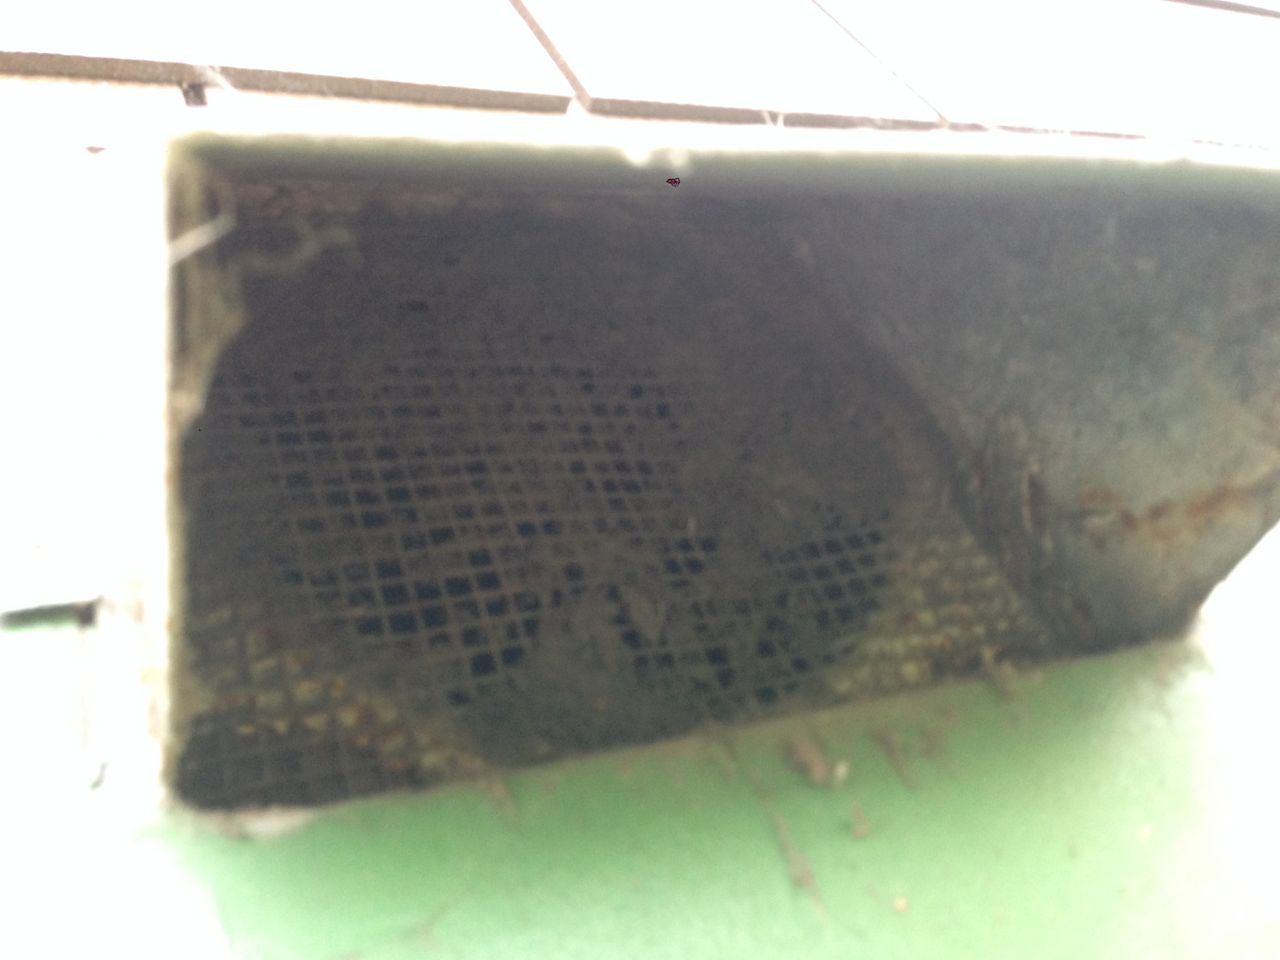
1) Bug Screen. The wire mesh, our first line of defense, was dirty. It covers the edge of the 7-inch diameter ComfoPipe at the exterior wall. Over half of the surface area was covered with spider webs and dust. I must confess that we haven't cleaned the bug screen regularly. This may be the first time we're cleaning this in five years! This opening is located about 12 feet above the ground on the east wall.


The bug screen has an awning over it to keep out rain. We didn't see how dirty the screen was until we climbed on a ladder to take a close look.


We placed a shop-vac on the ladder and vacuumed the accumulated debris on the wire mesh. The first point of entry is now clean.


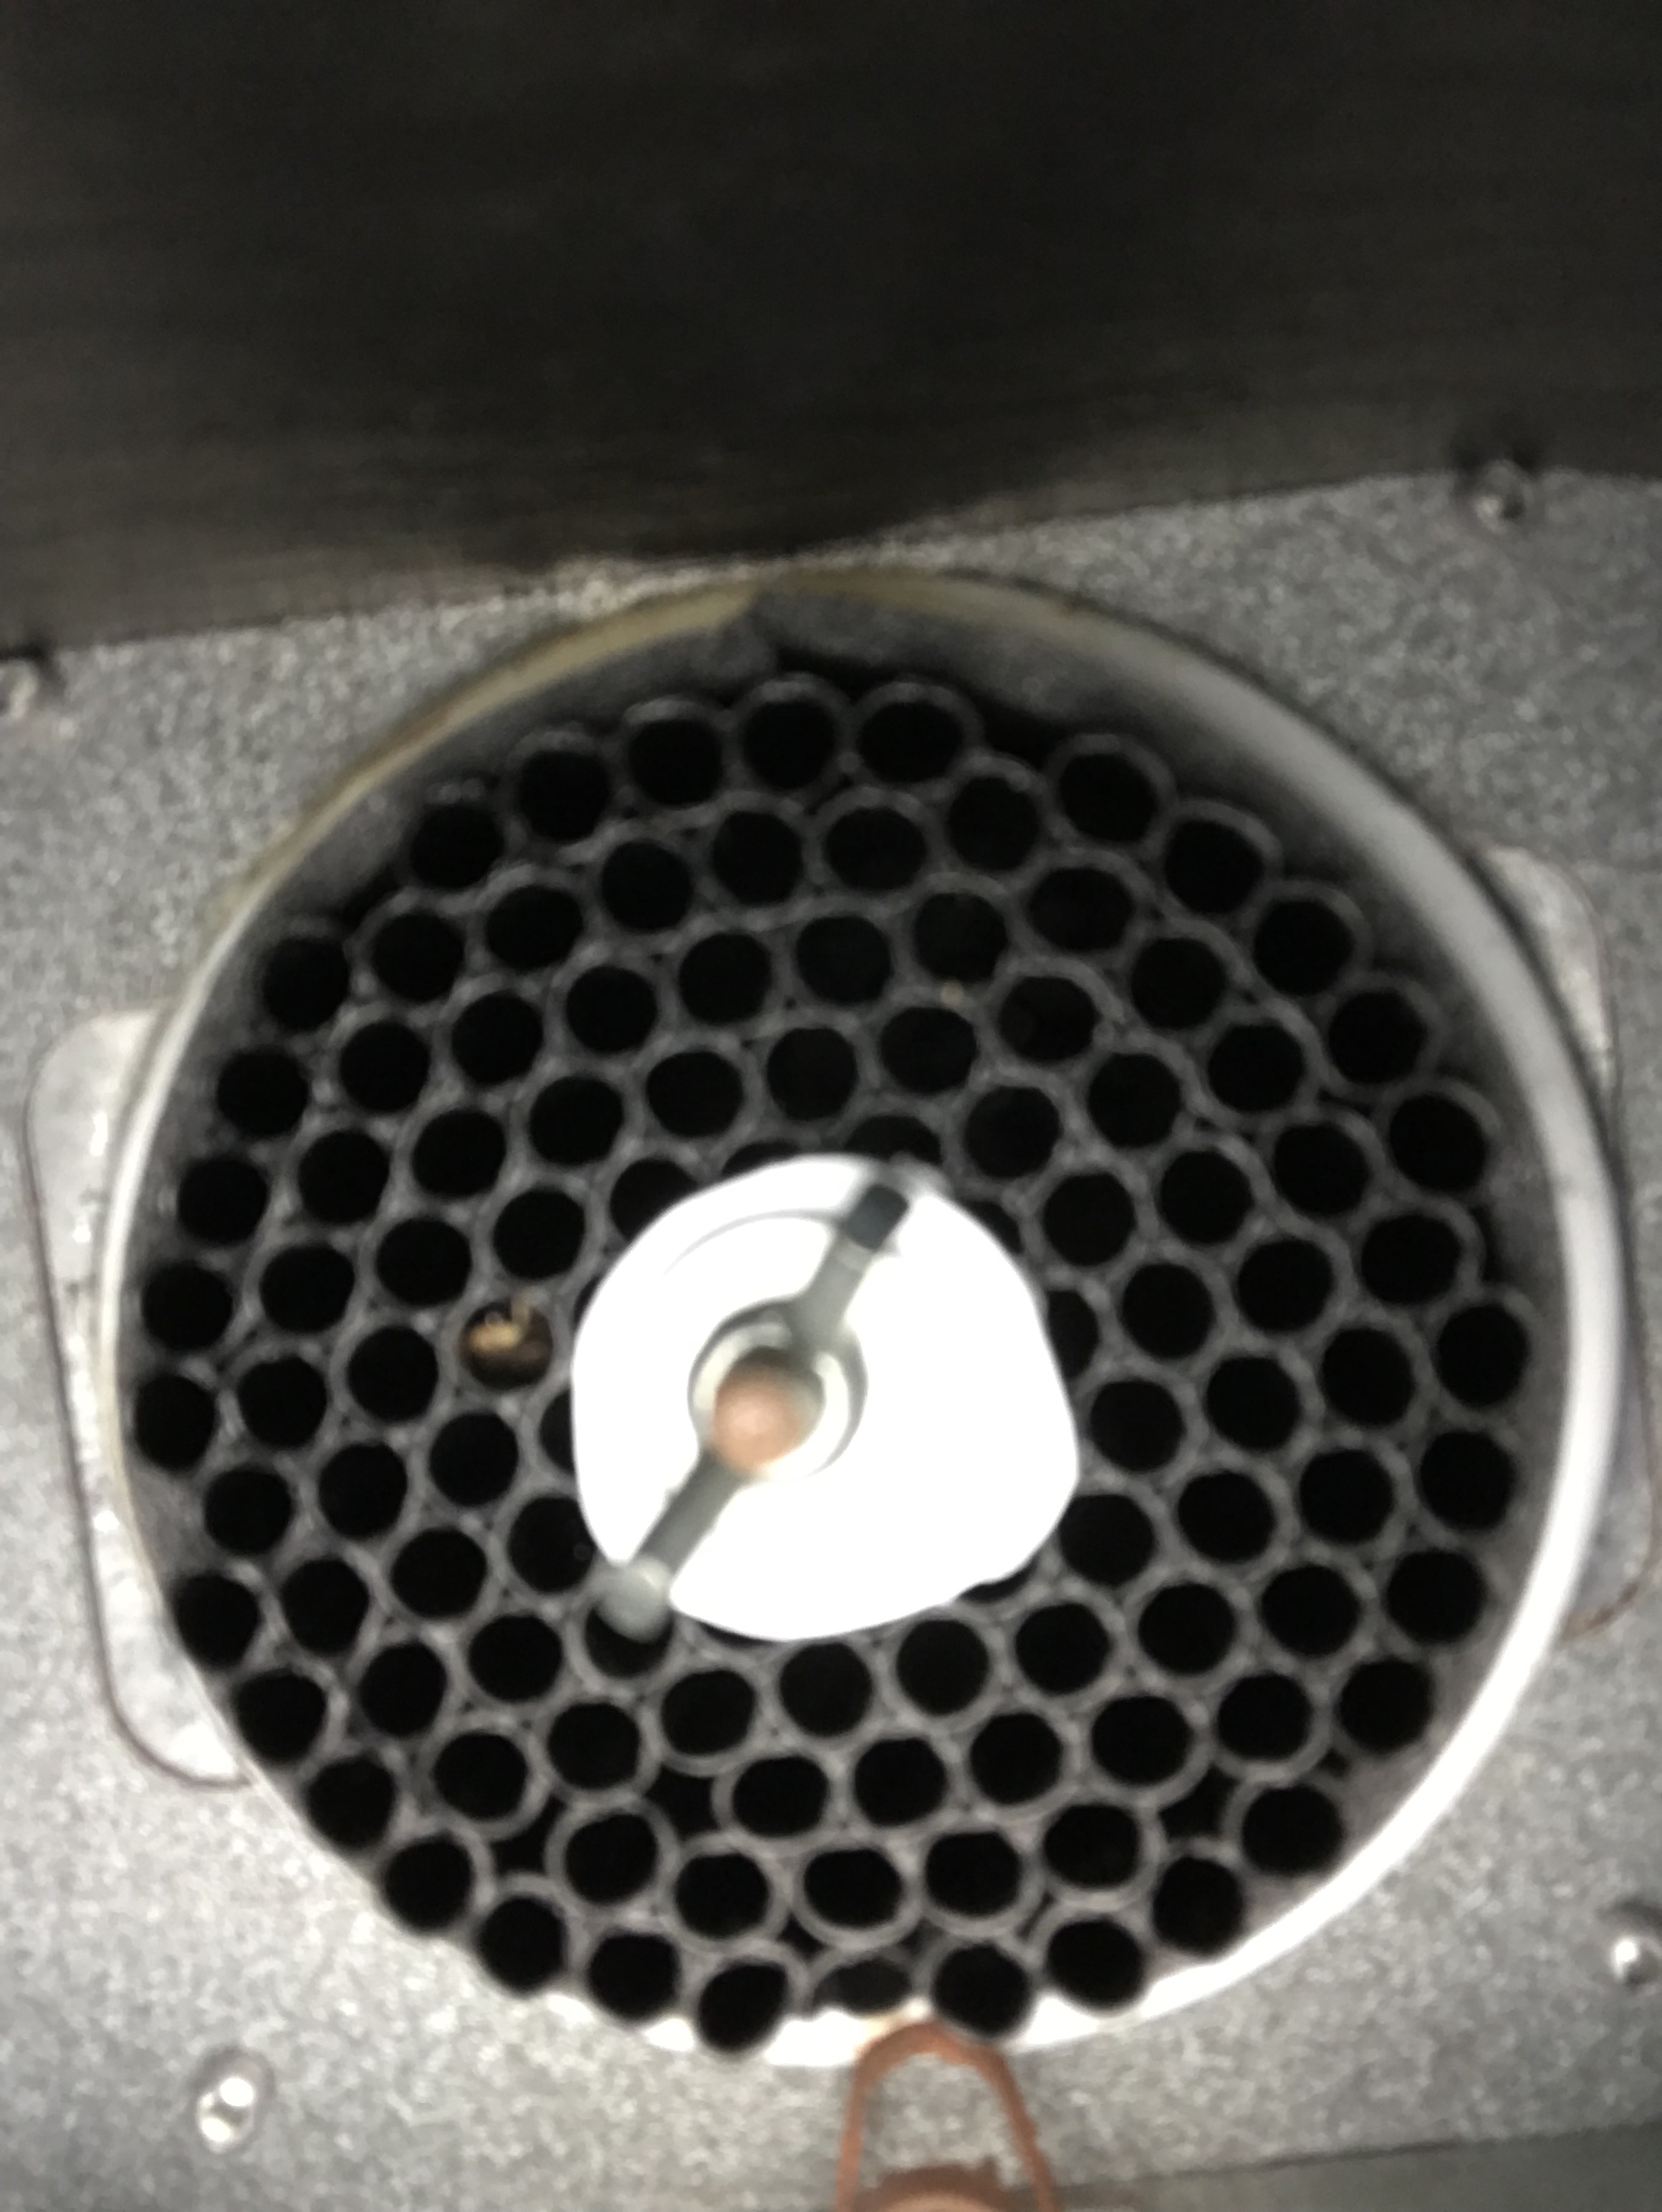
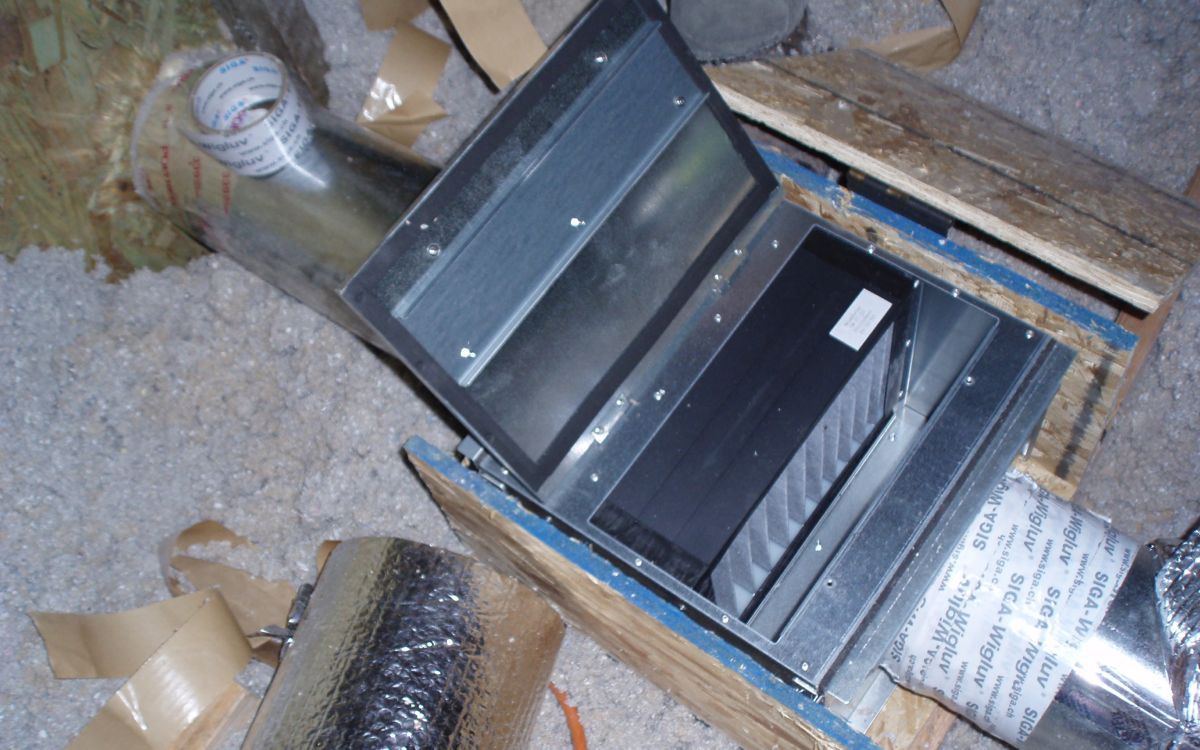
2) Activated carbon filter in ComfoWell. The housing for the ComfoWell 320 to hold the activated carbon filter is in the attic near the air intake wall. During our first year of living in Midori Haus, we smelled wood smoke and skunk spray inside the house. The filter in the body of the HRV didn't remove all of the fine particles. Being awakened in the middle of the night by a frightened skunk in the backyard was very unpleasant. This activated carbon filter doesn't completely eliminate the noxious smells, but it is a huge help.

The ComfoWell filter unit is housed in a wooden box to prevent insulation from being sucked into the ventilation system. We have 24-inches of blown in cellulose in the attic. Getting to this box can be messy.


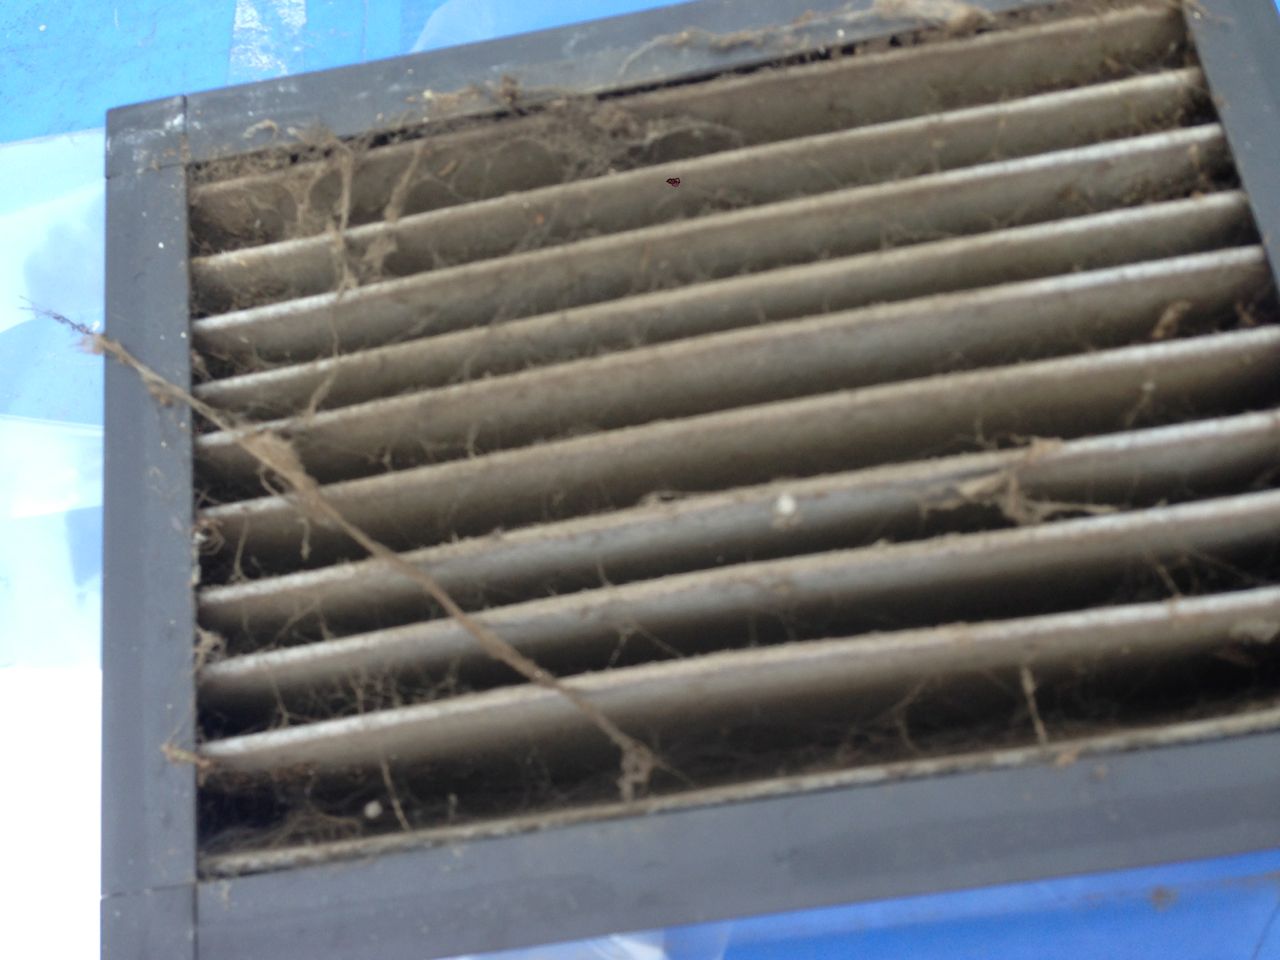
The carbon filter after one year of use is very dirty.


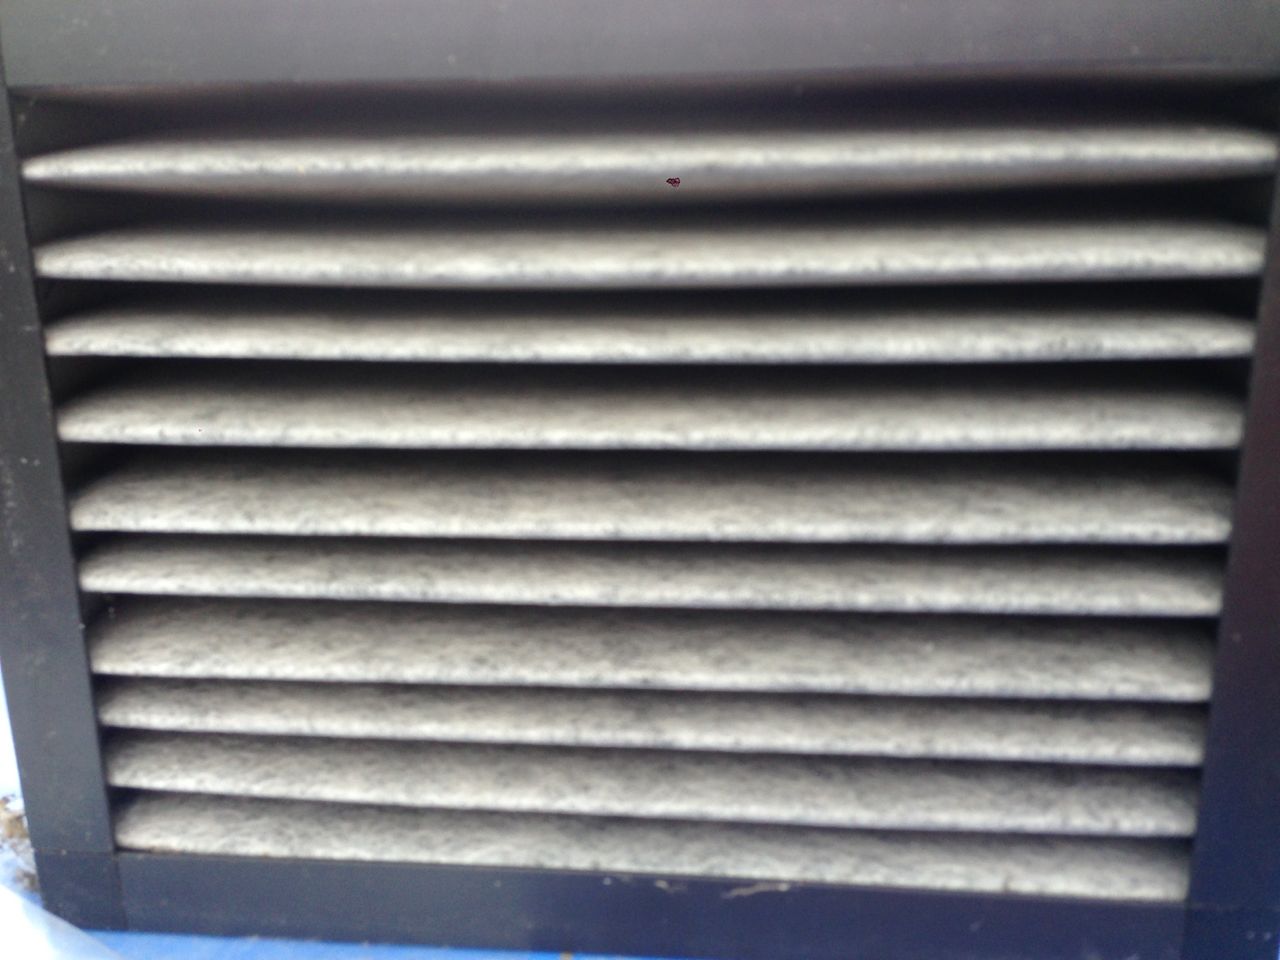
New carbon filter is very clean.


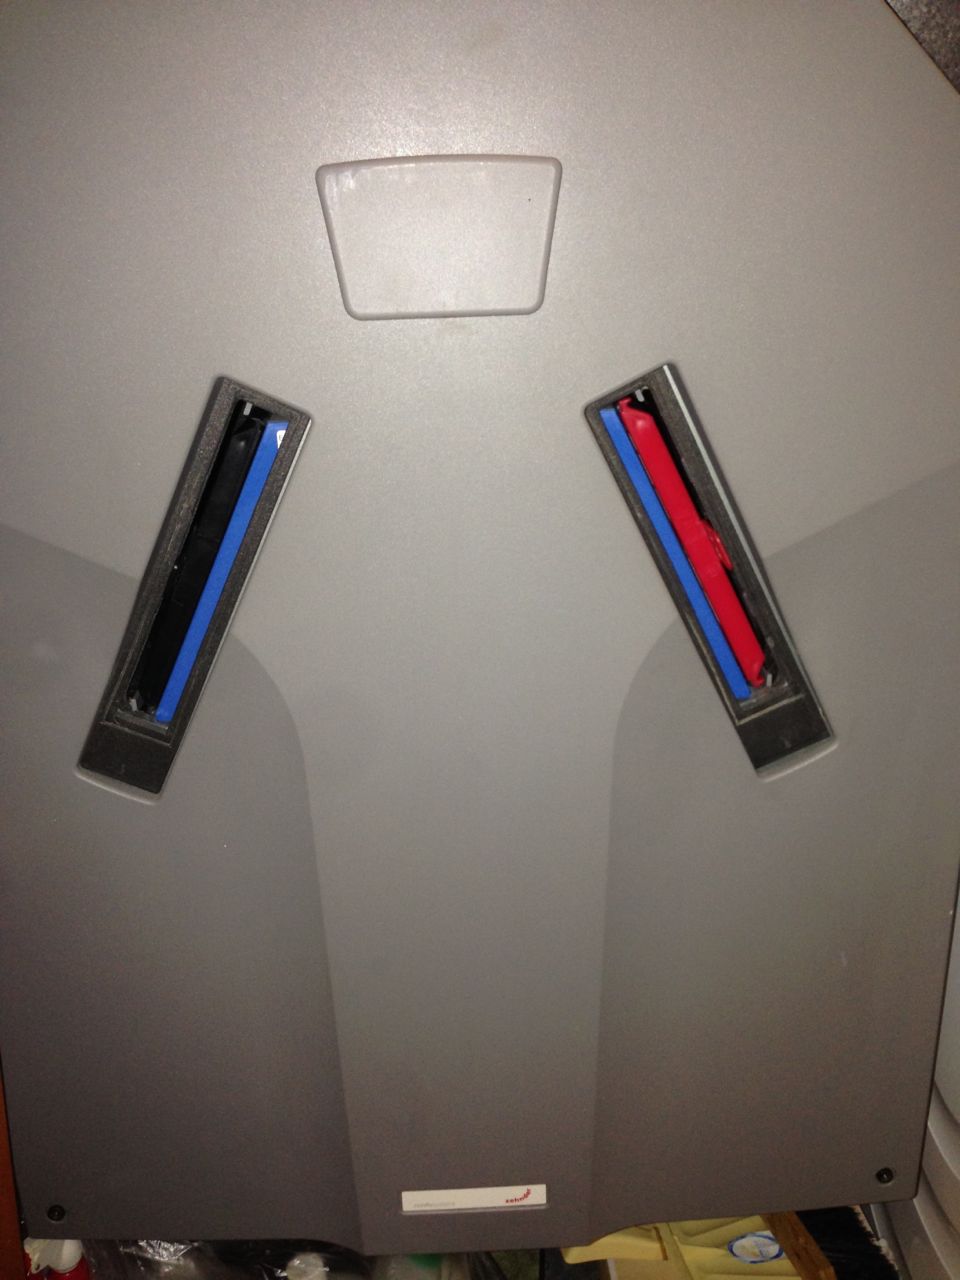
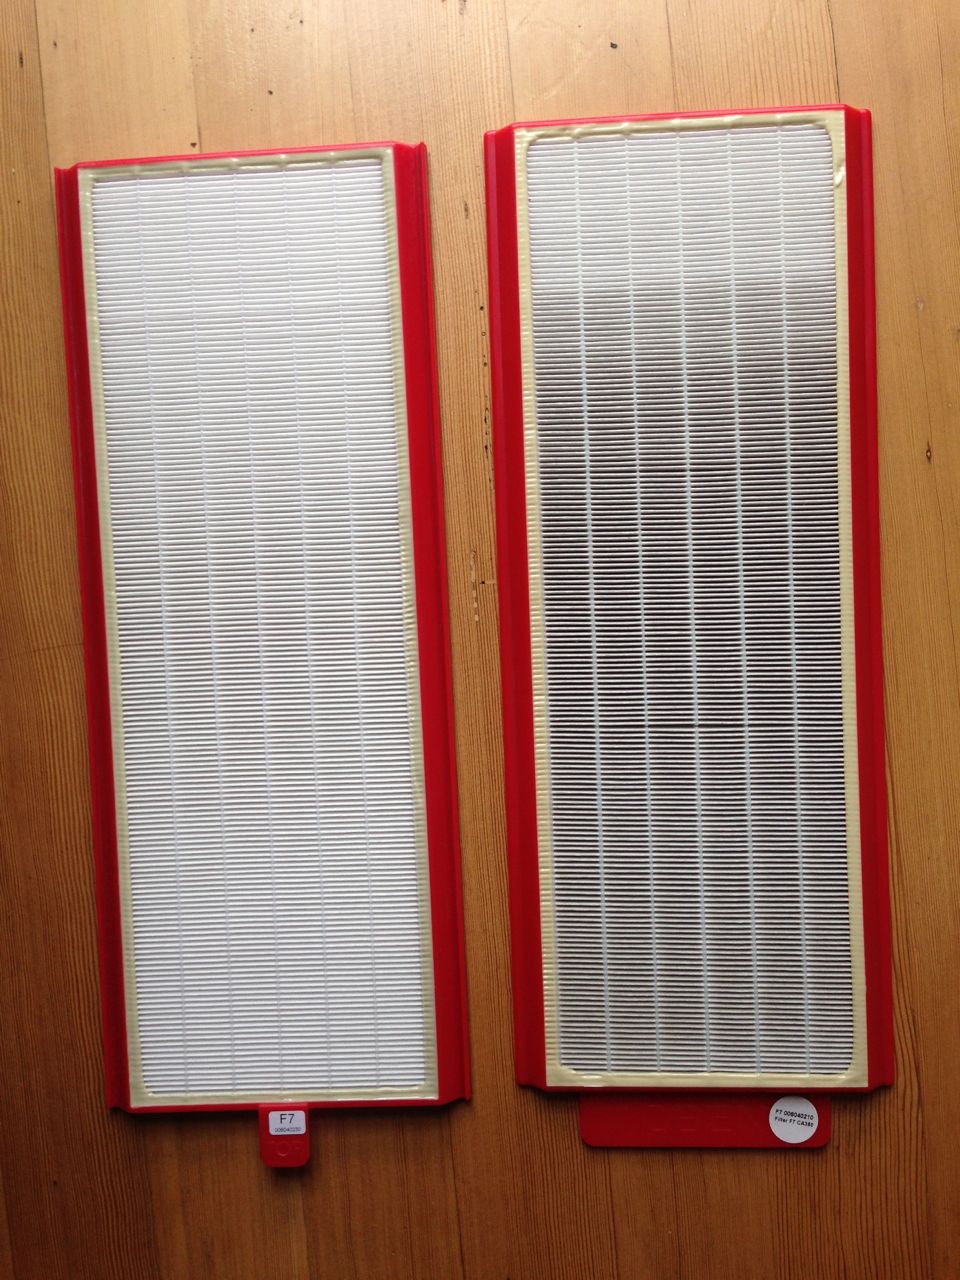
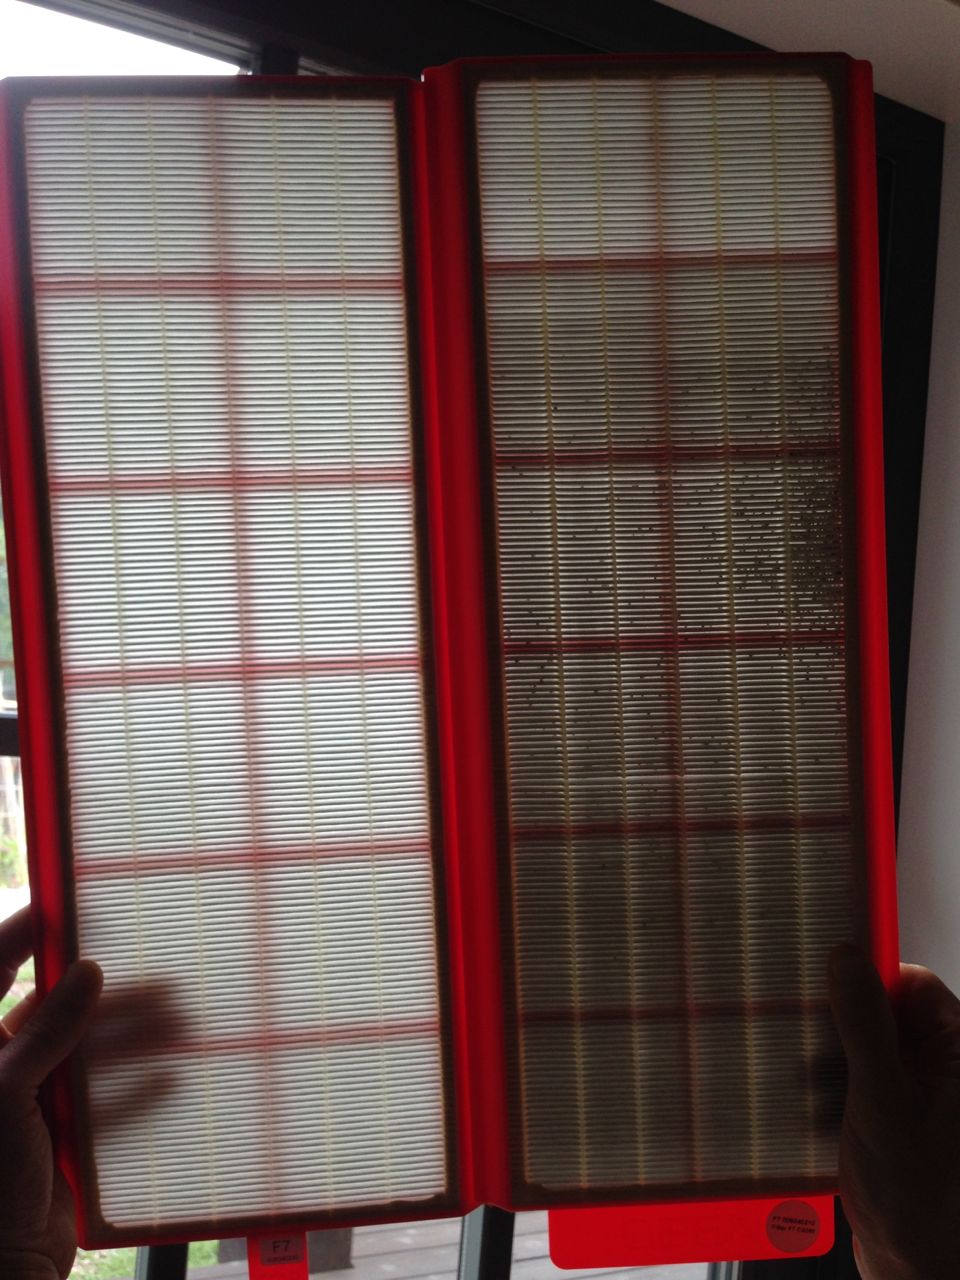
3) F7 filter for incoming air. The red F7 filter is placed at the right hand side of our HRV. Whatever that got passed the wire mesh screen and the activated carbon filter in the ComfoWell, the F7 red filter will trap. The red filter has a MERV 13 rating. The higher the number, the more effective the filter is at trapping small particles.


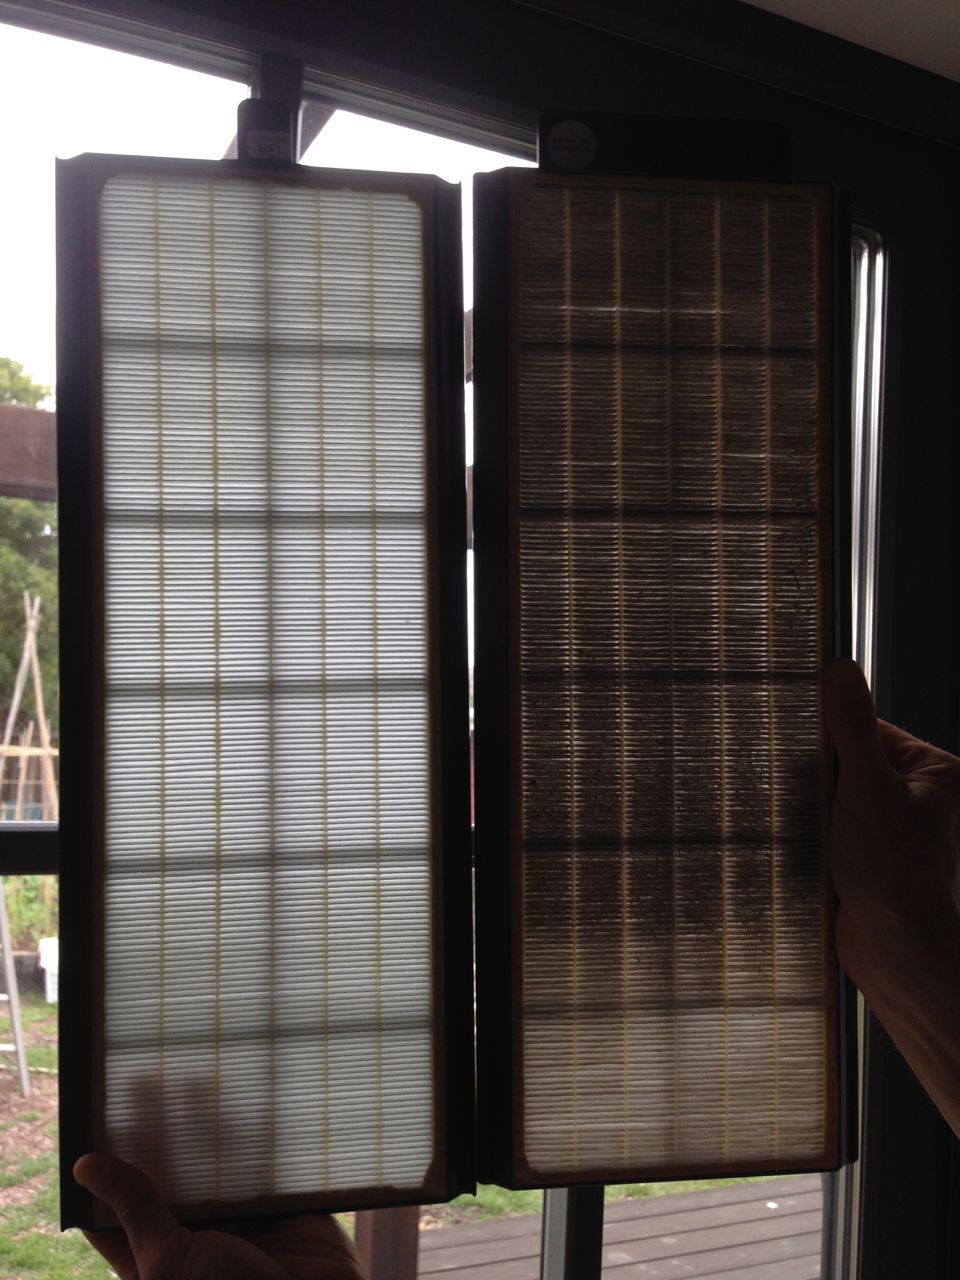
Left: new F7 filter;  Right: after 6 months use


Left: new F7 filter;  Right: after 6 months use


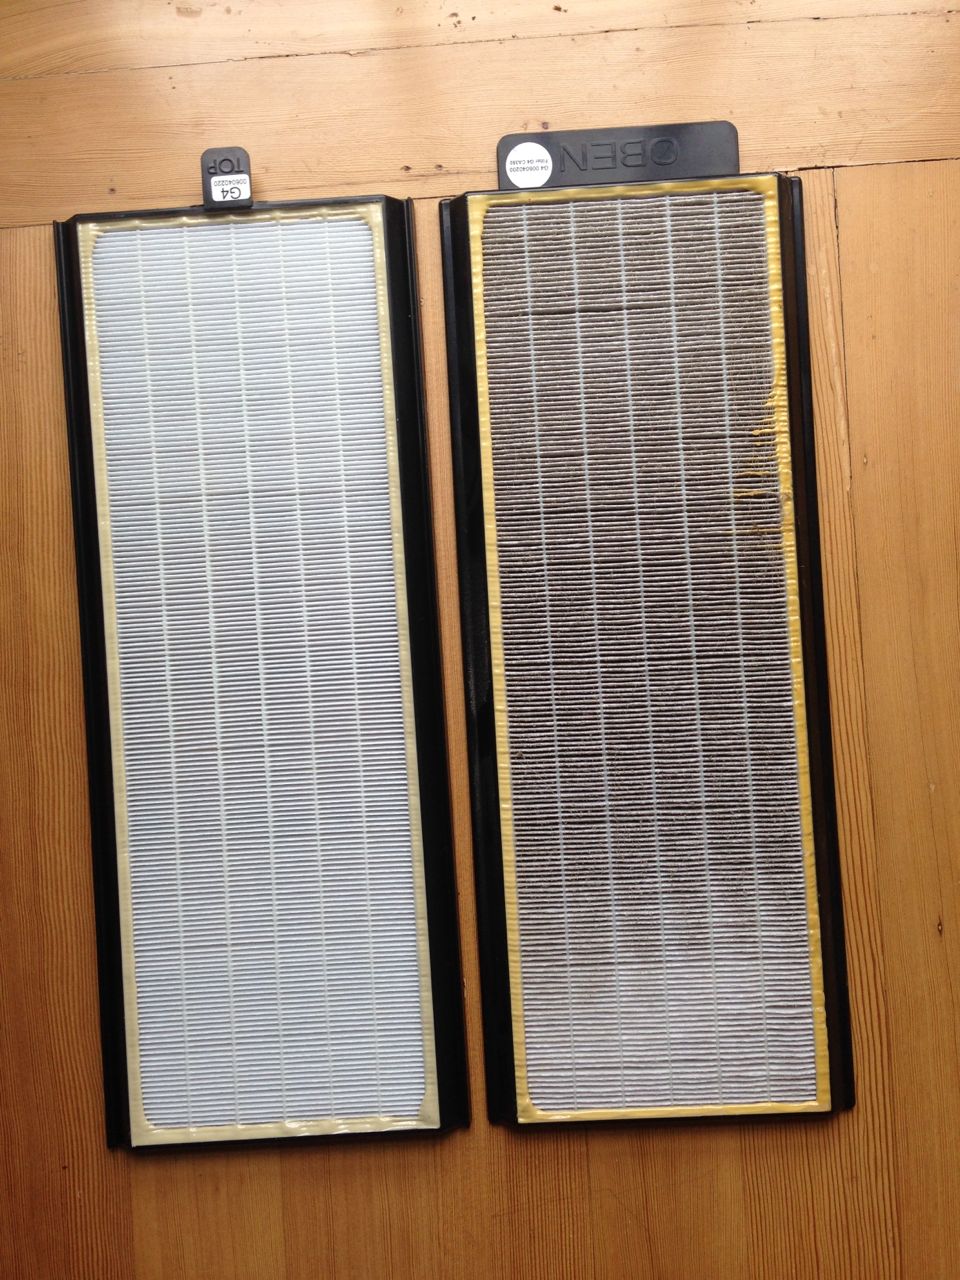
4) G4 filter for outgoing air. The black G4 filter is placed at the left hand side of our HRV. This is filtering out particulates that hitched a ride with the return air extracted out of kitchen and bathrooms. At first glance it may seem silly to filter the air before it is expelled out of the house. This black filter plays an important role in keeping the HRV core clean. The black filter has a MERV 7 or 8 rating.

Left: new G4 filter;  Right: after 6 months use


Left: new G4 filter;  Right: after 6 months use


We were surprised to see the black filter to be dirtier than the red filter. Why would that be? It's a reminder that we track in dirt and dust as we go in and out of the house. We add to the particulates in the air when we cook. Since we air-dry our laundry inside the house, all the lint that would have been trapped in the dryer lint trap is floating about inside our house. Every so often, I notice a spider hitching a ride on lettuce or chard I harvest from our garden. In other words, simply living in the house slightly degrades the air quality.

A set of filters cost $100 ($53 for activated charcoal, $25 for F7 red filter, $22 for G4 black filter). The red and black filters can be reused after cleaning. In the past, we've placed them in the dishwasher and also sprayed it down in the shower. It doesn't get pristine clean, but enough particles are removed to re-use the filter for another 6 months.

One final thing to do for this semi-annual maintenance event is to set a reminder in calendar for filter change. I have mine set for November 1 and May 1. 

Chapter 5: Designing for Lifestyle and Budget

January 11, 2018

Gathering ideas for the remodel was fun. I had been clipping out magazine pages, taking photos and writing notes during home tours, bookmarking web pages that conjured the feeling of “clean and beautiful,” learning from the mistakes of others, visiting showrooms, reading articles written by home energy professionals, attending conferences and workshops, and more. Choosing which of the numerous wonderful ideas to put into practice was much harder than I thought. Before our architect and Passive House consultant, Graham Irwin, could create the drawings and specifications, we had to tell him about our goals, what problems we’re trying to solve, and how we envisioned our daily life would flow in the house. Most of the cool ideas I’ve gathered didn’t make make the cut. In reality, we can only use one kitchen cabinet design even if I had clipped out five different styles I liked.

We appreciated the Passive House Standard. It is a performance-based standard that doesn’t dictate the look and feel of the house. When her transformation is done, Midori will look like a beautiful classic old house, allow us to flow through our daily activities with ease, and perform at the level of world-class energy efficiency. In chapter 5 of the Midori Haus book, we begin the design.

What I didn’t see at that time was the implicit boundaries or constraints we had. These constraints guided us down a path of seeing cre­ative opportunities rather than picking out and settling for a col­lection of routine rule of thumb choices. Unlike the blank slate we had at the beginning of our real estate search, we were proceeding down a funnel of constraints to shape Midori to our intentions in the design phase. In Midori’s transformation design, we focused within the multi-faceted constraints by:

• Honoring the original Arts and Crafts style

• Observing regulations

• Heeding data from health and safety diagnostics

• Using space well to meet the lifestyle we envisioned

• Embodying our personal values

• Navigating kitchen design to solve problems

• Applying the principles of Integrated Design

• Ensuring we could afford the vision with detailed estimate.

We clarified our lifestyle we envisioned by walking through the house, room by room, and making notes on what was important to us.

We started out at the front door on Midori’s generous porch facing the street. This could hold a dozen people lounging around with a glass of beer or their favorite drink in hand, engaging in conversation. We liked our vision of porch parties and decided to keep the solid concrete porch as it was, maybe with new patio fur­niture to make the space more inviting.

When Kurt and I walked into the formal dining room to con­sider our lifestyle and what we would do there, we both looked at the built-in furniture and said, “That stays!” The built-in furniture defines the space. It would be perfect for displaying the collectible porcelain that had been cooped up in storage.

It was helpful to do this exercise for all of the rooms and things easily fell into place. The kitchen was a different story. No matter how many ideas Kurt and I batted around, it never felt right. That’s where a skilled architect shined by presenting us with a kitchen design that met our needs and wants.

We learned about integrated design, a process where the architect incorporated feedback from a contractor and consultants. I’ve heard of sad stories of homeowners who had worked with an architect to create a beautiful design and were ready to start construction with a permit in hand, but the bids that came back from contractors were way over budget for them. We wanted to make sure our design was within our budget and didn’t present construction problems for the builder. During the design phase, we hired Taylor Darling of Santa Cruz Green Builders as a consultant to provide contractor’s perspective.

I could see their complementary styles with a common passion toward green building working out nicely. Graham would send Taylor links to Passive House articles like the “Cost Effective Passive House as European Standard” or an article on method to fasten furring strings to sheathing through foam insulation. Taylor would suggest things from his experience like having the deck height be a half inch lower than the finished floor height to ensure a smooth transition and avoid a tripping hazard. When we considered whether to raise the roof height of the 1947 addition (master bathroom and closet) to match the main house, Taylor took measurements and answered Graham’s question of whether the existing structure had adequate space for insulation. Ultimately the decision was ours to raise the roofline or not. We didn’t. Observing the objective discussion between two professionals informed our decision.

Of all the different interpersonal interactions that took place during the project, there is none more important than the relationship between Kurt and me, the homeowners.

Midori gave us the opportunity to learn about each other. We’d been married for almost ten years when we started this project, but we’d never worked together professionally. We have different strengths, weaknesses, and working styles. We wondered if we would annoy each other. So far, our complementary skills have fallen into place. We gained appreciation and respect for each other as we navigated through the design phase.

If you’re wondering about what choices we made in our design, stay tuned. In the next chapter of the Midori Haus book, we get into the materials we specified for our design.

Chapter 4: Interviewing Architects, Builders, and Homeowners

December 29, 2017

Passive House consultant Bronwyn Barry has noted that “passive house is a team sport” of architects, engineers, and consultants. At the beginning of Chapter 4 in the Midori Haus book we knew we needed a team of people, but we didn’t know how to choose them, how long it would take, or how much it would cost. We asked a lot of questions to reduce uncertainty and gain confidence in choosing team members. The most important questions, however, were directed at ourselves.
Q: Is this your forever house?

A: Yes.

Q: What are you goals and priorities?

A: 1) Very green remodel focused on energy efficiency with Passive House; 2) Honor the look and feel of classic Arts and Crafts style; 3) Keep cost within our budget.
Q: What are you willing to do and what skills do you have?

A: See excerpt from Midori Haus book below.
We could have gone with a design-build firm and left it up to them to pick the people from their network. This choice makes the design-build firm the single point of contact accountable for the results. While it means paying more for project management services, we would only have one neck to choke if something went wrong. Had we been short on time due to demanding careers while raising a family, this approach would have been very attractive. Or if we had the hard core do-it-yourself streak in us, then we could have gone down the owner-builder route and become our own general contractor and done everything ourselves.

We happen to fall in the middle of this spectrum. We knew our own strengths and limitations. We would actually be miser­able swinging hammers and using power tools. We have neither the talent nor the experience, so we’d make unnecessary mistakes and it would take longer and the outcome would be questionable. On the other hand, we are quite good at doing research and ask­ing questions. We knew that we could apply our respective career experiences in hiring people, team building, and managing proj­ects to our home-building project.

When we met with architects and contractors, we asked questions from a list we had prepared to see if we wanted to hire them. Their responses, and more importantly how we felt during the conversation, answered the main questions we asked ourselves: “Is he or she a good fit with our goals and priorities?” and “Is the chemistry right?” After all, we know there will be problems and challenges during the project. When it happens, we wanted to be partnered with someone who could rationally solve a problem rather than increase our stress.

Some of the most useful conversations took place with homeowners who were the reference clients of the architects and builders.

The best person to give information about the performance of a house is the person who lives in it. We found homeowners to be more than willing to share their experience and lessons from their house projects. They understood the value of the reference visit. The homeowners we visited were the beneficiaries of helpful others in their journey. They were now paying it forward by sharing their experience to those of us who were starting the renovation journey.

As with the architect interviews, we went in with a list of pre­pared questions. Our intent with the homeowner interviews was to build rapport with the homeowners in the first few minutes so that they would volunteer information as if they were talking to a friend. This was the closest we would get to test driving the con­struction experience, and we wanted to know what it really was like. We wanted to be exposed to things we hadn’t thought about. We weren’t trying to ferret out dirt about the builder or the archi­tect, but we wanted to know what “gotchas” were lurking around the corner in a recent construction project and maybe avoid mak­ing that mistake.

Building rapport is key to shifting the homeowner from the place of representing the work of a certain builder or architect to helping a fellow homeowner by sharing their lessons learned. Before getting into the “Where did you get those lovely tiles?” types of questions, I like to find out the context behind the remodel to understand why they did the remodel in the first place. I can easily judge a house or a feature based on assumptions in my head, but my interpretation could be completely off base. Plus, asking questions like, “What problems were you trying to solve?” or “What drove you to do the remodel?” opens the conversation in a way that allows the homeowner to tell their story. After asking such questions, we we practiced active listening and then asked clari­fying questions.

We talked to many people: architects, builders, and homeowners. We gathered information on products and materials used in their projects. We also gathered information on the process they went through and the lessons learned. After a while, I ended up with more ideas than we could practically implement. At these moments, it is just as important to release a dissonant idea as it is to embrace a brilliant one.

While interviewing architects and builders, we tested some of our pet ideas. We soon learned that a brilliant feature we saw at someone else’s house could not be incorporated into Midori out of context. It is just as important to release a dissonant feature as it is to embrace an unfamiliar logical concept. We needed to do both to move forward. So we thanked the architects and builders for the interesting exploration and moved on.

An example of a dissonant feature we released was a Trombe wall we saw at a friend’s house. It’s a passive solar design feature that uses an internal wall (our friend used brick) to collect heat from the sun during the winter day to release them into the living space at night. Several people coaxed us out of this idea saying it wouldn't work well in our coastal marine climate. We're glad they did because it would have been aesthetically awkward and it would have been expensive to beef up the foundation and floor to support the extra weight.

In a previous post, I mentioned the importance of asking questions and shared our list of questions we asked architects, builders, and homeowners. You’ll find the same set of questions at the end of chapter 4 in the Midori Haus book.

Chapter 3: Setting A Building Energy Limit

December 22, 2017

We couldn’t look at houses the same way again after we learned about the internationally recognized performance-based energy standard in construction called Passive House (Passivhaus in German). In chapter 3 of the Midori Haus book you’ll read about another shift that happened to us. My mindset transformed from “looking for a tech gadget that made green magic happen at the push of a button” to “looking at the whole house as a system and appreciating good design and craftsmanship.”

Early on we thought green building consisted of different green components: something that used resources efficiently so that we didn’t end up consuming everything and leaving nothing for future generations; something that protected our health so that we didn’t get sick from breathing toxins or allergens; something that reduced waste and pollution so that future generations (and ours) could enjoy clean air, clean water, and nature.

I used to think, “Why not install photovoltaic (PV) panels on the roof to generate electricity from the sun and be done with it?” Solar energy is green, right? We could generate all the electricity we used in our home and sell some back to the utility so that at the end of the year our electricity bill would be near zero. It would probably pay back in about twelve years. I wondered why some­one would go through the extensive calculation and install lots of insulations and perform extensive air sealing to save energy. It seemed to me that PV was easier and better. Eventually we learned that it depends on how you frame the problem.

The problem we were trying to solve was not solely about getting the electricity bill to zero. We wanted to live in a house that was comfortable and healthy. Covering the roof area of a ninety-year-old house with PV would not make it comfortable and healthy.

We first heard about the Passive House Standard in March 2010. We didn’t fully embrace it when we first heard about it from a green building consultant who came out to give advice on a property we wanted to buy.

On the surface there was nothing profound in what he had to say—better windows, insulation, minimizing air leaks, consider the shading from the trees. These all sounded mundane and pedestrian, perhaps because I was secretly hoping to get an insight into the latest tech gadget that makes green magic happen at the push of the button. Sadly, he offered no such gadget. The one thing that seemed to perk him up was discussing the Passive House Standard.

We didn’t dive into Passive House after our initial encounter with the consultant. Six months later, we were in a Passive House workshop. That’s when we finally embraced Passive House.

Chie and Kurt, ordinary homeowners, transformed into Passive House enthusiasts with a single realization: energy used to quickly adjust temperature, either to heat or cool a conventionally built house, can be eliminated if the shell of the building is constructed like a thermos. Keeping the indoor temperature constant and controlling ventilation could make our house comfortable and healthy. And we didn’t have to wait for some new invention to come about or spend extraordinary amounts of money to achieve a radical reduction in home energy.

The tools, techniques, and products to successfully build Passive Houses are available today. It requires the architect to use detailed modeling to guide the plans to hit the specific target for energy use. It requires the builder to pay careful attention to construction details and comply with the specific limit on air leakage. In other words, good design and good craftsmanship. This is Passive House.

Kurt summed up the appeal of Passive House Standard by saying, “It’s brilliant systems-thinking.”

… The green buiding certification programs we’d seen so far were like ordering à la carte from a restaurant menu: slap on a solar panel, get energy star appliances, get bigger windows to make use of day lighting, and so forth. Each component was green in its own way, but who knew if they would work together effectively to seriously reduce energy consumption. I didn’t want to wait until after we lived in our house to find out if the mishmash of systems resulted in comfort or heartburn. The Passive House Standard was geared towards achieving a very specific low-energy use with occupant comfort in mind…

We wanted more than a lower utility bill. Our focus was to follow our values and do the “right” things that would last a long time. We wanted to use more current sunlight and less of the ancient sunlight. We wanted the air inside our house to be healthy. We wanted the house to be pretty and pleasant and we wanted to be comfortable living there. We wanted to demonstrate and show others that an old house can retain its charm and have excellent energy performance. We wanted everything to work together nicely and within our budget. Passive House represented the path to achieving this. Simply install a bunch of PV panels on the roof without dong any of the other work did not.

It’s not that we’re opposed to using PV. Learning about Passive House clarified the sequence for us: First, do the improvement on the building envelope. See how it performs. Then later add PV when we’re ready to switch from gasoline vehicles to electric cars.

In the introduction of this book, I said that the most important thing we learned was to stick to our personal values, and that has guided us through buying a home and navigating options to make it green. Besides the personal benefits we’d enjoy by living in a Passive House, we set about on this renovation project to make a contribution to the greater community. Rather than wait for the government to institute regulations to curb greenhouse gas emissions to retard climate change, we wanted to reduce the greenhouse gas emissions that came from living in the house.

Learning about Passive House made a big difference in how we approached our home renovation project. Are you curious about the Passive House Standard? This short video will explain it in 90 seconds.

1 2 3 8
>