Rainwater Harvesting System Installation
Why did we choose to install a 5,000 gallon tank (technically 4,995 gallons) for our rainwater harvesting system? The short answer is because that’s what made sense for us. We’re using the rainwater to flush the toilets and for the cold water laundry. We estimate this volume to be around 6,000 ~ 8,500 gallons per year (roughly 500 ~ 700 gallons per month). So, we could have installed a much smaller tank, say 600 gallons if we wanted to. But when we looked at the cost of installing the system (this includes tank, pipes, filters, fittings, labor, etc.) the cost of the tank is just a fraction of the total system cost. Most of the cost is in the labor. So why not get a large tank?
But not so large. The reason why manufacturers sell tanks sized 4,995 gallons (just a shade smaller than 5,000 gallons) is because of the building codes. Above ground rainwater harvesting tanks larger than 5,000 gallons need to be placed on a foundation or platform. Tanks smaller than 5,000 gallons can simply be placed on a bed of gravel. Thus, we opted for the 4,995 gallon tank that will allow us to capture larger volume of rainwater during the winter without having to build a special foundation for it.
The amount of rainfall in Santa Cruz has been highly variable in the last 7 years. I invite you to take a peek at the data from WeatherCat website which shows the annual rainfall in Santa Cruz ranging from 15 inches to 34 inches annually. We’re grateful that this private weather station located just 2 miles away from our house provides us with lots of useful detailed climate data, much better than what we could do for ourselves. Thanks WeatherCat! So, how many gallons of water can be harvested from 15 – 34 inches of rain on our rooftop? It depends not only on how much rain we get but also on the roof area. We have most of the gutters (about 3/4 of the total roof area) directed towards the rainwater tank. This means 15 – 34 inches of rain per year can yield between 14,000 to 32,000 gallons of water.
By the way, the rule of thumb is 1 inch of rain yields about 600 gallons for 1,000 square feet roof. To get the precise conversion of inches of rain to gallons of water simply plug in the figures in this calculator.
Santa Cruz Municipal Utility bill tells us that our annual water usage (Apr 2013 – Mar 2014) is pretty low — 38 CCF or 28,424 gallons for everything. This includes water used for toilets, cooking, bathing, laundry, watering the garden, etc. What this means is that even if our roof areas is capable of capturing over 30,000 gallons of rainwater on a very rainy year we won’t be able to use all of it. Trying to maximize storage for our roof area is an overkill.
Rainwater Tank
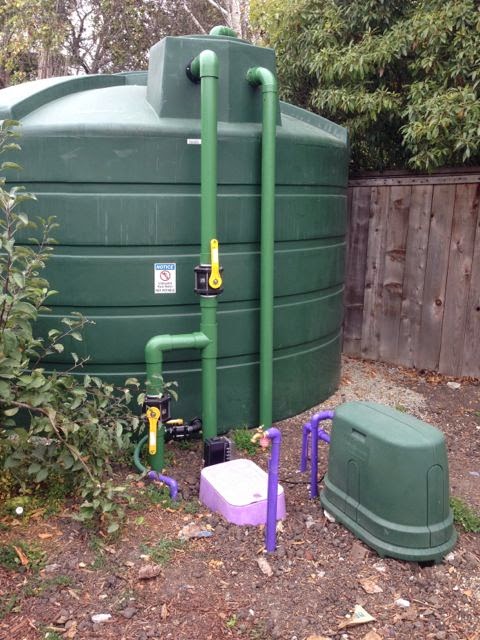
The 4,995 gallon tank comes in 2 different shapes — tuna can or the soup can. Easy to imagine them right? The tuna can is wider and shorter than the soup can and it fits nicely into the corner of our yard where the dark green tank blends in with the trees. The model is Bushman CWTX5-132 which measures 10-feet 9-inches in diameter and 8-feet tall. It looked huge when it arrived on Jon Ramsey’s trailer on a July morning. They said that it barely cleared some of the bridges and freeway overpass on the way. It rolled easily down the driveway into the backyard. The team from AquaSoleil was busy in our back yard for a few days.
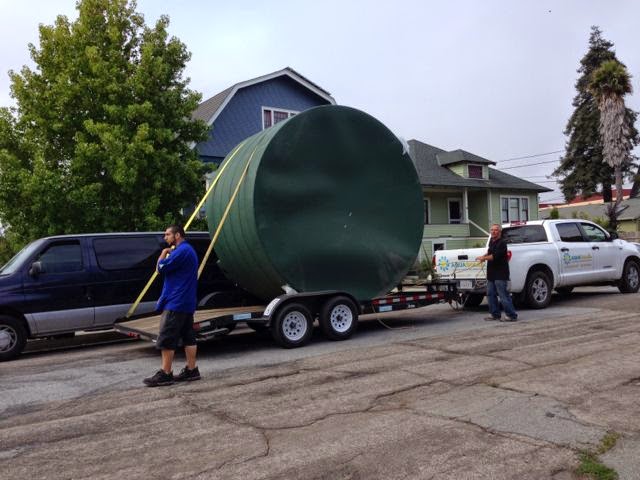 |
| rainwater tank delivery |
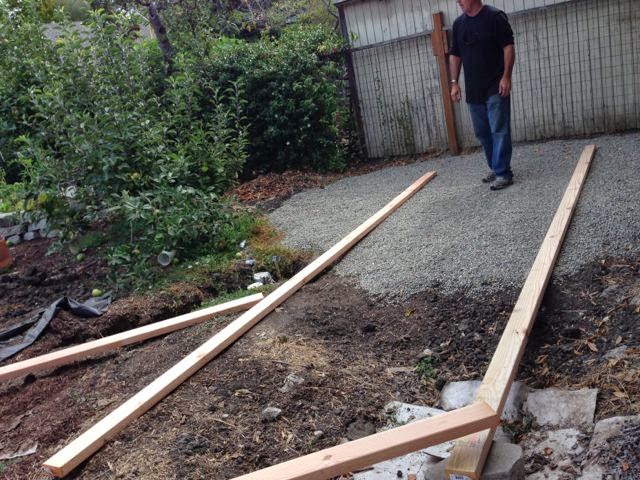 |
| skids to position the tank |
Now let’s follow the path of the water, from the rooftop to the tank. Rain from 1,503 square feet of roof is directed to the rainwater tank via the roof gutter and underground pipes that makes its way over to the back corner of the yard. The rest of the roof area feeds rainwater to the rain garden next to the tank.
Gutters, Leaf Screens
Since there are no tall trees next to the gutters we weren’t worried about having fallen leaves clog up the gutters and the downspouts. Still, there were gritty sand-sized debris accumulated in the gutter when we took a look one week before the rainwater system installation. To make sure we get clean water into the tank we cleaned out the gutters thoroughly by hauling the shop vac onto the roof and vacuumed it.
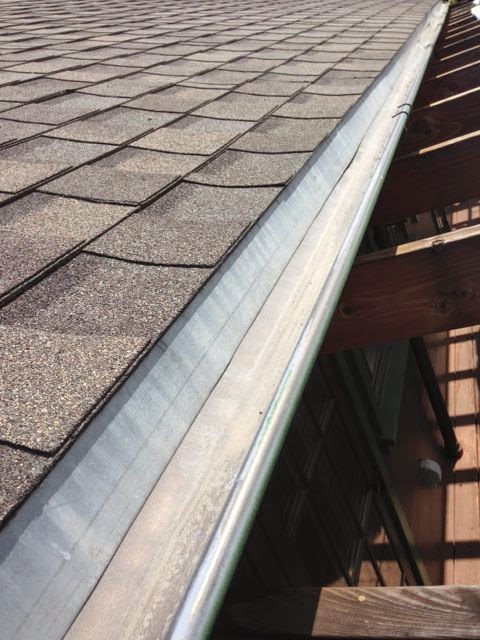 |
| clean gutters |
RHINO Gutter Guard was installed over the gutter. This will keep the gutters clean. No more cleaning gutters!
 |
| Rhino Gutter Guard |
Rain collected in the gutters flow down through the 2 screens from the downspout into the pipe that conveys water to the tank. In case you’re wondering, this was in place before the Rhino guard on the gutters. Now that we have screens directly on the gutters we really don’t need the leaf screens but it’s there just in case.
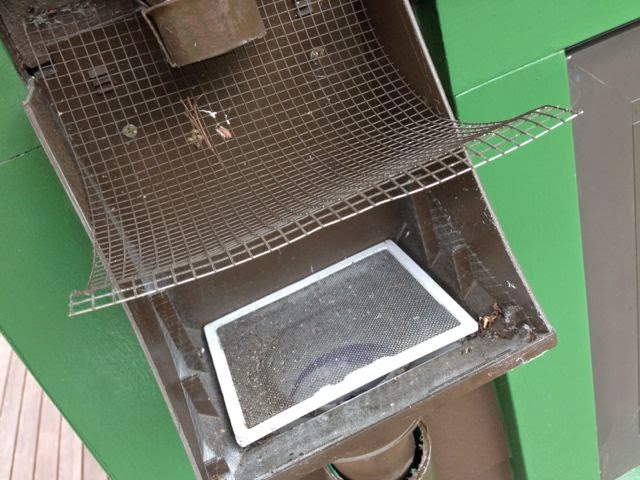 |
| leaf catcher in the downspout |
Fittings, Connections
The pipes that convey rainwater from the house to the tank in the backyard were installed 3 years ago during the installation of the french drain. 3-inch PVC pipes are buried 18-inches below grade and gently sloped down across the yard to where the rainwater tank is. Also installed 3 years ago were the electrical conduit to power the pump and the 1-inch rainwater supply line (purple pipe). The open ends of these pipes were covered with duct tape. When the rainwater system project came along we found some debris in the pipes since the duct tape fell off.
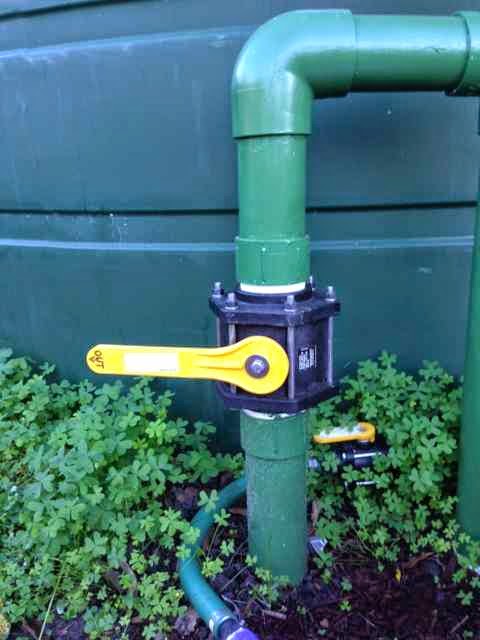
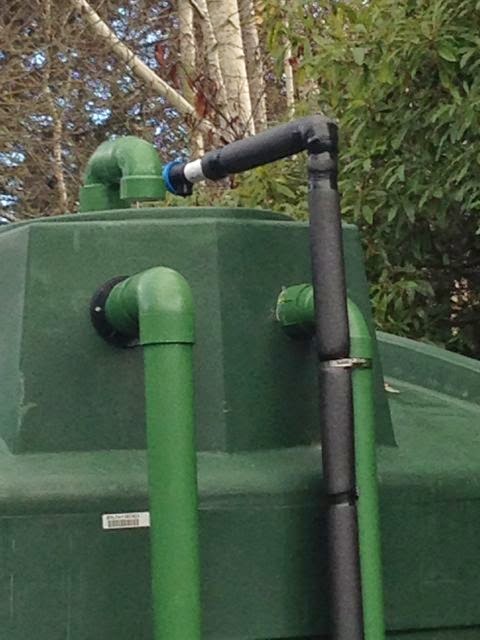
In the photo below the green pipe on the right (without any valves) is the overflow to the rain garden when the tank continues to fill beyond capacity. The green pipe on the left conveys rainwater from the roof and fills the tank. The two valves in the picture will either let the water pass or not. When we want the rainwater to fill the tank the upper valve will point upwards and the lower valve will be in a horizontal position to prevent water from draining directly into the rain garden. When the tank is full and we want to simply direct the rainwater straight to the rain garden the valve positions will be reversed — upper valve in horizontal position and the lower valve pointing down. (Note: The position of the valves in the photo below shouldn’t be used because the rainwater will never fill the tank.)
 |
| Rainwater tank |
The green hose coming out from the bottom is feeding the water from the tank into the pump.
 |
| Outlet from rainwater tank |
 |
| water filter and meter installed |
Filter
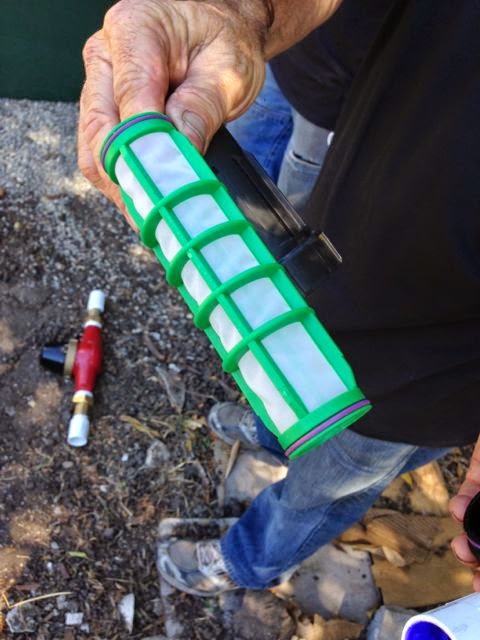
Inside the lavender box in the above photo are the water filter and the water meter. EZ Kleen Y-filter is installed to remove debris before the rainwater goes into the pump. The removable cartridge is easy to clean.
 |
| EZ Kleen 100 micron Y-filter |
Water Meter
This Netafim M series water meter is used to measure the amount of water that flows from the pump into the house. This was installed to measure the volume of rainwater used inside the house for toilets flushing and cold water laundry. On a monthly basis a field crew from Ecology Action comes by to take measurements and water samples. Thus far they’ve told us that our rainwater is pretty clean.
 |
| Netafim M-series Water Meter |
Pump
Grundfos MQ 3-45 pump turns on automatically when it detects water flow and shuts off automatically when water ceased to flow. So it only turns on when we flush the toilets or when the washing machine calls for cold water.
 |
| Grundfos MQ 3-45 pump |
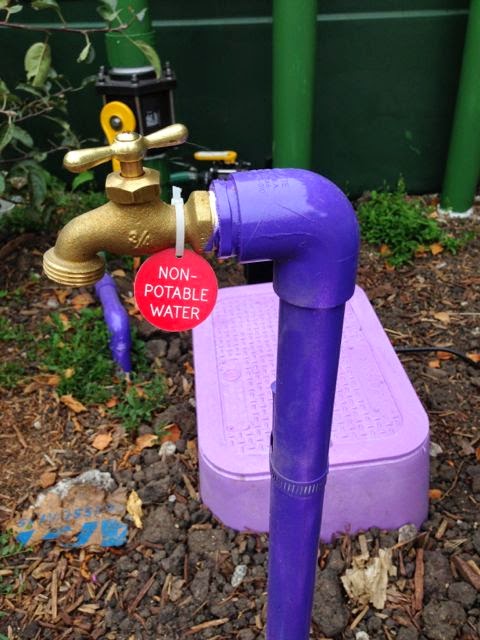
Notice the rainwater spigot is painted purple and the tag clearly says non-potable water. If you happen to visit our yard please don’t drink this water!
 |
| Rainwater Spigot |
Connect and Test
Since there were 2 different companies involved in installing our rainwater system infrastructure we asked both to be present when we did the initial test. Back in 2012 Santa Cruz Green Builders installed the dual plumbing to the toilets and washing machine inside the house as well as the underground infrastructure in the yard. In 2014 AquaSoleil installed the tank, pump, and the fittings.
It was a dry August week with no chance of rain when we did the installation. So the tank needed to be partially filled with city water supply to do the end-to-end test. First part of the test was to see if the water from the gutter will fill the rainwater tank. This was simulated by taking the garden hose and running the water into the downspout. This test removed all doubt of whether gravity feeding was adequate to fill the rainwater tank or not.
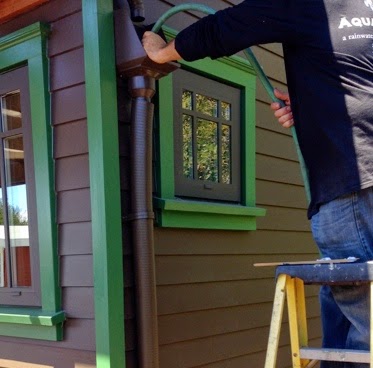 |
| Pour water into downspout for test |
 |
| Rainwater tank is filled |
The cutover from city water source to rainwater source was easy. First, the city water valve was turned off and the hose connected to toilet tank was switched over to the rainwater side. Before connecting the hose to the toilet, accumulated debris (dirt and mulch) was first flushed out from the pipe that sat dormant for 2 years. Flushing out the debris proved that the pump was working. When the water ran clear for a minute or so the hose was connected to the toilet. I had the honor of pressing the button on the Niagara Stealth toilet for the first test and it worked! So now, we just need to wait for the rain.
And we did get a little bit of rain in September. Less than an inch but it probably deposited about 400 gallons in our rainwater tank. Optimistically expecting more rain in October, we switched our toilet line from city water to the rainwater supply on October 1, 2014. Hurray! All done, right? Well, not really.
Backflow Prevention
In mid-October we learned that the rainwater system project was not truly done. Not until the paperwork is finished with the water department, anyway. We received a call from them asking us if we had a back flow prevention device installed. We didn’t and we hoped we didn’t have to.
Backflow prevention device is installed to protect the potable water supply. If there is a condition on the property that has the potential for untreated water (rainwater in our case) to flow back into the water department’s supply line then a backflow prevention device must be installed near the utility’s water meter on our property. In our case the potential exists because we have a pump that conveys rainwater to the toilets and washing machine. If a cross connection was made to connect rainwater to city’s potable water (which we wouldn’t do because we won’t be able to flush the toilets) and the city’s water pressure dropped because a nearby fire hydrant was hit by a bus (which I’ve seen happen last year) then our non-potable rainwater could get into the city’s water supply. It’s a very remote chance but our water department is vigilant and have a good track record for installing backflow prevention devices.
Below is a photo of a small backflow prevention device. Once I recognized this for what it is I started seeing them everywhere — in front of medical buildings, shopping malls, commercial buildings, schools, etc. The presence of the backflow prevention device means there’s some potential at the property for non-potable water to get into the water supply. Typical things that raise a red flag are radiant floor system, solar thermal system, and pump of some kind. Some of the backflow prevention devices on commercial properties are huge — diameter of the pipe being the size of a large tree trunk. Besides the additional cost to install the device there is an annual cost associated with having this on the property — annual inspection must be made by a certified professional who charges for such inspection. But mostly I didn’t want this in our front yard because I didn’t want it to deter other people from doing a rainwater harvesting project like ours. It’s a simple concept and the implementation should be simple too.
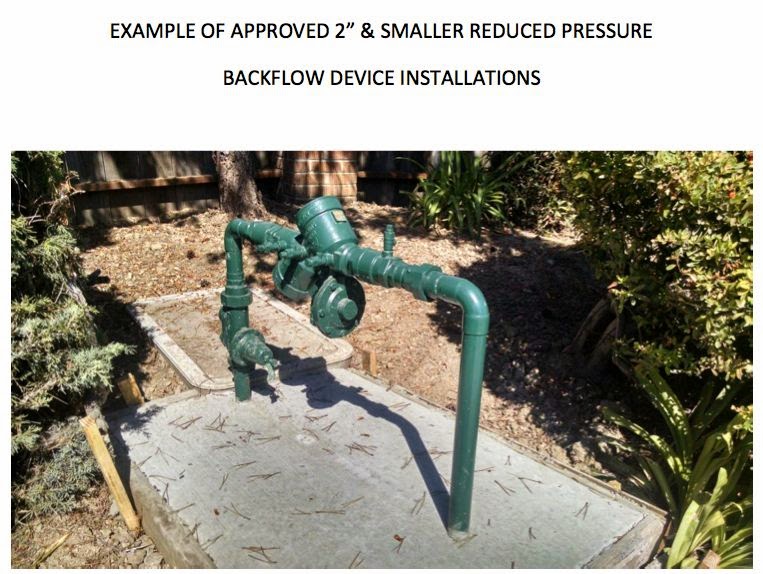 |
| Backflow prevention device |
I invited the inspector to come take a look at our installation and discussed the approach used by another site doing the same rainwater application over at the Live Oak Grange. They have the system set up so that the rainwater lines are permanently connected to the toilet, thus eliminating the need for switching the lines back and forth between city water and rainwater. The city water feeds the rainwater tank when the water level gets low using a float and a valve triggered by the float. ( This is just like how the toilet tank is filled using a float and a valve.) The key to this setup is to show that there is an “air gap” between the city water supply and the rainwater tank.
I told the inspector we will be doing the same and he agreed to this approach. When he came back again to look at the completed setup of the “air gap” he was satisfied and signed off on the paperwork. He’ll be making a visual inspection of the air gap on an annual basis.
Here are some photos from the installation of the air gap and testing to make sure it works.
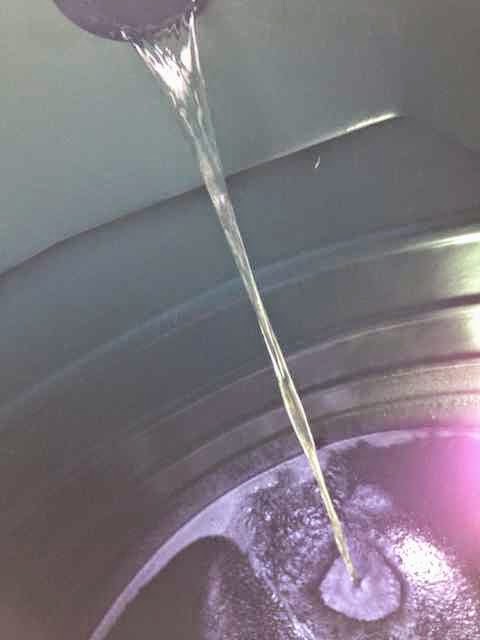
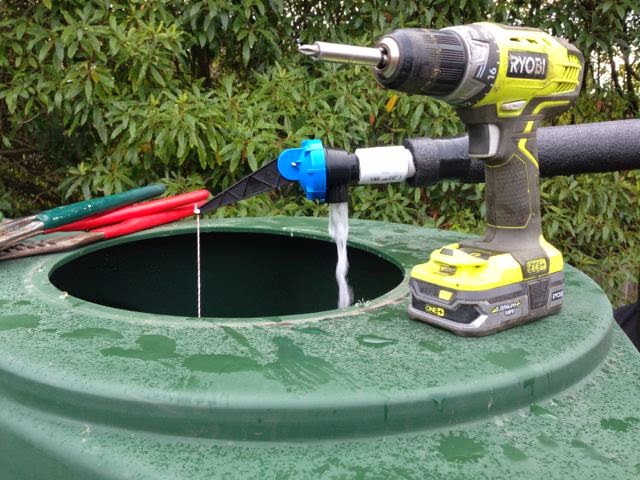 |
| When the water level is down the float pulls the string and the valve opens |
 |
| When the water level is up the float shuts off the valve |
 |
| There is an air gap of 3 inches between the valve (blue) and the top of the tank |
We started using rainwater for toilet flushing on October 1, 2014. After the big storm in December our rainwater tank was full so we switched our cold water line for the washing machine on January 5, 2015. We haven’t noticed any difference in the quality of laundry. So far so good!