Framing

February 14, 2012

The wood frame of the house is like the skeleton of the human body.  It forms the shape and size of the house and provides the strength.  For our project, the roof framing for the house will stay in tact, since we are not changing or replacing the roof.  Floor framing had to be addressed where water or termite damage was present.  But it was the walls that needed lots of reframing.  If we’re not adding any living space and keeping the layout of the rooms the same why do we need re-framing?  Reasons are changes in openings, water damage, termite damage and durability.

Changes in Openings
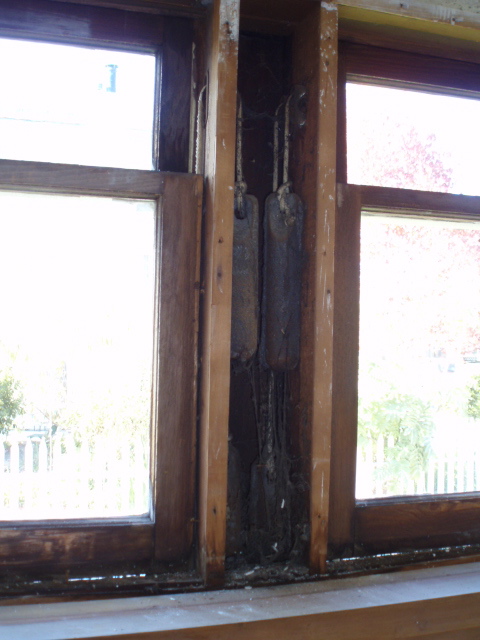
Though we were hoping to reuse most of the original framing, much were replaced with new wood because of the changes in the size and location of the openings.  The total number of windows was reduced by 4 — original house had 22 windows and the remodeled house will have 18 windows, half of them are different size from the original.  The total number of exterior door openings remain the same at 4.  The difference is the size and location of the 2 doors.  In the interior we removed (closed off) one door, widened another door (from a swing door to a large pocket door), re-positioned the opening of the hallway door (to accommodate book shelf) and widen the kitchen by removing the wall between the mudroom and the kitchen.  So these interior walls needed to be reframed too.

Before (old framing)

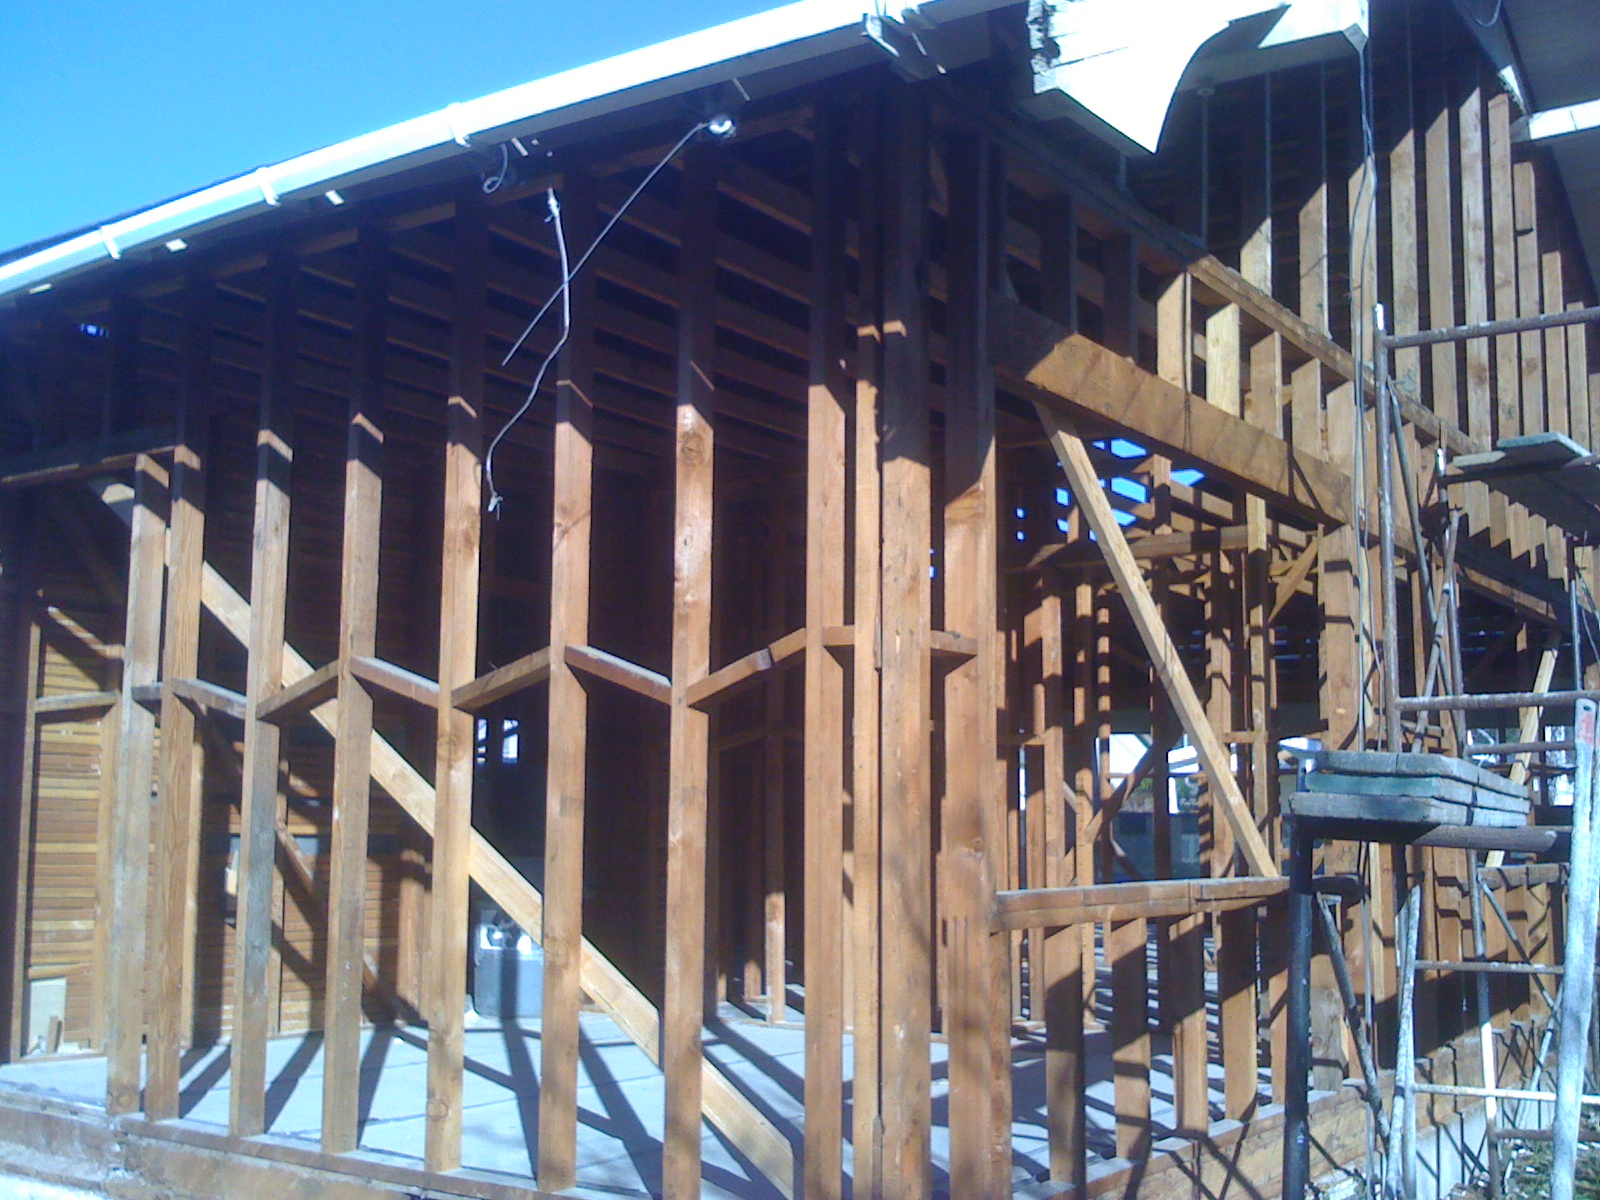
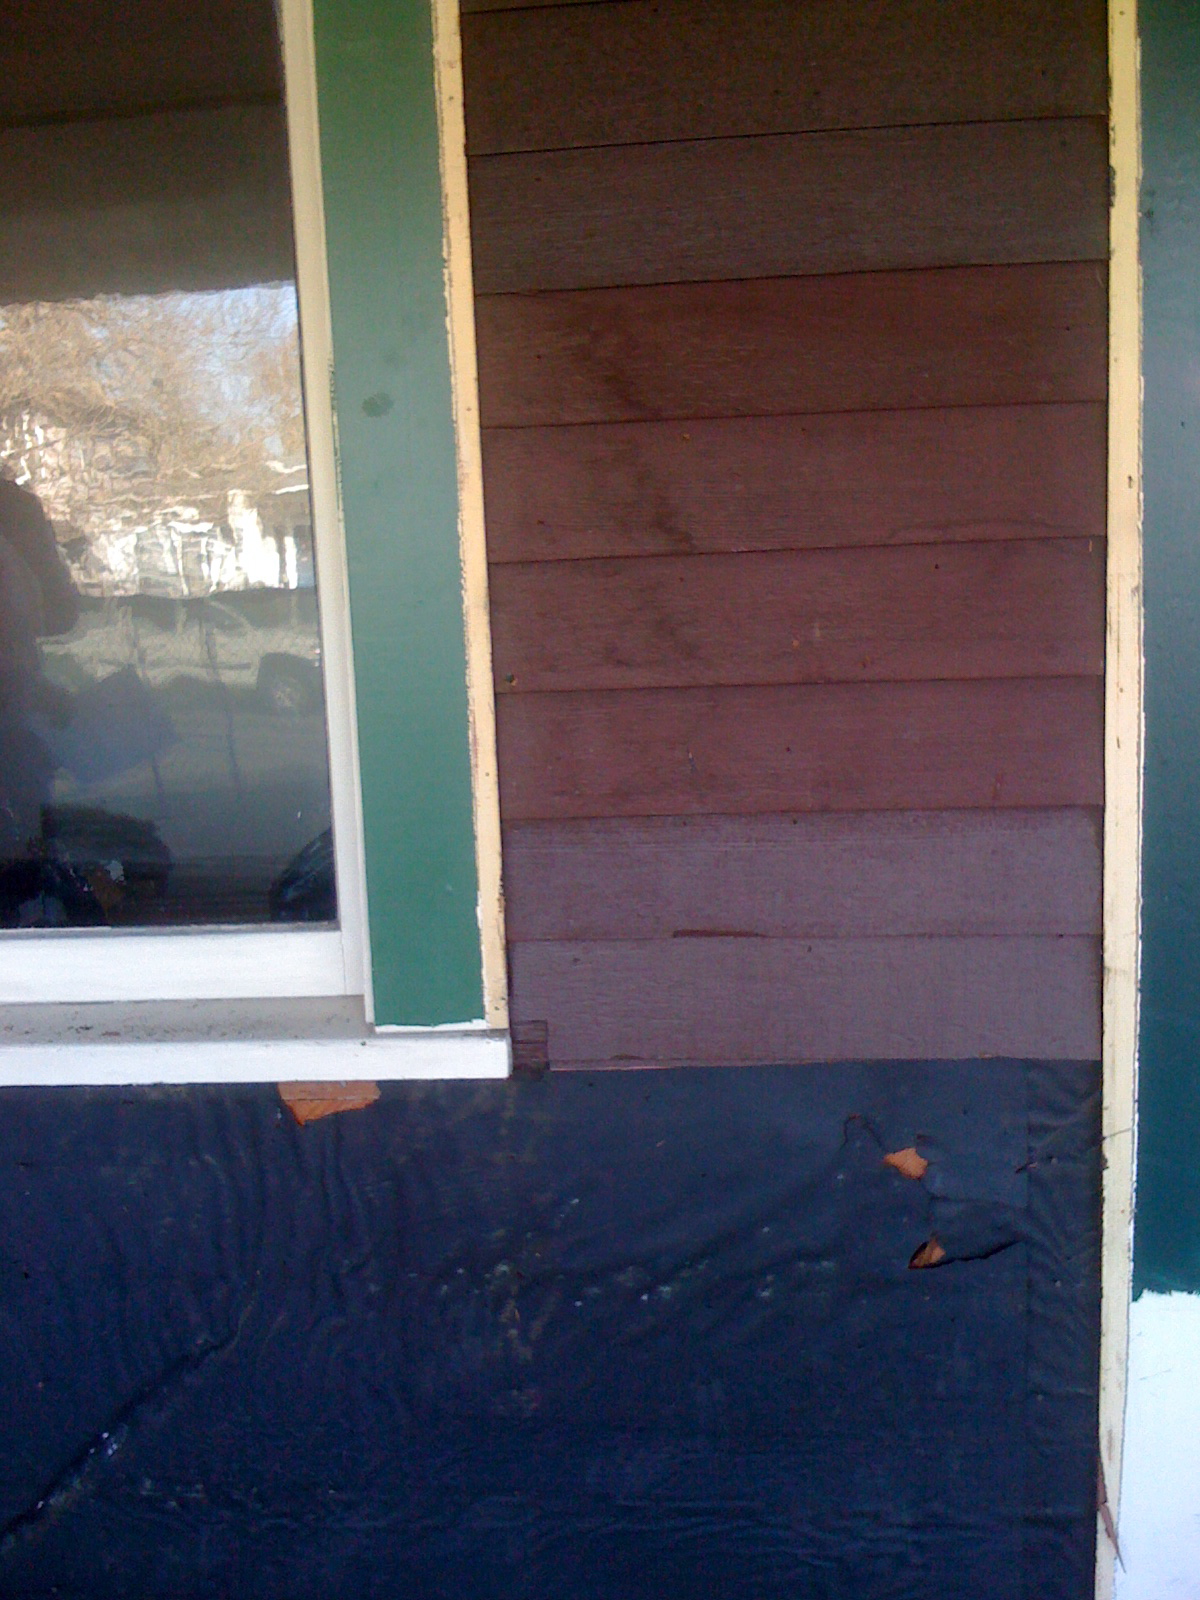
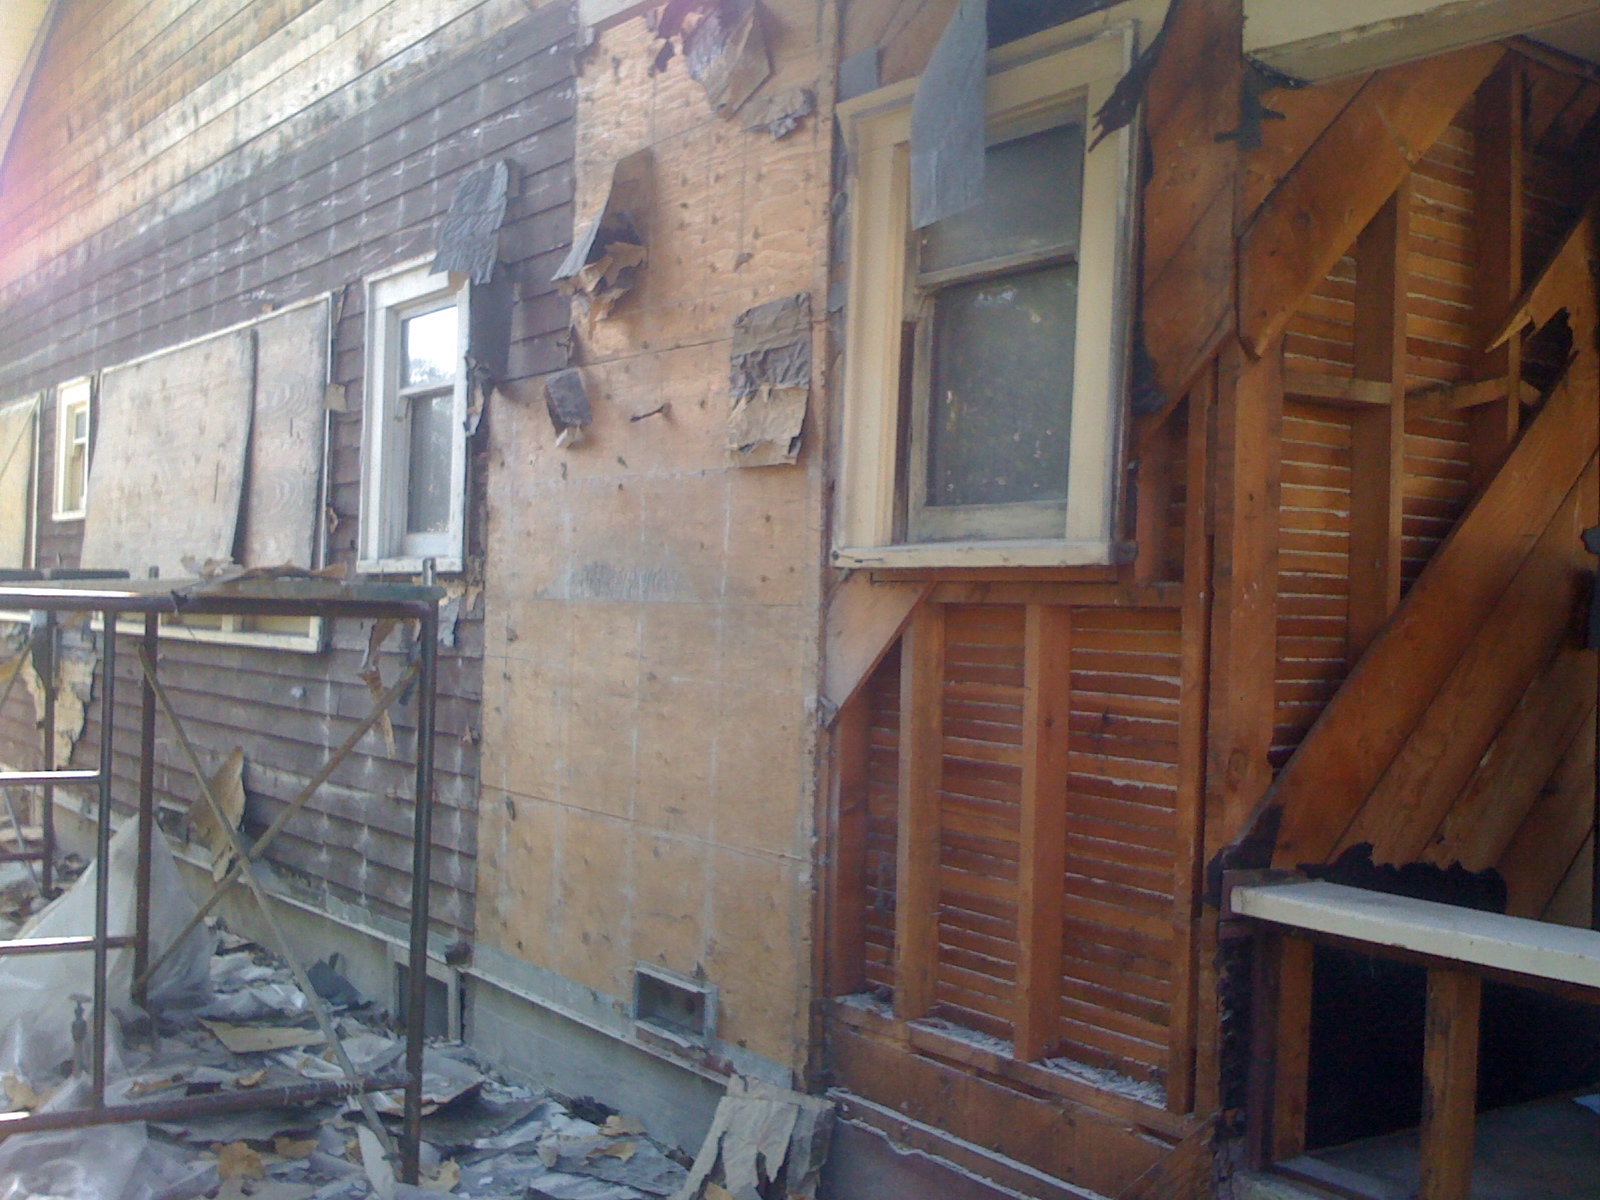
Here are pictures of the South-East corner of the house where you can compare before and after reframing for new windows.  (Note:  left side is south and right side is east.)

In this South-East bedroom the south wall had one door and no windows.  The east wall had a large opening for 2 double-hung windows.
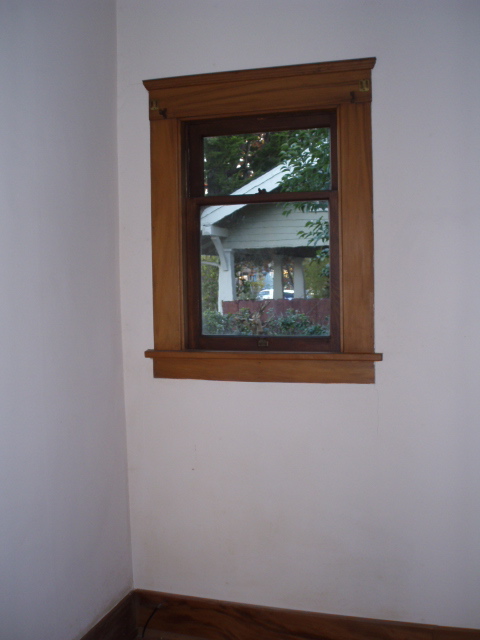
After (new framing)

After reframing you can see the south wall now had a large window and the east wall now has 2 small windows.
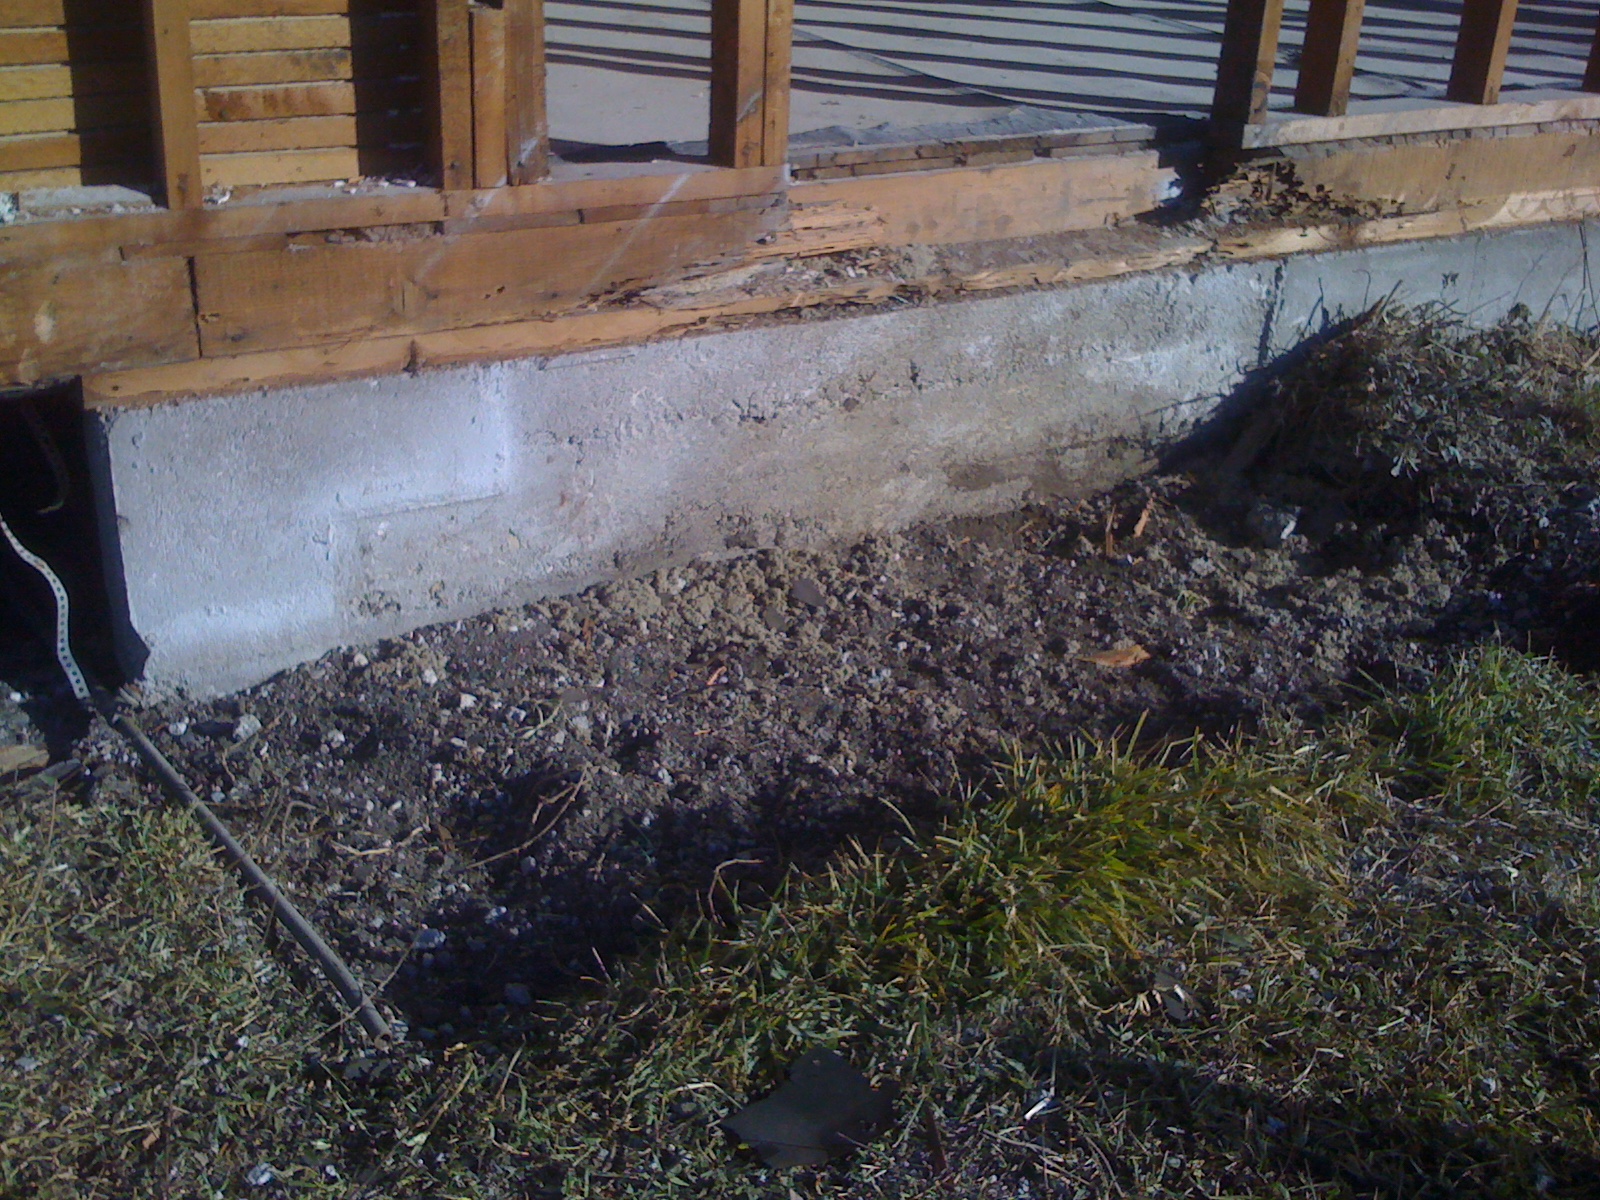
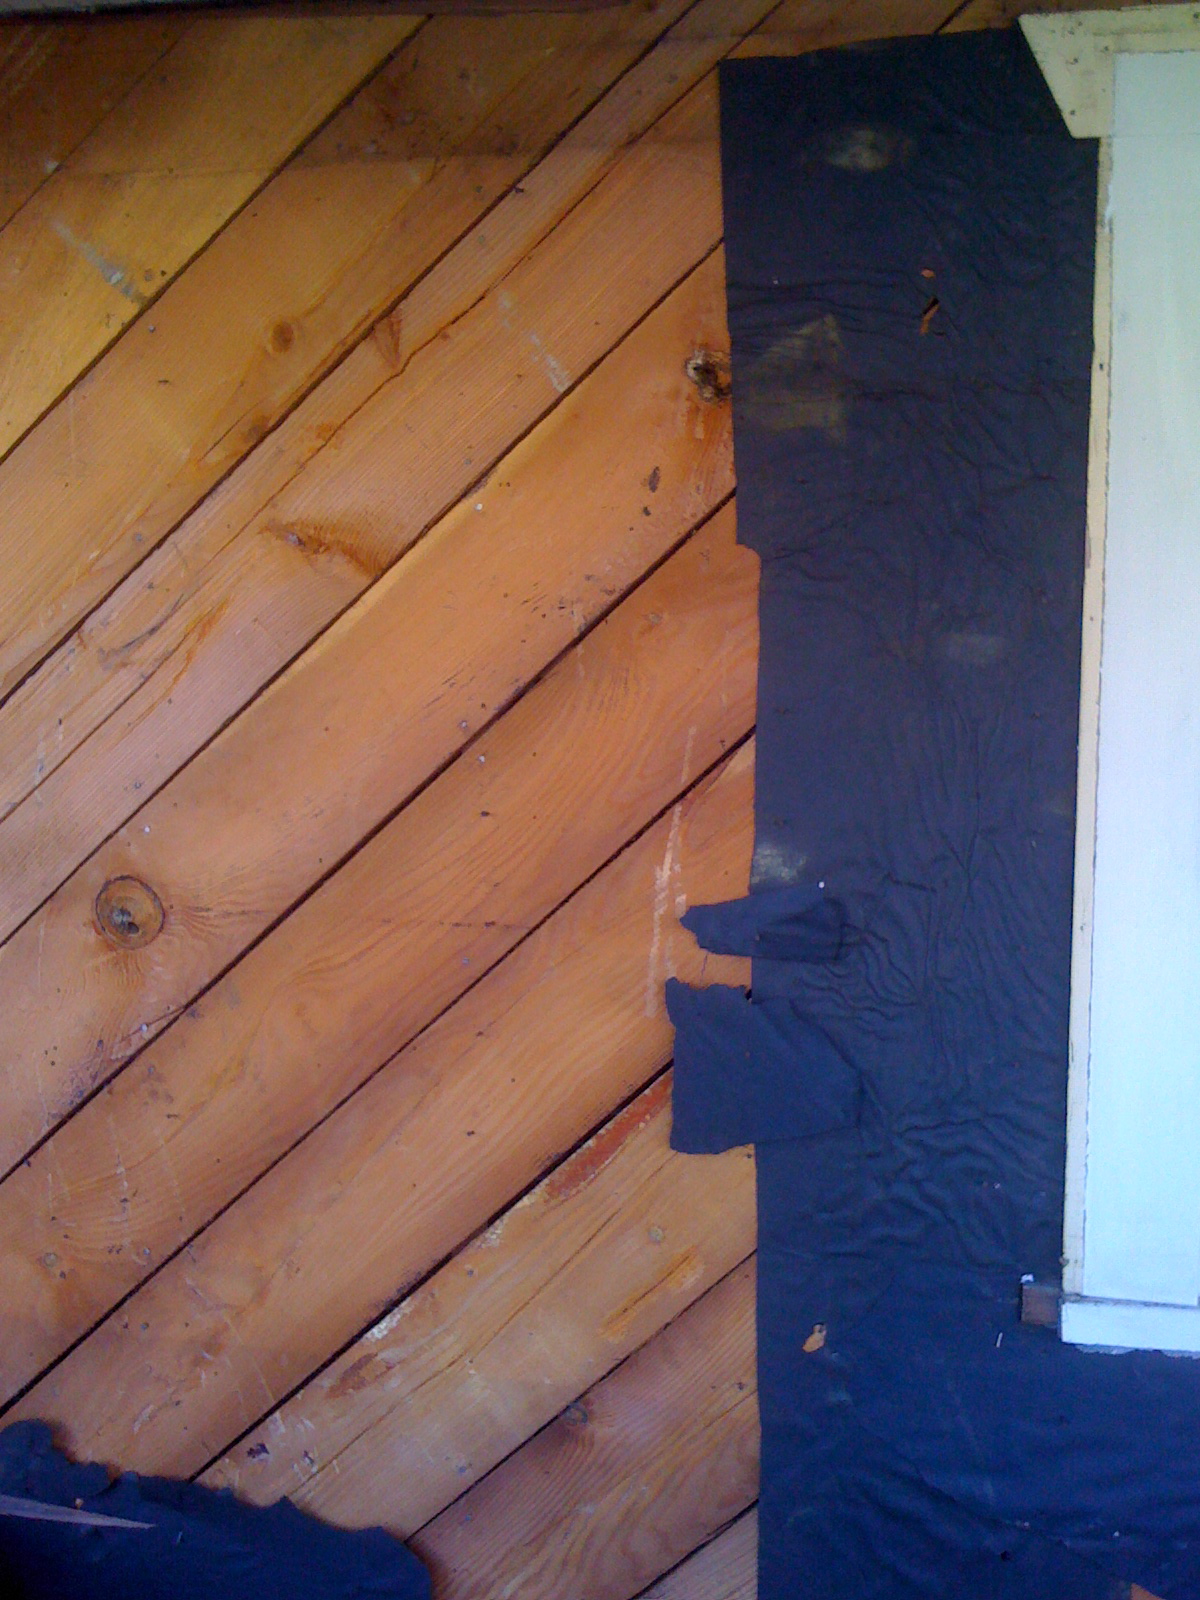
Water Damage
You may recall that we had rotted skip sheathing on the east and west ends of the house.  These were caused by water leaking around the window opening and spreading down.  In some places the wall studs, floor joistmudsill and subfloor needed to be replaced.

Note the skip sheathing is rotted at the bottom
Floor joitsts sistered and a portion of subfloor replaced
Rotten floor joist sistered

Termites
We found many evidence of termite damage during the framing stage as you can see from the photos below.  But did you know that only a small percentage of the 2600 species of termites are pests?  Lots of interesting tidbits are found on the Termite Web site.  Fascinating….

What we care about in our project is to prevent termites from eating our house. We also care about minimizing the use of harmful synthetic chemical pesticides on the property so we are choosing to use Bora Care.  The active ingredient, borate, go directly into the wood, not into the soil and kills the termites (and other wood eating insects) by starving them to death.  Borates, once inside the insects’ digestive tract poisons the microorganisms that break down the wood’s cellulose.

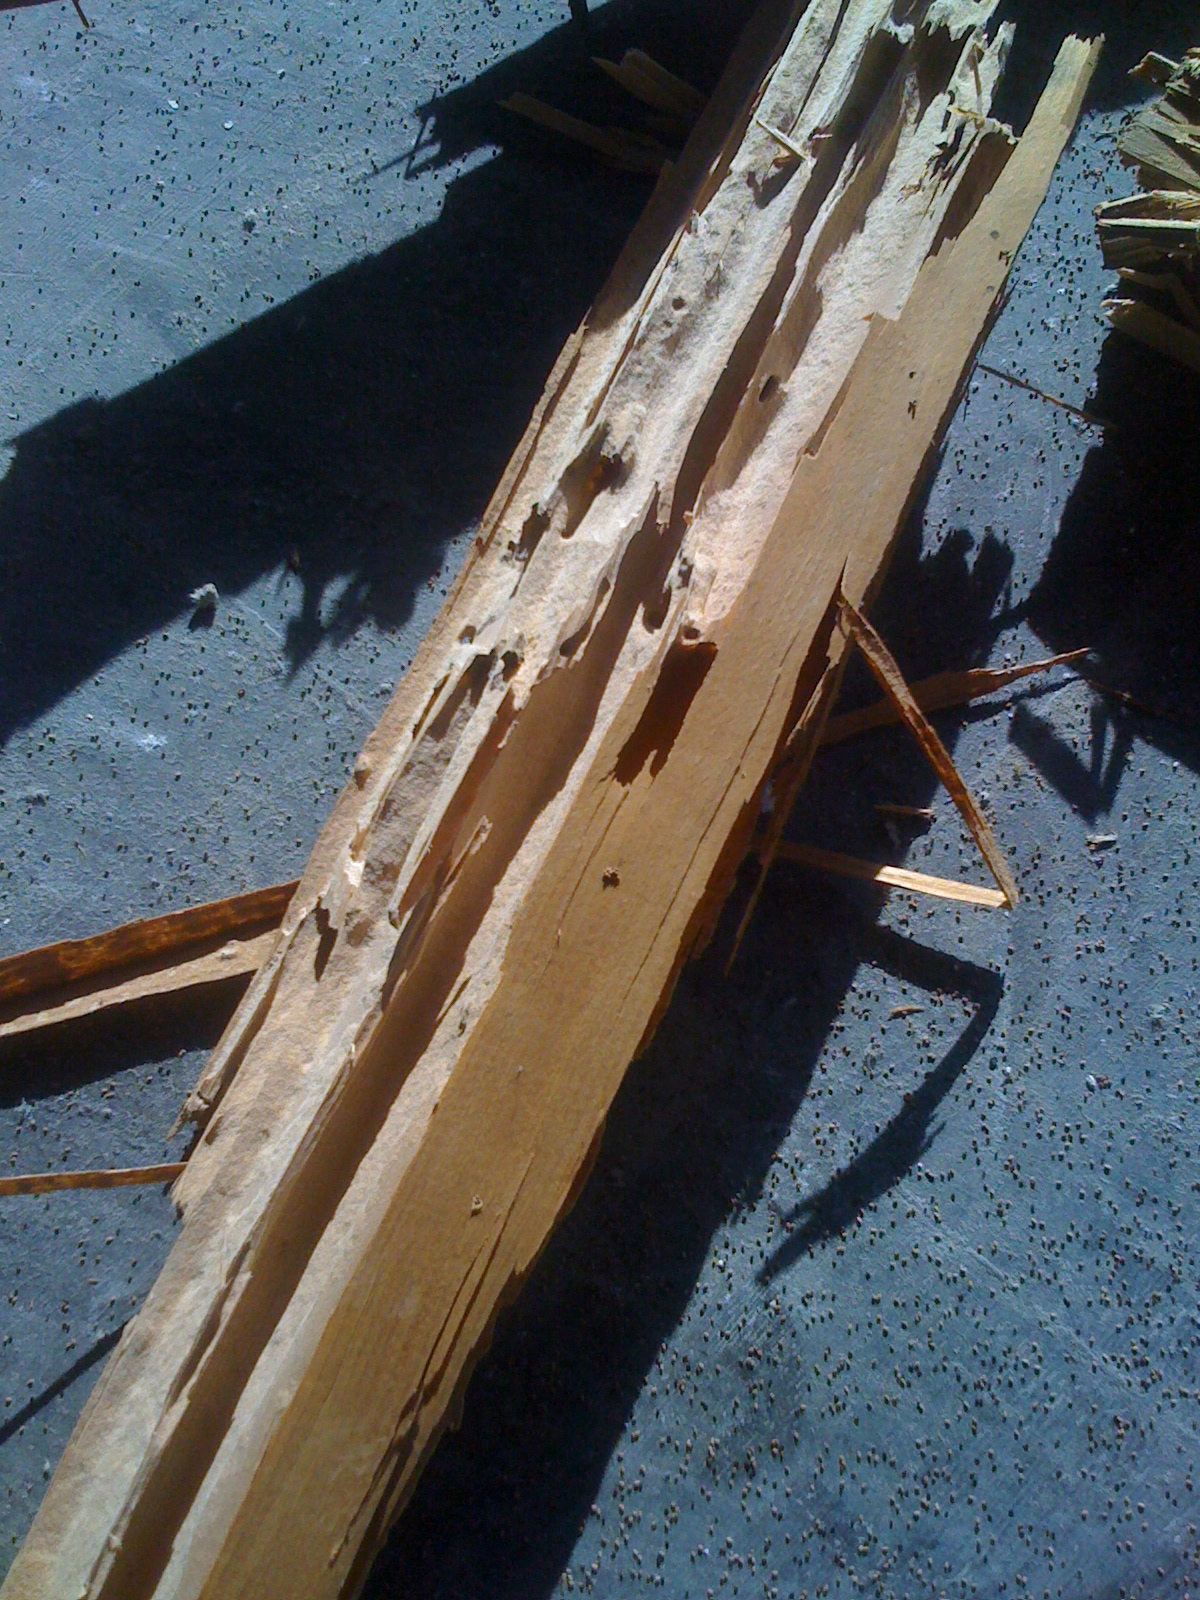
This stud was well-feasted by termites
Girder with termite damage
Last week we saw a live termite crawling around the bathroom!
Bora Care will be applied to all wood surfaces

Durability
We decided to have the ceiling joists replaced with sturdier ones.  The initial reason was to replace the termite eaten joist.  Then we thought beefing up all the ceiling joists would give us the option in the future to convert the attic space.

2×10 ceiling joists

Sustainable Lumber
As a consumer we can provide incentive for the industry to pursue responsible forestry by buying FSC certified lumber.  Forest Stewardship Council (FSC), a non-for-profit organization, has principles and criteria that describe how forest have to be managed to meet the social, economic, ecological, cultural and spiritual needs of present and future generations.  You can read about these 10 principles here.

FSC certified wood

Sustainable Forestry Initiative is another standard promoting sustainable forestry practices.  You can read about their standards here.

Sustainable Forestry Initiative certified wood

Tidbit
Sometime in the last 2 years I came across some curious tidbits about why building codes have 18″ as the minimum crawlspace height (because that’s how high termites jump) and why traditional framing uses 16 inches on center (because a larger span would cause plaster to crack).    But I haven’t found a source to quote!   If you have a link to a website that mentions either of these tidbits please comment.  Thanks!

Reuse and Recycle

January 30, 2012

I want to roll back the calendar a couple of months to share some thoughts on re-use, recycle and diverting waste from landfill.  You know, it takes resource and energy to make “stuff” whether it be kitchen appliance, table, chair, television, clothing, etc.  When we throw stuff away because it is broken, old or got replaced with a newer model the stuff becomes trash taking up space in a landfill.  On both ends of the lifecycle of “stuff” there are some cost and some limits.  Natural resources are limited and the space for storing our trash is limited too.  In fact, when I look at our utility bill from our local municipality the largest component of the bill is for garbage — It costs more to have my garbage hauled away than the cost of clean water and sewer service!

By the way, in chapter 7 of Scott Huler’s book, On The Grid, you can satisfy your curiosity on what happens to the trash and recycling material after they are picked up by the garbage truck.  If are really curious about systemic impact of the stuff we consume I invite you to take a look at The Story Of Stuff.

So, if we can maximize the use of our stuff or lengthen its life we can avoid taking up space in the trash dump site and also reduce the demand on natural resources.  Makes sense, right?  This means re-use of stuff is good and recycling of stuff is good.  Reuse means that the stuff gets a new life under a new owner.  For example, the cute antique O’Keefe and Merritt gas oven/stove has a new life in someone else’s kitchen rather than going to a landfill.  Recycle means that the item is processed and transformed to another useful item.  For example, some of the wood removed in the deconstruction of the house will be mulched and will begin its new life on someone’s landscape.

Again, reuse is good, recycle is good and we want to avoid sending stuff to the landfill.  [end of rant, thanks for your patience]  Below are some examples of reuse and recycle of of stuff in our project.

Furniture
The non-profit organization, Furniture for Families, took our dining room table, chairs, bed, dresser, television and microwave oven.  This all volunteer furniture bank provides qualified clients who are referred to them by caseworkers from social service agencies familiar with the specific needs of the clients.

Dining Room Table and Chairs

Appliances
We gave away the washer and dryer to someone we knew that had a broken one.  Listing the items for $5 each on Craigslist was quite effective in getting the refrigerator and gas oven/stove sold and hauled in a couple of days.  The toaster was donated to Goodwill.

Refrigerator and Antique Oven/Stove
Window and Door
One of the people who came to take a look at the antique gas oven/stove, an antiques dealer, didn’t like the stove.  But he ended up buying the front door, window and the desk.  You just never know what they’re interested in.

Front door

Reuse
Some of the lead weight removed from the double hung windows went to our Passive House air sealing consultant, Terry Nordbye, for use in one of his projects.

Lead weights from double-hung windows

Recycle
The recycled wood is mulched at the dump. The reclaimed wood is still on site in the form of skip sheathing that we can use for this project or others.  All the interior trim was salvaged and is now in the shed.

Wood for mulching

Deconstruction
The crew of Santa Cruz Green Builders did a terrific job of deconstruction and separating various items to be recycled.  Huge dumpsters were delivered to the job site.  The summary from the receipt from the city of Santa Cruz shows 82.6% recycle/reuse percentage by volume.  Details in cubic yards are:

Recycle/Reuse  (95 cubic yards)
20 concrete and plaster recycled
42 clean wood recycled
4   metal
3   sheetrock recycled
3   concrete rubble reused
20 dirt reused at another site
3  wood reclaimed

Garbage (20 cubic yards)
20 painted wood (cannot be recycled) and garbage

Wood for recycling
Trash

Salvage Company
Whole House Building Supply and Salvage runs a pretty neat operation where they offer 3 different options for helping you give your stuff a new life.  It’s a good source for reuse items.

Drainage

January 21, 2012

We’re finally having a good winter storm!  We’ve been having drier than normal weather since construction started last month and this was lucky for us.  Up until the arrival of the rain the crew was busy installing a perimeter french drain and ensuring drainage under the house.

As you’ve seen in the photos of earlier posting, excessive water can cause the wood to rot and cause structural problems as well as invite mold to grow.  To prevent water damage and keeping the house dry for comfort we have specified french drain and crawl space sealing.

French Drain
The perimeter french drain was dug down 18″-24″ deep along the perimeter of the house about 16″ away from the foundation.  Mirafi drainage fabric (filter fiber) is used to line the cavity and drainage pipes (perforated PVC) are placed.  Drainage rocks fill the cavity and topped off with soil.  So, when it rains the water will eventually find it’s way into the drainage pipe and the drainage pipe is sloped towards the back to fill the water garden by gravity.  The perimeter french drain helps prevent the water from pooling under the crawl space.

Digging along the perimeter of the house

Note that there are 2 pipes in the trench.  One of the pipe is perforated and will take in water — this is for the french drain.  The other one will be connected to the downspouts to route the water from the roof to the rain water harvesting tank at the corner of the property.  (By the way, the installation of the rainwater tank will be done as a community workshop coordinated through the local Resource Conservation District.  Stay tuned for that workshop in the late summer or early fall!)

Notice the drainage pipe is placed above mirafi fabric and gravel
French drain and rainwater harvesting pipe in the trench leading to back of the yard.

An interesting tidbit:  What’s the origin of the term, “French Drain?”  Well, I initially envisioned some clever drainage system in France.  It turns out the term is attributed to a lawyer named Henry French in Massachusetts who popularized the concept in his 1859 book, “Farm Drainage.”

Crawl Space Work
For a few days the crew got into their jump suits and crawled around to dig out drainage path under the house, install some pipes and sealing the dirt floor with plastic.  They had a cozy work space with lights and music under the floor.

You can see that there is a little carved out channel to direct the water beneath the plastic

Sump pump is installed under the house to pump out any water that pools under the plastic.  Note the electrical line coming out from under the plastic.  The sump pump will eventually be connected to an outlet.

This view is from the cutout in the kitchen floor looking down into the crawlspace

At each pier the plastic liner was taped to the concrete using Siga tape.

View of the sealed crawlspace

Rain Garden Pit
The water from the perimeter french drain as well as any overflow from the rainwater storage tank will go into the rain garden.  This was dug about 5′ deep.  The plastic “thing” (I don’t remember what it’s called) is a way to store larger volume of water than simply having drainage rocks covering the pit.

You can get a sense of the size of the pit with a really tall guy walking in it

When we get to the landscaping stage the area above this pit will have appropriate plants for rain garden.   For now it is covered up with soil and it looks like any other part of the yard.

Rain Garden pit is covered up

Other Work While Digging
Water line and sewage line from the street to the house were also replaced while all the digging was going on.  You just never know what you find when you dig.  The water line from the street to the house was a PEX pipe!  This is a flexible pipe that is used for indoor plumbing but not for external work.  The sewer line was made out of clay.

Fragment of old sewage pipe

Unforeseen Items

January 13, 2012

Here are few pictures of items discovered during deconstruction that were unexpected.

Chimney hidden behind the kitchen.  When measurements were taken to draw up the as-built plan we were wondering what this “dead” space was.  It was unaccessible earlier because the water heater was strapped on to the little “ironing board” door.  The bricks were removed and stashed on the side for re-use.

Rot on skip sheathing and rim joists.  These were on both east and west sides of the house.  Why did these appear on east and west sides only and not on north-south sides?  Well, these rots appeared below windows so very likely the windows leaked and the water traveled diagonally down the skip sheathing.  It didn’t occur on the north side of the house because it’s protected with the porch and on the south side of the house the roof overhang probably protected the windows from the rain more.  The highest point on the roof corresponded to the east and west sides so the windows were more exposed to the rain.  

Rot behind the concrete stairs.  These were found on the south door and the west (mudroom) door.  Concrete wicks water so anytime concrete comes in contact with wood it can damage wood.

Mudsill not attached to skip sheathing.  You can see that in the first picture below that the sheatinga nd mudsill are flush.  In the second picture you’ll see that the Mudsill was trimmed by 3/4″ so that the new sheathing can be attached to the mudsill.

Midorihaus Passive House Windows

It’s important readers! High performance windows tuned to the climate and the compass orientations of the building envelope area are a critical part of the Passive House architectural approach. In our case the glazing area comprises [290ft2/ 1700ft2] or about 17% of the total wall area. The holy grail of window thermal performance is R factor, which is a measure of heat resistance related to the heat transfer per unit area per degree temperature difference from interior and exterior. In the US it has units of (ft²·°F·h)/Btu and is known as R-value. In the rest of the world, window performance is quantified in metric units by a measure of thermal transfer efficiency known as U-factor which is inversely proportional to R-value and whose units are W/(m²·°K). You can see the impact of windows’ thermal performance (R-value) on the overall wall assembly as a function of % glazing area from this graph:
The process of choosing our Passive House windows was quite involved. We were not only trying to achieve the best cost-performance from the window itself but were also wishing to improve the Bungalow aesthetic of our home by adding simulated divided lites (SDLs) known in the past as “muntins.” The original 1920’s architect employed single pane windows throughout the house without muntins. Divided lites are however a key stylistic hallmark of the Bungalow. The opportunity to add this important Bungalow stylistic feature made removing the old single pane lead crystal less regrettable.
Throughout our project we wanted to source materials as locally as possible. However the very best performing windows are European. This also means they have a huge embedded energy resulting from the considerably long shipping distance. High quality European triple glazed windows are generally fabricated from timber sustainably forested in the EU. Wood windows may have as little as 1/6 the embodied energy compared to fiberglass windows and 1/10 the embodied energy compared to vinyl windows. However even with this high performance their total life cycle back time would be largely compromised in the short term because of the embodied freight energy.
Lower cost domestic vinyl windows not only have very high embodied energy but also have significant environmental impacts on air quality (dioxins) during manufacture. Other American windows such as Marvin (wood) or Serious Windows (fiberglass) either offered lower thermal performance or a more limited range of coating options for tuning the glazing to the installed compass orientation to maximize passive solar heat gains for our project.
To complicate matters further there is a significant difference in window performance testing and verification between the continents. European windows are rigorously modeled for performance. However in Europe a physical example of the window is not actually tested by a 3rd party for performance verification as in United States via the National Fenestration Rating Council (NFRC) certification. One cannot understate the importance of physical verification of modeled performance.
The graph below (ZehnderUSA) shows the overall cost efficacy of the subcomponents of Passive House features. The Specific heat consumption numbers shows that, after building orientation, window performance constitutes the largest chunk of energy savings for a building. The cost efficacy units in blue are FR/kWh/a or (Swiss Francs per kWh per annum) savings and show that investing in the best possible windows is a no brainer from the perspective of energy efficiency payback.
We also see that after the investment in high performance windows, increasing the insulation of the exterior shell and employing a heat recovery ventilator (HRV) or energy recovery ventilator (ERV) are the next wisest dollars spent.
Yes, investing in high performance windows is a good investment provided they can provide a lasting energy savings over less expensive but lower performing windows. However the coastal climate of Santa Cruz involves wide swings in outdoor relative humidity levels, precipitation, drizzling fog, and extended intense direct sun & UV due to generally high ambient air quality. This is a stress factor for wood window frame materials and necessitates more frequent resurfacing/repainting even though wood frames are the most sustainable material for window frame fabrication from the perspective of embodied energy. Termites need also be considered as a risk factor with wooden windows.
This is a graph from the Canadian manufacture of pigmented fiberglass windows (Cascadia) we ultimately chose for the project. It is vendor-formatted data you have to take it with a grain of salt but I believe is in general faithful to the facts. It compares many performance attributes of the four different windows frame material types commonly available.
So why did we choose this vendor Cascadia over the rest? This can be seen from the graph below which compares cost and various performance criteria for several vendors:
Simply put, energy efficient buildings minimize reliance on artificial lighting. To achieve this they maximize the amount of natural light admitted into the building interior through their windows. As a result energy efficient buildings enjoy high natural lighting efficacy. Energy efficient buildings also need to retain interior heat very efficiently at night and during cold seasons. For windows to accomplish all this at once requires special optical coatings which transmit in the light we see (visible light) while controlling or reflecting invisible heat energy (short wave infra-red) from the inside out and from the outside in. Different vendors offer different solutions but generally a thin layer of metallic silver is deposited onto the inner surfaces of the outmost glass and the cavity is filled with an inert gas such as Argon to prevent future tarnishing of the silver. One exception is Serious Windows whose products offer good thermal performance but rely on an inner polymer film to control Solar Heat Gain Coefficient (SHGC). SHGC is the measure of the amount of short wave infrared that passes through the window from the exterior. If the SHGC is too high and there is no effective roof overhang or shading this can contribute to high summertime HVAC loads, especially in climates with a high CDD (Cooling Degree Day) load. You learn more about HDD and CDD here: http://en.wikipedia.org/wiki/Heating_degree_day. Maps for the US are here: http://en.wikipedia.org/wiki/File:United_States_Heating_Degree_Day_map,_1961-1990.jpg and here: http://en.wikipedia.org/wiki/File:United_States_Cooling_Degree_Day_map,_1961-1990.jpg.
In the case of the Serious Windows approach, the windows were dimmer that other vendors with comparable SHGC. In quantitative terms this means they are lower in natural lighting efficacy due to lower Visible Transmittance or VT, which is the ratio of the light ultimately getting through the window expressed as a fraction of the total visible light reaching the exterior of the window. Serious Windows uses internal, non-ceramic thin films between the outer glass panes, which are also absorptive in the ultra-violet band. Ultra violet light chemically alters many hydrocarbon-based materials over time. This approach may not prove as durable as triple glazed with all ceramic glass although, however in all fairness, Serious Materials offers a life warranty on their windows. The Marvin triple glazed windows are not as well performing as either the Cascadia or the other European triple glazed offerings. The Cascadia windows offer a higher Solar Heat Gain Coefficient, higher VT (more light gets indoors), and somewhat better thermal performance (lower U value) than the Marvin Windows but to not quite attain performance the European vendors. It should be mentioned the Marvin Windows had some nice features such as optional built-in bug screens and SDLs that looked very nice in the show room.
The European windows we saw on tours were, as expected, beautiful and extremely well built. Many offer an aluminum cladding over the wood frames. The Sorpetaler windows were quite impressive as seen in two other Bay Area Passive Houses. However, all of the European windows would have been burdened with very high embedded shipping energy. Since we also considered global warming potential when selecting our insulation materials we thought being consistent with the windows too would serve the overall desired project outcomes. The Cascadia windows were the best overall balance of desired outcomes at the time of our project. However this will likely change and hopefully more domestic alternatives for Passive House projects will become available domestically. The American made wooden H and H windows were very cost competitive to Cascadia. From a sustainability perspective H and H seemed an ideal choice with lower transport embodied energy (made in the US) and lower embodied manufacturing energy (wooden frames). But at the time of our project H and H had no NFRC certification. That was too high of a risk to assume since we would only learn of any shortcomings in air sealing after installation. A final vendor comment..the Inline window rep kept trying to steer us away form triple pane and towards a high performance double pane option.
This brings us to a final discussion point. Why triple paned in the comparably mild climate of Santa Cruz CA? Three reasons (1) enhanced street noise attenuation (2) enhanced winter comfort due to higher indoor glass surface temperature (3) best bang for the buck in energy savings. The fact of the matter is that once you are working with a vendor who can satisfy the air tightness requirement and window frame R values needed for a Passive House you are in a price range where much of what you are paying is for the overall build quality and engineering. The marginal savings of a few thousand dollars do ‘downgrade’ to double pane glass didn’t seem with it when considering the ancillary comfort benefits.
Getting your Passive House windows right will be an in depth exercise for the homeowners and designers requiring tremendous attention to detail and patience in working with the vendors. It is critical to ensure that the correct coatings are incorporated in each window to ensure that window’s performance relative to its compass orientation NSEW. Customer service is sometimes lacking. Be fore-warned! Our issues involved trying to avoid the ‘grilles between glass’ or GBG with our SDLs. We were unable to get a different color SDL adhesive (which adheres the SDL bar to the exterior glass surfaces). This meant using aluminum bars between the #2 and #3 glass surface to avoid the awkward visual gap when looking though the windows from an angle. The Cascadia GBG bars are thermally broken as they intercept the divider at the edge of the glass. We have been told the thermal performance as modeled by the glass unit manufacture (Cardinal USA) is not appreciably affected. We have yet to receive the exact modeling for our project..story continued.

Removing the Layers and Asbestos

December 18, 2011

“Your house is getting naked…” is what Taylor said to me this week.  He and his crew were busy removing and storing the interior trims and taking off the various layers of the house.  It was curious to see the different layers peeling off.  As expected there were no insulation in the wall cavity.  If I were to compare these layers on of the wall to layers of clothing on a person it’s like having couple layers of windbreaker or rain jackets (with many holes, remember the 22 ACH?) and no sweater (i.e. no insulation).  So the house kept you dry from rain but it did not keep you warm.  Have a look at the layers below.

The Layers

The front of the house has a fake brick siding, a type of roofing material –

“Fake Brick” siding on the front of the house

Underneath the fake brick is the redwood siding –
(we did some test paints on the redwood siding)

Redwood siding under the fake brick

Under the redwood siding is the black plastic rain screen –

Black plastic sheet under redwood siding

Under the black plastic is the diagonal boards providing extra shear –

Diagonal planks under the black plastic

Here you see no insulation in the wall cavity –

No insulation between lath and plaster interior wall and exterior siding

Back and sides of the house had a layer of stucco over the redwood planks

Here you see the different layers on the side

Trims and Windows

Window trims (Before)

Trims remove to reveal counterweights on double-hung windows –

Windows removed –

Asbestos

Back in March we had we had Asbestos Inspectors, Inc. perform a survey of the house to identify where we had asbestos and in what concentration.  Besides of obvious suspect of “popcorn ceiling” we found asbestos to be present in the hallway tile, kitchen countertops, vinyl floor tile in the bedroom, tape mud in the bathroom and kitchenette, exterior paint where fireplace was repaired, and window putty.

Asbestos is a naturally forming mineral and has been known for its heat and fire resistance.  Until the 1970’s many types of building materials and insulation products used in homes contained asbestos.  So we expected to find asbestos in our house that was built in 1922.  If you’re interested in the regulation information have a look at the US EPA website or the California OSHA site for information.  I also found the article in the Building Materials Reuse Association to be useful.  This link explains the background of asbestos, including some interesting tidbits such as King of France (Louis IV) using a banquet table cloth made of asbestos.

Asbestos material in good shape can be left alone if it’s not going to be disturbed.  But we are gutting the building leaving asbestos material in place was not an option.  So a company that is licensed to remove asbestos did the work this week.  I had no interest in poking my head in the house covered with plastic while men in protective clothing worked within the house.  From the outside it looked like this –

Here’s an example of before and after –

By the way, my friend shared an interesting tid-bit on asbestos — the material Chrysotile comes from California’s state rock, serpentine.  I never would have guessed that all that asbestos was local material!

Transition: Design Phase to Construction Phase

December 14, 2011

We’ve transitioned from design phase to construction phase in the last 2 weeks.  We’ve selected Santa Cruz Green Builders as our general contractor and we did our due diligence in setting up an agreement.  Now when you drive by the house it looks like a construction site — the temporary fence is up, porta potty and dumpsters are in place and you hear the noise of deconstruction going on during the day.

Last month we donated the couch, bed, dining room table and chairs, dresser, microwave, tv and stereo to a nonprofit organization called, Furniture for Families.  Then in the last 2 weeks we had a fire sale on Craigslist for the refrigerator, stove and oversized desk.  The house is now empty.

Our building permit application submitted on 7/26/2011 had many milestones.  On 8/4/2011 it was approved by Green Building, then Planning approved it on 9/6/2011.  We went through 3 rounds of “comment and response” exercise with CSG Consultants, the external plan checker contracted by the Building department and finally approved on 11/21/2011.  Public Works approved it on 12/7/2011, then it took another few days for the building department to calculate the fees and everything.  So after 4.5 months of follow-up and $6K later our permit was issued.  Phew…

22 ACH – Leaky House

December 9, 2011

As you may know, we are pursuing the Passive House Certification.  One of the criteria is airtightness, targeting 0.6 air changes per hour (ACH) at 50 pascals.  This is pretty darn tight.  I’ve heard that a typical new home built today in the US is measured at about 6 ~ 7 ACH.  So we are trying to get our remodeled home to be 10 times more airtight than that.

So, we know that our house built in 1922 is quite drafty.  How drafty is it?  We decided to find out.  To establish the “before remodel” baseline we did a blower door test on Monday, 11/28/2011.  This was done using a blower door, which is a device used to measure the air leakage rate by pressurizing and depressurizing the building.  We did the pressurized test.

After the technician from Allterra Environmental fitted the frame and flexible panel to the front door he slowly cranked up the fan speed and we watched the numbers on the meter rise up and up and up….

The top number 49, is in pascal, a unit of measure used for pressure measurement.  The bottom number is the volume of air movement measured at cubic feet per minute (CFM).  When the picture was taken there were 5,390 cubic feet of air moving out of the house every minute.

How do you convert 5390 CFM at 49 pascal to air change per house (ACH)?  Well, you first multiply the the CFM number by 60 (because 1 hour has 60 minutes) and divide the total by the volume of the house.  The real estate report showed the house to have an area of 1574 square feet and the average ceiling height of the house is 9 feet, so the volume of the house is 14,166 cubic feet.

So, the ACH is (5,390 x 60) / (1574 x 9) = 22.83

I’ve heard that 50 pascal is equivalent to having 20 mph wind blowing outside.  So this means if we had constant high winds of 20 mph the house would completely exchange the air in the house over 22 times. That’s leaky….. and cold!

You can find out more about the history and the basics of blower door at this link.

Here’s a snapshot from the report:

Laundry to Landscape – Graywater

October 29, 2011

Starting January 2010 the changes to the California Building Code made it easier for homeowners to install a laundry to landscape graywater system — no permit required for this simple system.  Using the laundry water from the washing machine to irrigate your landscape cuts down on your water demand during the summer.  Makes sense, right?  I won’t go into the details of graywater requirements, benefits in this post.  If you’re interested you can read about in these links:
    What is Graywater
    City of Santa Cruz Requirements for Installation of Graywater Irrigation Systems
    Guide to Conserving Water Through Rainwater Harvesting and Graywater Reuse for Outdoor Use


What I do want to share is my experience of learning about a simple graywater system installation in a Do It Yourself workshop.  Last Saturday I attended a day-long graywater workshop in Santa Cruz led by LeAnne Ravinale of Laundry to Landscape and Ken Foster of Terra Nova Ecological Landscaping.  About 10 people participated in this hands-on workshop where we learned the basic concepts in an hour-long classroom presentation then went outside to do the installation.  I liked this approach because it builds the knowledge in the community and it’s cost-effective for the homeowner.


Overview


The homeowner wanted to re-use the laundry water to irrigate the rose plants.  Here is a rough sketch and an overview of what we did.

1. At the washing machine, we connected a 3-way valve to enable the homeowner to direct the laundry water to either to the landscape or to the sewer.

2. Outside the house the we fastened the PE tubing to the wall and ran the trunk line to the yard.

3.  T-connectors were installed to connect the branch lines leading to the rose plants from the main trunk line.

4. We dug around the plants to make a “C” shaped moat around the plants.

5. Plastic potting containers were cut and placed in the ground.

6.  We tested the system using water from the hose bib and adjusted the volume valves at the end of the branch line.  Then we mulched the area nicely.


1.  At the Washing Machine

A hole was cut into the wall of the laundry room ahead of time.

A piece of plywood with cutout for the 3-way valve was fastened to the wall at the stud.

The workshop participants were 60% women and we all took turns to use power tools and such to install the 3-way valve and plumbing at the washing machine.  So it’s light construction work that most people can do.

The bottom connection is to the washing machine

When the yellow handle points down the laundry discharge goes to the sewer on the right side.

When the yellow handle is horizontal (pointing right) the laundry discharge goes to the landscape.

Why should the owners care?  During the winter rain the landscape does not need water so laundry water can go to the sewer.  Also if you’re washing materials containing bacteria like diapers you need to send the laundry water to the sewer.

2.  Outside the House

The 1-inch polyethylene (PE) tube was fastened against the exterior wall.

The 1″ PE tube ran down the wall, across the walkway then ran along the fence perimeter.

We used about 80 feet of this 1″ PE tube as the trunk line.  This was fastened to the fence and also staked down into the ground with a staple.

The walkway was covered later to protect the PE tube and prevent it from becoming a tripping hazard.

3.  T-Connectors

At specified placed the 1″ trunk line was cut and the T-connector was attached.

Note that the bottom of the T is a smaller diameter where 1/2″ PE tube (branch line) can be attached.

See the completed connection of the branch line near the rose.

One of the requirements of graywater irrigation is that the discharge water needs to be at least 18″ away from the fence.

4.  Digging Around Plants

Note that the hole we dug is not directly at the root of the rose plant.  It’s deep enough to bury a quart sized plastic potting container.

It’s a bit hard to see in this photo, but we dug a “C” shaped moat around the rose plant.  The moat and the larger hole will be filled with mulch.  When water is discharged at the end of the branch line the mulch will absorb and convey the water .

5.  Cutting Up Potting Containers

Here you can see the a circle cut in the middle of quart-sized plastic potting container so the branch line can be inserted.

The “bottom” of the container will be the top cover that can flap open so that the owners can check the end points for maintenance.

The plastic potting container is placed in the hole we dug.

6.  Testing and Mulching

When all branch lines were installed in their respective places the system was tested.

We attached the garden hose to the connector on the trunk line and ran water through the system to see how much water was coming out at each branch.

Flow restrictor valves were used at the end of branch lines to control the volume of the water discharged at each end point.  Without this all the water would pool at the first few branches and nothing would get to the end of the line.

Here you can barely see the trickle of water coming out of the valve.

Note that the branch line is “hanging” from the side of the potting container and the valve doesn’t touch the bottom.

See how the “flap” is pulled back so that you can see the valve at the end of the branch.

Mulch is spread around the area outside of the potting container.

Ornamental stepping stone will be placed on top of the “flap” so that the homeowner will know where the end points are.

That’s it!  It’s a simple system that takes a little bit of labor.

The instructor, LeAnne, visited the homeowner the day after the installation to do a test with the washing machine.  She mentioned they found some leaks and things had to be tightened but otherwise the system worked and the homeowner was happy.

Materials

I heard that the local ProBuild Store on River Street has the graywater stuff organized neatly in one area so I checked it out.  Sure enough all the materials we used were displayed at the end of the aisle.  You can see from these photos that the materials are not expensive to do a simple installation.

Getting the Bids

August 30, 2011

Each time we meet a new sub-contractor we learn something new.  They may ask a question we’ve not considered before or suggest something interesting.  So I carry my little project notebook around the house as we talk to various subs and take notes on the ideas that come up during the Q&A session along with jotting down follow-up action items.  This note taking part is really not much different than taking notes in an office meeting and doing the follow up.

Here’s an example:  Today the cabinet specialist asked me whether I liked the look of having moulding at the top of the cabinets.  My response was, “No, I want the cabinets to go up flush to the soffit in the kitchen,” because I liked the straight edged look I saw in the bungalow kitchen books.  The challenge, I’m learning, is that our house is old and the floor is uneven and the wall is not super straight too.  So to give the straight flushed look the installer of the cabinet would need to adjust the cabinet to the shape of the room by scribing, which requires more precision and attention to detail and translates to 1.5 days of additional labor.  If moulding is applied then the gap would be covered up by the decorative woodwork and it would take less time.  I nodded as I heard this making a mental note of, “OK, if we have to shave cost this may be one area to consider…”

Then we have similar Q&A sessions with the electrician, drywall specialist, flooring specialist, painter, etc.  Its quite exciting couple-few hours when the general contractor invites his sub-contractors to examine the house to put together a bid.  We’ve found that spending the time with the sub-contractors during these visits is important for two reasons.  First, we learn something.  They ask us questions or make suggestions on things we’ve not thought of before.  Second, it’s a bit like an interview where we have a chance to observe them and get a feel for their interpersonal skills as well as their knowledge.  So these visits are good for us as well as for the bidders.

Now that we’ve met the subs for all of the 3 general contractors who are bidding for our project we’re happy to say that we’ve been favorably impressed with them all.  Which leads to the problem of, “Gosh, whom do we pick?  They all seem good…” I suppose the numbers on the bid would help shape the decision somewhat but the problem of choosing one from 3 good general contractors is a fortunate problem to have.  Bids are due Wednesday, September 7th.

>