Beginning of Air Sealing

Why Air Sealing?

We want our house to be comfortable, durable and energy efficient.  So air sealing is an important element in meeting those criteria.  You know that air can pass through small cracks, spaces and even pin holes, right?  For example, if you see daylight in the door frame when it’s closed you’ll feel a draft standing next to it when it’s cold outside and warm inside.  Then if you put weather stripping around it to prevent air flow the house feels more comfortable, right?  So, stopping air leakage leads to comfort.

Air sealing also leads to durability of the building because air can transport moisture.  You might ask, what’s the connection to durability?  Well, remember the pictures of rotted skip sheathing due to rain water intrusion?  Prolonged water exposure can cause wood to weaken and also invite mold to grow.  Not good for durability of the structure nor the health of occupants.  Let’s imagine a hypothetical example for illustrating why moist air passing through cracks in the walls is bad for durability.   Say there’s a lot of cooking going on in the kitchen and the indoor temperature is 80 degrees with 50% humidity and the outside temperature is 40 degrees.  The dew point (the temperature that vapor in the air changes to liquid) is 59 degrees.  Warm air can hold more moisture than cold air.  So for a given relative humidity, the the surrounding air temperature will determine if it will stay in the air as moisture or condense to liquid and become water.  For an explanation of using simplified psychrometric chart have a look at this guide on air properties from NebGuide.  In this hypothetical example the warm air leaking through the kitchen wall will to the outside will encounter drop in temperature along its path and when the temperature drops below dew point the moisture vapor will change to liquid water.  If the cold surface happens to be the insulation layer it will get soggy and dampen the wood around it and if it doesn’t dry out over a period of time there will be rot and maybe mold.  So, stopping air leakage leads to durability.

Air sealing is good for energy efficiency.  Imagine driving in your car with the windows open in the winter.  The heater is on in the car but the hot air is escaping through the window.  When you close the window it’s warmer because the heat is no longer escaping through the window and you can use a lower temperature setting to stay comfortable.  Same thing with the house.  If you have the windows open you use more energy to heat the house than if you had the windows closed.  The opening and closing of the windows are something we can do voluntarily to control and minimize the use of energy to heat the house.  The air sealing of small cracks and spaces are like having lots of tiny miniscule windows that we can’t close.  Some of these cracks are buried under layers of building material and homeowners can’t get to them easily.  So we rely on the builders to ensure that these miniscule uncontrollable windows in the house at different stages of construction.

Air Sealing Examples

When we’re talking about air sealing for passive house standard the builder is taking steps to mitigate air leaks from tiny spaces like gaps between two pieces of wood on a top plate, mudsill, etc.  To refresh your memory, we are striving towards Passivhaus certification and the airtightness goal is 0.6 air changes per hour (ACH) at 50 pascals.  If you recall our baseline blower door test came in at 22 ACH.  This means we are targeting the house to be 3600% more airtight than the original house!

By the way, you may want to take a look at this page for a brief overview of Passivhaus.

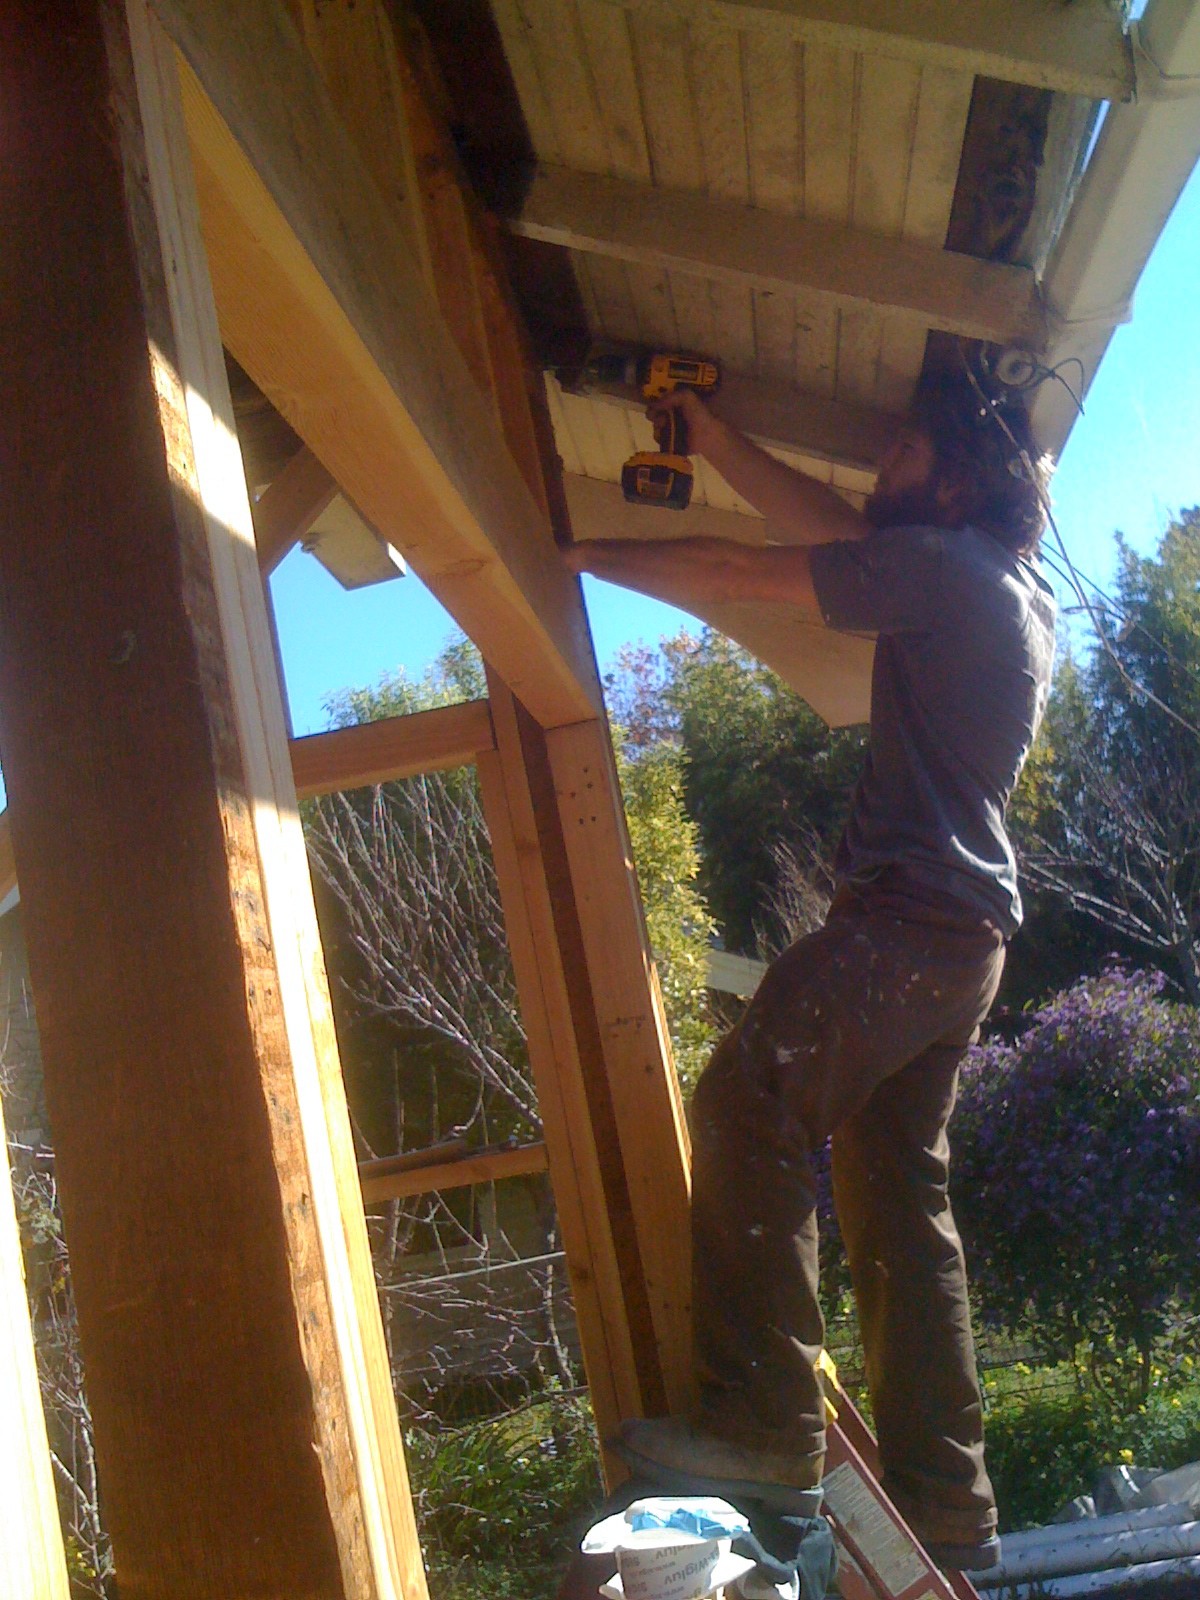
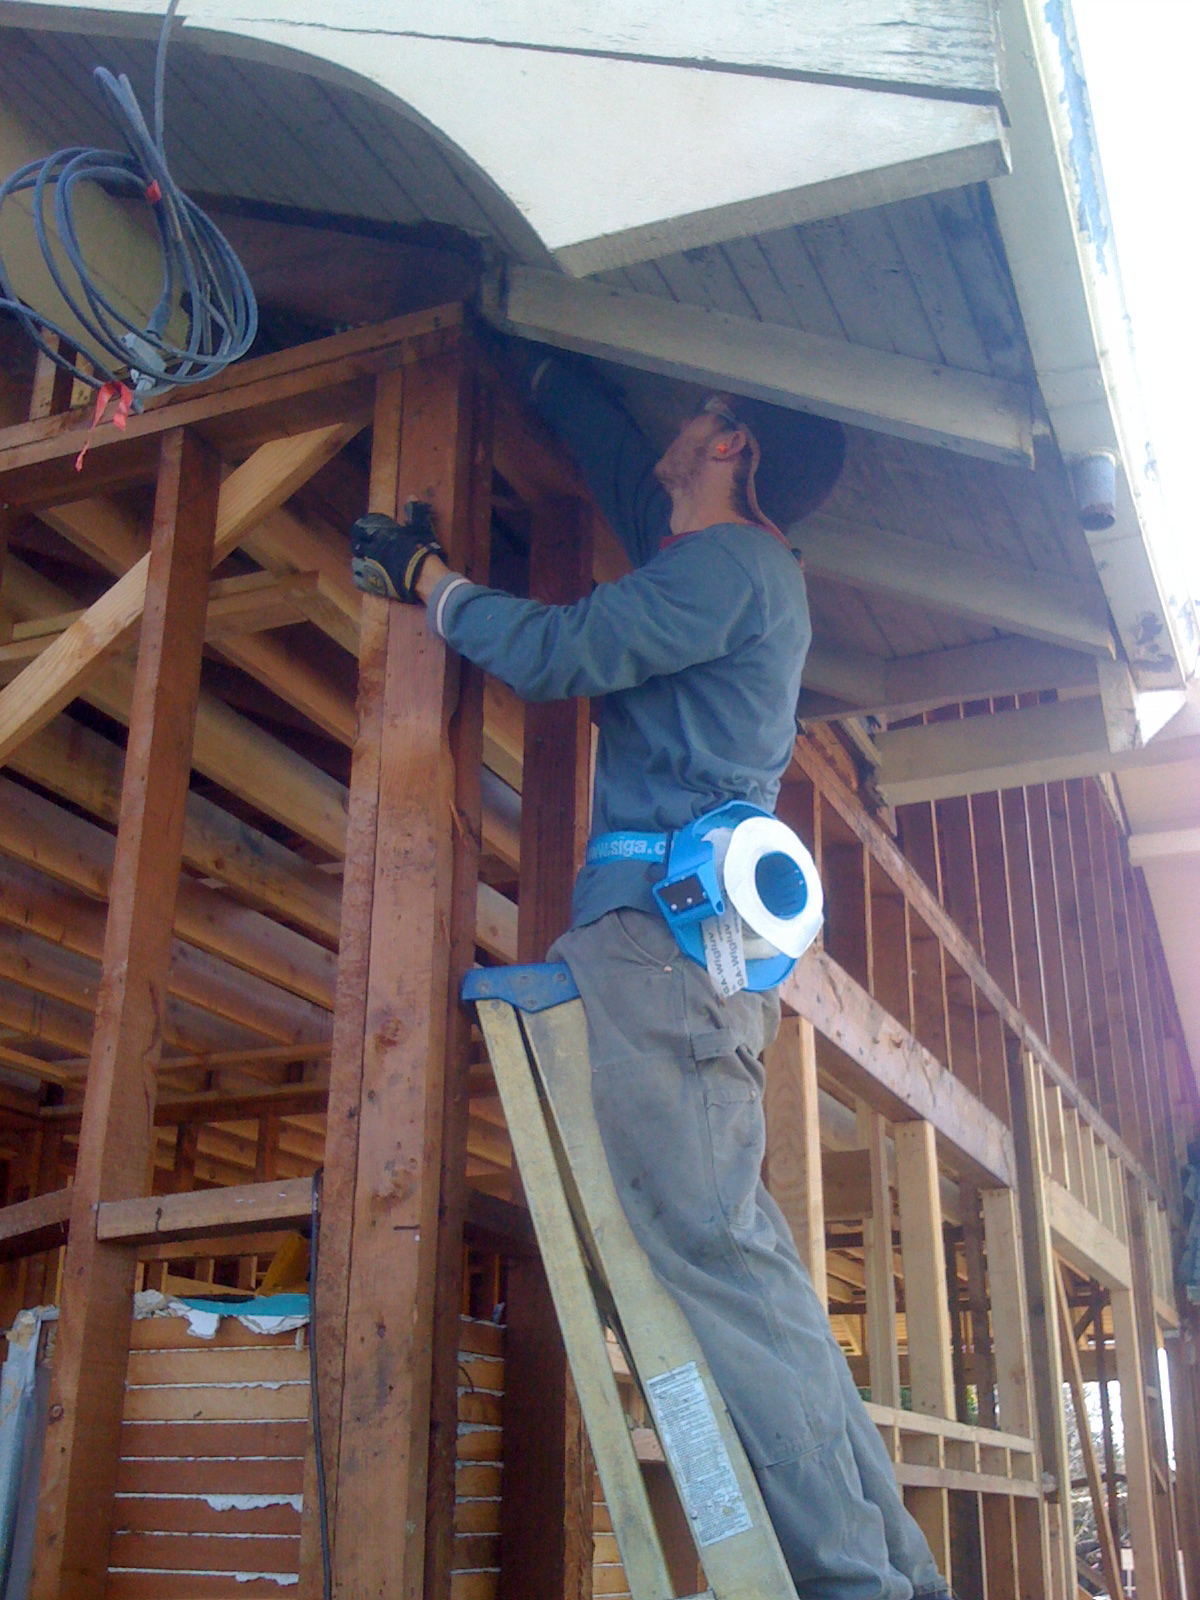
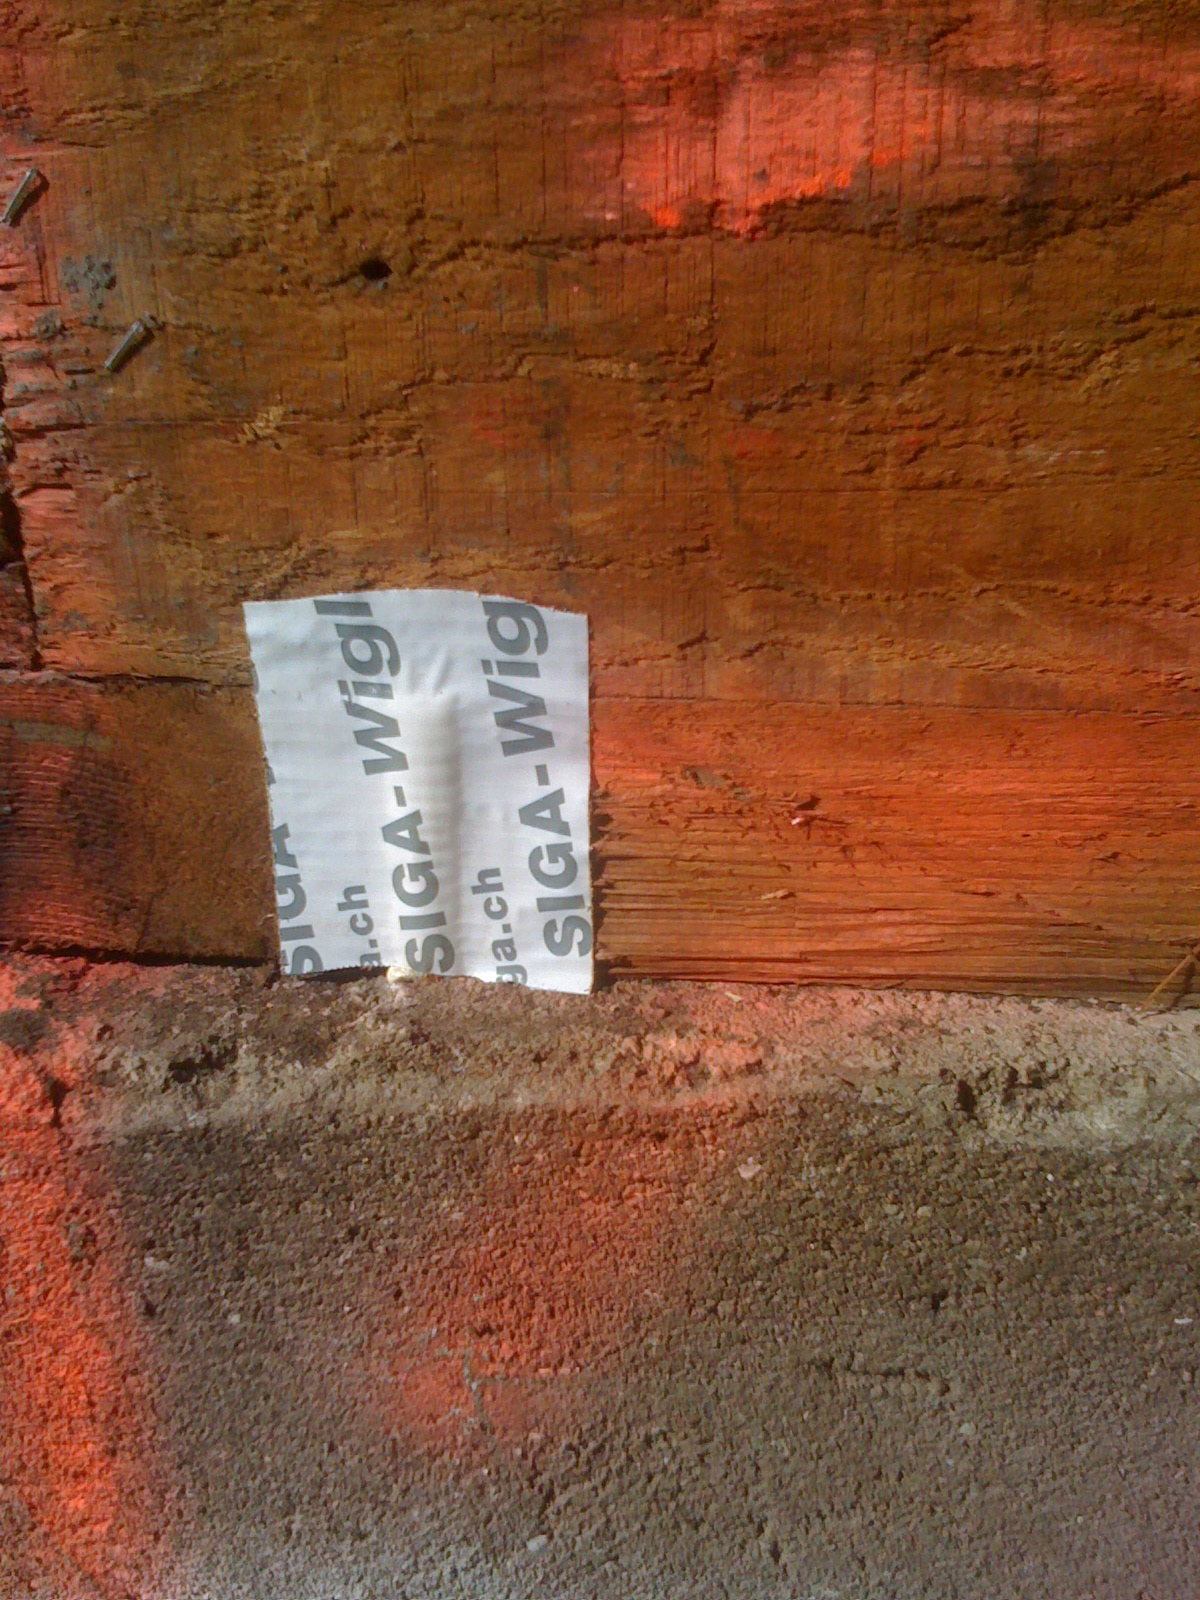
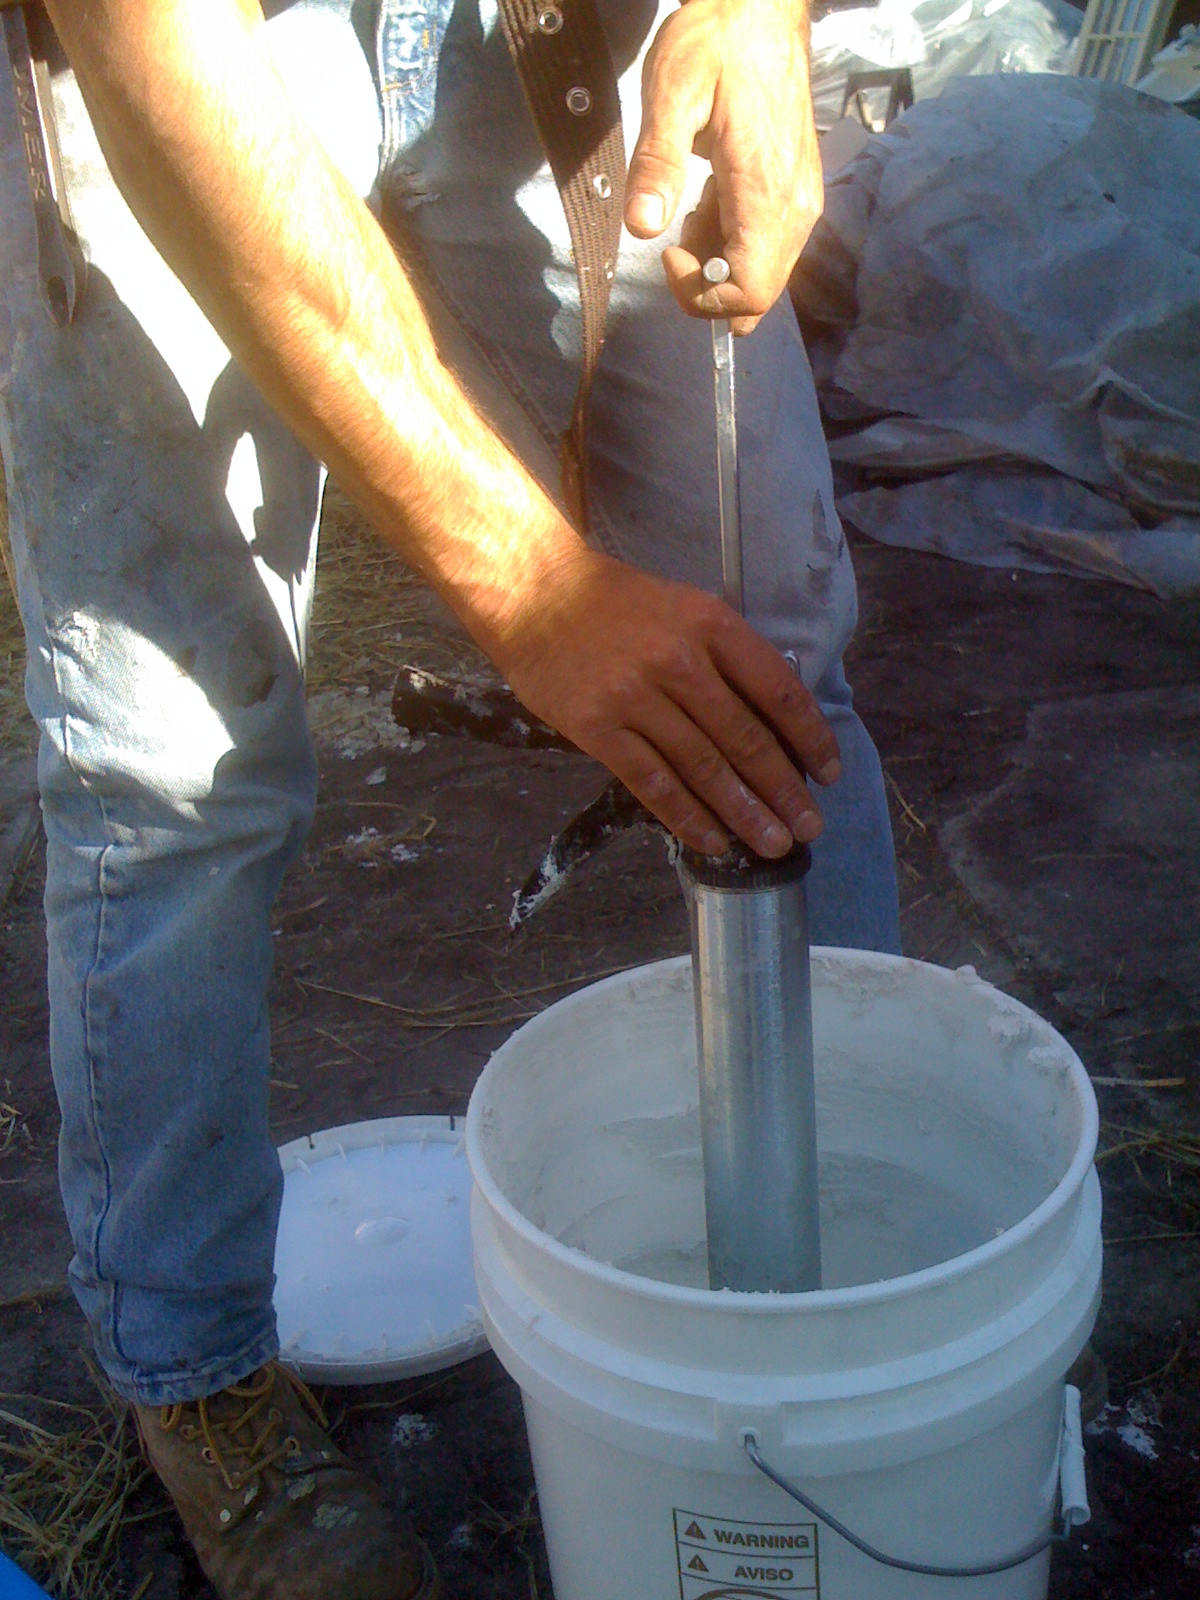
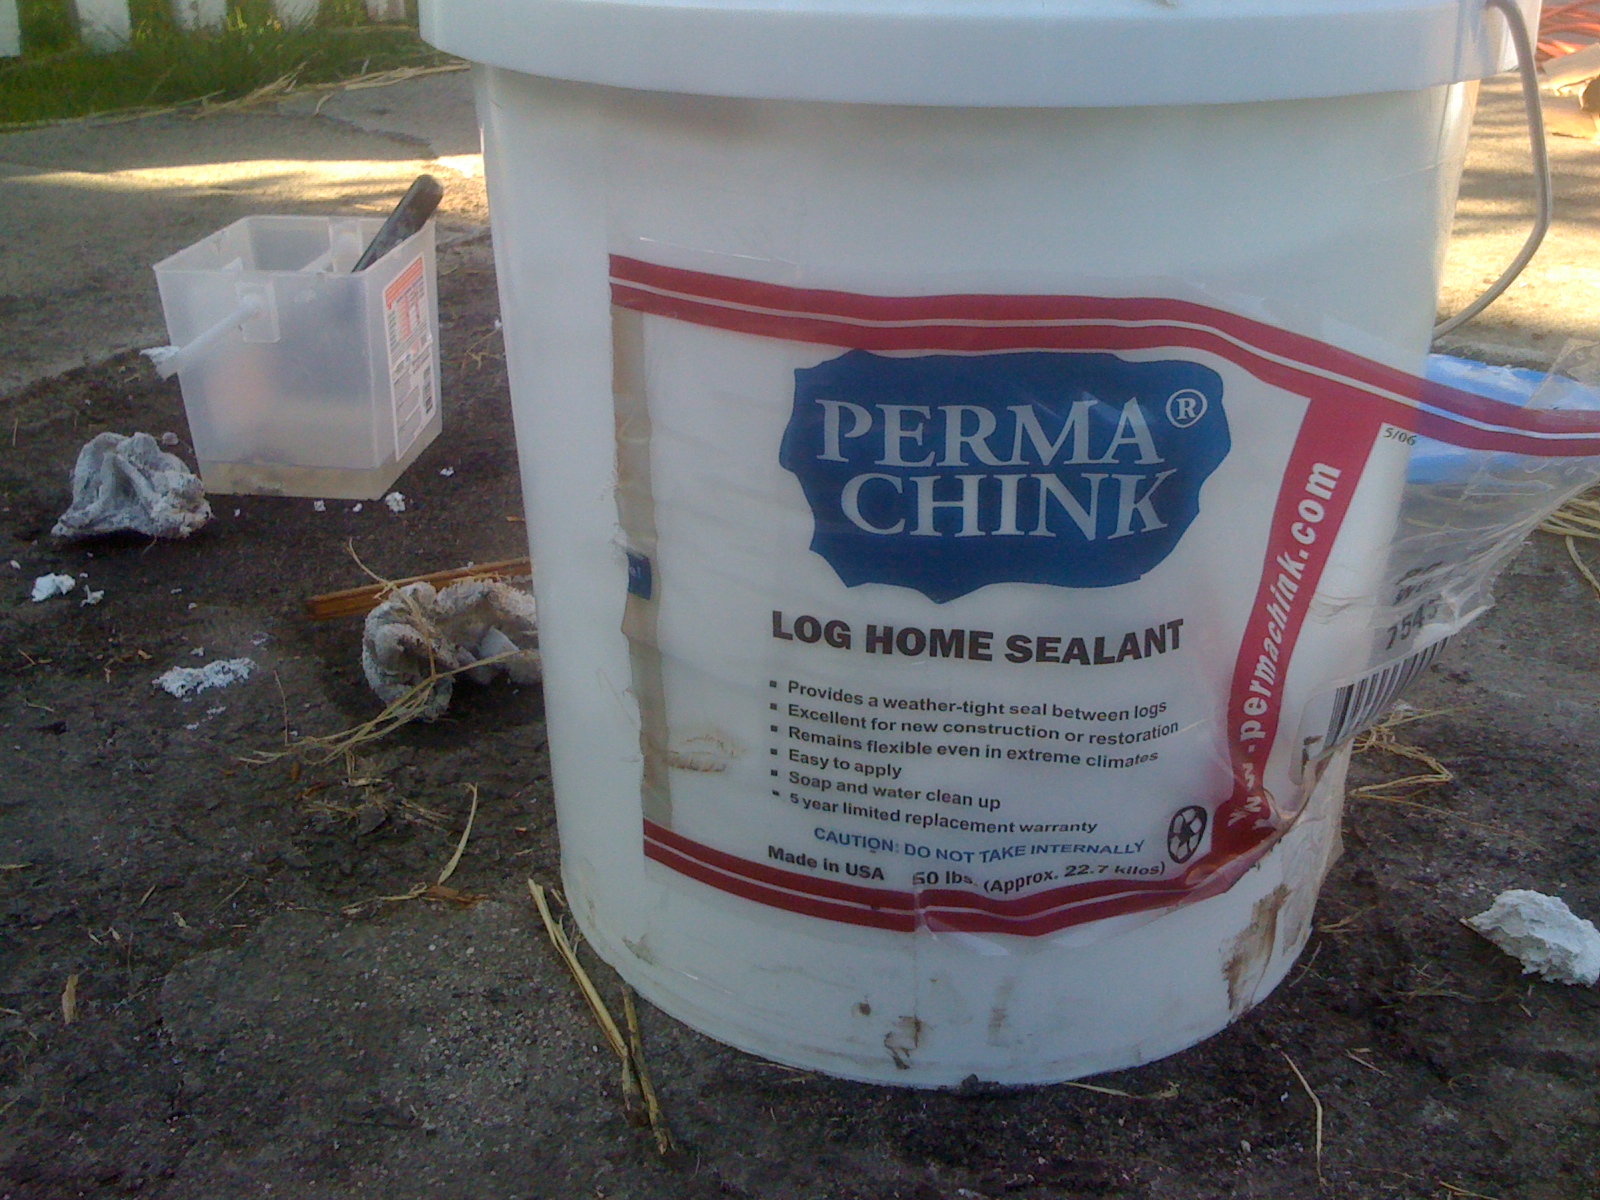
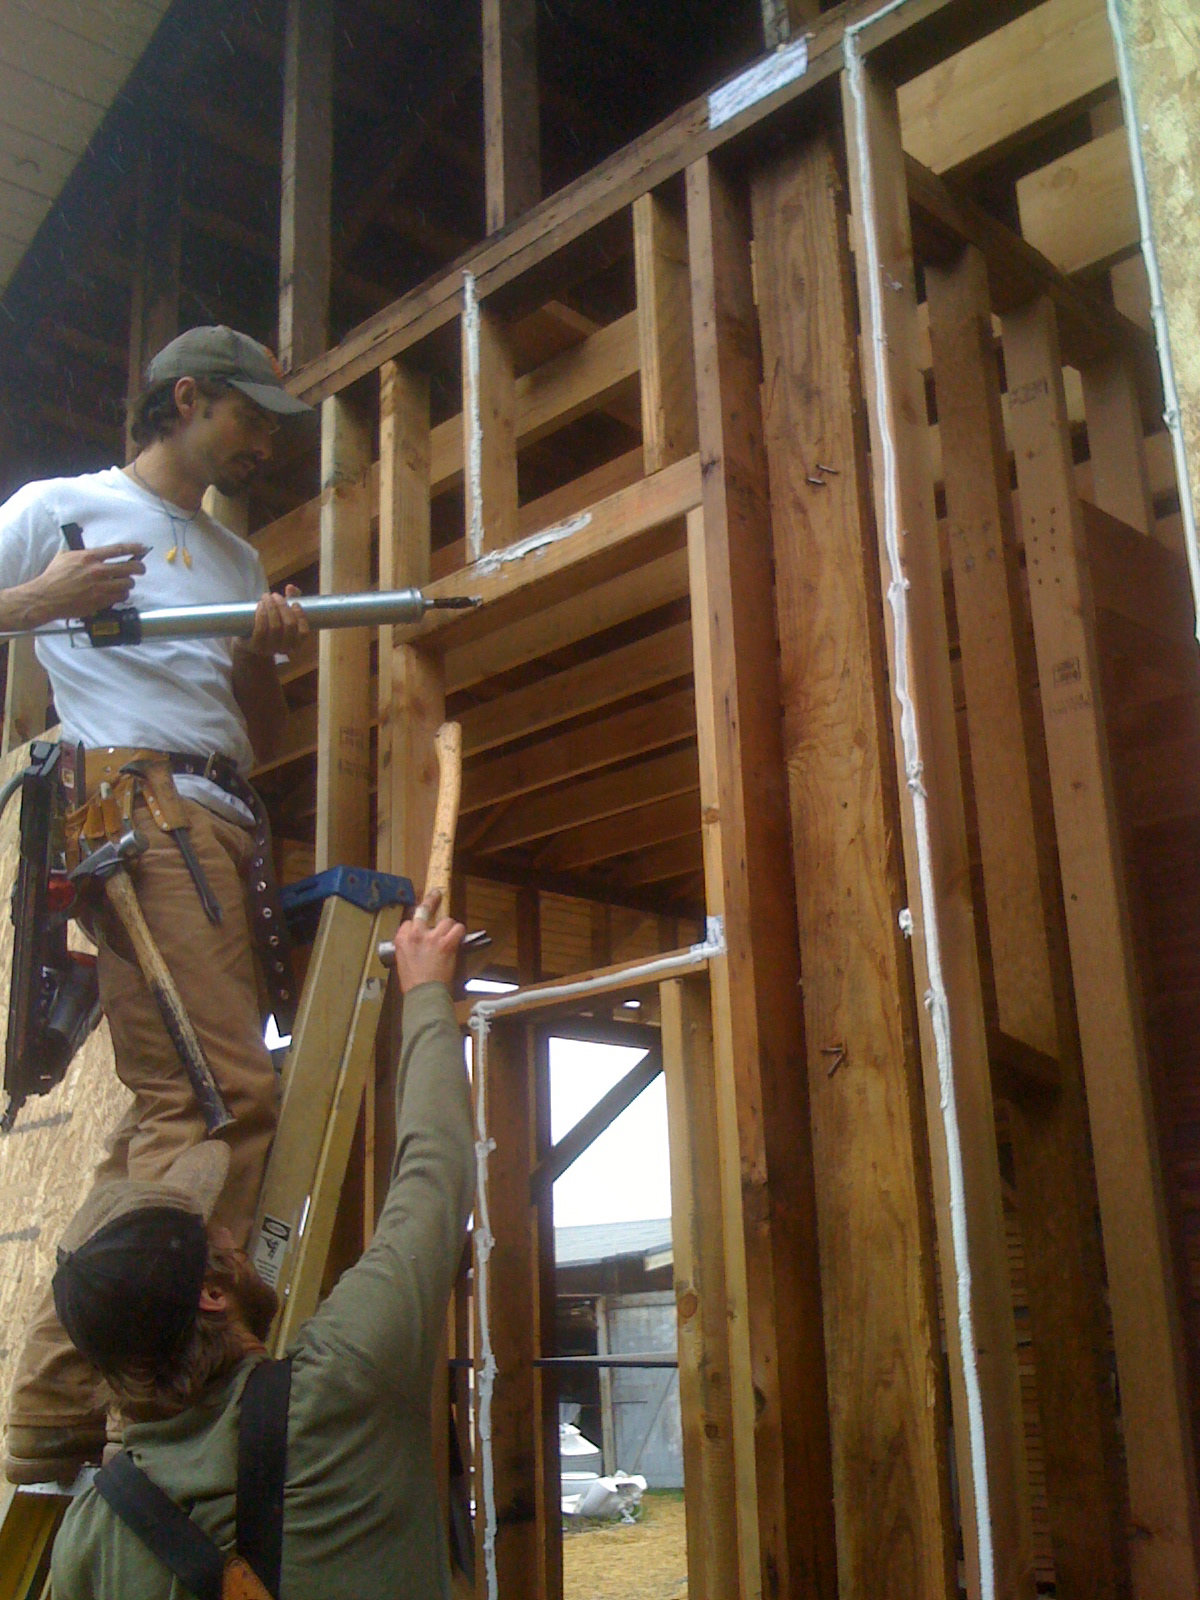
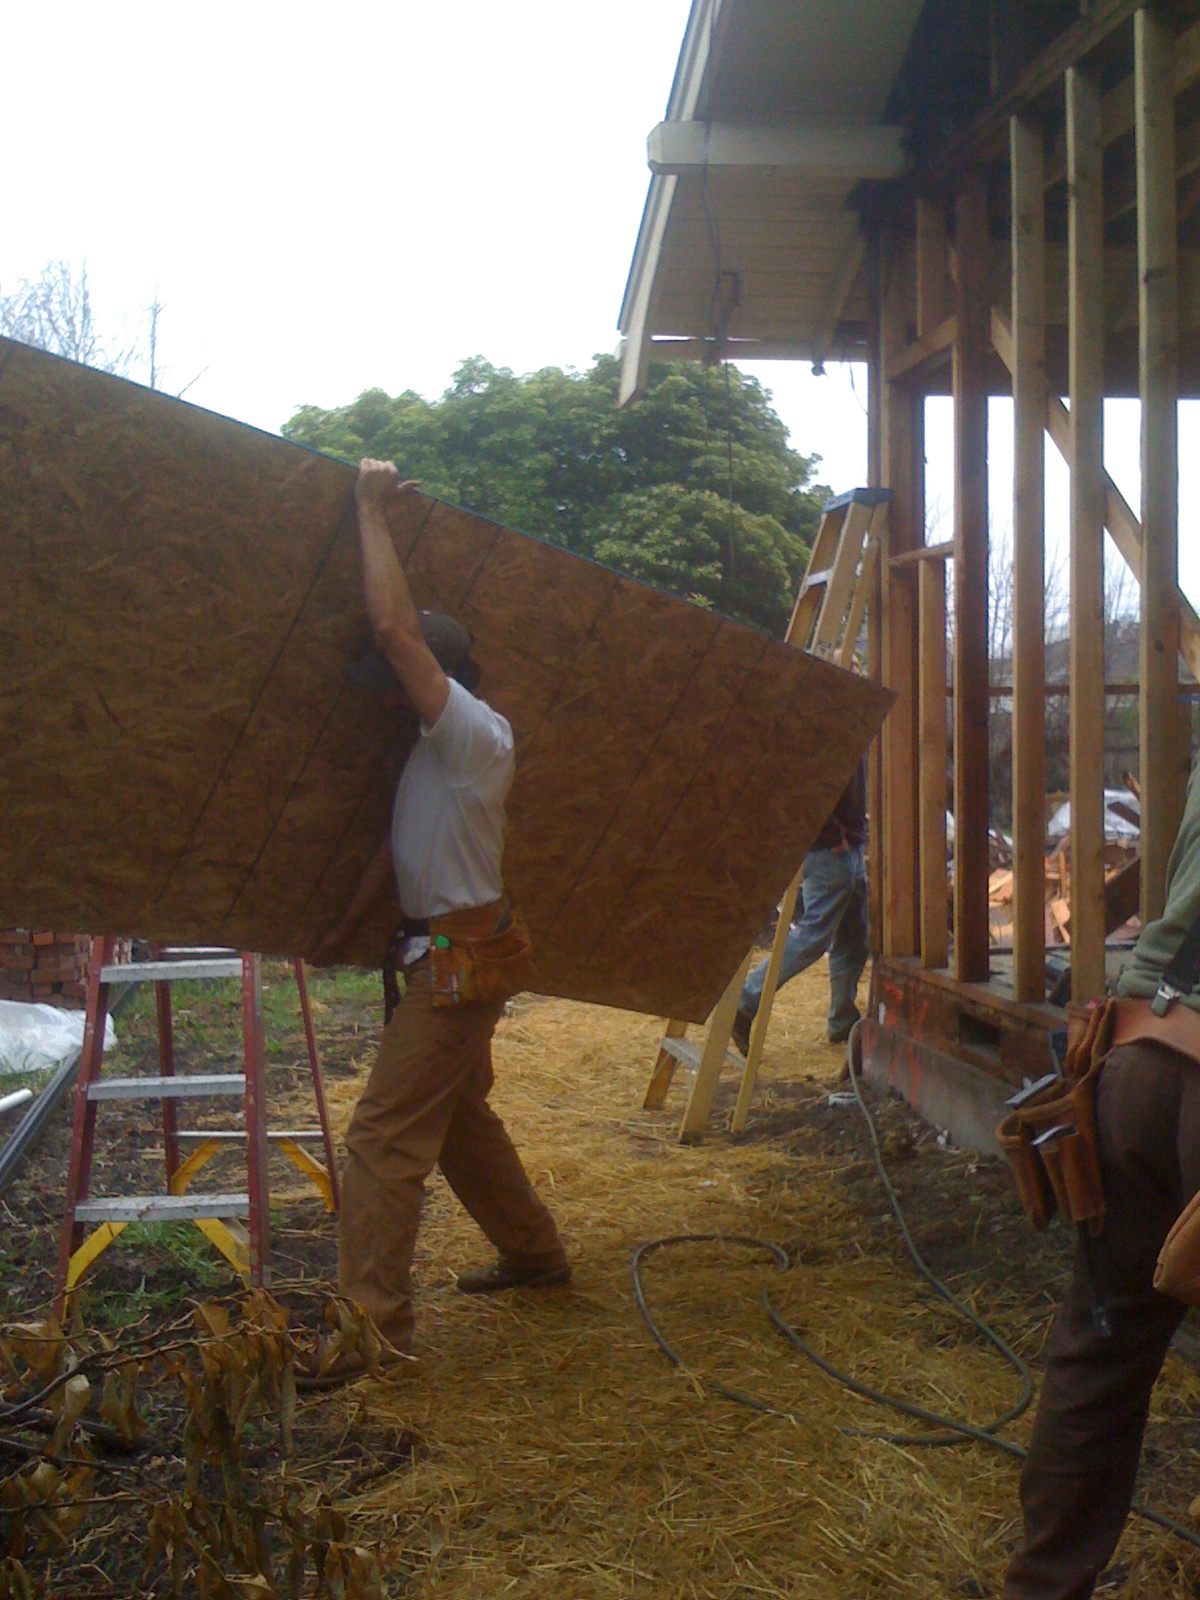
Air sealing work on the wall framing was done prior to sheathing.  These guys examined the places were unintended airflow could occur, like the junction of mudsill and studs, corners, etc.  Below are some pictures of air sealing examples.

To prevent air leakage in the small pinhole openings the crew shot foam
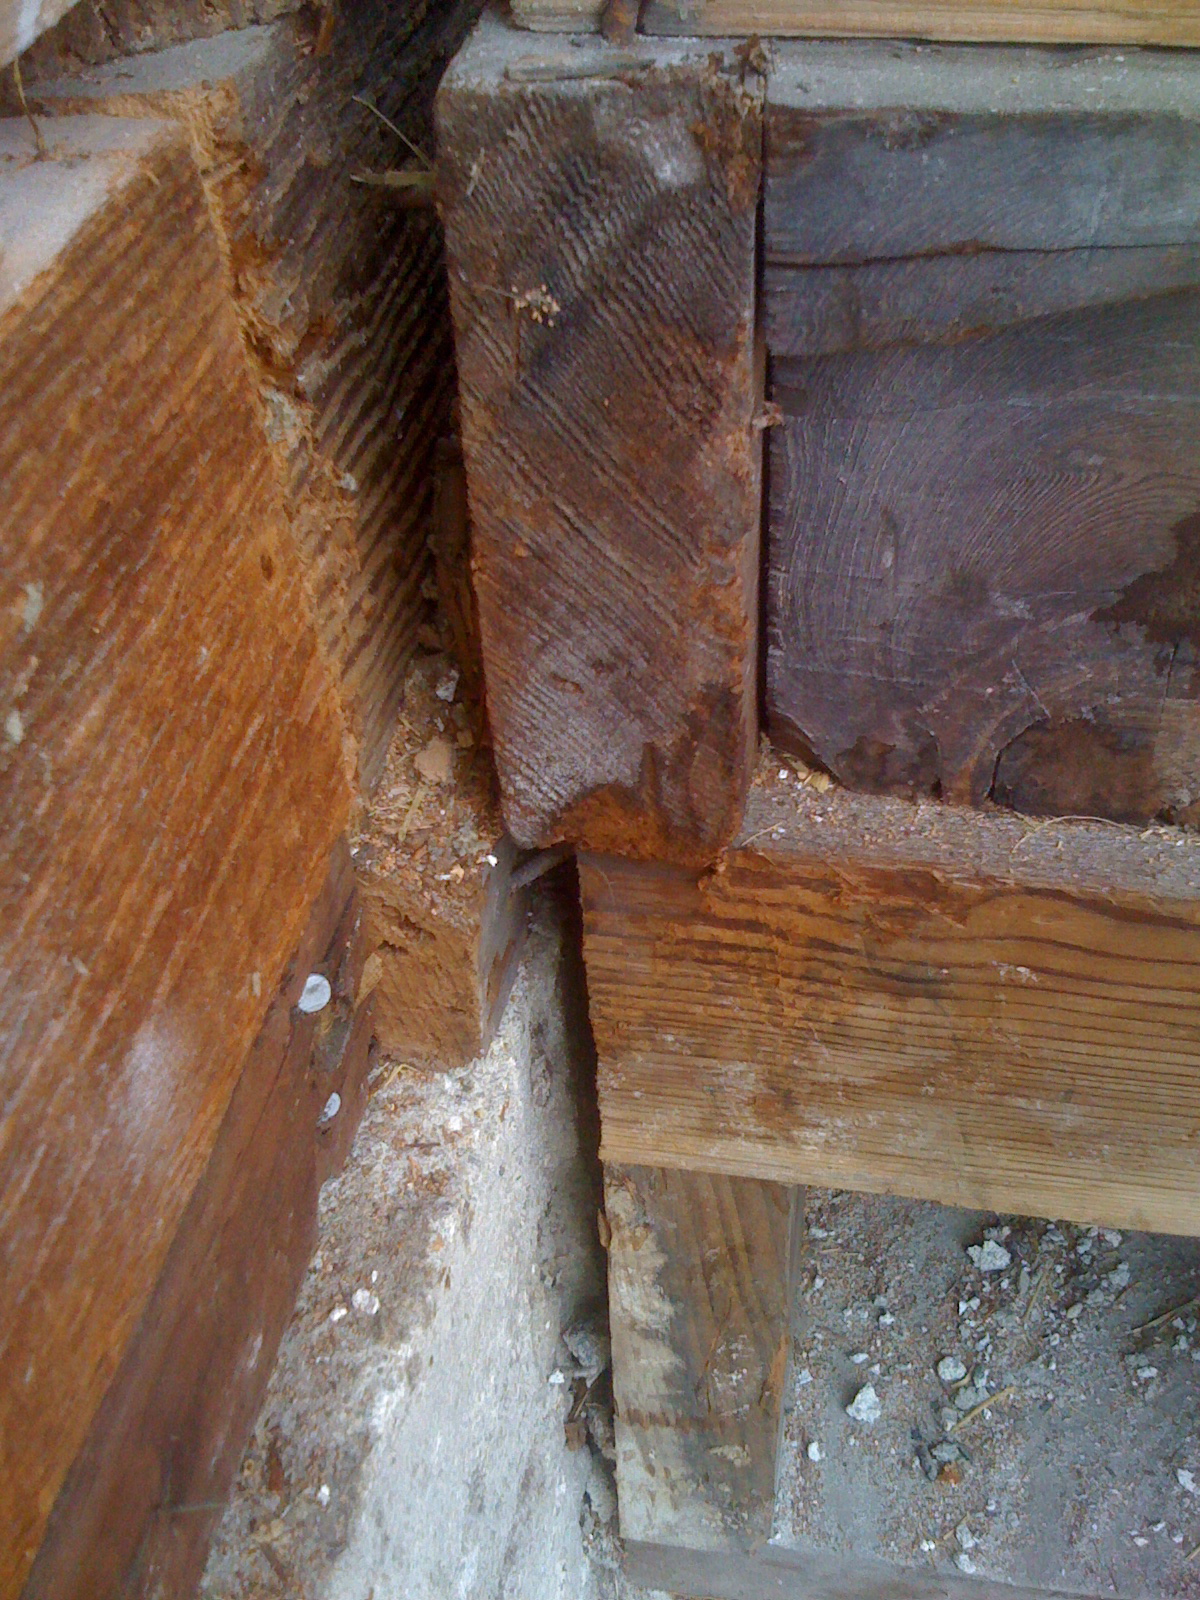
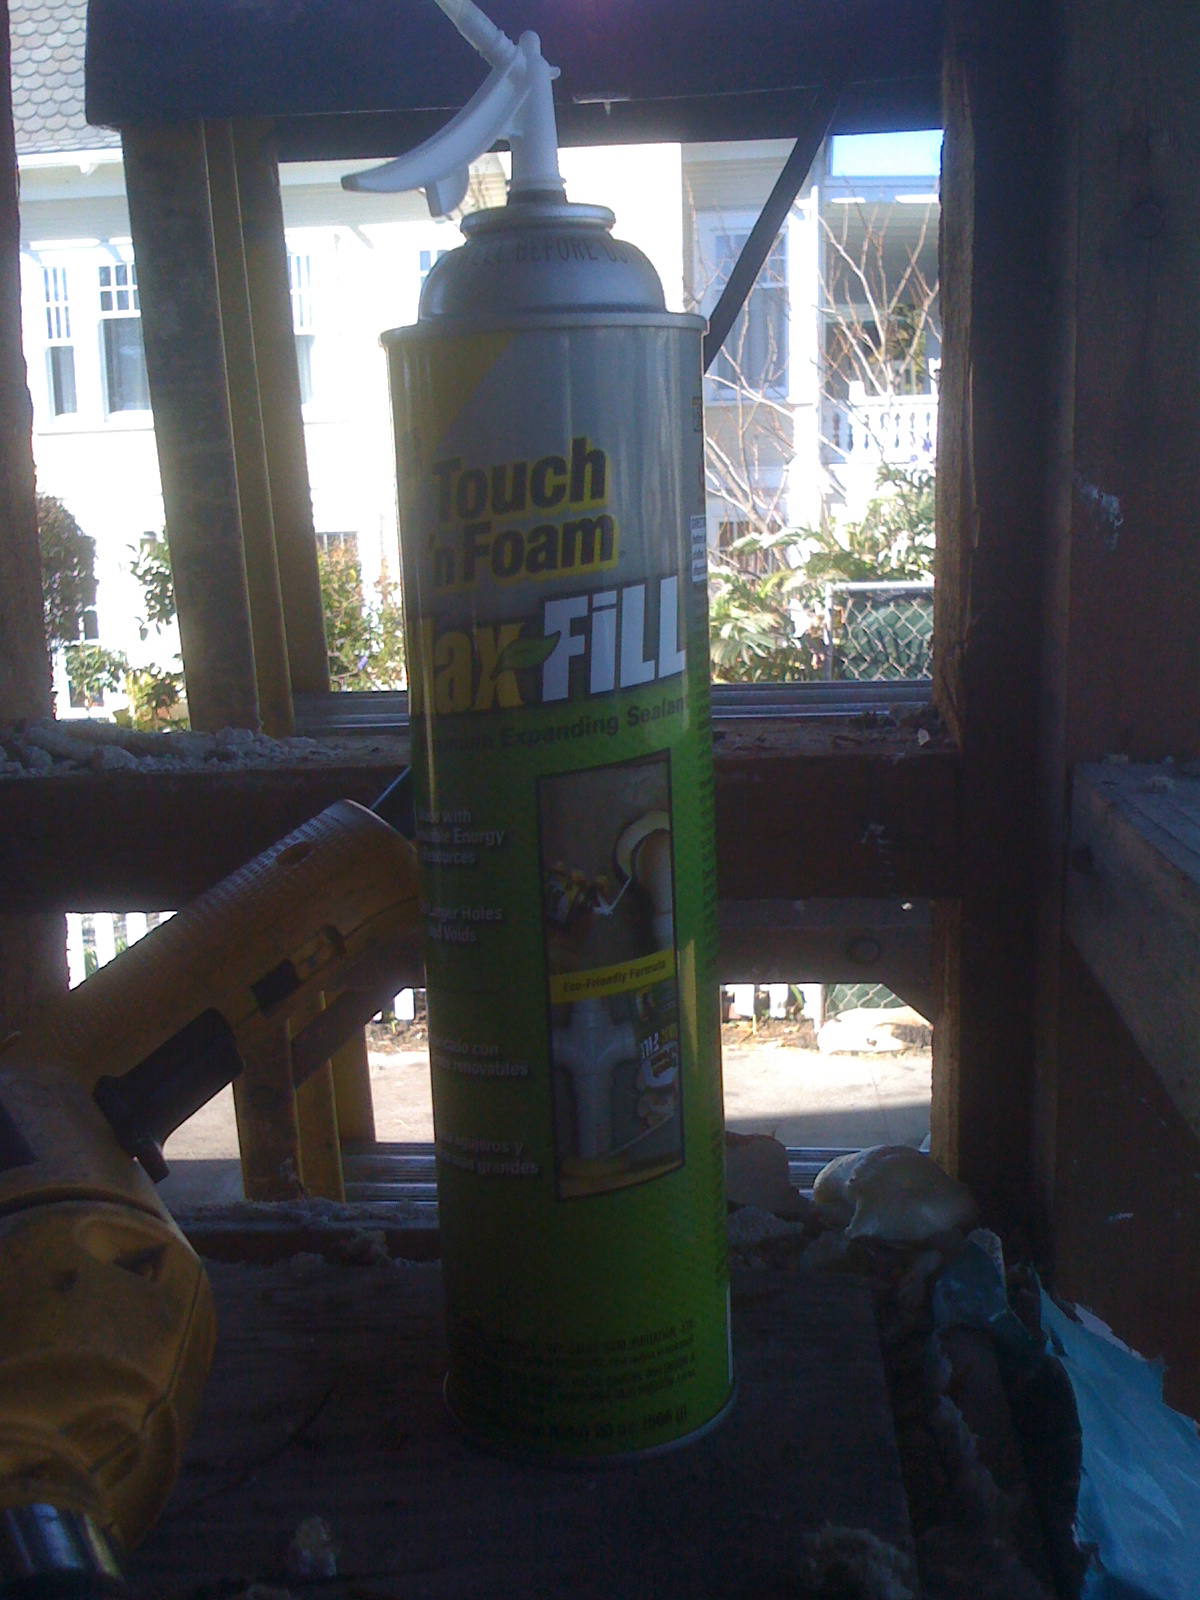
into the openings, sometimes drilling through the stud to access a spot where
the foam could expand and fill all the crevices, then sealing the outside with
a tape.  The crew tended to this
tedious work diligently towards the goal of 0.6 air change per hour at 50
pascals.  
Here are some examples of air-sealed spots where foam was blown in and covered up with tape.
Sealant from Perma Chink was applied with a bulk loading gun to ensure sealing of the sheathing to the wall studs.

Reuse and Recycle

January 30, 2012

I want to roll back the calendar a couple of months to share some thoughts on re-use, recycle and diverting waste from landfill.  You know, it takes resource and energy to make “stuff” whether it be kitchen appliance, table, chair, television, clothing, etc.  When we throw stuff away because it is broken, old or got replaced with a newer model the stuff becomes trash taking up space in a landfill.  On both ends of the lifecycle of “stuff” there are some cost and some limits.  Natural resources are limited and the space for storing our trash is limited too.  In fact, when I look at our utility bill from our local municipality the largest component of the bill is for garbage — It costs more to have my garbage hauled away than the cost of clean water and sewer service!

By the way, in chapter 7 of Scott Huler’s book, On The Grid, you can satisfy your curiosity on what happens to the trash and recycling material after they are picked up by the garbage truck.  If are really curious about systemic impact of the stuff we consume I invite you to take a look at The Story Of Stuff.

So, if we can maximize the use of our stuff or lengthen its life we can avoid taking up space in the trash dump site and also reduce the demand on natural resources.  Makes sense, right?  This means re-use of stuff is good and recycling of stuff is good.  Reuse means that the stuff gets a new life under a new owner.  For example, the cute antique O’Keefe and Merritt gas oven/stove has a new life in someone else’s kitchen rather than going to a landfill.  Recycle means that the item is processed and transformed to another useful item.  For example, some of the wood removed in the deconstruction of the house will be mulched and will begin its new life on someone’s landscape.

Again, reuse is good, recycle is good and we want to avoid sending stuff to the landfill.  [end of rant, thanks for your patience]  Below are some examples of reuse and recycle of of stuff in our project.

Furniture
The non-profit organization, Furniture for Families, took our dining room table, chairs, bed, dresser, television and microwave oven.  This all volunteer furniture bank provides qualified clients who are referred to them by caseworkers from social service agencies familiar with the specific needs of the clients.

Dining Room Table and Chairs

Appliances
We gave away the washer and dryer to someone we knew that had a broken one.  Listing the items for $5 each on Craigslist was quite effective in getting the refrigerator and gas oven/stove sold and hauled in a couple of days.  The toaster was donated to Goodwill.

Refrigerator and Antique Oven/Stove
Window and Door
One of the people who came to take a look at the antique gas oven/stove, an antiques dealer, didn’t like the stove.  But he ended up buying the front door, window and the desk.  You just never know what they’re interested in.

Front door

Reuse
Some of the lead weight removed from the double hung windows went to our Passive House air sealing consultant, Terry Nordbye, for use in one of his projects.

Lead weights from double-hung windows

Recycle
The recycled wood is mulched at the dump. The reclaimed wood is still on site in the form of skip sheathing that we can use for this project or others.  All the interior trim was salvaged and is now in the shed.

Wood for mulching

Deconstruction
The crew of Santa Cruz Green Builders did a terrific job of deconstruction and separating various items to be recycled.  Huge dumpsters were delivered to the job site.  The summary from the receipt from the city of Santa Cruz shows 82.6% recycle/reuse percentage by volume.  Details in cubic yards are:

Recycle/Reuse  (95 cubic yards)
20 concrete and plaster recycled
42 clean wood recycled
4   metal
3   sheetrock recycled
3   concrete rubble reused
20 dirt reused at another site
3  wood reclaimed

Garbage (20 cubic yards)
20 painted wood (cannot be recycled) and garbage

Wood for recycling
Trash

Salvage Company
Whole House Building Supply and Salvage runs a pretty neat operation where they offer 3 different options for helping you give your stuff a new life.  It’s a good source for reuse items.

Midorihaus Passive House Windows

It’s important readers! High performance windows tuned to the climate and the compass orientations of the building envelope area are a critical part of the Passive House architectural approach. In our case the glazing area comprises [290ft2/ 1700ft2] or about 17% of the total wall area. The holy grail of window thermal performance is R factor, which is a measure of heat resistance related to the heat transfer per unit area per degree temperature difference from interior and exterior. In the US it has units of (ft²·°F·h)/Btu and is known as R-value. In the rest of the world, window performance is quantified in metric units by a measure of thermal transfer efficiency known as U-factor which is inversely proportional to R-value and whose units are W/(m²·°K). You can see the impact of windows’ thermal performance (R-value) on the overall wall assembly as a function of % glazing area from this graph:
The process of choosing our Passive House windows was quite involved. We were not only trying to achieve the best cost-performance from the window itself but were also wishing to improve the Bungalow aesthetic of our home by adding simulated divided lites (SDLs) known in the past as “muntins.” The original 1920’s architect employed single pane windows throughout the house without muntins. Divided lites are however a key stylistic hallmark of the Bungalow. The opportunity to add this important Bungalow stylistic feature made removing the old single pane lead crystal less regrettable.
Throughout our project we wanted to source materials as locally as possible. However the very best performing windows are European. This also means they have a huge embedded energy resulting from the considerably long shipping distance. High quality European triple glazed windows are generally fabricated from timber sustainably forested in the EU. Wood windows may have as little as 1/6 the embodied energy compared to fiberglass windows and 1/10 the embodied energy compared to vinyl windows. However even with this high performance their total life cycle back time would be largely compromised in the short term because of the embodied freight energy.
Lower cost domestic vinyl windows not only have very high embodied energy but also have significant environmental impacts on air quality (dioxins) during manufacture. Other American windows such as Marvin (wood) or Serious Windows (fiberglass) either offered lower thermal performance or a more limited range of coating options for tuning the glazing to the installed compass orientation to maximize passive solar heat gains for our project.
To complicate matters further there is a significant difference in window performance testing and verification between the continents. European windows are rigorously modeled for performance. However in Europe a physical example of the window is not actually tested by a 3rd party for performance verification as in United States via the National Fenestration Rating Council (NFRC) certification. One cannot understate the importance of physical verification of modeled performance.
The graph below (ZehnderUSA) shows the overall cost efficacy of the subcomponents of Passive House features. The Specific heat consumption numbers shows that, after building orientation, window performance constitutes the largest chunk of energy savings for a building. The cost efficacy units in blue are FR/kWh/a or (Swiss Francs per kWh per annum) savings and show that investing in the best possible windows is a no brainer from the perspective of energy efficiency payback.
We also see that after the investment in high performance windows, increasing the insulation of the exterior shell and employing a heat recovery ventilator (HRV) or energy recovery ventilator (ERV) are the next wisest dollars spent.
Yes, investing in high performance windows is a good investment provided they can provide a lasting energy savings over less expensive but lower performing windows. However the coastal climate of Santa Cruz involves wide swings in outdoor relative humidity levels, precipitation, drizzling fog, and extended intense direct sun & UV due to generally high ambient air quality. This is a stress factor for wood window frame materials and necessitates more frequent resurfacing/repainting even though wood frames are the most sustainable material for window frame fabrication from the perspective of embodied energy. Termites need also be considered as a risk factor with wooden windows.
This is a graph from the Canadian manufacture of pigmented fiberglass windows (Cascadia) we ultimately chose for the project. It is vendor-formatted data you have to take it with a grain of salt but I believe is in general faithful to the facts. It compares many performance attributes of the four different windows frame material types commonly available.
So why did we choose this vendor Cascadia over the rest? This can be seen from the graph below which compares cost and various performance criteria for several vendors:
Simply put, energy efficient buildings minimize reliance on artificial lighting. To achieve this they maximize the amount of natural light admitted into the building interior through their windows. As a result energy efficient buildings enjoy high natural lighting efficacy. Energy efficient buildings also need to retain interior heat very efficiently at night and during cold seasons. For windows to accomplish all this at once requires special optical coatings which transmit in the light we see (visible light) while controlling or reflecting invisible heat energy (short wave infra-red) from the inside out and from the outside in. Different vendors offer different solutions but generally a thin layer of metallic silver is deposited onto the inner surfaces of the outmost glass and the cavity is filled with an inert gas such as Argon to prevent future tarnishing of the silver. One exception is Serious Windows whose products offer good thermal performance but rely on an inner polymer film to control Solar Heat Gain Coefficient (SHGC). SHGC is the measure of the amount of short wave infrared that passes through the window from the exterior. If the SHGC is too high and there is no effective roof overhang or shading this can contribute to high summertime HVAC loads, especially in climates with a high CDD (Cooling Degree Day) load. You learn more about HDD and CDD here: http://en.wikipedia.org/wiki/Heating_degree_day. Maps for the US are here: http://en.wikipedia.org/wiki/File:United_States_Heating_Degree_Day_map,_1961-1990.jpg and here: http://en.wikipedia.org/wiki/File:United_States_Cooling_Degree_Day_map,_1961-1990.jpg.
In the case of the Serious Windows approach, the windows were dimmer that other vendors with comparable SHGC. In quantitative terms this means they are lower in natural lighting efficacy due to lower Visible Transmittance or VT, which is the ratio of the light ultimately getting through the window expressed as a fraction of the total visible light reaching the exterior of the window. Serious Windows uses internal, non-ceramic thin films between the outer glass panes, which are also absorptive in the ultra-violet band. Ultra violet light chemically alters many hydrocarbon-based materials over time. This approach may not prove as durable as triple glazed with all ceramic glass although, however in all fairness, Serious Materials offers a life warranty on their windows. The Marvin triple glazed windows are not as well performing as either the Cascadia or the other European triple glazed offerings. The Cascadia windows offer a higher Solar Heat Gain Coefficient, higher VT (more light gets indoors), and somewhat better thermal performance (lower U value) than the Marvin Windows but to not quite attain performance the European vendors. It should be mentioned the Marvin Windows had some nice features such as optional built-in bug screens and SDLs that looked very nice in the show room.
The European windows we saw on tours were, as expected, beautiful and extremely well built. Many offer an aluminum cladding over the wood frames. The Sorpetaler windows were quite impressive as seen in two other Bay Area Passive Houses. However, all of the European windows would have been burdened with very high embedded shipping energy. Since we also considered global warming potential when selecting our insulation materials we thought being consistent with the windows too would serve the overall desired project outcomes. The Cascadia windows were the best overall balance of desired outcomes at the time of our project. However this will likely change and hopefully more domestic alternatives for Passive House projects will become available domestically. The American made wooden H and H windows were very cost competitive to Cascadia. From a sustainability perspective H and H seemed an ideal choice with lower transport embodied energy (made in the US) and lower embodied manufacturing energy (wooden frames). But at the time of our project H and H had no NFRC certification. That was too high of a risk to assume since we would only learn of any shortcomings in air sealing after installation. A final vendor comment..the Inline window rep kept trying to steer us away form triple pane and towards a high performance double pane option.
This brings us to a final discussion point. Why triple paned in the comparably mild climate of Santa Cruz CA? Three reasons (1) enhanced street noise attenuation (2) enhanced winter comfort due to higher indoor glass surface temperature (3) best bang for the buck in energy savings. The fact of the matter is that once you are working with a vendor who can satisfy the air tightness requirement and window frame R values needed for a Passive House you are in a price range where much of what you are paying is for the overall build quality and engineering. The marginal savings of a few thousand dollars do ‘downgrade’ to double pane glass didn’t seem with it when considering the ancillary comfort benefits.
Getting your Passive House windows right will be an in depth exercise for the homeowners and designers requiring tremendous attention to detail and patience in working with the vendors. It is critical to ensure that the correct coatings are incorporated in each window to ensure that window’s performance relative to its compass orientation NSEW. Customer service is sometimes lacking. Be fore-warned! Our issues involved trying to avoid the ‘grilles between glass’ or GBG with our SDLs. We were unable to get a different color SDL adhesive (which adheres the SDL bar to the exterior glass surfaces). This meant using aluminum bars between the #2 and #3 glass surface to avoid the awkward visual gap when looking though the windows from an angle. The Cascadia GBG bars are thermally broken as they intercept the divider at the edge of the glass. We have been told the thermal performance as modeled by the glass unit manufacture (Cardinal USA) is not appreciably affected. We have yet to receive the exact modeling for our project..story continued.

Laundry to Landscape – Graywater

October 29, 2011

Starting January 2010 the changes to the California Building Code made it easier for homeowners to install a laundry to landscape graywater system — no permit required for this simple system.  Using the laundry water from the washing machine to irrigate your landscape cuts down on your water demand during the summer.  Makes sense, right?  I won’t go into the details of graywater requirements, benefits in this post.  If you’re interested you can read about in these links:
    What is Graywater
    City of Santa Cruz Requirements for Installation of Graywater Irrigation Systems
    Guide to Conserving Water Through Rainwater Harvesting and Graywater Reuse for Outdoor Use


What I do want to share is my experience of learning about a simple graywater system installation in a Do It Yourself workshop.  Last Saturday I attended a day-long graywater workshop in Santa Cruz led by LeAnne Ravinale of Laundry to Landscape and Ken Foster of Terra Nova Ecological Landscaping.  About 10 people participated in this hands-on workshop where we learned the basic concepts in an hour-long classroom presentation then went outside to do the installation.  I liked this approach because it builds the knowledge in the community and it’s cost-effective for the homeowner.


Overview


The homeowner wanted to re-use the laundry water to irrigate the rose plants.  Here is a rough sketch and an overview of what we did.

1. At the washing machine, we connected a 3-way valve to enable the homeowner to direct the laundry water to either to the landscape or to the sewer.

2. Outside the house the we fastened the PE tubing to the wall and ran the trunk line to the yard.

3.  T-connectors were installed to connect the branch lines leading to the rose plants from the main trunk line.

4. We dug around the plants to make a “C” shaped moat around the plants.

5. Plastic potting containers were cut and placed in the ground.

6.  We tested the system using water from the hose bib and adjusted the volume valves at the end of the branch line.  Then we mulched the area nicely.


1.  At the Washing Machine

A hole was cut into the wall of the laundry room ahead of time.

A piece of plywood with cutout for the 3-way valve was fastened to the wall at the stud.

The workshop participants were 60% women and we all took turns to use power tools and such to install the 3-way valve and plumbing at the washing machine.  So it’s light construction work that most people can do.

The bottom connection is to the washing machine

When the yellow handle points down the laundry discharge goes to the sewer on the right side.

When the yellow handle is horizontal (pointing right) the laundry discharge goes to the landscape.

Why should the owners care?  During the winter rain the landscape does not need water so laundry water can go to the sewer.  Also if you’re washing materials containing bacteria like diapers you need to send the laundry water to the sewer.

2.  Outside the House

The 1-inch polyethylene (PE) tube was fastened against the exterior wall.

The 1″ PE tube ran down the wall, across the walkway then ran along the fence perimeter.

We used about 80 feet of this 1″ PE tube as the trunk line.  This was fastened to the fence and also staked down into the ground with a staple.

The walkway was covered later to protect the PE tube and prevent it from becoming a tripping hazard.

3.  T-Connectors

At specified placed the 1″ trunk line was cut and the T-connector was attached.

Note that the bottom of the T is a smaller diameter where 1/2″ PE tube (branch line) can be attached.

See the completed connection of the branch line near the rose.

One of the requirements of graywater irrigation is that the discharge water needs to be at least 18″ away from the fence.

4.  Digging Around Plants

Note that the hole we dug is not directly at the root of the rose plant.  It’s deep enough to bury a quart sized plastic potting container.

It’s a bit hard to see in this photo, but we dug a “C” shaped moat around the rose plant.  The moat and the larger hole will be filled with mulch.  When water is discharged at the end of the branch line the mulch will absorb and convey the water .

5.  Cutting Up Potting Containers

Here you can see the a circle cut in the middle of quart-sized plastic potting container so the branch line can be inserted.

The “bottom” of the container will be the top cover that can flap open so that the owners can check the end points for maintenance.

The plastic potting container is placed in the hole we dug.

6.  Testing and Mulching

When all branch lines were installed in their respective places the system was tested.

We attached the garden hose to the connector on the trunk line and ran water through the system to see how much water was coming out at each branch.

Flow restrictor valves were used at the end of branch lines to control the volume of the water discharged at each end point.  Without this all the water would pool at the first few branches and nothing would get to the end of the line.

Here you can barely see the trickle of water coming out of the valve.

Note that the branch line is “hanging” from the side of the potting container and the valve doesn’t touch the bottom.

See how the “flap” is pulled back so that you can see the valve at the end of the branch.

Mulch is spread around the area outside of the potting container.

Ornamental stepping stone will be placed on top of the “flap” so that the homeowner will know where the end points are.

That’s it!  It’s a simple system that takes a little bit of labor.

The instructor, LeAnne, visited the homeowner the day after the installation to do a test with the washing machine.  She mentioned they found some leaks and things had to be tightened but otherwise the system worked and the homeowner was happy.

Materials

I heard that the local ProBuild Store on River Street has the graywater stuff organized neatly in one area so I checked it out.  Sure enough all the materials we used were displayed at the end of the aisle.  You can see from these photos that the materials are not expensive to do a simple installation.

Plans Submitted

This morning we submitted our plans at the City of Santa Cruz Building Department.  5 sets of plans along with energy calculations and archaeological reports were submitted.  The archaeological report was needed because the house sits in a zone that is archaeologically sensitive.  Fortunately the archaeology found nothing interesting.  The city’s green building program require plans to have the green building checklist as part of the plan.  The checklist is used to tally the green points.  There is a minimum number of points required for the permit to be issued — 20 points for new construction and 15 points for remodel.  If the total number of points on the plan is above 45 for new construction or 35 for remodel the plan is eligible for accelerated building permit processing.  If you rack up more than 75 for new construction or 45 for remodel then you receive the green building award and move up to the front of the queue.  Our plan easily exceeded the number of points for green building award so we expect the processing to move along quickly.  By the way, when we spoke with the city’s green building specialist a year ago, he mentioned that about 30% of the permits received green building award.

So, what’s in the plan?  Well, the size of the living space remains at 1569 sq.ft. and the roof has about 10-15 years of life so we are not changing that.  Just about everything else will be touched. These include –

  • Replace all windows (single pane to triple pane)
  • Replace all existing exterior doors and add french door to the master bedroom
  • Expand the kitchen area and lay it out to accommodate 2 cooks in the kitchen
  • New kitchen cabinets
  • All new energy efficient appliances
  • Replace all plumbing fixtures
  • Replace all lighting fixtures
  • Rewire the entire house
  • Re-plumb the entire house
  • Refinish the hardwood floor where possible
  • Remove all existing floor covering and either refinish hardwood floor or put new covering
  • Insulate walls, ceiling and floor
  • Remove siding and replace with Hardie planks
  • Remove floor furnace
  • Install Heat Recovery Ventilator
  • Plumbing to make it gray water ready  
  • Most challenging part will be to make it air tight to meet Passiv Haus standard

It’s taken us a while to get to this stage because we did a lot of research and education in this past year to get educated on various things and shopped for appliances, fixtures, insulation, door, windows, sidings, etc.  So we pretty much know what we want and what we don’t want.  We’ve kept a list of materials we’ve selected on a spreadsheet in Google Docs so that we can share it with the other people we’re working with.

Now we will turn our attention towards getting bids from general contractors.

About a year ago is when we first saw the house for sale.  We thought we’d move along quickly through the design process but it took much longer than we originally anticipated.  Now, if we can just begin construction by the anniversary of our escrow close on September 17th, we’ll be pleased.

Indoor Air Quality – Testing For Radon

Radon was one of the topics covered in the Indoor Air Quality class we took recently.  We understand that the concentration of radon gasses that naturally come out from the soil various from region to region and in some cases from house to house.  Our instructor, Rich Prill, Washington State University’s Extension Energy Program, mentioned that one of his clients found higher level of radon compared to the neighbor’s houses because there is a subterranean stream running under the client’s house some 10-20 feet below surface that affects the gas composition of the soil under the house.  So, even if the radon zone map of California show that we are in a moderate area (predicted average indoor radon screening level between 2 and 4 pCi/L), we should test for it.

What is radon?  
Radon is a noble gas that doesn’t react with anything else.  It’s present in our soils, rocks and sometimes water.  The problem with radon is that it has a 3.8 day half life during which it goes through radio active decay, releasing alpha particles that can cause lung damage.  So, if you breathe in radon, which is a colorless and odorless gas, these large alpha particles can damage and mutate cells in lining of your lungs.  Radon is the second leading cause of lung cancer after smoking.

So where does it come from?  You’ve heard of uranium, right?  Uranium 238 is the most prevalent naturally occurring radioactive material in the ground.  It has a half life of 4,500,000,000 years.  Uranium 238 eventually turns into radium 226, which has a half life of 1590 years.  Then radium 226 turns into radon, which has a half life of 3.8 days. At this  point you may ask, “What is half life?”  Half life means the period of time after which only half the mass of the original radioactive element remains.  So, suppose a radioactive material starts with 100% of a radioactive material, after a single span of its half-life only 50% of that radioactive material would remain. The other 50% of the material would have converted either into energy or another element which may or may not be radioactive.

Why do you want to test for it?
Radon is a colorless, odorless gas and it occurs naturally and it’s in our soil at different concentration.  The gas comes out of the ground and it can get into your house if the floor is not airtight.  Most houses with crawl space like ours is not airtight.  We know it’s not airtight because we can smell the dampness and mold from the crawl space when it rains.  So, if there is any radon in the ground, it would certainly get into the house.  In fact, when it rains the water in the ground acts like a air and vapor barrier so any radon gasses in the ground would look for path of least resistance, or dry soil to release.  The dry area happens to be under the house so when it rains the crawl space may have extra concentration of radon.

The testing result could be different from day to day, depending on the season, rain and stack effect.

EPA gathers data from the various testing conducted by labs and publishes results (aggregated by zip codes) on a map.  California Department of Health publishes a report that lists the number of tests conducted in a given zipcode as well as the number of tests that resulted in level above the EPA threshold of 4pCi/L.  You can find the PDF here.

A reader of this blog suggested this resource for radon detection and safety.

Next Steps
So, I just bought some short term radon test kits at the neighborhood hardware store and will test the house.  If the results show a level higher than 4pCi/L then we would take measures to mitigate it by putting in a pipe under the plastic sheet used for sealing off the crawl space and venting it to the outside.  You can find a PDF of radon resistant construction here.

UPDATE:  Our result for the short term (96-hour) Radon test was .2pCi/L, which is quite low!

Passive House Tours

Organized home tours are great way to get ideas, meet interesting people and learn about the house.  Architecture and landscaping gives a certain “feel” to the house.  Finding out about material choices give an insight to the owner’s values.  Learning about various systems used, like solar thermal, photovoltaic, energy management, rainwater harvesting and gray water systems has been interesting and often inspiring.  Years ago, when we’ve attended “Solar Homes Tour,” or “Green Homes Tour,” or “Open Architecture Tour,” we would dream about doing a green house project of our own someday.  After visiting a home we would note, “How we felt,” at the house and discuss what we liked and disliked about the house.  These tours were planting seeds in our mind.  After going to so many of these we found that our tastes and preferences were similar so when we decided to do our Midorihaus Project we simply germinated the seeds that were planted through the tours.

This year we’ve been to several “Passive House Tours” in the Bay Area.  Unlike the one day organized tours of several houses where people come and go all throughout the day, these Passive House Tours are compact and provide the visitors with an in depth view of the project.  At each of these sites there is a formal presentation with a team of architect, builder, passive house consultant and sometimes the owner that presented the highlights of the project.  They’re all quite passionate about building energy efficient homes and are generous with their time.  We’ve learned so much from talking to different people at these tours!

This is a brief list of passive house tours we’ve been to this year (2011).

March 27 – Cottle Zero Energy Home in San Jose, designed and built by One Sky Homes.

May 13 – Green Gulch Farm at San Francisco Zen Center at Muir Beach.

June 1 – Menlo Passive Project in Menlo Park by Clarum Homes.

Coming up….
Green Home Project in Palo Alto that is going live on June 4.  This site will host the next monthly meeting for Passive House California on June 26.

Of course, sometime in 2012, we will host a tour of our Midorihaus Project in Santa Cruz.

What’s Important

Color Coded Diagram

A while ago we clarified our priorities by writing down what’s important to us for this Midori Haus project.  It was a good exercise for us even when we knew that our values are closely aligned.  This is what we did –

  • On a blank sheet of paper we wrote down words and phrases that answered the question, “What is important to you?”  This was done in a brainstorm fashion where we each grabbed a pen and wrote down thoughts as they came.
  • Next we reviewed the items and agreed that all of the items could fit into 5 categories.  The categories are, “Happiness,” “Our Values,” “Passive House,” “Initial Cost,” and”On-Going Cost.”  I’m sure if a dozen different couples did the same exercise there will be a dozen different ways of slicing and dicing their list.  These 5 categories just happened to be the ones that came together for us.   
  • Then we took different colored pens and circled the items on the list  Some of the items fell into more than one category.  It was interesting to note that some items had double or triple circles.  Here’s what that looked like:

  • We took one more step after the color coding step to prioritize the items in each category individually and compare them.  For the most part our priorities matched!

We did this exercise partly to have an agreed upon basis for making trade-off decisions as we move along in the project.  Most recent usage was to review and compare the cost estimate line items with our color coded priority to see where we could reduce cost.

Who’s Rules?

Back in January, we had an opportunity to visit with Larry Weingarten at the House on Hummingbird Hill.  He generously spent time with us and shared a lot of information about his home, his approach to building and the amazing hot water heater museum he has in his basement.  His house was very comfortable and I was amazed at how he could heat the house to a comfortable 70 degrees (F) using solar heated water at only 80 degrees (F).  There are many interesting features to his home and I invite you to explore them at the Water Heater Rescue site.

When we showed our exuberance on passive house, he asked a very sage question, “Who’s rules are you following?”  Then kindly suggested that we spend money on “What we want,” and “Not necessarily to a standard.”  He made us think whether we fell into the lure of “Getting a certificate or plaque on the wall for bragging rights,” like some do with LEED, Greenpoint rated, Passiv Haus, Net Zero Energy, etc.  He was trying to make sure that we’ll be happy at the end of our project.  One of the design rule Larry used was, “What will last 200 years?” He was also very focused on “quiet” in his home.  His refrigerator was so silent that I didn’t know it existed.  Well, I think he planted a seed during that conversation because it led us to doing the color-coded diagram above.

Invest in Items With Long Life

Sometime last year I spoke with a local builder who was born in Germany in a house that is more than 600 years old.  Wow, talk about a building with long life!  I wondered if our building stock in our neighborhood, city, country would last that long.  Probably not.  If you’re interested in ideas on making buildings more sustainable and increase longevity, have a look at Tedd Benson’s lecture at the College of the Atlantic.  I like the idea of applying the concept of Product Lifecycle Management and building as a noble trade.  You’ll need 34 minutes to watch this video…

Midori Haus

By the way if you were wondering what Midori Haus is it literally means green house. “Midori” is the Japanese word for green and “Haus” is the German word for house.  For us it has meaning beyond the literal green house.  All the values we mentioned above are embodied in it.

Design Process

We’ve been quite fortunate to work with two capable guys during the design process.  Last fall we chose to work with Graham Irwin of Essential Habitat to do both the home design work as well as the Passive House consulting.  He’s been gently guiding us and patiently educating us through the design process.  We appreciate his thoughtful style.  We first started with the layout of the master bedroom and bathroom.  Kitchen area took a while because we were trying to fit in a whole lot of stuff in a modest sized area.  There will be a deck on the south side of the house as well as a smaller one on the west side to give a feeling of indoor and outdoor connection.  The hallway closet will become the laundry room and there will be a small mechanical room on the south deck to hold the hot water heater.  Soon Graham will be shifting gears from architectural design to Passive House Planning Package (PHPP), where he will calculate the building energy consumption through a software model.

Another capable and patient guy we’ve been working with is Taylor Darling of Santa Cruz Green Builders.  As we iterated through the design Taylor provided the builder’s perspective to the team as well as coming up with the construction estimate.  Our goal is to come up with a realistic, solid design that could be built within a reasonable budget — basically, avoiding surprises.  We’ve heard stories where a homeowner took the approved/permitted plan out to bid and found out that it was way over the budget.  By taking out a small consulting contract with Taylor and having him involved in the design process we are mitigating the sticker shock.

While we iterated through the design we’ve been learning and shopping.  The free classes from PG&E are terrific value and we found the the monthly Passive House meetings to be a good place to learn and network.  As for shopping, Kurt has been diligently keeping up with various window manufacturers to get quotes.  Since this is the single most expensive category with the longest lead time it’s important that we play close attention to it.  Kurt’s been doing a great job on this.  We also drove around the Bay Area to look at doors, cabinets, tiles, fixtures, appliances and lighting.  After a while the collecting and compiling shopping data got to be a bit cumbersome so we’ve been keeping the master material selection list on a Google Doc shared by the design team.

Since we tend to be very detail-oriented and ask a lot of questions, both Graham and Taylor must have been taxed on their patience every now and then. Thanks guys, we appreciate your work and patience!

Solar Access and Shading

December 14, 2010

Another good resource we learned about is the Tools Lending Library at Pacific Energy Center.  This is another free program provided by our local utility, PG&E.  Just as you would borrow books from the public library, we filled out the online request form to borrow tools from PG&E’s tools library.  Nice, isn’t?

Since we needed to get “shading analysis” for the 4 sides of the house to be used for the passive house calculation we looked for “Shading/Solar Access” types of tools in the lending library.  The search returned 7 results and we selected to borrow the SunEye by Solmetric. 

The SunEye comes with the hand-held electronic device, power cable, USB cable, PC (not Mac) software and a manual in the case. We also borrowed a Windows PC from Kurt’s brother because the companion software only runs on Windows machine and not on Macintosh — we only have Macs at home.  It took us a few tries to get the picture and the data in the form that was useful for our passive house consultant, Graham.  We found the user interface of the tool to be good once you get the hang of it by taking a few pictures.  I think the hardest part of the data transfer to the PC was getting the cable to plugged in correctly to the hand held device.  The hand-held side of the USB cable did not have an obvious “this way up” marker so you could easily plug it in the wrong way.  Once the data was transferred from the hand held to the PC a report can be generated and extracted for emailing.

Since the data from this tool is most often used for determining the optimal placement for solar panels the instructions in the manual directs the user to be facing south when taking pictures.  We actually had to stand with our backs to the wall to get the pictures we wanted.  Here’s what we did to take the pictures at each of the sides of the house:
1.  After powering on the device, press the sun icon on the lower left hand corner
2.  Press Session button and choose New in the selection window
3.  Enter data such as the session name, notes and location information
4.  Press sun icon
5.  Press Skyline then choose New in the selection window
6.  Enter panel tilt (we entered 25 degrees) and press OK
7.  Then, standing with our back to the wall, we looked in the camera image on the screen to make sure that the sun path clears the roof overhang and stood very still to make sure that the camera was level (using the built in level) and pressed snap to take the picture.

Starting at the south (back) side of the house we took the snaps.  Each time I ducked away from the fish-eye lense to make sure I was not in the picture.  We repeated steps 4 – 7 for each side of the house.  This is what the pictures looked like:

East side of the house shows lots of shading (in green) from trees.  Yellow color represents sun.

South side of the house receives lots of sun.

After Kurt took the pictures he stood still while I measured the distance from the wall to the fish-eye lens.  We took 2 pictures on the west and north sides of the house because they have protrusions. (e.g. the porch sticks out from the front of the house)  Here are the measurements:
South:  49 inches
West 1:  42 inches
West 2:  60 inches
North 1: 52 inches
North 2: 50 inches (from the bottom step of the porch)
East: 52 inches

We used the post-processing software to correct the tilt angle to 90 degrees to reflect the shading to the vertical walls.

>